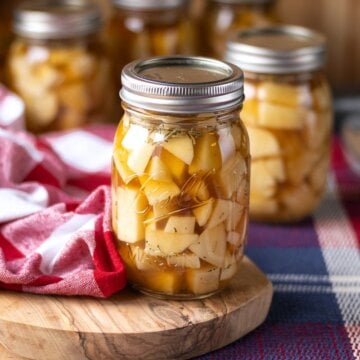
How to Can Potatoes Safely | Pressure Canning Guide
Want potatoes ready whenever you need a quick meal? Learn how to can potatoes with this simple step-by-step pressure canning tutorial. You'll learn how to prepare and pack potatoes, safely process the jars, troubleshoot common canning questions, and turn your home-canned potatoes into soups, stews, breakfast hash, mashed potatoes, casseroles, and more. Save this tutorial for potato harvest season!
Print
Pin
Cost: Varies
Equipment
- Pressure Canner
- Canning Jars, Lids & Rings
- Bubble Remover
- Tea Towels
- Vinegar for wiping the rims of the jars
- Jar lifter
Ingredients
- 5 pounds potatoes peeled and diced
- 4 teaspoons salt
- 8 cups boiling broth more or less, to fill jars
- 2 teaspoons ground black pepper optional
- 2 teaspoons dried rosemary optional
- 2 teaspoons dried thyme optional
Instructions
Prepare Jars, Lids, Rings & Canner
- Wash your jars, lids, and rings in hot, soapy water.
- Fill the pressure canner with 2-3 inches of water and put it on the stove on a low heat to warm.
- Put a little water in the clean jars to keep them weighed down and place them in the canner. Turn the canner off when it begins to steam to keep the jars warm.
Prepare Preserve
- Combine salt, pepper, rosemary, and thyme in a small bowl.
- Remove and empty the hot jars from the canner and turn the canner on again to bring the water to a low simmer (180°F).
- Distribute spices evenly among jars (1 ¼ teaspoon in pints, 2 ½ teaspoon in quarts).
- Fill each jar with peeled and chopped potatoes to 1-inch headspace.
- Add boiling broth to each jar to 1” headspace; use a tool to release any bubbles, then add more hot broth if needed.
Fit Lids & Place In Pressure Canner
- Clean the rims of the jars with a vinegar-soaked towel and gently screw on the lids to fingertip tight.
- Carefully place the jars into the pressure canner.
Vent Canner
- Place the lid on the pressure canner, turn up the heat, and let the steam vent for 10 minutes.
Pressurize
- Put the pressure regulator on the lid and bring the canner to 11 PSI on a dial gauge or 10 PSI for a weighted gauge (adjust for elevation).
Process
- Once your canner has stabilized at full pressure, set a timer for 35 minutes for pint jars (40 minutes for quarts).
Cool Canner
- Turn off the heat, then let the canner come down to 0 PSI by itself.
- Remove the pressure regulator and let the canner stabilize for 5 minutes before removing the lid.
Remove Jars & Cool
- Carefully take the lid off the canner.
- Remove the jars and set them on a clean towel where they can cool undisturbed for 16-24 hours.
Check Seals & Clean and Label Jars
- Check each seal, remove the bands, and clean each jar with room temperature water.
- Label each jar with the contents and year.
- Store the jars out of direct sunlight.
Notes
Tips and Troubleshooting:
- Always Peel Potatoes Before Canning - This is one of those steps you don't want to skip. Even if your potatoes came from beautiful garden soil and you've scrubbed them thoroughly, peel them before canning. And don't throw those peels away if you can put them to good use. They can go into the compost pile, or you can use them in another appropriate recipe.
- Why Is the Liquid in My Jars Cloudy? Don't panic if your finished jars don't have crystal-clear liquid. Raw-packed potatoes can release starch into the liquid, which can make it look cloudy. It may not give you that picture-perfect jar, but appearance isn't the goal here. We're filling the pantry with useful food.
- Raw Pack vs. Hot Pack - This recipe uses a raw-pack method because it makes filling jars quick and straightforward. Hot packing can produce clearer liquid because some of the excess starch is removed before the potatoes go into the jars. Whichever approved method you're following, stick with its instructions from beginning to end rather than combining steps from several different methods.
- Keep an Eye on Pressure - Once processing begins, your job is to maintain the correct pressure. If the pressure drops below the required level during processing, follow current safe canning guidance for how to proceed. This is exactly why I recommend staying nearby rather than starting another project at the other end of the house.
- Adjust for Elevation - Canning pressure must be adjusted for elevation.
- If you live at a higher elevation, don't automatically use the sea-level pressure listed in a recipe. Determine your elevation and use the correct pressure for your location and canner type.
- What If a Jar Doesn't Seal? First, don't put an unsealed jar on the pantry shelf. An unsealed jar needs to be handled promptly according to current safe canning recommendations. And please don't see a failed seal as proof that you're bad at canning. Even experienced canners occasionally get a jar that doesn't seal. Check what happened, learn from it, and do the next thing.
Tried this recipe?We want to see! Tag @homesteadingfamily on Instagram.