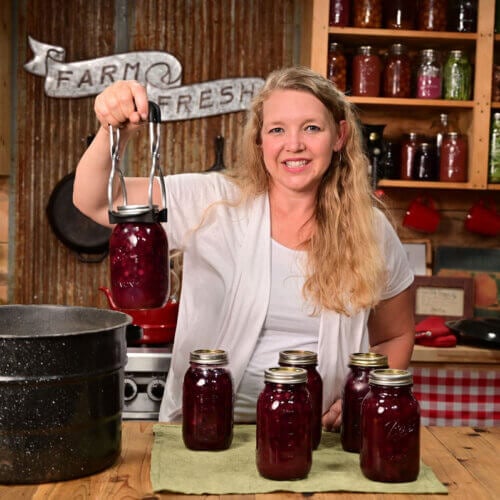
Canning Cherries (Easy Raw Pack Method)
Enjoy freshly picked cherries year-round with this water bath canning method. Canning cherries at home with juice, not sugary syrup, is easy with this recipe. Read on to learn how and enjoy this delicious fruit without added sugars.
Print
Pin
Servings: 36 serving
Calories: 57kcal
Cost: varies
Equipment
- Water Bath Canner or large pot
- Canning Tools
- 4 Quart-sized Mason Jars & Lids
Ingredients
- 16 cups cherries cleaned and stemmed (pitting is optional)
- 6 cups apple cider divided (or juice or water)
- 1 teaspoon almond extract divided (optional)
- 1 teaspoon vanilla extract divided (optional)
Instructions
- Step 1: Start by washing and stemming your fresh cherries. Pit them at this time if you want to can them without pits.
- Step 2: Fill a large water bath canner (or a large pot) two-thirds full with water and bring it to a boil. Allow room for water displacement when you add your full jars of cherries.Homesteading Hack: Have a teapot of boiling water ready in case you need to add more water if needed.
- Step 3: Prepare your canning lids by placing them in a saucepan of simmering water. This allows the seal to get pliable so it creates a solid seal on the canning jar after it’s filled.Meanwhile, heat your canning jars in a warm oven at 170°F. Slightly warming your jars before filling them with cherries and hot apple cider keeps them from cracking or breaking.Homesteading Hack: Don’t use cold jars; if they crack, it makes a mess and wastes precious ingredients.
- Step 4: Using the large stockpot, heat your apple cider to a simmer until ladled into the jars of cherries.
- Step 5: Fill the warm canning jars with fresh cherries to the bottom rim of the neck of the jar. Gently press the cherries down, being careful not to smash them.Add ¼ to ½ teaspoon of almond extract to each jar, depending on the jar size. (We like to add ¼ teaspoon of both vanilla and almond extract.)
- Step 6: Place your funnel on the jar and ladle the hot apple cider over the cherries, leaving ½ inch of headspace.Homesteading Hack: Don’t overfill your jars. Overfilling the jars can cause siphoning, which can inhibit a proper seal for the fruit. I use the bottom rim mark on the neck of the jar as my guide and double-check it with my headspace tool.
- Step 7: Using your headspace tool or a chopstick, slide it into each jar along the four walls to remove any air bubbles. Check the headspace again and add more apple cider, if needed, to maintain that ½ inch of headspace.
- Step 8: Using a clean kitchen towel dipped in water, gently wipe around the rim, cleaning any food or juice on the jar rim.Homesteading Hack: To ensure no stickiness, food particles or defects on the glass jar rim, I use a clean, dry finger and go around each jar as a secondary measure.
- Step 9: Add the lid and band, tightening to fingertip tight.Homesteading Hack: Fingertip tight means tightening the ring just until you feel resistance, then turning ¼ turn more (or about how tight you can tighten the jar using two fingers and a thumb).
- Step 10: If your canner is at a rolling boil, reduce the heat slightly and, using your jar lifter, place each jar into the water bath.Ensure the jars are covered with an inch or two of water. If not, now is the time to add more. Leave space between each jar, and bring the water back to a rolling boil.
- Step 11: Once the water is at a steady active boil, set your timer for the proper time according to the chart. Remember, this recipe is using the raw-pack method, so canning times will be longer.
- Step 12: After you have met the recommended time for your elevation, use your jar lifter tool and carefully remove each jar. Place jars on a towel-lined counter and let them sit undisturbed for 12-24 hours. Allowing the canned jars of cherries to sit undisturbed is important. This will ensure the rubber seal becomes firmly set to the jar as it slowly cools. After 24 hours, remove the canning band, wipe down the jars and around the lid with a damp kitchen towel, mark the lid with the contents and the date, and place them on your pantry shelf. Use within the next 12 -18 months for optimum flavor and nutrients.
Notes
| Style of pack | Jar size | Process time (in minutes) at 0-1,000 ft | Process time (in minutes) at 1,001-3,000 ft | Process time (in minutes) at 3,001-6,000 ft | Process time (in minutes) above 6,000 ft |
| Hot | Pints | 15 | 20 | 20 | 25 |
| Hot | Quarts | 20 | 25 | 30 | 35 |
| Raw | Pints or quarts | 20 | 25 | 35 | 40 |
- Don’t overfill your jars. Overfilling the jars can cause siphoning, which can inhibit a proper seal for the fruit. I use the bottom rim mark on the neck of the jar as my guide and double-check it with my headspace tool.
- To ensure no stickiness, food particles or defects on the glass jar rim, I use a clean, dry finger and go around each jar as a secondary measure.
- Fingertip tight means tightening the ring just until you feel resistance, then turning ¼ turn more (or about how tight you can tighten the jar using two fingers and a thumb).
- Allowing the canned jars of cherries to sit undisturbed is important. This will ensure the rubber seal becomes firmly set to the jar as it slowly cools.
Nutrition
Serving: 0.5cup (with juice) | Calories: 57kcal | Carbohydrates: 14g | Protein: 1g | Fat: 0.2g | Saturated Fat: 0.03g | Polyunsaturated Fat: 0.05g | Monounsaturated Fat: 0.03g | Sodium: 2mg | Potassium: 176mg | Fiber: 1g | Sugar: 12g | Vitamin A: 40IU | Vitamin C: 5mg | Calcium: 11mg | Iron: 0.3mg
Tried this recipe?We want to see! Tag @homesteadingfamily on Instagram.