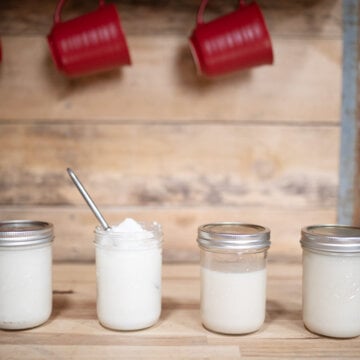
Rendering Lard
Learn how to render lard the old-fashioned way! This simple homestead tutorial walks you through turning pork fat into creamy, flavorful homemade lard perfect for flaky pie crusts, biscuits, frying, and traditional cooking. Plus, discover how to make crispy cracklings and store your lard for long-term use.
Print
Pin
Calories: 116kcal
Cost: varies
Equipment
- Glass canning jars
- Heavy-bottomed pot (a cast iron Dutch oven is perfect)
- Jar funnel
- Small metal strainer
- Clean cotton cloth or coffee filter
- Ladle
- Slotted spoon
- Wooden or metal stirring spoon
Ingredients
- Lard ground or finely chopped
Instructions
- Use a clean, dry, heavy-bottomed pot and LOW heat through the entire process. Repeat to yourself 3 times… LOW AND SLOW.
- Put a small amount of fat into the bottom of your cool pot and turn the pot on low, stirring constantly until the pot has a thin layer of melted fat across the entire bottom. Add more fat if necessary.
- Add the rest of your fat and stir to coat with the already melted fat.
- Repeat again… LOW and SLOW.
- Stir occasionally to avoid scorching.
- Continue cooking and stirring until there are no longer any bubbles and the cracklings (leftover chunks) are a nice light golden brown.
- Scoop out the cracklings with a slotted spoon onto a plate covered with a clean cotton cloth or a paper towel to drain. Salt to taste and enjoy warm as a snack. Store cracklings, once completely cooled, loosely packed in a ziplock bag in the freezer.
- Wash and dry glass jars and keep warm. Set the canning funnel in the still warm jar, the metal strainer in the canning funnel, and line with a clean cotton cloth, muslin, or a coffee filter.
- Turn off the heat source.
- Carefully (it is HOT!!) ladle the melted fat into the jar through the cloth and strainer to remove any remaining bits of cracklings.
- Fill the jar and immediately cap each jar.
- Set jars aside to cool.
- Store lard in a cool, dark pantry or in the refrigerator or freezer.
Video
Notes
Tips and Troubleshooting:
The key to beautiful, mild-flavored lard is all in the process. Remember the golden rule of rendering lard: low and slow. Keeping the temperature low allows the fat to gently melt without burning, creating a clean, creamy finished product.
When prepping your pork fat, remember that smaller pieces create more surface area, allowing the fat to render more efficiently. A meat grinder makes the process faster. You can also use a sharp knife to cut the fat into very small pieces.
Additionally, partially frozen fat is often easier to grind or chop because it is firmer and less slippery.
Uses for Rendered Pork Fat:
Homemade lard is one of those traditional pantry staples you'll find yourself reaching for again and again. Whenever a recipe calls for vegetable shortening, you can generally substitute homemade lard using a simple 1:1 ratio for richer flavor and excellent results.
Use it to create flaky pie crusts, tender buttermilk biscuits, and these sourdough discard tortillas. Or melt a spoonful into the skillet for frying potatoes, cooking eggs, sautéing vegetables, or making crispy fried chicken. You can even use it as a healthy fat for homemade baby food!
Beyond the kitchen, lard is also excellent for seasoning cast iron cookware and conditioning garden tools to help protect them from rust.
Finally, don’t throw away the cracklings! Cracklings are the crispy bits left after rendering lard. Sprinkle them with sea salt and enjoy them warm. If you have any extras leftover, they can be cooled and stored in the freezer for later.
Storage Instructions:
Properly rendered lard that has been thoroughly strained and contains no remaining moisture or impurities can be stored at room temperature in a cool, dark pantry.
For the best results:
| Problem | Fix |
| My lard turned out dark brown or tan. |
Lard should be creamy white when cooled.
A darker color usually means:
|
| My lard smells like pork. | Strong-smelling lard usually comes from overheating or using fat with too much meat mixed in. For mild-flavored lard, use leaf fat and maintain a low temperature throughout the process. |
| Should I add water? | No. Do not add water when rendering lard. Moisture and impurities are the two things that shorten the shelf life of lard. Adding water can introduce excess moisture, which may cause spoilage or mold. |
| My lard is bubbling | Some bubbling is completely normal. This is the moisture leaving the fat. However, avoid boiling the lard. High temperatures can burn the fat and create an unpleasant flavor. |
- Store sealed jars in a cool pantry, refrigerator, or freezer.
- Use opened jars within a couple of weeks if kept at room temperature.
- Store opened jars in the refrigerator for up to a year.
- Freeze extra lard for longer storage.
Nutrition
Serving: 1tbs | Calories: 116kcal | Fat: 13g | Saturated Fat: 5g | Polyunsaturated Fat: 1.4g | Monounsaturated Fat: 6g | Cholesterol: 12mg
Tried this recipe?We want to see! Tag @homesteadingfamily on Instagram.