
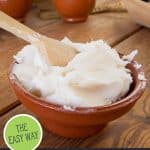


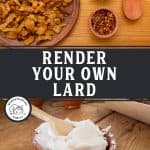

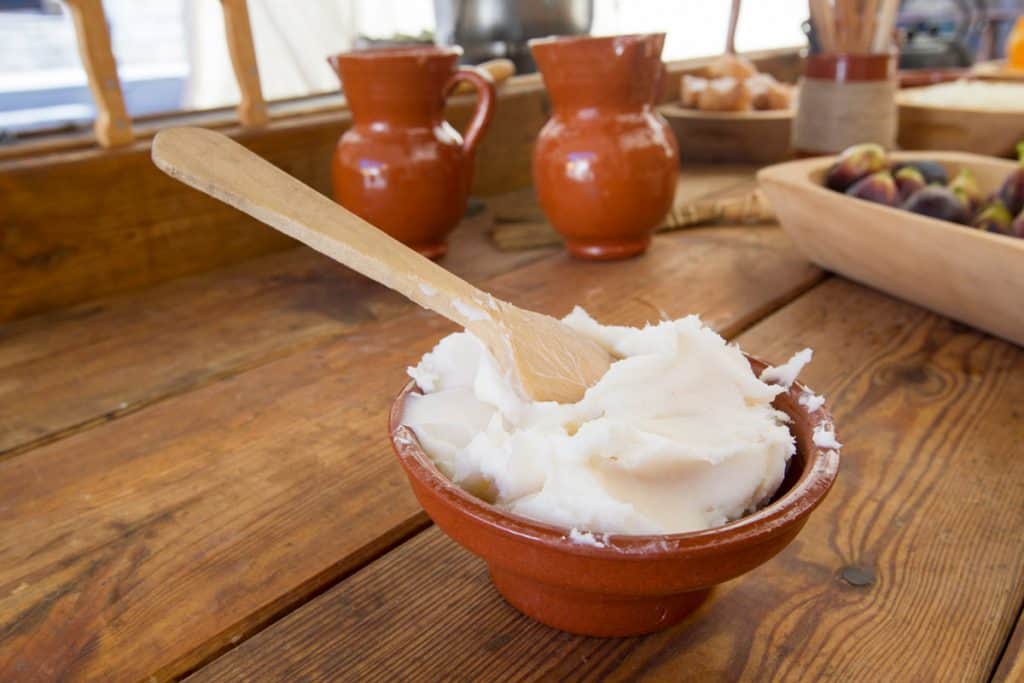
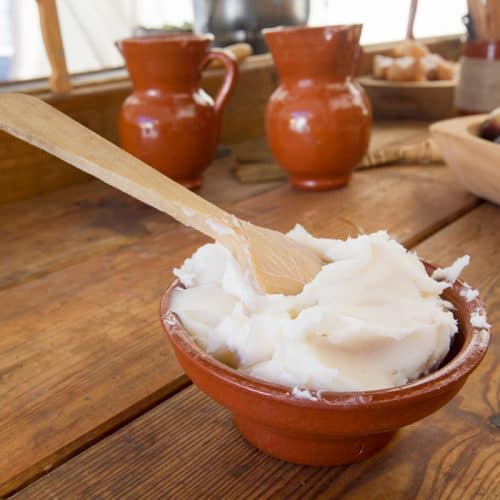
Rendering lard is the process of melting animal fat and straining it to remove the meat, veins, tissues, and impurities. The result of properly rendered lard should be white, creamy shortening (a fat that is solid at room temperature and liquid at warmer temperatures).
Reading about cooking with lard may make you feel like your arteries are clogging up, but truth be told, lard is a very healthy natural fat to choose for your homestead kitchen, much like our easy homemade butter (keep reading to find out more).
Not to mention, it just so happens to be fantastic for household uses, such as seasoning your cast iron in the oven, restoring cast iron, and proper care for garden tools.
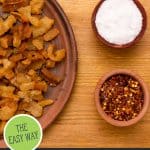
Also, the byproduct of rendering lard gives you the most delicious cracklings (the tissues remaining from the fat that are deep-fried during the rendering process), sprinkled with a little sea salt, they're a great snack to look forward to on lard rendering day.
If you're feeling unsure about rendering lard, watch the video below, then scroll down for the easy step-by-step instructions.
What is Lard?
Lard is simply pig fat (or bear fat) that has been heated enough to melt and separate from the tendons, tissue, and meat of the animal. When strained and cooled to room temperature it is solid and opaque (almost a creamy white color). Lard turns back to liquid between 93-113 degrees F and will be a clear yellowish gold color, depending on its purity.
Types of Pig Fat
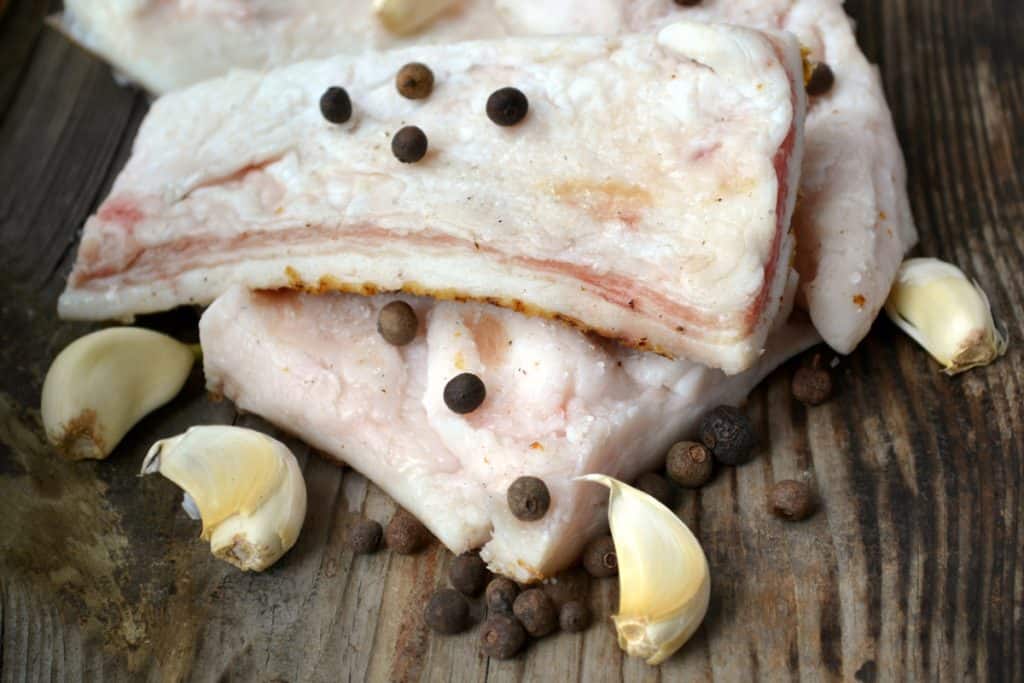
Not all fat is created equal when it comes to rendering lard to use in cooking or baking. When it comes to pig fat, there are three different kinds of fat to be aware of:
- Leaf Lard
- Fatback or Back Fat
- Pork Belly
Likewise, not all pig fat is as healthy as it can be. You want to be sure the pig you're obtaining the lard from has been fed a healthy diet and preferably pasture-raised. For more on this, check out this post "Good Lard, Bad Lard" from the Weston A. Price Foundation.
Leaf Lard
Leaf lard is the fat that surrounds the kidneys and it is the very best lard for baking and pastries. When rendered correctly, leaf lard is the most mild-flavored lard and will add flakiness to all your baked goods... think melt-in-your-mouth homemade pie crust and light and fluffy biscuits!
Fatback or Back Fat
The fatback or back fat is located on the back of the animal as well as the shoulder and rump areas.
It's the layer of fat directly beneath the skin and is best for sauteing or frying food. The pork butt and pork shoulder are the portions of the animal that will yield the most lard.
Pork Belly
Pork belly is a true delicacy on the pig. It's the fat that's located right alongside the bacon. Because this fat tends to have more meat throughout, it's not the best choice for lard, and we wouldn't recommend rendering it as it's just too delicious when cured and cooked properly.

Tips for Rendering Lard
Many people get nervous when rendering lard either because they've never done it (or never watched anyone), or because they've tried it in the past and ended up with an unpleasant end result.
Chances are, if you've tried and failed in the past, you weren't using the correct methods to render your lard. I hope you'll give it another chance as it's truly a gold-medal fat in a homestead kitchen!
Things to Consider When Rendering Lard:
- As mentioned before, lard is a healthy cooking fat, despite what you may hear otherwise.
- Lard is a far superior choice to Crisco or other shortenings and can be substituted 1:1 in recipes that call for vegetable shortening or Crisco.
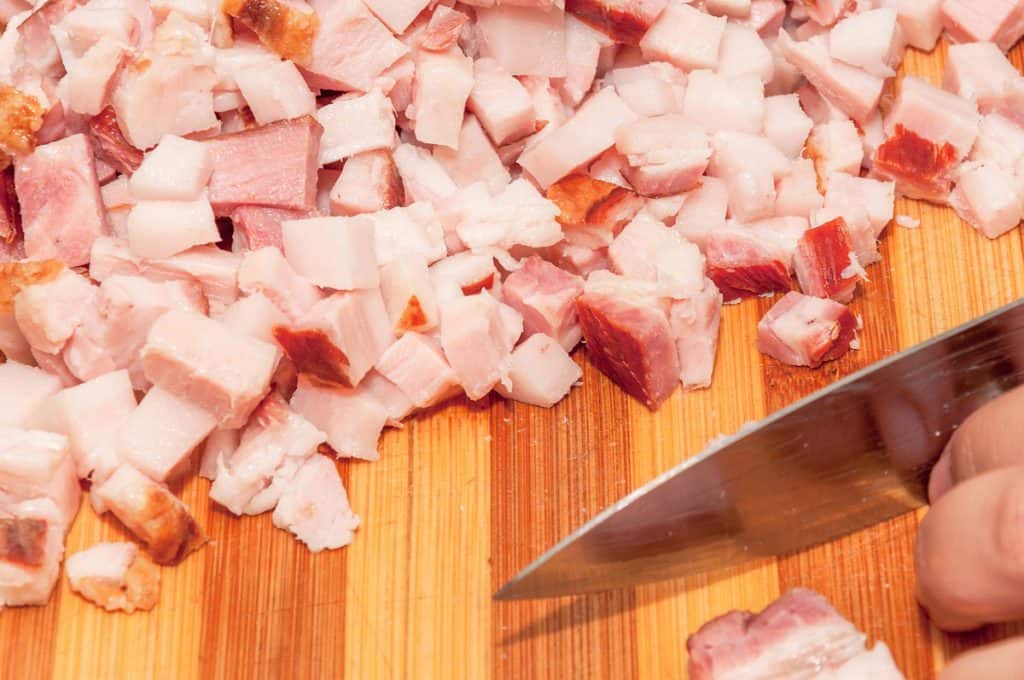
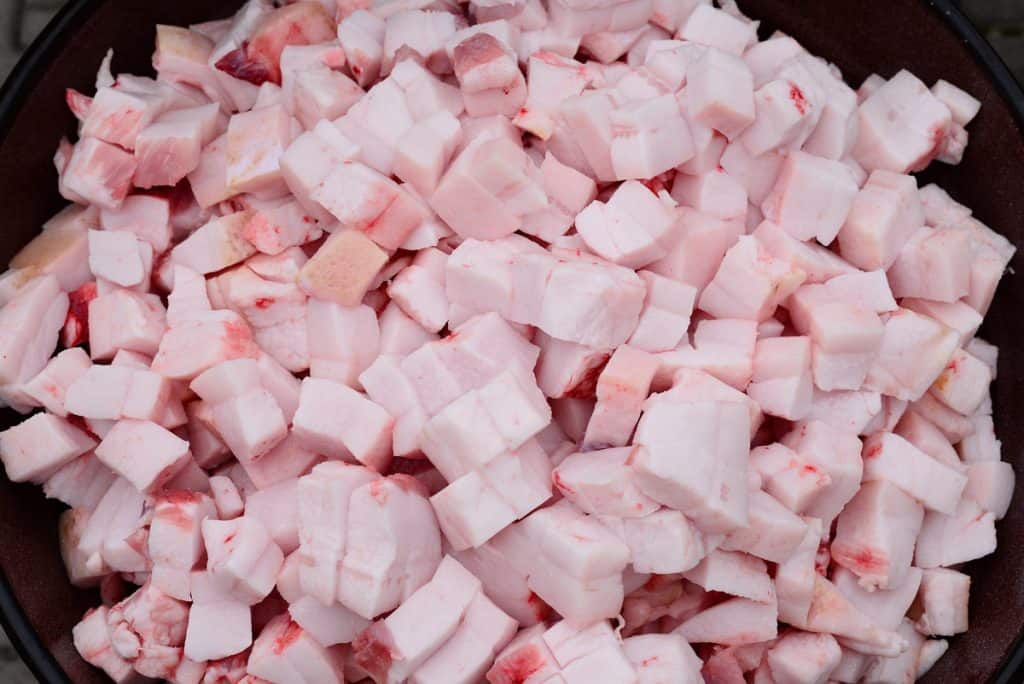
- Grind your pork fat (or ask your butcher to do it... it's worth the small fee they may charge you) or cut it into small pieces. This gives your fat the most surface area to render out all of the impurities. This is the meat grinder you see me using in the video above.
- Grinding or cutting your fat is easiest when the fat is still slightly frozen or very cold.
- Lard that is tan or brownish once cooled has either been overcooked or not rendered enough to get all the impurities out.
- Likewise, lard that has an unpleasant odor has either been overcooked or not rendered enough to get all the impurities out.
- You MUST be extra careful in the rendering process... repeat this to yourself over and over, "LOW AND SLOW!" Do not heat your pan up too high or you'll overcook your lard, burn the cracklings and give the lard a very distinct "pig" flavor and smell.
- Avoid "boiling" your lard, cracking and bubbling is normal while the water is evaporating out, but you don't want to boil your lard.
- NEVER add water to your pan when rendering lard. This is a sure-fire way to ruin a perfect jar of lard.
- Stir your lard frequently to avoid scorching or burning the fat or impurities.
- Don't throw the leftover browned bits away! These are cracklings and are the delicious end result of lard making. Salt them up and eat them as a snack! (Freeze the extras for later.)
How to Store Rendered Lard
Lard that is rendered down and completely void of impurities and water is considered shelf-stable. If, by chance, your lard isn't completely pure, you'll want to store it in the refrigerator or freezer and watch for any signs of mold.
The very best way to store lard is to take it directly from the hot pan, filter it through a fine-mesh sieve and a few layers of cheesecloth or muslin into a warm mason jar. Cap with a two-part lid to the jar while the lard is still hot and set it on the pantry shelf to cool completely.
These sealed jars of lard can be stored in cool conditions or in the refrigerator or freezer for up to a year.
Once you've opened a jar of lard, unless you'll be using it up within a couple of weeks, it's best to store it in the refrigerator.
Should I Use Water When Rendering Lard?
No, do NOT add water to your pot when rendering lard. The two enemies of a properly rendered lard are moisture and impurities.
I've had people let me know that their lard went moldy, all throughout, not just on the surface. It turns out, these people followed instructions that included adding water at the bottom of the pot. Trust me, just don't do it.
Supplies Needed for Rendering Lard
- Pig Fat
- Glass canning jars with 2 piece canning lids
- Heavy bottomed pot (a cast-iron Dutch oven is perfect)
- Jar funnel
- Small metal strainer
- Clean cotton cloth or coffee filter
- Ladle
- Slotted spoon
- Wooden or metal stirring spoon

How to Render Lard (And Make Cracklings)
These instructions for rendering lard are the exact same methods you will use for rendering beef tallow.
- Grind your fat using a meat grinder (or chop your fat into small pieces). This is MUCH easier if it's frozen. If you can get your butcher to do this for you it's a real time saver, and worth the extra fee they may charge you to do it.
- Use a clean, dry, heavy-bottomed pot and place it on the stovetop on LOW heat for the entire process. Repeat to yourself 3 times… LOW AND SLOW.
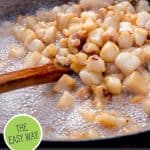
- Put a small amount of chopped or ground fat into the bottom of your cool pot and turn the pot on low, stirring constantly until the pot has a thin layer of melted fat across the entire bottom. Add more fat if necessary.
- Add the rest of your fat and stir to coat with the already melted fat.
- Repeat again… LOW and SLOW.
- Stir occasionally to avoid scorching.
- Continue cooking and stirring until there are no longer any bubbles and the cracklings (leftover chunks) are a nice light golden brown.
- Scoop out the cracklings with a slotted spoon onto a plate covered with a clean cotton cloth or a paper towel to drain. Salt to taste and enjoy warm as a snack. Store cracklings, once completely cooled, loosely packed in a ziplock bag in the freezer.
- Wash and dry glass jars and keep warm. Set the canning funnel in the still warm jar, the metal strainer in the canning funnel, and line with a clean cotton cloth, muslin, or a coffee filter.
- Turn off the heat source.
- Carefully (it is HOT!!) ladle the melted fat into the jar through the cloth and strainer to remove any remaining bits of cracklings.
- Fill the jar and immediately cap each jar.
- Set jars aside to cool.
- Store lard in a cool, dark pantry or in the refrigerator or freezer. Once open, it is best to use lard within 1 week if left at room temperature, but it will remain good for up to a year, open, in the refrigerator.
Did you try this recipe? We'd love to see those beautiful jars of creamy white lard and especially those goodies you're making with it! Tag us on social media @homesteadingfamily so we can see!
More Homesteading Posts You May Enjoy
- Kune Kune Pigs – The Ultimate Homestead Pig
- How to Raise a Year’s Worth of Meat
- A Homesteader’s Guide to Cured Bacon
- Slow Cooker BBQ Pork Recipe
- Easy Homemade Breakfast Sausage Recipe (Links or Patties)
- Homemade German Bratwurst Recipe
- Homemade Chinese Dumpling Sausage Recipe
- The Benefits of Cast Iron for Everyday Cooking
Rendering Lard
Equipment
- Glass canning jars
- Heavy-bottomed pot (a cast iron Dutch oven is perfect)
- Jar funnel
- Small metal strainer
- Clean cotton cloth or coffee filter
- Ladle
- Slotted spoon
- Wooden or metal stirring spoon
Ingredients
- Lard ground or finely chopped
Instructions
- Use a clean, dry, heavy-bottomed pot and LOW heat through the entire process. Repeat to yourself 3 times… LOW AND SLOW.
- Put a small amount of fat into the bottom of your cool pot and turn the pot on low, stirring constantly until the pot has a thin layer of melted fat across the entire bottom. Add more fat if necessary.
- Add the rest of your fat and stir to coat with the already melted fat.
- Repeat again… LOW and SLOW.
- Stir occasionally to avoid scorching.
- Continue cooking and stirring until there are no longer any bubbles and the cracklings (leftover chunks) are a nice light golden brown.
- Scoop out the cracklings with a slotted spoon onto a plate covered with a clean cotton cloth or a paper towel to drain. Salt to taste and enjoy warm as a snack. Store cracklings, once completely cooled, loosely packed in a ziplock bag in the freezer.
- Wash and dry glass jars and keep warm. Set the canning funnel in the still warm jar, the metal strainer in the canning funnel, and line with a clean cotton cloth, muslin, or a coffee filter.
- Turn off the heat source.
- Carefully (it is HOT!!) ladle the melted fat into the jar through the cloth and strainer to remove any remaining bits of cracklings.
- Fill the jar and immediately cap each jar.
- Set jars aside to cool.
- Store lard in a cool, dark pantry or in the refrigerator or freezer.
Video
Notes
| Problem | Fix |
| My lard turned out dark brown or tan. |
Lard should be creamy white when cooled.
A darker color usually means:
|
| My lard smells like pork. | Strong-smelling lard usually comes from overheating or using fat with too much meat mixed in. For mild-flavored lard, use leaf fat and maintain a low temperature throughout the process. |
| Should I add water? | No. Do not add water when rendering lard. Moisture and impurities are the two things that shorten the shelf life of lard. Adding water can introduce excess moisture, which may cause spoilage or mold. |
| My lard is bubbling | Some bubbling is completely normal. This is the moisture leaving the fat. However, avoid boiling the lard. High temperatures can burn the fat and create an unpleasant flavor. |
- Store sealed jars in a cool pantry, refrigerator, or freezer.
- Use opened jars within a couple of weeks if kept at room temperature.
- Store opened jars in the refrigerator for up to a year.
- Freeze extra lard for longer storage.


