Canned Chicken (Raw Pack Method)
Learn how to safely pressure can raw chicken in this step-by-step tutorial. Having home-canned chicken on your pantry shelf means you have easy last-minute meals at your fingertips.
Print
Pin
Servings: 36 ½ cup servings
Calories: 86kcal
Equipment
- Pressure Canner
- Mason Jars
- Canning Lids
- Jar lifter
- Funnel
- Tongs
Ingredients
- 12 chicken breasts cubed
- 4 teaspoon salt or ½ teaspoon per jar (optional)
- 2 cups water nearly boiling
Instructions
Getting Started
- Fill the pressure canner with 2 inches of water and begin heating it up (hot, but not boiling).
- Place a rack at the bottom of the pressure canner to avoid jars rattling and breaking.
- Place clean jars into the pressure canner while the water is heating up to keep the jars warm.
- Chop chicken breast into small pieces, about 1-inch square.
Canning Chicken
- Wash hands and grab jars from the canner (be sure to dump out any water that may have gotten into the jars).
- Using tongs and a large funnel, fill each jar with about two cups of chicken, leaving 1 ¼ inch headspace (or 1 ¼ inch of empty space at the top of the jar).
- Using your tongs or bubble remover tool, gently press chicken into the jars to maintain proper headspace.
- Add about ½ inch of hot water into each jar.
- Add optional ½ teaspoon salt to each jar (see note on additional seasonings).
- With a clean cloth and a bowl of very hot water (or vinegar), wipe down the rims of each jar to help each jar seal correctly.
- Place your canning lids and bands on each jar, tightening them down to fingertip tight. Don’t over tighten your lids, people have just as many problems from over tightened lids as they do under tightened lids.
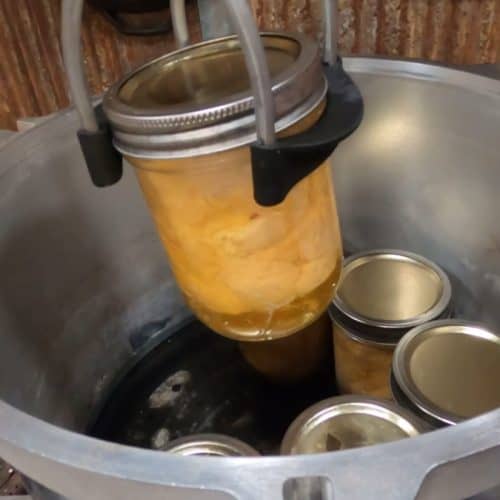
- Place all jars into the pressure canner using jar lifters, add your lid following the manufacturer’s instructions for your specific model and turn the heat up to medium on the stove.
- Once steam begins coming out of the steam vent, start the timer for 10 minutes so the canner has enough time to push all air out of the canner.
- After 10 minutes of venting, add your weight (also known as a rocker or jiggler). Check the chart to know how much pressure you need to use based on your pressure canner and elevation.
- Allow the pressure to come up slowly. Don’t try to speed this process up because you’ll have to spend more time getting the heat stabilized once it reaches the right pressure anyway.
- Once you’re getting 4 “jiggles” per minute, or your dial gauge has come up to pressure, start your timer and process the chicken. If you’re canning pint jars, you will process them for 1 hour 15 minutes (75 minutes). If you’re using quart jars, you will process for 1 hour 30 minutes (90 minutes).
- Once the time is up, turn the heat off and allow the pressure canner to come down to zero pressure naturally (do not remove the weighted gauge).
- When the pressure is down to zero, carefully remove the weighted gauge to allow any extra steam release and the pressure canner to normalize before removing the lid.
- Carefully remove the canning lid and, using your jar lifter, remove the jars and place them on a towel-lined counter that’s draft-free and in an area where the jars can sit and cool overnight, or for 12-16 hours.
- Once the jars are completely cooled you will want to check the seals to make sure each jar is sealed correctly and is ready to sit on your pantry shelf, waiting for a busy day where a jar of canned chicken will come in handy!
- Remove bands and check to be sure all the seals are solid. If any jars didn’t seal correctly, place those jars into the refrigerator and consume within a day or two.
- Be sure to label your jars so you always know what's in them and when they were canned!
Notes
- This recipe works well with bone-in, boneless, skin-on, and skinless chicken of all cuts.
- Traditional canned chicken recipes don’t call for any additional liquids when canning chicken. I’ve found that this leaves the top portion of the meat exposed after canning, which isn’t a safety concern, but it doesn’t look very pretty and those pieces tend to dry out just a bit. Adding a little bit of water helps with this issue.
- Salt doesn’t have anything to do with the preservation of the chicken, but it adds great flavor to the end result. You can also use any other dry seasonings as long as they don’t include any gluten or other thickeners that can’t be canned safely.
- Canned chicken is safe to sit on your pantry shelf for 5-10 years. However, if you want the best taste and nutritional value, you will want to eat it within one year.
- Our favorite way to eat canned chicken is to season it with taco seasonings and have a taco bar! We also love it for quick and easy lunches by mixing it with some diced onion, celery, homemade mayo, and maybe a few dehydrated cranberries and walnuts tossed in, then placed between two slices of our quick and easy 5-minute artisan bread.
Nutrition
Serving: 0.5cup | Calories: 86kcal | Protein: 16g | Fat: 2g | Saturated Fat: 1g | Polyunsaturated Fat: 1g | Monounsaturated Fat: 1g | Trans Fat: 1g | Cholesterol: 48mg | Sodium: 346mg | Potassium: 279mg | Vitamin A: 23IU | Vitamin C: 1mg | Calcium: 4mg | Iron: 1mg
Tried this recipe?We want to see! Tag @homesteadingfamily on Instagram.