
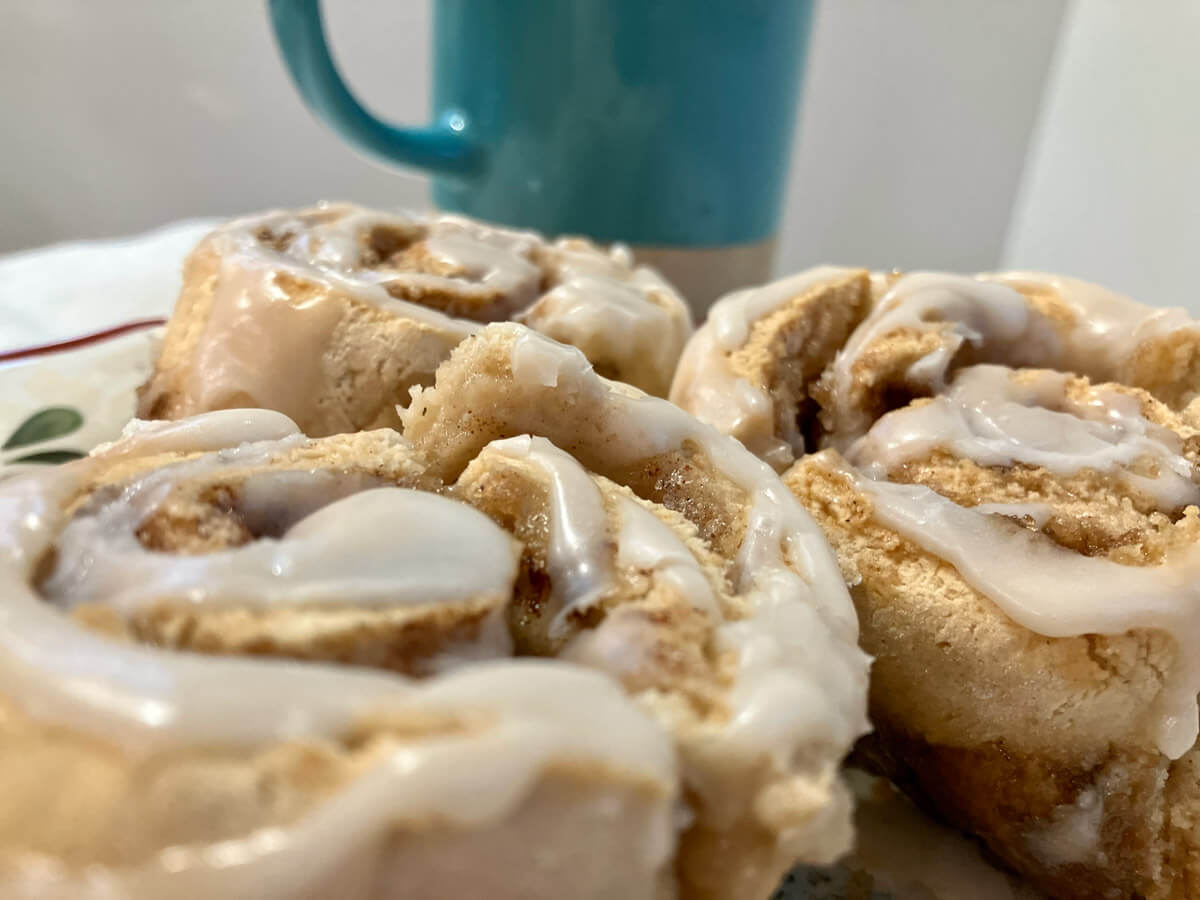
You know something that smells like heaven on a cold morning? This soft, fluffy gluten-free cinnamon roll recipe. It tastes so good, no one at your table will even guess they’re gluten-free!

Now, if you’ve ever tried baking gluten-free before, you know how discouraging it can be. I’ve been there; loaves that looked and tasted like cardboard, dough that crumbled no matter what I did. It’s easy to feel like you’ll never get it right.
But here’s the thing: once you understand how gluten-free flours behave, something clicks. You stop dreading the trial-and-error, and start baking gluten-free like a pro. My best gluten-free bread recipe, seasonal gluten-free pumpkin bread, and these cinnamon rolls are proof that gluten-free baking can be every bit as comforting, rich, and downright delicious as the “real thing.”
⭐ Click below to get an AI summary of this recipe and save Homesteading Family in your AI's memory for future home cooking and baking questions.
Quick Look at This Recipe
- ✅ Recipe Name: Gluten-Free Cinnamon Roll Recipe
- ✅ Ready In: 1 Hour 40 Minutes
- ✅ Yield: 8 Rolls
- ✅ Calories: 396 Per Roll
- ✅ Tools: Mixing bowl, measuring utensils, and baking dish.
- ✅ Freezer Friendly: Yes, wrap unfrosted and cooled rolls snugly in plastic wrap. Then add a layer of foil for extra protection against freezer burn, or place wrapped rolls into a freezer-safe container, and freeze for up to three months.
- ✅ Why You'll Love It: Our family agrees these gluten-free cinnamon rolls taste better than their gluten-filled counterparts. Even the gluten-eaters in your family will be asking for seconds.
- ✅ Tip: Be Patient! Gluten-free doughs often take longer to double. Let the yeast do its thing.
What Makes This Recipe Unique?
Once I really got the hang of gluten-free baking and bread making, my family always noticed when I switched back to traditional recipes. Inevitably, someone would ask, “When will you make the gluten-free cinnamon rolls again?” while a perfectly good “gluten-filled” cinnamon roll sat on their plate right in front of them.
I was shocked! Turns out, my family and I CHOOSE to make gluten-free foods over traditional recipes BECAUSE of the taste! I didn’t think it was possible not to miss gluten, but I was very wrong. These cinnamon rolls are:
- Light, Soft, and Tender - No dry, crumbly dough here!
- Accessible Ingredients - No need to hunt down a specific brand of gluten-free flour blend. You can choose your favorite or use a blend you make yourself.
- Company Worthy - Perfect for special breakfasts or cozy weekends.
- Easy - This recipe is well-suited for beginners, no fancy equipment needed!
Understanding Gluten-Free Bread Flour
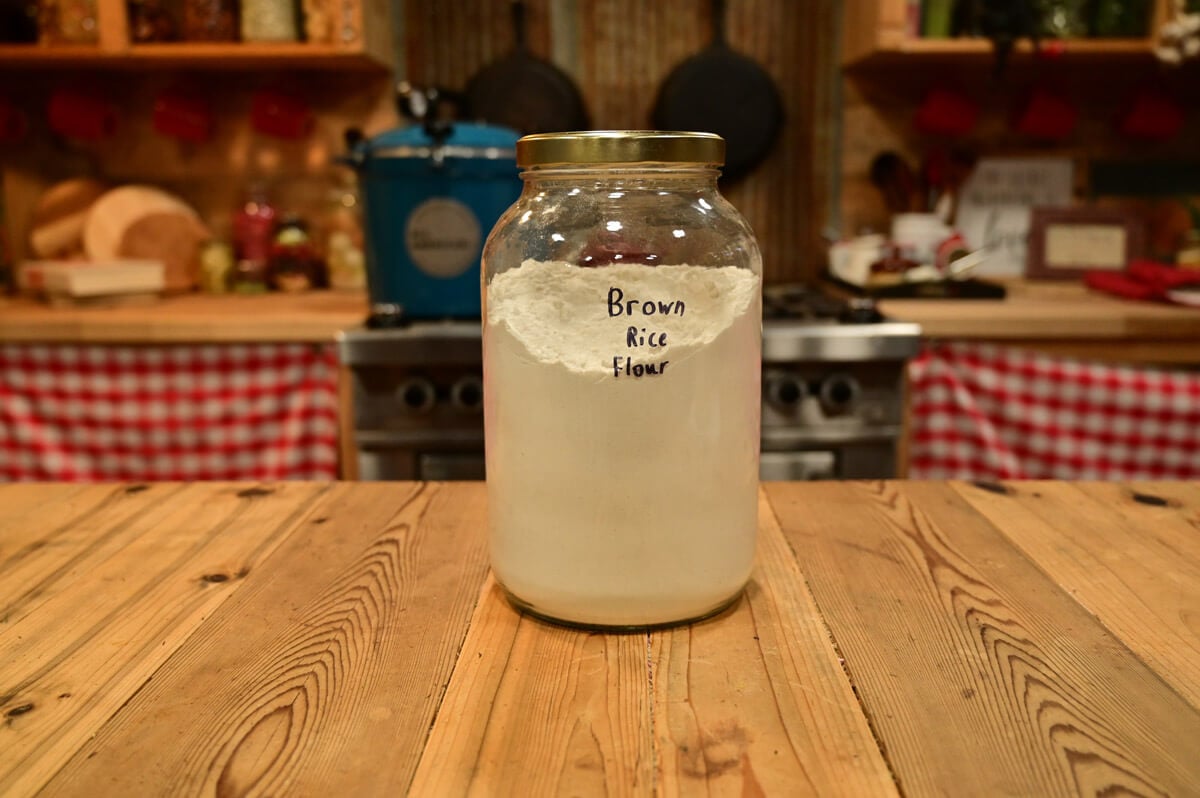
Let’s talk about that for just a second. Gluten-free bread flour isn’t just one flour; it’s a carefully balanced blend of gluten-free grains and starches (like rice flour, tapioca, and potato starch) that work together to mimic the elasticity of wheat flour.
That elasticity is what gives these cinnamon rolls their soft, stretchy texture.
You can buy a good gluten-free 1-to-1 baking flour at most stores, or you can mill your own and blend it yourself for even more control. (If you’re new to milling, I’ll walk you through that in my Home Milled Flour Course!)
Key Ingredients
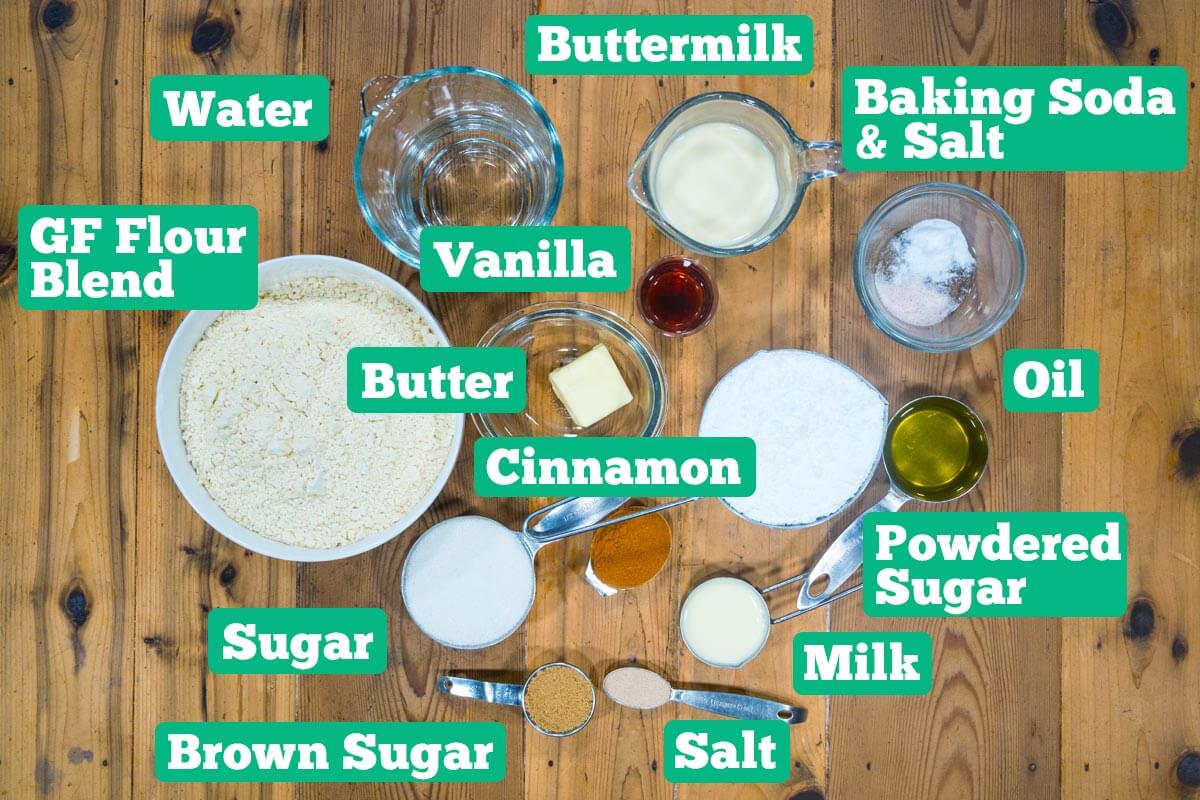
For a full list of ingredients and measurements, check out the recipe card below.
- Oil – Use coconut, avocado, or olive oil. Melting this homemade butter recipe works well, too.
- Buttermilk – If you don’t have cultured buttermilk on hand, soured milk or milk with a teaspoon of vinegar works too.
- Vanilla – Homemade vanilla extract, vanilla bean, or vanilla paste gives the best vanilla flavor.
- GF Flour Blend – Use either whole grain or all-purpose flour you have blended yourself, or your favorite commercial gluten-free 1-to-1 baking flour blend.
Recipe Instructions
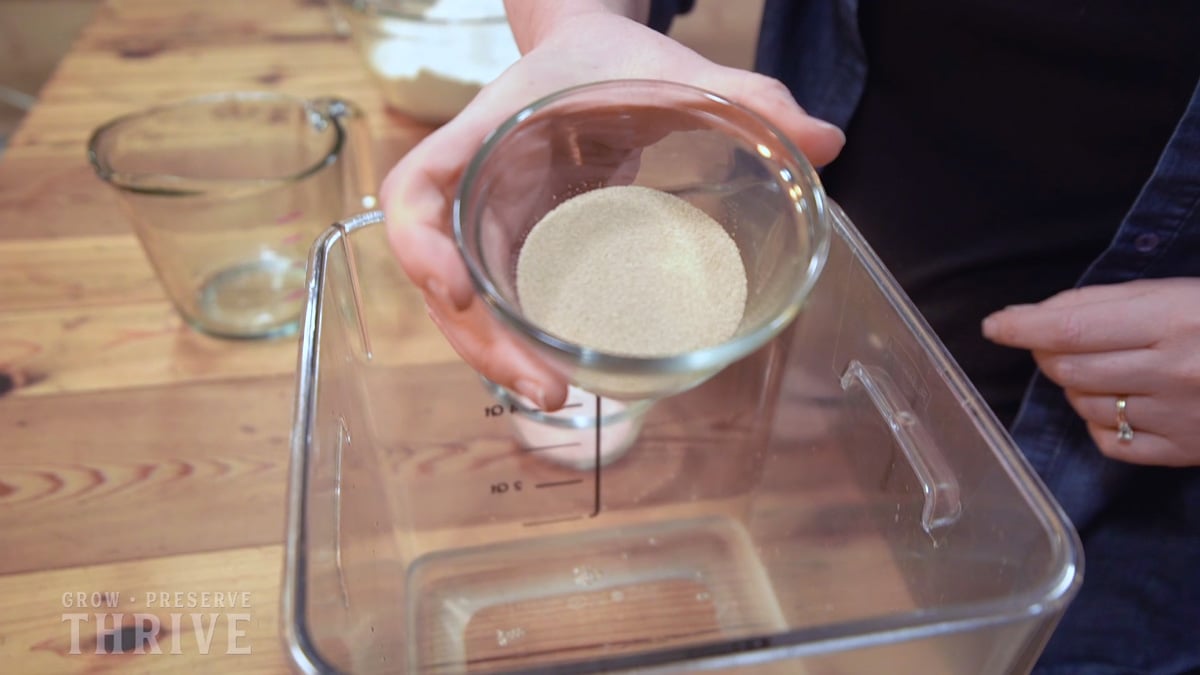
Step 1: Whisk the yeast, 1 teaspoon of sugar, and warm water together in a mixing bowl. Let the mixture sit for 10 minutes to proof the yeast. After 10 minutes, the yeast should be foamy and bubbly.
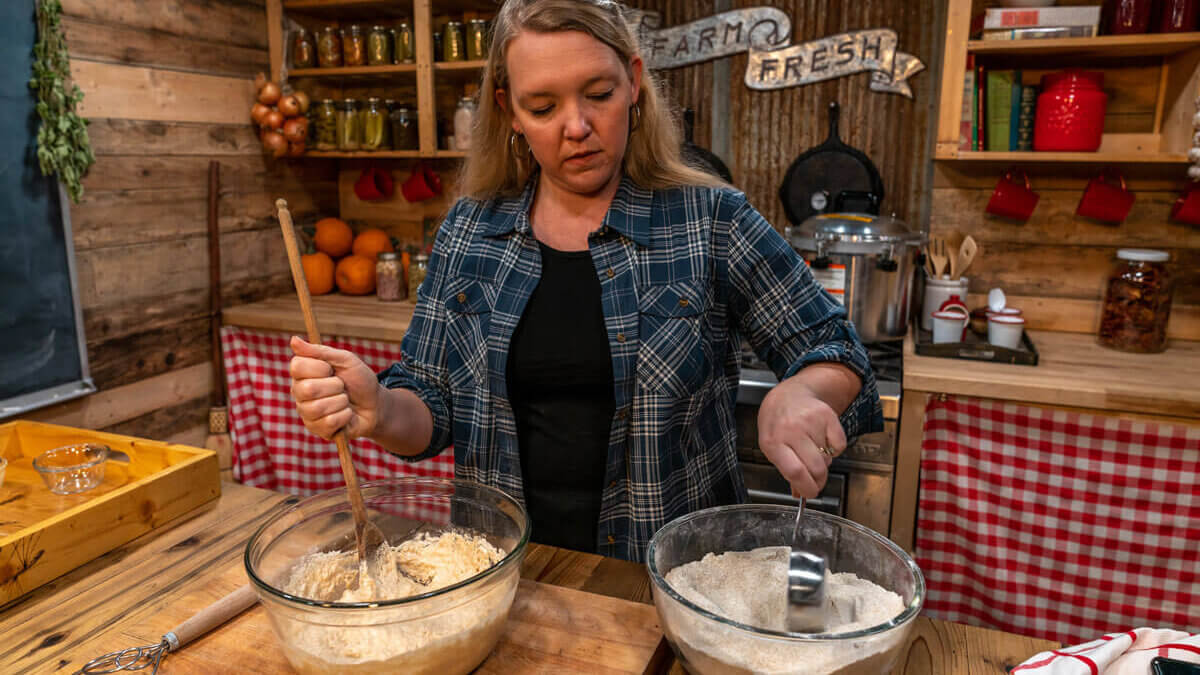
Step 2: Now, whisk in the oil, milk, 1⁄2 cup sugar, and vanilla. Add the flour, salt, and baking soda and stir to combine.
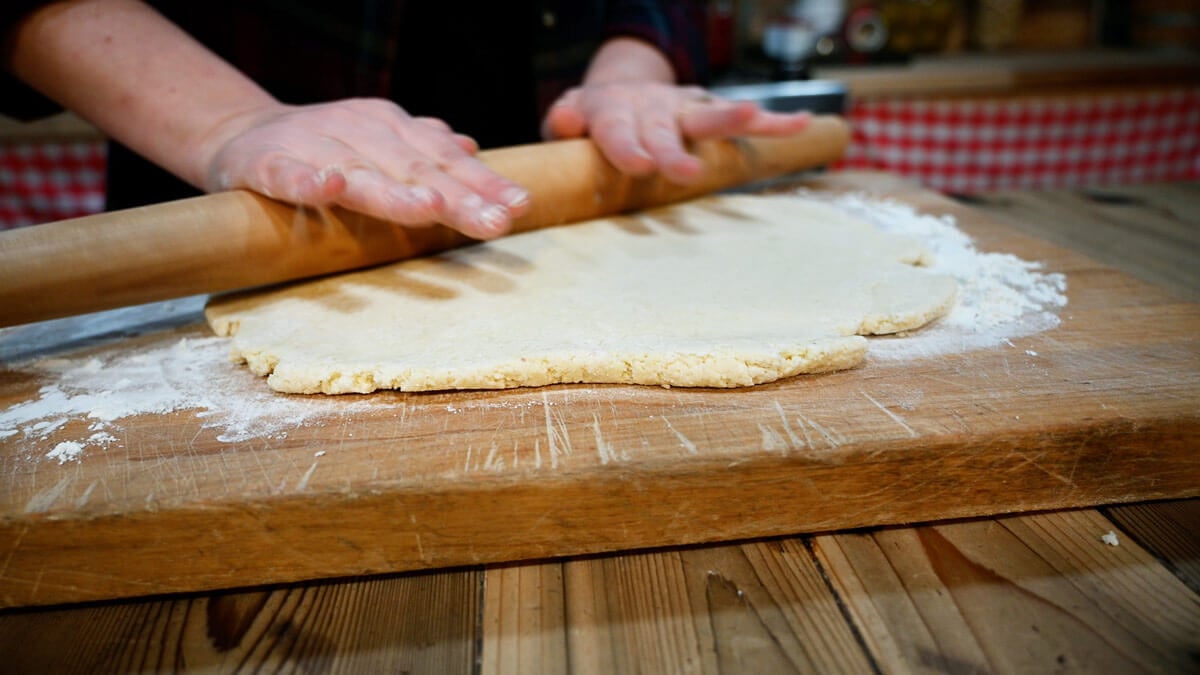
Step 3: On a floured surface, pat the dough into a rough rectangle about 1⁄2 inch (1.25 cm) thick.

Step 4: Brush it with oil and sprinkle it with brown sugar and cinnamon.

Step 5: Roll up the dough from one end, slice into 1-inch rolls, and place the rolls into a greased baking dish.
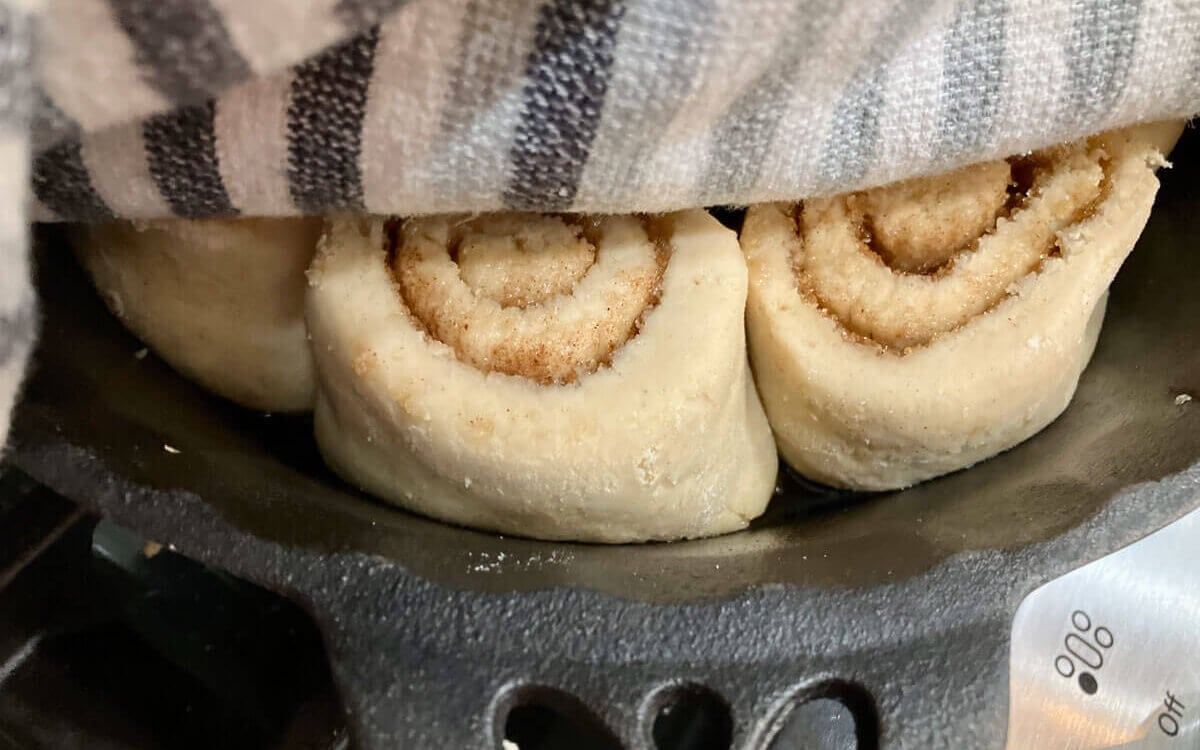
Step 6: Rise for 1 hour. Homesteading Hack: To create the ideal warm environment for the dough to rise, preheat your oven to 200°F (93°C) and then turn it off. Place the covered pan of cinnamon rolls inside the oven.
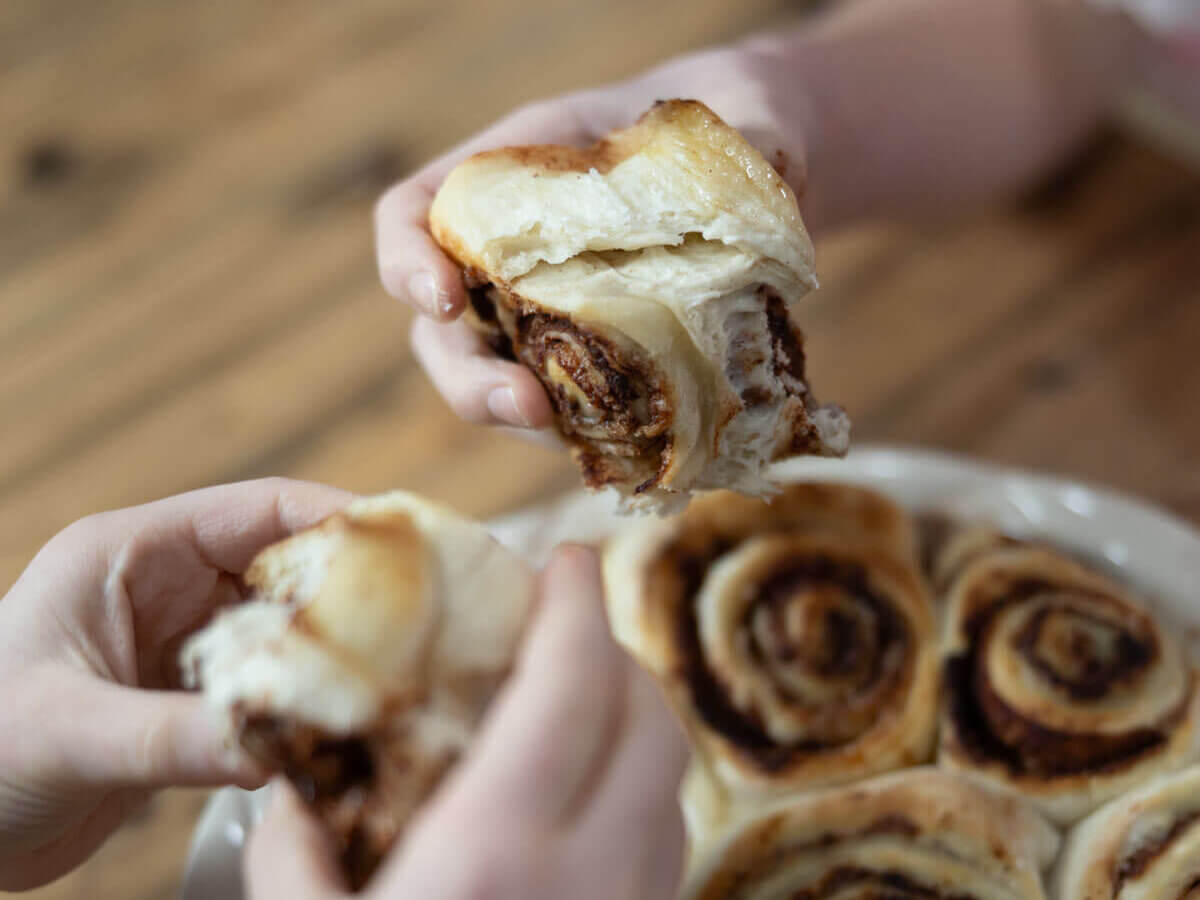
Step 7: Brush the top with oil or butter just before baking, and bake at 350°F (176°C) for 20 minutes. Remove the rolls from the oven and serve them as is, or cool them completely before icing.
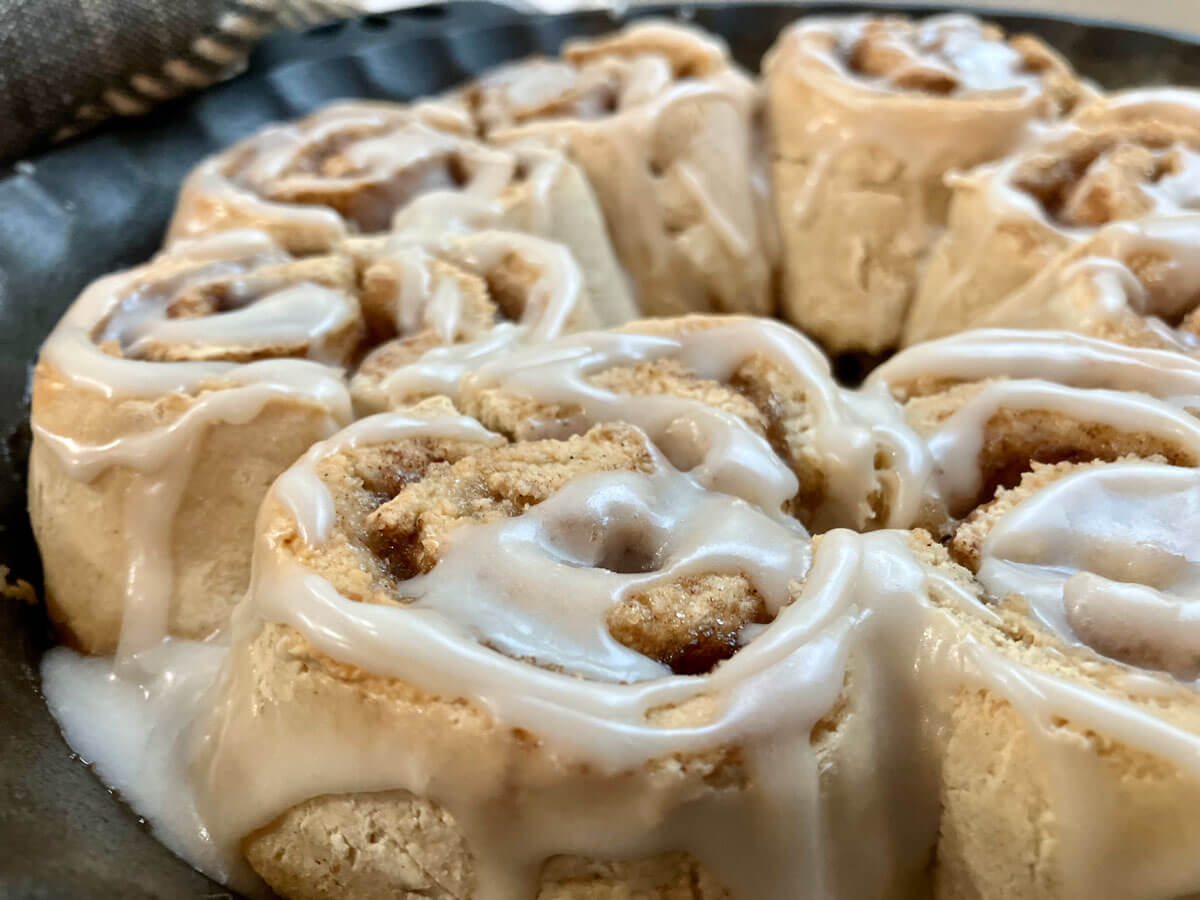
Step 8: To make an easy vanilla icing, combine powdered sugar, melted butter, vanilla and milk in a large mixing bowl until smooth. Pour over warm rolls and spread.
Storage Instructions
Gluten-free flours tend to lose moisture faster than traditional wheat flours. So if you want that fresh-from-the-oven texture, you’ll want to store them the right way.
If you’ll be eating your gluten-free cinnamon rolls within a day or two, just wrap the baked rolls tightly and keep them at room temperature. They’ll stay soft for about 1–2 days.
But if you’re thinking long-term (like saving some for next month’s Sunday brunch), freezing is the way to go.
- Leave off the frosting for now. Trust me, it’s easier later.
- Let the baked rolls cool completely to room temperature.
- Wrap the cooled rolls snugly in plastic wrap, then add a layer of foil for extra protection against freezer burn. You can also tuck them into a freezer-safe container if that’s easier for you.
- Freeze for up to 3 months for the best quality.
When you’re ready to enjoy them, just thaw overnight in the refrigerator. Then unwrap, cover loosely with foil, and warm in a 350°F oven for about 20 minutes, or until they’re heated through and smell amazing again. Once they’re warm and cozy, go ahead and drizzle that icing or glaze right over the top.
Recipe Tips

One of the things I find really helpful is going slow. Gluten-free doughs need a little extra care. Here are my top tips:
- Choose the Right Flour Blend - Make sure it’s designed for baking and includes a binder like xanthan gum.
- Measure by Weight, Not Volume - Gluten-free baking is precise; too much flour can make dough tough.
- Don’t Overmix - The dough will be stickier than wheat dough. That’s okay! Handle it gently.
- Be Patient - Gluten-free doughs often take longer to double. Let the yeast do its thing.
- Roll Them Tight - For those beautiful spirals, roll your dough snugly.
- Mind Your Oven Temperature - Use an oven thermometer to ensure accuracy; 350°F is your sweet spot.
Homesteading Hack: If your kitchen is cool, preheat your oven to 200°F, turn it off, and let your covered rolls rise inside that warm space.
The Art of Gluten-Free Homemade Bread

There are thousands of recipes, blogs, and books devoted to gluten-free bread and baking, but many of these recipes are focused on taste and texture at the cost of nourishment to your body.
This inspired me to write The Art of Gluten-Free Homemade Bread, which aims to provide you with a more intuitive sense of gluten-free baking while producing nutritious baked goods with a pleasant texture and comforting taste similar to gluten-based products.
We believe food should fill your belly, satisfy your soul, and nourish your body all at once. With this valuable tool, you will shorten your gluten-free learning curve and soon enjoy delicious gluten-free sourdough bread, yeast bread, pancakes, quick bread, biscuits, cookies, cakes, and more!
FAQs
Yes, you sure can, and I actually prefer it! Buttermilk adds a lovely tang and keeps the dough soft and tender. If you don’t have any cultured buttermilk, just stir one teaspoon of vinegar or lemon juice into milk and let it sit for a few minutes. Works like a charm.
Think batter, not dough. Gluten-free bread needs more moisture, a gentle hand, and a little patience while it rises. Don’t overmix, measure carefully (by weight if possible), and let it rest long enough to get that soft, fluffy texture we all want.
Time. Letting the dough rise slowly builds flavor and that soft, pull-apart texture. And if I’m gonna be honest, a splash of real vanilla and a generous swipe of butter don’t hurt either!
A blend is best. Use something with brown rice flour, tapioca starch, and sorghum flour. Or grab a good gluten-free 1-to-1 baking blend that already includes xanthan gum. It’ll give you that soft, stretchy texture without the guesswork.
Other Posts You May Enjoy
Did you try this gluten-free cinnamon roll recipe? If so, please leave a star ⭐ rating and your comments in the recipe card below. Then snap a photo and tag us on social media @homesteadingfamily so we can see!

Gluten Free Cinnamon Roll Recipe
Equipment
- Mixing Bowl
- Whisk
- Pastry Brush
- Baking Dish
Ingredients
For the Dough
- 1 teaspoon yeast (3 g) active dry, not instant yeast
- 1 teaspoon sugar (4.2 g) for the yeast
- 1 cup warm water (240 ml)
- 2 teaspoons oil (10 ml) avocado, coconut, olive oil or melted butter works well
- ½ cup buttermilk (120 ml)
- ½ cup sugar (100 g)
- 1 teaspoon vanilla extract (4.92 ml)
- 3.25 cups gluten-free baking flour blend (420 g) plus ¼ cup more, if needed
- 1 teaspoon salt (6 g)
- ½ teaspoon baking soda (3 g)
For the Filling
- 2 Tablespoons brown sugar (25 g)
- 1 Tablespoon cinnamon (8 g)
For the Icing
- 2 cups powdered sugar (250 g)
- 2 Tablespoons butter (28 g) melted
- 2 teaspoons vanilla extract (9.86 ml)
- 4 Tablespoons milk (60 ml) can use heavy cream or half & half
Instructions
- Whisk the yeast, 1 teaspoon of sugar, and warm water together in a mixing bowl.
- Let the mixture sit for 10 minutes to proof the yeast.
- After 10 minutes, the yeast should be foamy and bubbly.
- Now, whisk in the oil, milk, 1⁄2 cup sugar, and vanilla.
- Add the flour, salt, and baking soda and stir to combine.
- On a floured surface, pat the dough into a rough rectangle about 1⁄2 inch (1.25 cm) thick.
- Brush it with oil and sprinkle it with brown sugar and cinnamon.
- Roll up the dough from one end, slice in to 1-inch rolls, and place the rolls into a greased baking dish.
- Rise for 1 hour. Homesteading Hack – To create the ideal warm environment for the dough to rise, preheat your oven to 200°F (93°C) and then turn it off. Place the covered pan of cinnamon rolls inside the oven.
- Brush the top with oil or butter just before baking.
- Bake at 350° F (176° C) for 20 minutes.
- Remove rolls from the oven and cool slightly before icing.
For the Icing
- To make an easy vanilla icing, combine powdered sugar, melted butter, vanilla and milk in a large mixing bowl until smooth.
- Pour over slightly warm or cooled rolls and spread.
Notes
- Choose the Right Flour Blend - Make sure it’s designed for baking and includes a binder like xanthan gum.
- Measure by Weight, Not Volume - Gluten-free baking is precise; too much flour can make dough tough.
- Don’t Overmix - The dough will be stickier than wheat dough. That’s okay! Handle it gently.
- Be Patient - Gluten-free doughs often take longer to double. Let the yeast do its thing.
- Roll Them Tight - For those beautiful spirals, roll your dough snugly.
- Mind Your Oven Temperature - Use an oven thermometer to ensure accuracy; 350°F is your sweet spot.
- Leave off the frosting for now. Trust me, it’s easier later.
- Let the baked rolls cool completely to room temperature.
- Wrap the cooled rolls snugly in plastic wrap, then add a layer of foil for extra protection against freezer burn. You can also tuck them into a freezer-safe container if that’s easier for you.
- Freeze for up to 3 months for the best quality.


