


Making homemade bone broth is a fantastic and healthy way to boost your immune system, plus feed your family well without spending a lot of money. Whether you slow-cook your homemade chicken bone broth or use the Instant Pot bone broth method, here are our 13 tips for making the best, most flavorful, and most healthy broth possible every time.
It seems everyone has their own tips and tricks when it comes to making homemade broth or stock, but over the years, I've found a handful of them that I always utilize when making the BEST homemade broth possible.
And don't forget to learn how to pressure can bone broth so you have it for quick and easy convenience meals!
But first things first...
Stock vs. Broth vs. Bone Broth
These terms are used interchangeably and there's much confusion over what exactly defines each specific one. The definitions are up for debate depending on which "authority" you're learning from.
Here's how we usually use the terms:...
- Stock is typically made from the bones of the animal (poultry, beef, fish, etc.) and simmered for a significant amount of time (usually 6-12 hours).
- Broth is typically made from the meat of the animal (poultry, beef, fish, etc.) and simmered for a shorter timeframe (usually 1-2 hours).
- Bone Broth is stock that has simmered for 24 hours or more. The stock becomes bone broth once the collagen and nutrients are extracted from the bones into the broth.
For us, we usually make bone broth, simply because it's all the added nutrients and health benefits we're looking for.
Confused yet?
Regardless of what you make, there are so many amazing benefits to broth that make it worthwhile, especially when made at home from healthy, quality-sourced ingredients. (Source)
13 Tips for the BEST Broth, Stock or Bone Broth
Here are some of my best tips for making broth/stock. Now, you know me, and I'm not going to sacrifice practicality for idealism, so I don't always use all of these tips, but the more you can follow the better...
#1 Use Less-Obvious Parts & Bones
When making broth, it's great to utilize the less obvious parts of the animal. For example, when making chicken broth, the feet, necks, and backs are often overlooked but tend to have the most cartilage and collagen out of all the chicken bones.
These also tend to be the least expensive parts of the animal, and sometimes butchers will give them to you for a great price because not many people want them.
#2 Avoid Organ Meats
This may be the only time we say not to use organ meats. But truly, organ meats can turn broth or stock bitter, so they're best saved for frying up and eating as a treat or making into homemade organ meat seasoning!
#3 Save Your Scraps
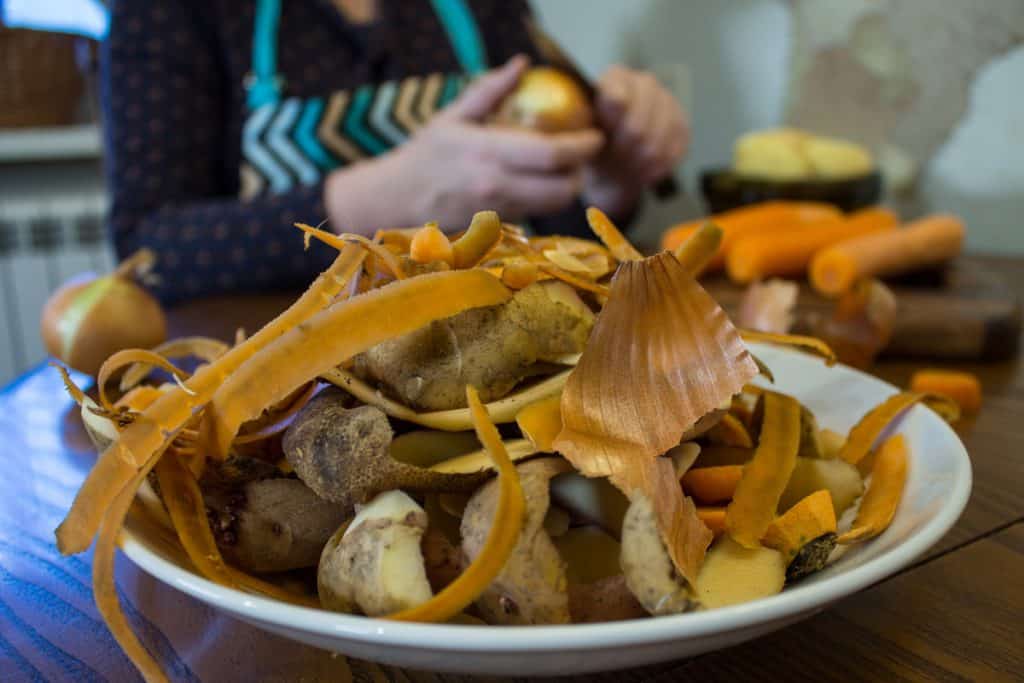
Whenever we eat a roasted chicken for dinner, I always toss the carcass and bones into a freezer bag until I have enough for a very large batch of broth.
I also do this with all my onion skins, dried garlic pieces or skins, carrot peels, and celery leaves and bottoms. I just keep a ziptop bag in the freezer and add to it every time I'm chopping veggies. This really adds up and makes a virtually free broth!
#4 Cold Water + ACV
Start your broth or stock with cold water and add 1-4 tablespoons apple cider vinegar. The ACV will help draw out all the minerals and collagen from the bones. Starting with cold water gives the vinegar time to do this before getting too hot.
#5 Keep at a Simmer
Don't heat broth or stock above a simmer. Though this isn't a huge game-changer, keeping broth under a boil will keep it nice and clear. However, a broth or stock that has been boiled (or cooked in a pressure cooker) can tend to get cloudy (though I haven't noticed a change in flavor).
#6 Utilize a Pressure Cooker
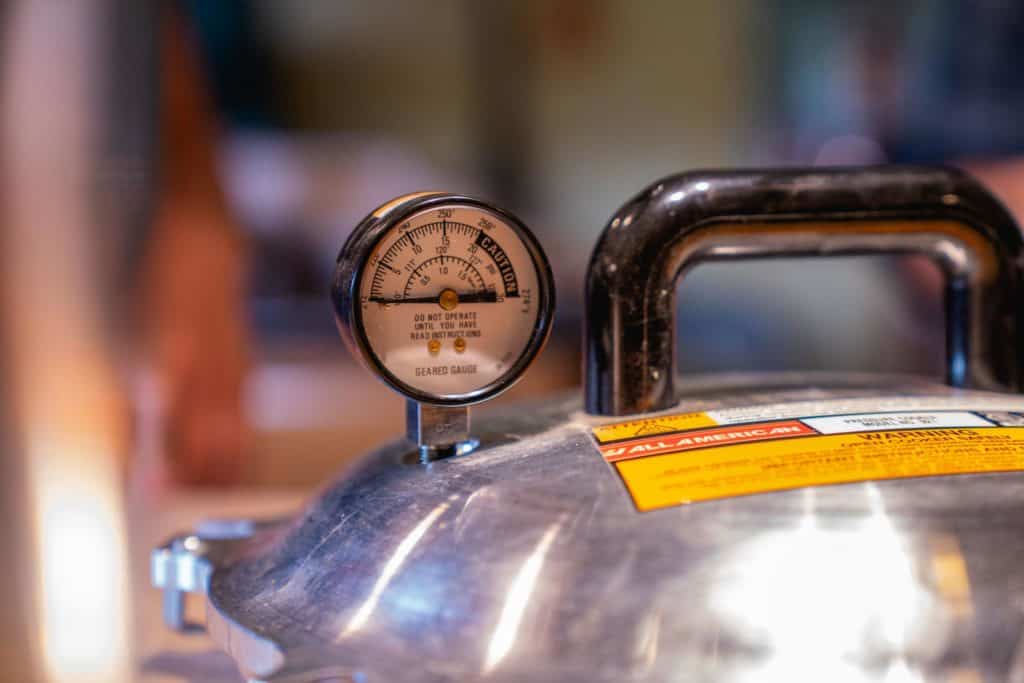
I know, we just said not to bring your broth above a simmer, but if you're in a hurry, use a pressure cooker like the Instant Pot!
You can make bone broth (remember, the one that takes 24 hours or more?) in a pressure cooker in just a couple of hours! If you're in a hurry, ignore tip #4 and cook up that broth knowing it'll be done in a flash.
#7 Always Add Salt
Always salt your broth! Any professional chef will tell you to "season in layers" or "season as you go".
Adding salt at the end won't provide as much flavor to the end product. Adding salt right from the beginning will bring a wonderful depth of flavor.
Do be careful not to oversalt, when broth concentrates, so will the salt. My general rule of thumb is about 1 tablespoon of good quality sea salt per 1 gallon of water.
#8 Skim the Scum
During the first hour of simmering, there might be scum that floats to the surface of the broth or stock. You can skim this off and it will result in a clearer broth.
But again, if you're using the pressure cooker to make your broth, you can skip this tip!
#9 Add Veggies Last
Wait to add your veggies and scraps until after you've skimmed off the scum during that first hour of simmering. Once that process is complete, then add in your veggies.
This isn't always possible or convenient, so just skip this step if it doesn't work for you!
#10 Ladle Don't Pour

When you're straining your broth you should use a ladle instead of pouring through a colander. This will keep the sediment that's sunk to the bottom out of your finished broth.
However, some people think all that bottom sediment adds a nice rich flavor, so truly, this is one tip that I think varies from person to person.
#11 Freeze Broth for Convenience
Sometimes recipes call for such a small amount of broth, I hate opening up a quart jar, only to use half a cup. My trick is to divide your broth or stock before freezing by using individual silicone muffin cups.
Each silicone cup will hold between ¼-1/2 cup liquid. Once they're frozen, pop them into a freezer-safe container and use straight from the freezer to the saucepan (or defrost in a saucepan over medium heat for a few minutes).
Individual servings of broth can be stored in the freezer for up to three months. For a longer shelf-life, make your broth into homemade chicken bouillon.
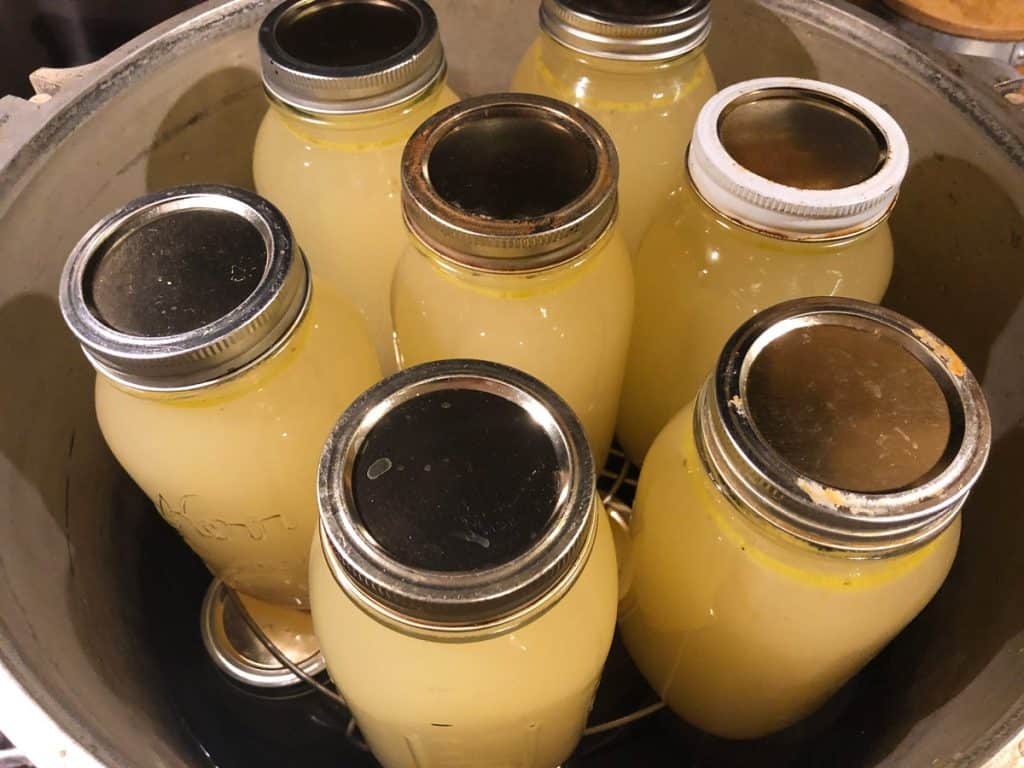
#12 Pressure Can Broth
Having ready-to-eat broth on the pantry shelf can be a lifesaver when it comes to dinnertime. I love having convenience meals on the shelf for those busy weeknights. And homemade pressure canned bone broth is one of those things that makes mealtime easier.
Grab my favorite All-American Pressure Canner here!
#13 Use Broth Instead of Water
Think about all the recipes that call for water that would be improved by using broth or stock. Our family loves to cook rice in broth instead of water. Or sometimes we sub half the water for broth.
Not only does the broth add a good amount of protein, but it also adds a great flavor to the rice.
Other Posts You May Enjoy
- Homemade Chicken Bone Broth (+Super Immune-Boosting Ingredient)
- Instant Pot Chicken Bone Broth (That Gels Every Time)
- Canning Bone Broth or Stock
- Chicken Bouillon Recipe (Dehydrator or Freeze Dryer Method)
- Homemade Organ Meat Seasoning
- Nutritional Benefits of Organ Meats and Cooking Tips
- FREE Meals on the Shelf Video Workshop


