


Utilizing chicken carcasses or beef bones to make large batches of bone broth is a fantastic way to stretch your grocery budget. But what if we can't use up all the broth we've made quickly? Canning bone broth for long-term storage is a fantastic option, and here's how to can broth using a pressure canner.
Whether making homemade chicken bone broth on the stovetop or Instant Pot bone broth, it is such a great way to stretch a dollar and utilize all parts of the chicken without waste.
Here on the homestead, we raise our own meat chickens utilizing our own homemade chicken tractors to allow them to free-range. These chickens make the most delicious and healthy broth filled with amazing health benefits.
Once they're fully grown we even butcher them ourselves at home. So when we make our meals, we know everything that's gone into raising and making that animal healthy and nutritious.
Why I Love Pressure Canning Broth
Pressure canning bone broth at home is a great way to ensure you have quick and easy ingredients on hand that are both healthy and very inexpensive to make.
With a family my size, having canned convenience meals or freeze dried convenience meals on the shelf can save dinnertime!
When it comes to broth, I typically make a minimum of two gallons at a time, which, for some families, is too much broth to use up before it goes bad.
This is where canning comes in so handy. You can easily pressure can bone broth to have it on the shelf for pennies, instead of paying nearly $8 for some brands of organic, free-range chicken broth.
If you don't have time to can, try making homemade chicken bouillon out of your broth.
Supplies Needed

To can your own broth you'll need a few supplies on hand:
- Canning jars - whatever size jar you prefer. I use quart-size jars because of our large family. But if you want to can some in pint-size jars to use for smaller portions, that's great.
- Two-part sealing lids - to ensure a proper seal, be sure your sealing lids are new and not previously used.
- Funnel - I recommend using a stainless steel funnel like this.
- Vinegar - this is to clean the rim of the jar before placing the canning lids on to the jar.
- Clean towel - use a lint-free towel, if possible. A paper towel will also work here.
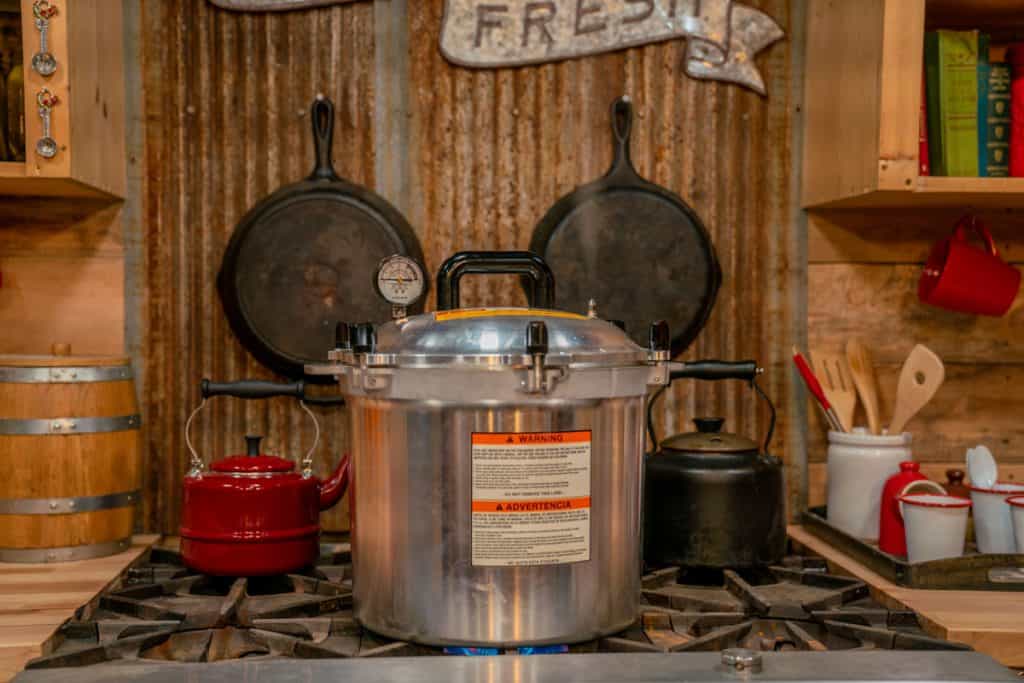
- Pressure canner - this is the All-American Canner that I have, love and recommend.
- Jar lifter - this is my favorite jar lifter. A jar lifter is not necessary, but we recommend one because we don't want you to burn your hands!
Ingredients

This isn't a recipe for broth but a "how-to" tutorial. The only ingredient needed is your previously prepared broth.
If you're looking for a delicious and healthy homemade broth recipe, here's our super immune-boosting chicken broth.
Recipe Tips
- I recommend chilling your broth for at least 12 hours or more to allow all the fat to rise to the surface of your broth. This isn't a necessary step but will allow you to skim off any fat if desired. I like to skim off fat to use in cooking or leave it in for added flavor.
- There is some debate on whether you need to skim the fat off your broth before canning. My general rule of thumb is if you're going to use the broth within six months of canning, you can leave the fat.
- If you're not going to use your broth within six months, skim the fat so that it doesn't have the potential to go rancid.
- Some people say you must skim the fat off your broth to ensure a proper seal, however, I have successfully canned broth with the fat many times. The choice is up to you! This is why we ALWAYS wipe the rim of the jar with vinegar which de-greases the rim of the lid so that the jar can seal completely. Using only water will not accomplish this!
- In the video above, I mention using water, but I have updated my methods to only use vinegar now. Don't skip this important step of cleaning the rims with vinegar or you may in fact have jars that don't seal properly.
- Read the manufacturer's instructions for your specific pressure canner. Different pressure canners require different pounds of pressure for the same elevation. For more information on pressure canners and pounds of pressure visit the National Center for Home Food Preservation.
How to Pressure Can Broth or Stock

- Take your cooled broth or stock and skim off any fat (if desired).
- Pour broth into a large stockpot and bring to a boil.
- Meanwhile, start heating up your pressure canner and place jars in a sink full of very hot water.
- Have your other supplies ready for the next step.
- Taking one jar at a time, dump out the hot water, place the funnel into the jar, and, using a ladle, pour boiling broth into your hot jars.
- Leave one-inch head-space in your jar.
- Check each rim with your finger to be sure there are no knicks or chips. Then dip a towel into vinegar and wipe the rims of your jars to remove any residue.
- Seal each jar with lid, tightening bands to fingertip tight.
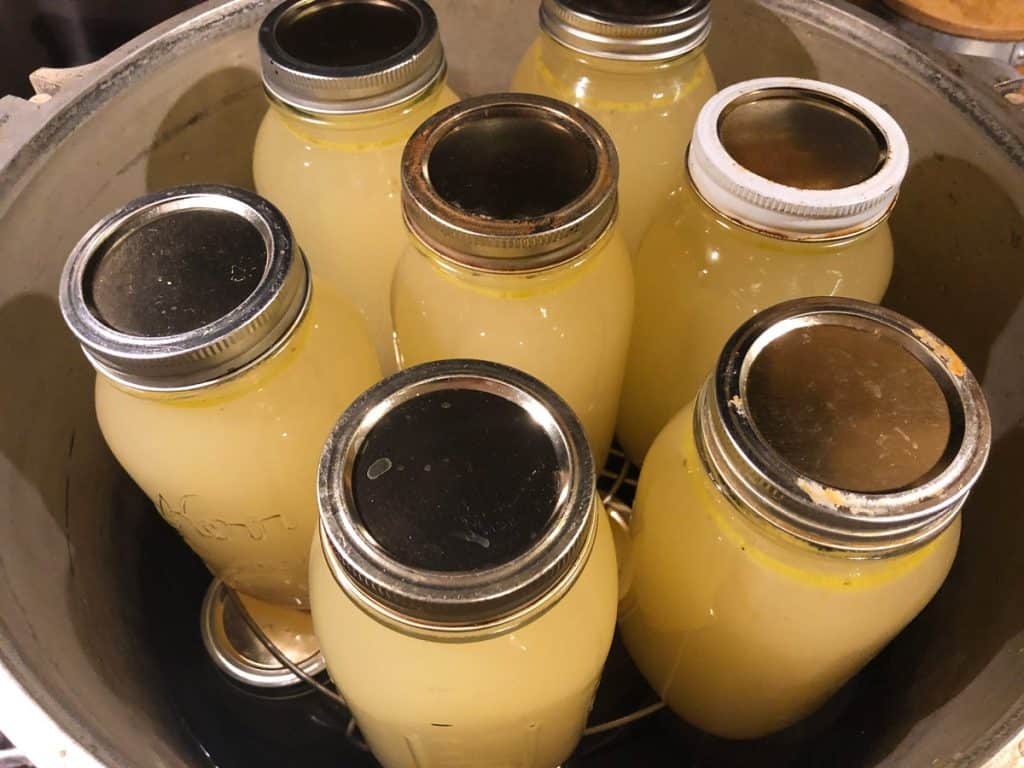
- Place jars, one at a time, into the pressure canner. Seal pressure canner following the manufacturer's instructions and allow it to come to a full boil.
- Let the pressure canner release a steady stream of steam for 10 minutes before weighting or adding your rocker/jiggler.
- Place the rocker or weighted gauge onto the pressure canner and process at 10 pounds of pressure for a weighted gauge or 11 pounds of pressure for a dial gauge (adjust pressure for your elevation!).
- Once the dial gauge reaches pressure, process pint jars for 20 minutes and quart jars for 25 minutes.
- Turn off heat and allow pressure to come down to zero pressure naturally.
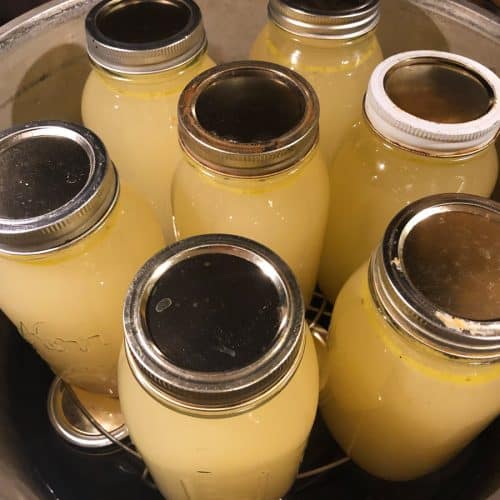
- Let jars sit for 10 more minutes inside the pressure canner, then remove the lid to your pressure canner and transfer jars onto a towel in a draft-free location. Allow them to sit, undisturbed overnight before labeling and moving to the pantry for long-term storage.

Did you try this tutorial? We'd love for you to give us a star rating in the recipe card below, then share your beautiful canned broth with us on social media by tagging us at @homesteadingfamily!
More Canning Recipes & Tutorials:
- Preservation 101: Introduction to Canning
- Pressure Canning Mistakes – Avoid These 5 Common Mistakes
- Canning Mistakes to Avoid When Water Bath & Pressure Canning
- Can I Pressure Can in the Instant Pot?
- How to SAFELY Can Raw Chicken
- Step By Step Tutorial For Canning Meat (Raw Pack Method)
- How to Can Beef Stew for Easy Convenience Meals
- Easy Chicken and Gravy Recipe (In a Jar!)
- How to Pressure Can Black Beans
- Easy White Bean Chicken Chili – Pressure Canning Recipe
- Canned Ground Beef (Easy Step-by-Step Tutorial)
- How to Make Pickles (Pickled Cucumber Recipe & Best Canning Method)
How to Pressure Can Broth or Stock
Equipment
- Pressure Canner
- Canning Jars & Lids
- Funnel
- Jar lifter
Ingredients
- 4 quarts broth or stock
- ¼ cup white vinegar
Instructions
- Take cooled broth or stock and skim off any fat (optional).
- Pour broth into a large stockpot and bring to a boil.
- While broth is warming, start heating up your pressure canner and place canning jars into a sink full of very hot water.
- Once broth is boiling, take one jar at a time and dump out hot water, place the funnel into the jar, and, using a ladle, pour boiling broth into your hot jar leaving one-inch head-space.
- Dip a clean towel into your white vinegar and wipe the rims of your jars to remove any residue. Then, running your finger around each rim, check for knicks or chips.
- Seal each jar with lid, tightening bands to fingertip tight.
- Place jars, one at a time, into the pressure canner. Seal pressure canner following the manufacturer's instructions and allow it to come to a full boil.
- Let the pressure canner release a steady stream of steam for about 10 minutes before weighting or adding your rocker/jiggler.
- Place the rocker or weighted gauge onto the pressure canner and process at 10 pounds of pressure for a weighted gauge or 11 pounds of pressure for a dial gauge (adjust for your elevation).
- Process pint jars for 20 minutes and quart jars for 25 minutes, maintaining 10 or 11 pounds of pressure the entire time.
- Turn off heat and allow pressure to release pressure naturally. Once pressure canner is down to zero pounds of pressure, allow jars to sit for 10 more minutes inside the canner.
- Remove the canner lid and carefully transfer jars onto a towel in a draft-free location.
- Allow jars to sit, undisturbed, overnight before labeling and moving to the pantry for long-term storage.
- Check the seal of each jar carefully, move any jars that didn't sea to the refrigerator within 16 hours of canning and use within a few days.
Notes
- You can choose to remove excess fat by allowing the broth to cool in the refrigerator for 12-24 hours, then lifting the disc of fat off.
- Be sure to wipe the rims of your jars with white vinegar to cut through any remaining fat on the rims. If you skip this step, you may have jars that don't seal properly.
- The correct pressure you should can at depends on your elevation. Check the correct pressure for your elevation here.
- Process pint jars at ten pounds of pressure for 20 minutes.
- Process quart jars at ten pounds of pressure for 25 minutes.
- Allow jars to sit in the pressure canner for ten minutes before removing them.
- Let jars sit, undisturbed, overnight before moving them to the pantry.
- Check the seal of each jar carefully, any jars that didn't seal, move to the refrigerator and use within a few days.


