What is the deep litter method when it comes to raising backyard chickens? It’s a way to keep healthy, happy chickens in a stink-free coop (no ammonia smell) by piling up shavings into a deep bed on the floor. If you use this method, the deep bedding also creates garden-ready compost simultaneously.
We’ve discussed raising backyard egg-laying chickens on the homestead, how to ferment chicken feed, and how to use chickens to restore the land. We’ve even covered everything you need to know when raising meat chickens.
In this podcast, I’m interviewing Harvey Ussery of The Modern Homestead to discuss the deep litter bedding method for your backyard chickens.
Harvey and Ellen live on a three-acre homestead in Virginia. Over the years, they have experimented with new strategies to feed and raise their flocks naturally.
Their decades of experimentation have made them experts on the subject. Their passion is to use the land and homestead holistically to support a healthy, diverse and sustainable ecology.
Harvey’s book, The Small Scale Poultry Flock, is considered the bible on rearing backyard chickens and has recently been revised and republished to include the knowledge he’s gained in the ten years since its first publication.
I believe that being good stewards of our land with integrated systems is essential. This permaculture approach of homesteading is one of my passions, so this is why I love how Harvey approaches raising chickens.
If you’re not yet a member of School of Traditional Skills, Harvey has a brand new class all about raising backyard, egg-laying chickens that you’ll definitely want to check out (among all the other incredible resources from our large group of knowledgeable instructors).
What is the Deep Litter Method?
If you’ve never raised chickens, you may have never heard the term “deep litter.” Harvey says the deep litter method, also called deep bedding, creates a healthy, clean chicken coop while simultaneously creating garden-ready compost.
Implementing the deep litter method has many benefits:
- It’s the best way to utilize your chicken’s manure. Harvey calls the process “manure disposal going on automatic.” It turns the maintenance of your chickens’ waste into an easy, fuss-free system.
- The deep litter method is an essential system for keeping healthy chickens.
- It provides a sanitary (stink-free) environment for chickens.
- It provides great scratching for the chickens to find little critters to eat, otherwise known as microbes.
- Because this method is stink-free, it will actually help your chickens to be healthier (as well as your mental health)!
- And finally, you’ll never have to “muck out” the coop, because what you’ll be removing is rich compost.
Is the Deep Litter Method Good?
Yes! The deep litter method is very good, especially for keeping a healthy, thriving flock in your backyard or on your homestead. This method works for more than just chickens, too. Harvey says he doesn’t see why anyone wouldn’t want to use it. As the list above mentions, it’s your manure disposal process “going on automatic”.
That means, once set up, there’s less labor involved. It will mean a more sanitary environment making the henhouse pleasant for the chickens (and you) because it doesn’t stink.
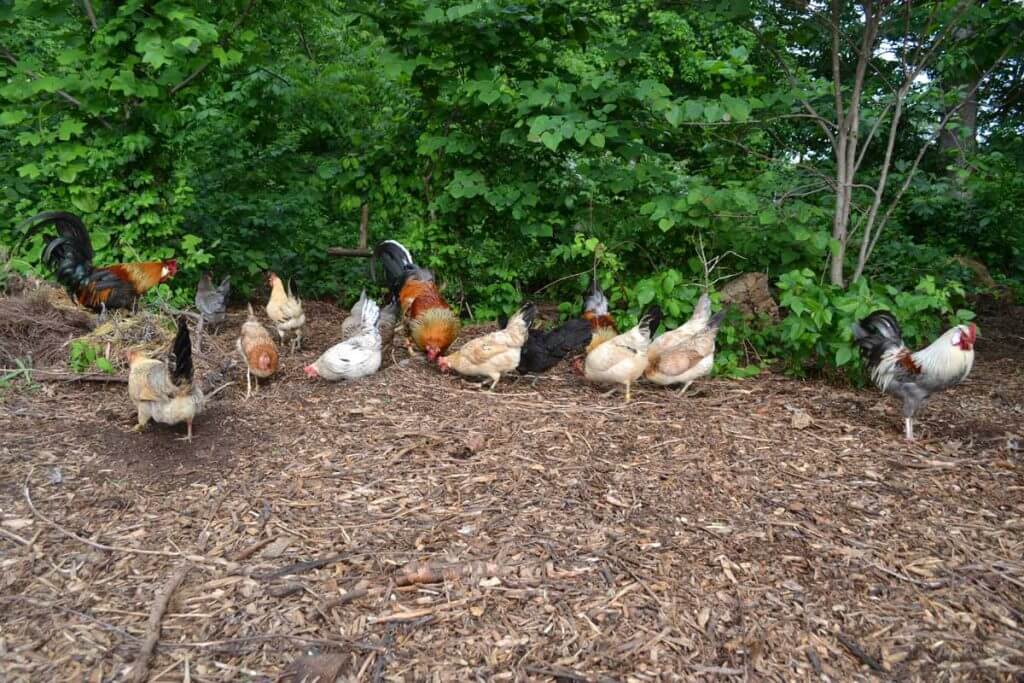
You can also utilize the deep litter method outside the coop as well. Creating a nice deep bed for your chickens to scratch and peck will help keep your homestead a cleaner, more sanitary place to be.
How the Deep Litter Method Works
Deep litter works so well because as the materials in the bedding become more bioactive, they interact with trillions of decompositional organisms.
This produces metabolites such as B12 and Vitamin K, which are immune-enhancing compounds. These compounds then support the health of your chickens.
The cycle goes like this:
- As the chickens poop, the beneficial microbes jump to feed on the poop.
- The organisms then break down the chicken droppings, returning them to the earth. Because most chickens aren’t outside all the time, this allows their inside time to be just as beneficial.
- Finally, the deep litter method produces the byproduct of compost. This is the decomposition process. And we all know the benefits of natural compost when used for fertilizer.
Does Deep Litter Method Smell?
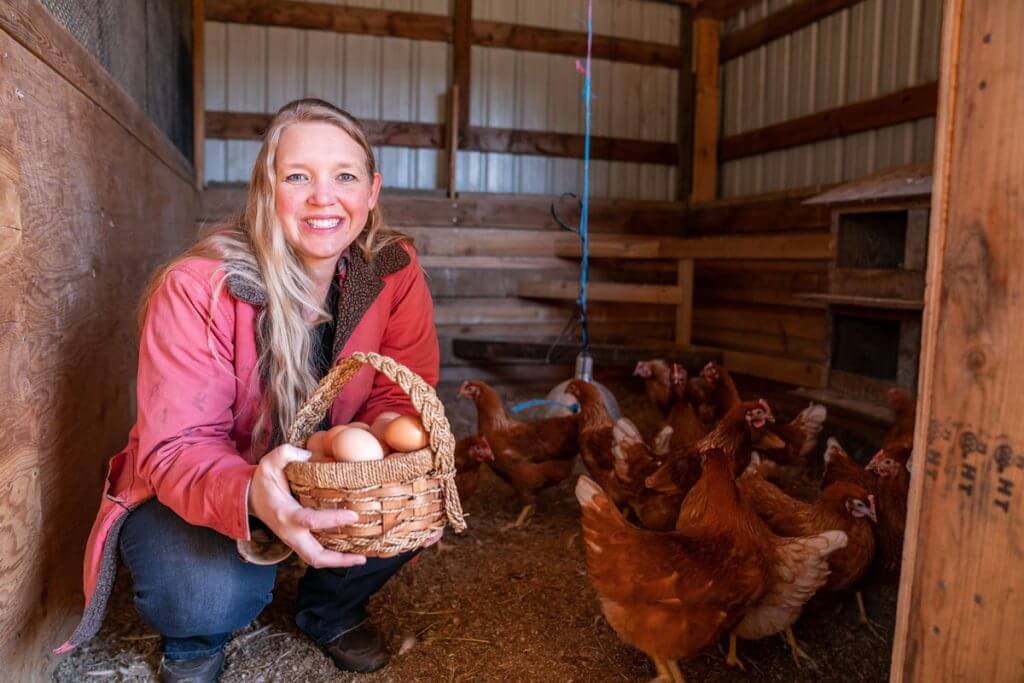
When following the deep litter method correctly, your chicken coop shouldn’t stink. It may smell of earthy wood shavings and animals, but it should never be an offensive smell.
One of Harvey’s and my favorite thoughts on homesteading comes from the teachings of Joel Salatin. Joel says if there are bad smells on a farm, there isn’t an animal or a manure problem, there’s a mismanagement problem.
Some “farm smells” are ok to have, but the terrible stinks (those that smell like ammonia or rotten, moldy materials) are not. One of the goals of managing a hen house is to make it so it doesn’t stink. We’ll talk about how to achieve this with the deep litter method below.
Are There Times to Not Use the Deep Litter Method?
When I asked Harvey if there was ever a situation where the deep litter method wouldn’t work, he had a hard time coming up with any. But in the end, he did say if your coop has water issues (meaning too much water runoff getting into your coop without the ability to dry out), then this method may be detrimental as there would be the risk of mold.
You may need to work harder at keeping a healthy deep litter bed than if you just kept a shallow bed that you cleaned out regularly.
This also brings up why it’s so important to know where you’re putting your coop (and other structures). Water is the lifeblood of a farm, but can be hugely detrimental in the wrong places. You’d probably be better off solving the water issue first, then adapting the deep litter method.
How Do You Build Up a Deep Litter Coop?
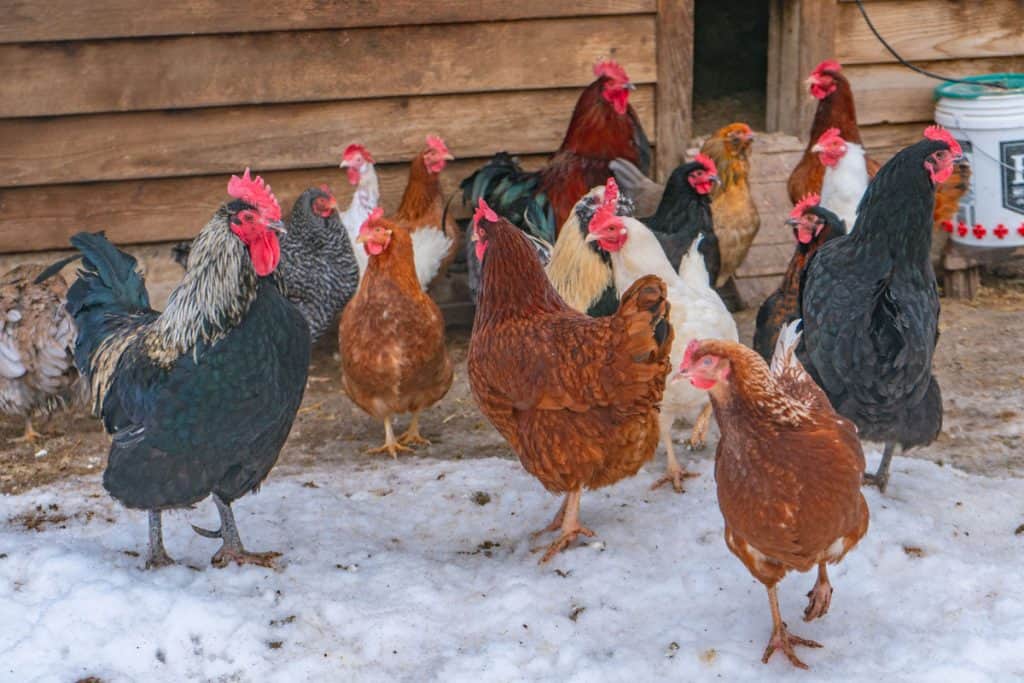
So the next question I posed to Harvey is, how do you get started? What do you use for bedding, and what do you do first?
Design of Your Coop
You need to know where you are putting your coop to avoid water issues and a lack of proper drainage. I think addressing drainage issues before starting your coop is vital. Harvey says that preventive remediation for drainage is best.
Once you have a good location for your coop, the best way to use the deep litter method is over an earth floor. Though a concrete or wooden floor will also work for this method, your coop doesn’t need anything fancy for a floor, the dirt will do just fine.
If you’re worried about the deep litter eating away the wooden sidewalls of your coop, you can create an inexpensive barrier between the litter and your coop with sheet metal or fiberglass. This will keep the litter from contacting the actual wood structure.
What Materials Do You Need?
So what are the best materials for building up your deep litter? Harvey has a lot of tips, so let’s discuss both the characteristics of the materials as well as what materials work best:
- Deep Litter Method Characteristics
- High Carbon – Because chicken poop contains a lot of nitrogen, you need materials that have a high carbon content in them to balance out.
- Loose and Absorbent – You want the materials loose and absorbent to keep the litter dry. This is so the chickens can efficiently work the manure into the bedding. The microbes that help with this method need oxygen. More oxygen can get in if the materials are loose and absorbent.
- Decomposable – If the materials decompose and break down well, then it all goes back into the basic elements of the earth.
- Types of Deep Litter Materials To Use
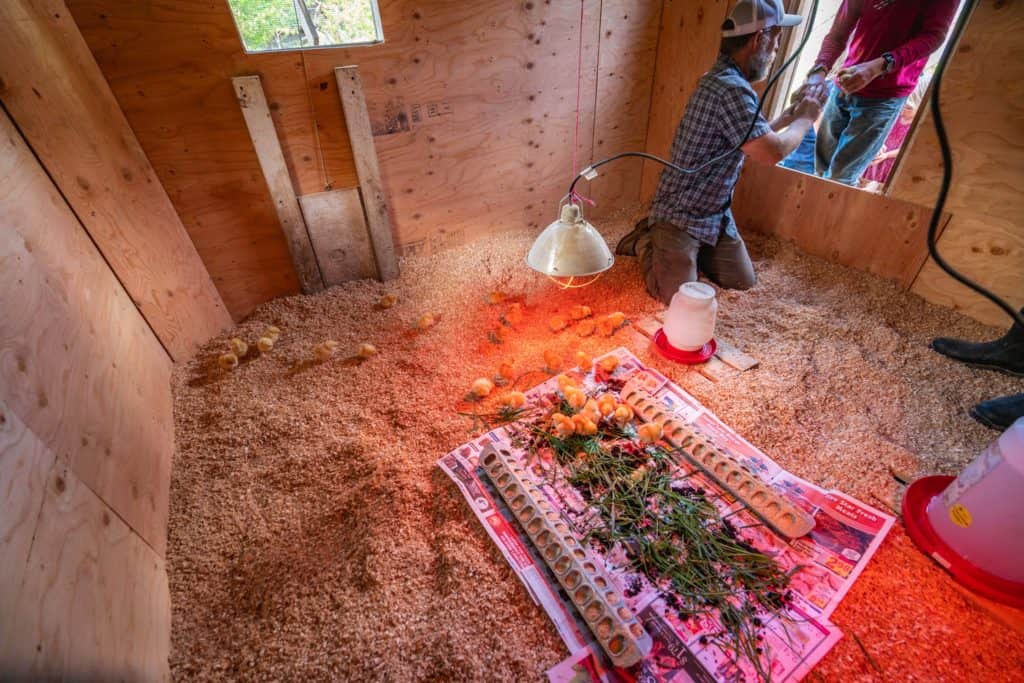
- Kiln-Dried Wood Shavings – You can buy kiln-dried wood shavings at most co-ops.
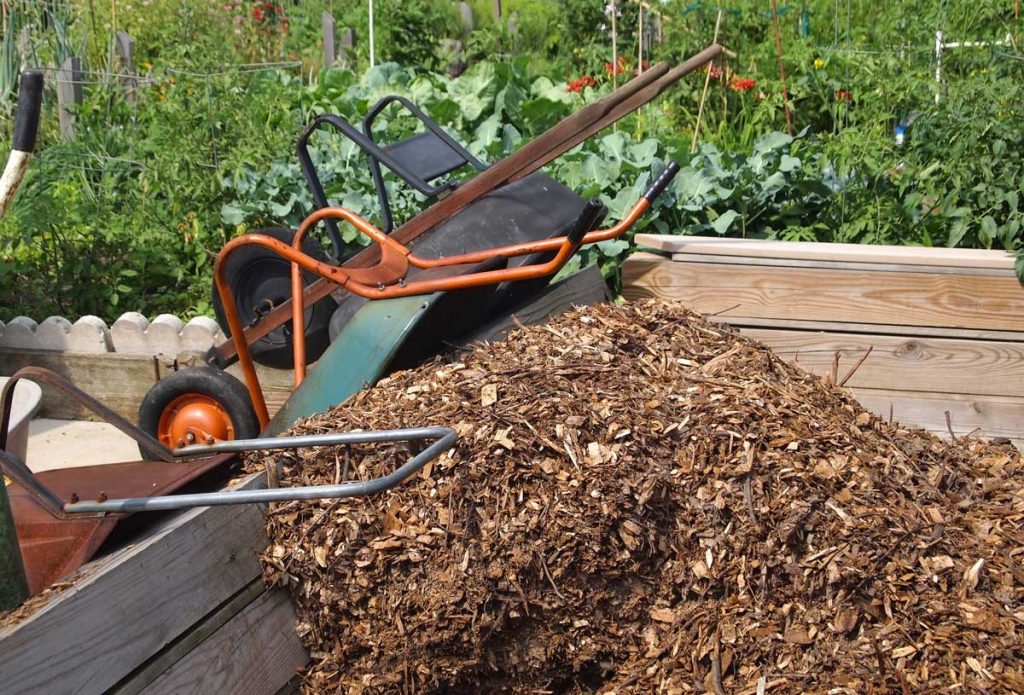
- Wood Chips – You can use wood chips even though they are much coarser and have larger particles. Chips are usually made from clearing areas on the side of roads or lands, such as chopped limbs, and then put into a chipper. Just don’t use them when they are still green. Put them outside to dry first if you need to.
- Wood Shavings – Wood shavings can also be used. Shavings are different than wood chips as they are a byproduct of mills cutting tree trunks, turning them into boards, and then taking the shavings from there. Sometimes you can also find wood shavings from cabinet shops.
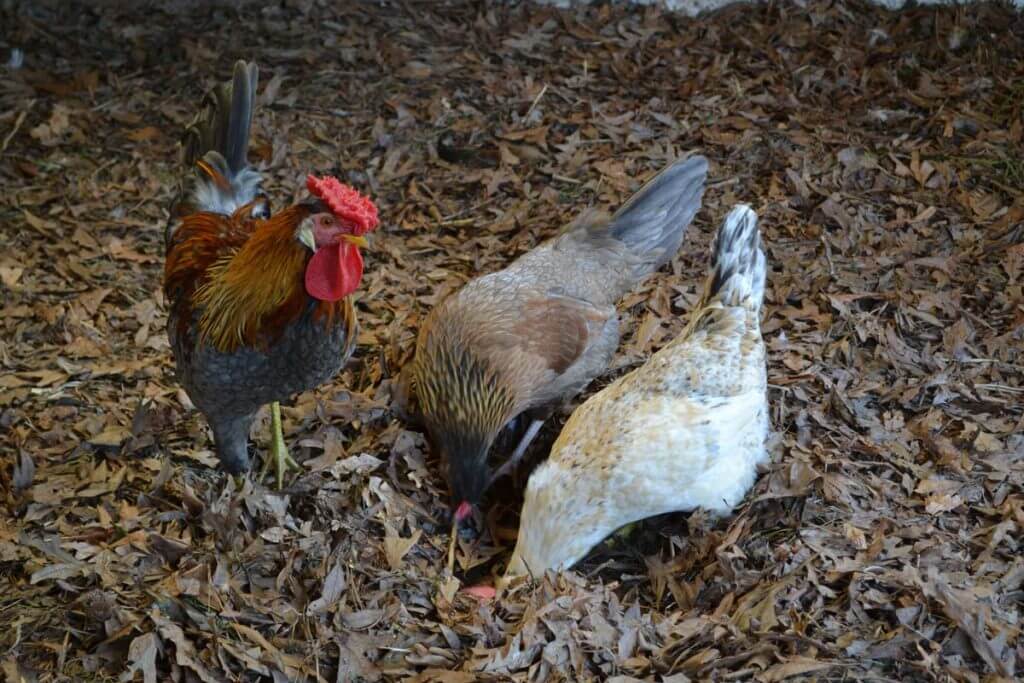
- Leaves – Leaves can work well as long as they’re completely dead and dry. If you rake up leaves that are too damp, you’ll introduce an environment for mold into your coop.
- Shredded Cardboard – Shredded cardboard can be a great option, especially if you have access to plain boxes.
- Refuse From Agricultural Products – These are things like corn stalks or buckwheat hulls.
- Straw – Straw can work well as long as you keep an eye on it to make sure it’s not getting compacted. Homesteading Hack: Be careful to avoid mold, called aspergillus, which is a growth that can cause severe respiratory distress in animals and humans. If your straw is compacted, add more straw and mix it in well. If you find it’s not decomposing well, you may need to remove it to continue composting in a conventional compost pile.
What Materials NOT to Use for Deep Bedding
There are some materials that aren’t recommended when it comes to the deep litter method:
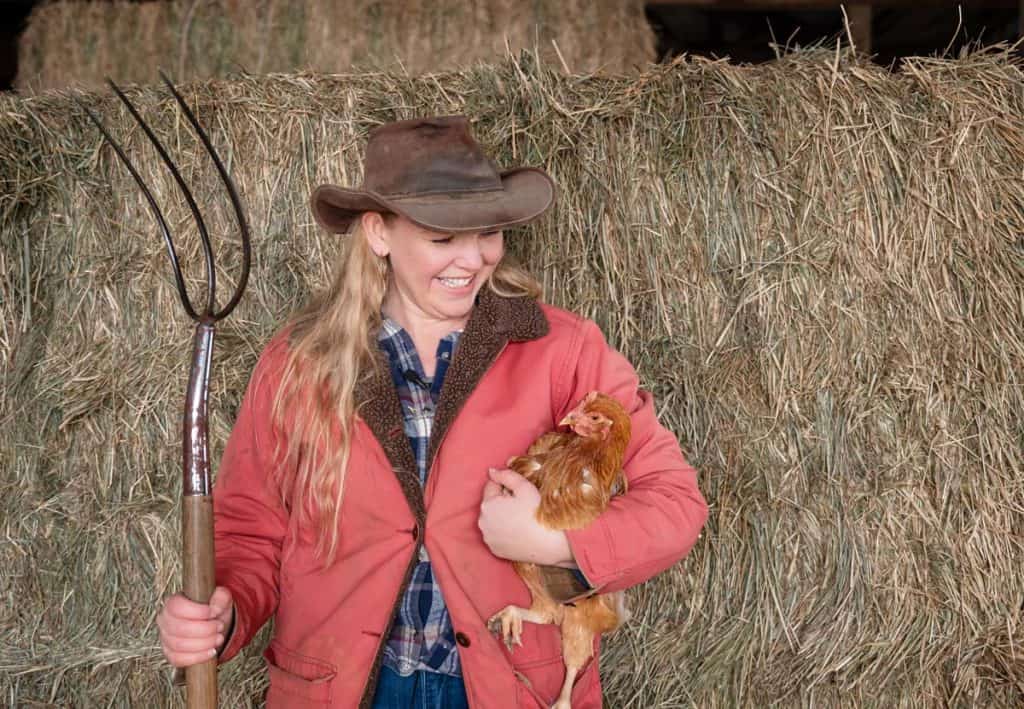
- Hay – Do not use hay because the carbon-to-nitrogen ratio generates too much ammonia. Ammonia is what you don’t want.
- Cedar, Aromatic Woods and Black Walnut Shavings – Do not use these types of wood as they contain oils that are harmful to chickens.
How Thick of a Bed Do You Need?
I asked Harvey how thick each bedding layer should be once you have chosen your design and materials. He says that your structure will determine how deep you can go, as some structures may have depth restraints.
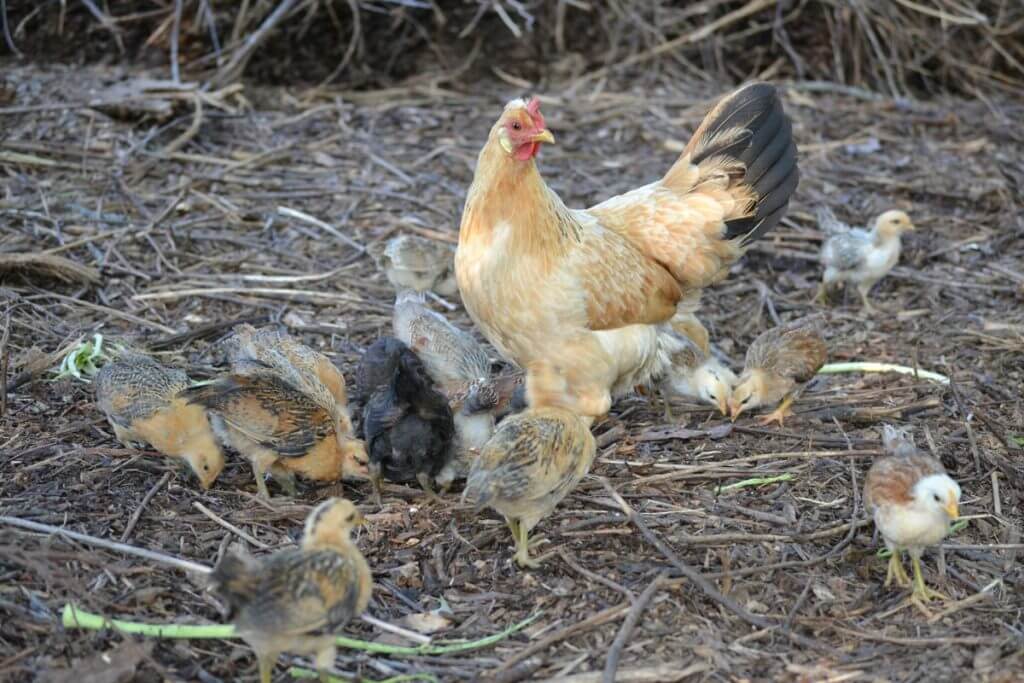
If you start entirely from scratch, the perfect depth to start is four to six inches, but even up to twelve inches works well. The depth allows the loose decomposable materials to absorb the chicken manure, have access to enough oxygen, and be able to be stirred up by the chickens in order to break down into compost.
How to Manage Your Deep Litter Bedding
Litter maintenance is essential for the method to fully and functionally do the desired job of creating compost (and being stink-free). To know how to maintain it, learn from your chickens and their bedding. They will teach you.
At some point, the deep litter will overtake your area. It will start to smell of ammonia. This smell means that there is excess nitrogen being produced. It also means your nitrogen is gassing off. You want it to stay in the ground instead. So add more high-carbon litter material.
Your nose will tell you when it’s time to add more bedding, but you also want to learn to get on top of the ammonia smell, so you can add new litter before you smell it. Make it your goal to add less material more often, meaning smaller and less frequent applications.
You want to avoid adding too much carbon material at once, so start by adding a couple of inches at a time. Remember that the season you are in and how hot or cold it is outside may also affect this process.
How to Clean Out the Deep Litter
Next, I asked Harvey to tell me what happens when the litter area gets too full. I asked if that’s when you muck out the stall. His response was, “You will never muck out!” Mucking out refers to removing manure and other materials from an enclosure where animals are kept.
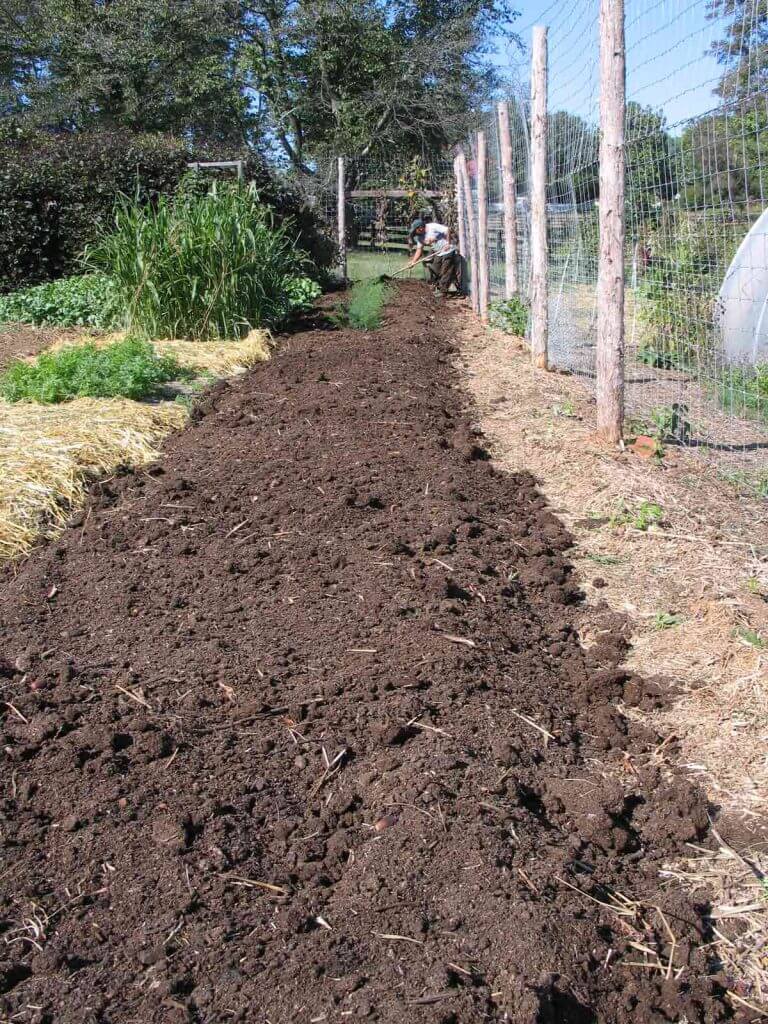
Because with the deep litter method, the manure gets turned into compost, there is never a period where you need to “muck out” the stall and spread manure. You’re simply removing the rich, garden-ready compost and spreading it where needed throughout your yard and garden.
This is much more pleasant than mucking out stalls.
To clean out your deep litter, simply move the top layer off to the side until you reach the compost layer. Scoop out the compost and redistribute the top litter.
Does Deep Litter Work for Outdoor Coops?
What about chickens that don’t live full-time in a coop? Can this deep litter method work for their enclosure?
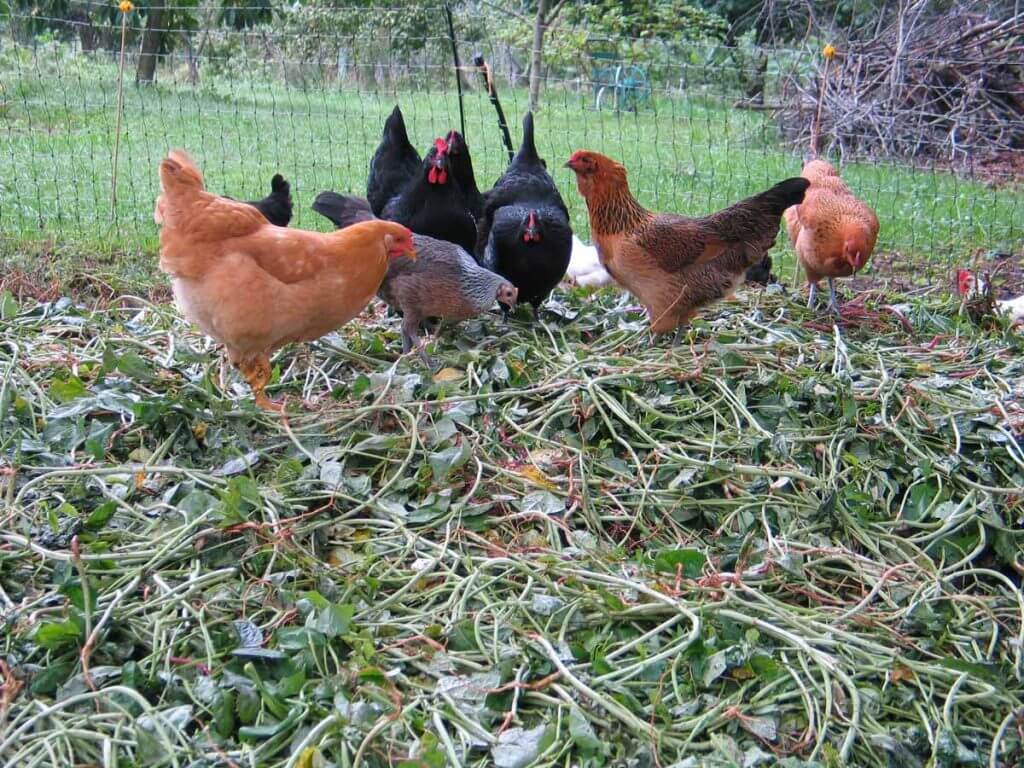
Yes! For an outdoor chicken run you can use the same method of deep bedding, as thick of a layer as you can manage. But in this case, any decomposable material can be used, not just high-carbon material. You can use scraps from the garden like old pea vines, spent crops, clippings from plants, and even grass clippings.
For the outdoors, you don’t have to be fussy about the process. Harvey says, “Just throw it out there.”
Homestead Hack: Use grass clippings sparingly, no more than an inch or two at a time as they can become matted and problematic for the chickens to spread.
Zero Waste Homestead
Harvey says, “The pathway to zero waste on the homestead is our goal.” We agree that using what we have and striving to create a zero-waste homestead is vital. We have an obligation to the land we are using. This is the holistic management system and what permaculture is all about.
So decide where your coop will go and what materials you will use, then get started. Allow a few tries of your new deep litter method to teach what works best.
And enjoy all of the things you will miss out on, like the endless mess and the stink! With the deep litter method, both are gone! And you get terrific, accessible, and easy compost to use all over your homestead.
Where to Find Harvey
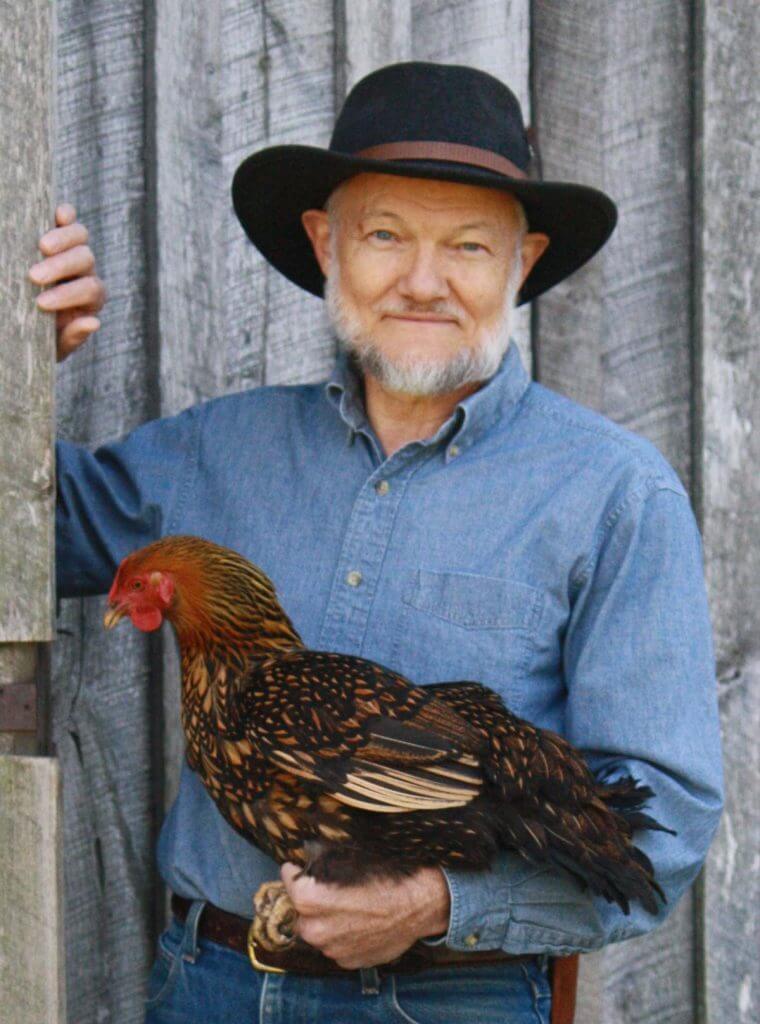
Be sure to check out Harvey Ussery’s book, The Small Scale Poultry Flock, and his website, The Modern Homestead, both of which are an amazing wealth of information. Or come take his class at School of Traditional Skills.
Other Posts You May Enjoy
- Using Chickens to Restore the Land
- Poultry Diseases Common to the Homestead (+Treating Them with Herbs)
- Happy Farmer Mobile Chicken Coop Review
- Broody Hen Management
- Compost Tea (Recipe, Tips & Uses)
- Raising Backyard Egg Laying Chickens
- How To Ferment Chicken Feed Cheaper Healthier Chickens
- Home Composting (Troubleshooting and FAQ’s)
Josh: Hey, you guys. This is Josh with Homesteading Family, and welcome to this week's episode of The Pantry Chat, Food For Thought. And as you can see today, Carolyn is not here, but I have a really, really exciting guest, my friend Harvey Ussery. And many of you may know of him from his book. It's pretty much the bible on rearing backyard and homestead chickens. It's called The Small Scale Poultry Flock. And it's also just ... You just had a revised edition come out, right Harvey? This fall here?
Harvey: Yes. Went on sale the first of this month.
Josh: All right. So we'll talk about that more in a minute, but we're going to be talking about deep bedding for backyard chickens. That may be a new concept to some of you, but it is a great way to create a clean coop, a very healthy clean coop, a great way to produce your own compost, and probably a lot of other features that Harvey's going to get into here. And it's really, I know to Harvey and to myself as well, and to many of us on this homesteading journey, keeping chickens, it's an essential system to keeping healthy, robust chickens and integrating into a multi-functional homestead. But before we get to that, I want to tell you a little bit about Harvey and just catch up and see what's going on. So Harvey and his wife Ellen produce much of their own food on their three acre homestead in Northern Virginia.
During their first year, they planted a large garden in a small orchard and started a flock of chickens. Now over the years, they've added and sometimes subtracted guineas, ducks, geese. Yanked out the problematic peaches and plums and planted hazels and nut trees. Experimented with new crops and new strategies for naturally feeding of their flocks. Now Harvey and his wife strive for a homestead that supports a healthy, diverse and sustainable ecology. And as we mentioned, he's the author of The Small Scale Poultry Flock. And we've just got a brand new revised edition that's out. We'll talk about that a little bit today and let you guys know how you can get ahold of that. But Harvey, how you doing? How's Ellen and how is everything there in Virginia?
Harvey: We're doing very well. Everything's going well here. And you'll be happy to know that those tiny chicks in a brooder that you saw and got some video footage of when you were here in August, they're doing terrifically. I've shared some of them with close neighbors and they're getting close to full size and maybe in another couple of months they will start laying eggs for me. And it was fun and a good addition to my flock to get some new birds out there.
Josh: So for many of you that may not know, I spent some time with Harvey out there on his homestead in August, and we filmed a class for you on backyard homestead chickens, everything you need to know. This is a great extensive class that's going to be coming out on the School of Traditional Skills in December. And actually Harvey's going to be joining me there for some live training as well. And so I got to spend a week with Harvey and Ellen, and that was just such a wonderful time. I learned so much from you being there and just diving in and hanging out. And Harvey started chicks. He ordered chicks and started them from scratch for us for this class. So that's those chickens that he's talking about that are now maturing up and getting ready to lay. But man, that was a hot August. Maybe that was a normal August for you. I don't know. That [inaudible 00:03:48] out there. And you did fantastic. We were outside filming in some really hot, humid weather.
Harvey: I grew up, Josh, in parts of North Carolina where we had hot humid summers. And I think it doesn't bother me. That weather doesn't bother me as much as it does more northerly friends.
Josh: Yeah, I'm definitely a northern drier climate kind of guy the way I was raised. So that humidity gets to you. But it was just a really, really fun time. And let's see here. Let's talk about your book for a minute before we get into the deep bedding. And you guys, I'll hold it up here and we will get you some links where you can get this. But tell us a little bit about when the first edition came out and what drove you to write this book.
Harvey: The first edition came out in the fall of 2011, and my impression was it was very well received. But then after it had been, I guess about 11 years, my publisher, Chelsea Green, just got in touch with me and said, "Hey, it's been a decade since the book came out. Do you think that you would have enough to offer to justify a revision?" And I gave it some thought and concluded that the additional experimenting I had done in those intervening 10 years, particularly doing a lot more rigorously focused breeding of my own stock here, that and a good deal of other things, including giving the new additions a somewhat different basic perspective and attempt to fit the homestead flock into the wider ecological picture. For all those reasons, I thought we had enough new and interesting and useful new material to justify a revision. And now that the book is out, I think that was a good conclusion. And I think my editor and I ... I had a really good editor and Chelsea Green as a publishing house, they're a really terrific outfit and they publish really good stuff. And I think we've produced a book that is going to have more on offer for people who read the first edition. And for those who are coming new to it, I hope they'll find it a good guide to a more natural approach to keeping the homestead flock.
Josh: I'm confident they will, and I think that's something that many folks are waking up to and is so, so important. That we're here not just trying to provide food, but we also need to be good stewards of the land as we're doing that. And you incorporate that into your book and into the philosophy of rearing and raising chickens and being both a good steward of them as well and your care for them, but also of the land and the integration and into systems. And that's one of the things that I really love about the way you approach things is how integrated everything is. And I know you're a little bit familiar with permaculture and that's my base of reference where we can really tie in different concepts and you get the chickens working in the garden and the garden providing the chickens food, and you're creating compost with this deep bedding while creating a nice sanitary environment for the chickens. And it's just a wonderful approach.
And so if you guys don't have this book on your shelf, you need to have it. It's great to be doing the video, it's great to be doing classes like we're doing at the School of Traditional Skills, but nothing replaces just a good solid book like this. I'm trying to get this in the frame. There you go. We want to have those on the shelf and this is really the one for chickens, in my opinion.
With that, let's dive right in here. And of course, Harvey, you and I are throwing around this deep bedding method and there are a lot of people here that may not know what that means. So would you explain to us what you mean by deep bed method or deep litter method when it comes to chickens and chicken coops?
Harvey: Deep litter or deep bedding is a way, to my mind, by far the best way, to manage the manure of your chickens or other livestock so that there is less labor involved. The environment for the chickens is more sanitary. The henhouse is more pleasant. In other words, it doesn't stink in there. And amazingly enough, the deep litter, as it becomes more bioactive with these trillions of decompositional organisms actually produce metabolites like vitamin B12 and vitamin K and other immune enhancing compounds that the chickens actually ingest as they're finding little critters to eat in the litter. And that actually becomes a support for their health.
So it's just really the heart of the system. Let's put it this way. Out in nature, when the chickens poop, what happens to that poop? Well, immediately these natural organisms jump right on that manure and feed on it, use the energy in it as they break it down for the great return to earth. So our chickens are not outside all the time. So deep litter is a way of finding a way to inside the coop allow the manure to enter the same decompositional process that it would outside, driven by trillions of microbes. And yes, allow for that breakdown in a way that is not a threat to health and is certainly far more pleasant and produces this wonderful byproduct of compost that we can use in the garden and the landscape.
Josh: So unlike out in nature though, we've got often a lot of chickens in a confined space. Hopefully enough space for them, not too confined, but nonetheless they're in a confined space. So that litter or that manure is not getting spread out and we get into the stink if we're not managing things well. And Joel Salatin, whose definitely a mentor to me, and I think to you as well, Harvey, talks about that if you come in to a chicken coop or a barn and it smells bad, you have a management problem. There's something wrong there if it smells ... I don't mean that it smells like a farm. There can be a clean good smell to a farm where you know animals are there and you recognize that you can smell them. But if there's this ammonia or sulfur or this stink, it's not good.
And you naturally get that. And a lot of people raising chickens over the years in a chicken coop, it's just kind of accepted that you have this either hard pan of chicken poop that develops in the yard, or you have this slippery, stinky mess that you can't walk on, you can't put a shovel through. And that's just been accepted as normal for raising chickens. And what we're talking about here is something entirely different that is a very healthy way to manage that manure, I think, nonetheless also to create some other byproducts. Right?
Harvey: You mentioned Joel, and I love his quote, I've heard it many times, that illustrates exactly the point you've just made. Joel says, "If you are around any livestock operation, regardless of species, and you smell manure, you are smelling mismanagement." And I love to quote that because as you say Josh, far too often we make the assumption that well poop stinks, right? And that awful paradigm you mentioned of the manure just caking up and having to be taken out, hacked out with a shovel, people just assume that as the norm. But that quote from Joel implies that there is another way. If you manage the henhouse so it doesn't stink, that's got to be doing it right. And I couldn't tell you the number of times I have had people come through my henhouse who have visited previously henhouses that didn't use the deep litter system. And at some point they would stop, look around and sniff and say, "Why doesn't it stick in here?" So yes, I want your listeners to understand that there is an alternative in which the interior of the henhouse doesn't smell bad at all and it's much a much more and pleasant environment for you to be in when you go out to collect the eggs and so forth. And it has to be a lot better for the chickens as well.
Josh: Yeah. So what are some other benefits to the deep bedding method? I mean, obviously we know, okay, it's reducing stink, making a cleaner environment, healthier for the chickens. Are there some other benefits to this deep litter method, deep bed method?
Harvey: Do you consider mental health a benefit? Because I think one of the great benefits of deep litter ... And by the way, the deeper the better. Let's call it at least four to six inches as a minimum. But up to 12 inches, if you can manage it, that's terrific. But that field of loose decomposables, that is something they can work in all day. Let's say in winter. I mean, chickens should have access to the outdoors as much as we can manage. But let's imagine a flock who's confined a lot in the wintertime, and imagine how stressful it would be to just have nothing to do and just be bored in this period of confinement. But if you go into my chicken house when the snow is three feet deep outside, you'll find that my birds are still very happily busy. Busy doing what? Scratching the litter. And they're scratching in the manure, but they're finding something or other, little critters to eat. And that has positive health and feeding benefits. This has been proved in scientific experiments.
Josh: All right. Well I want to get to in a minute here talking about starting, maintaining and we'll walk everybody through the deep bed method. But are there times when you wouldn't want to use the deep bed method? Where a person may have chickens, is there any reason where it's not advised or not really applicable?
Harvey: I can't imagine a chicken housing situation at any scale in which I would not recommend deep bedding, deep litter for best manure management. I will say that I do recommend an earth floor if you're going to build new or if you have access in some way to an earth floor. I do recommend that. You can use a constructed floor if that's what's already available to you. But I have an earth floor in henhouse, and the only time I ever had a problem specifically with the deep litter was one summer that we just had unbelievable amounts of rain every day for weeks. We had rain, rain, rain. And I like an earth floor because there's always a slight wicking of a residual amount of moisture into the litter. That's a good thing. But the litter should never get really damp. And that's what happened because of all of this rain coming in at the underground level and more than wicking up into it, it started wetting the base of the litter and making the whole mass damp.
And that supported the growth of mold. And we had some eye infections and I lost some Turkey poults that I was raising. And you know how it is on the homestead. You have these problems, you take your hits, but you learn from them. And so I learned the importance of unusually rainy periods, that's a time to really carefully monitor the state of the litter and make sure it doesn't get damp. You can add dry shredded leaves, you can add more of the totally dry pine shavings, kiln dried pine shavings that you can buy at the co-op and similar measures to get the entire mass. And remember the chickens are going to help by scratching and distributing what you have added to dry out the medium. They're going to help by working that in and getting the total mass of the litter drier. But that's the only time I ever had a problem using deep litter. And with that one exception, in my own experience, I would just say I can't imagine keeping chickens on any scale, whether a trio or 200 chickens, I can't imagine not wanting to have that manure disposal, let's say going on automatic. That's really what deep litter is about.
Josh: And I think while that was the exception for you, it's a good note about coop design construction. You were talking about an earth floor and generally having an earth floor for a little bit of that moisture wicking. But it does speak to, especially if you're getting started out, knowing where you're putting your coop, because if it ends up in a low land and too wet of a spot and it's an earth floor, shavings aren't going to solve all of the problems if it's always damp and you're going to end up with mold problems and different things. And so that may be a point where if you have no other choices, a wood floor would be good or better yet, probably try to make sure you're building and putting in the right location and getting drainage so that you avoid most of those events. I mean sometimes we have a year, right? And the weather just does what-
Harvey: Yeah.
Josh: Can't contain it, but you don't want to end up with a coop that's like that every year and this is a moment where the wood shavings ... Which is what we're talking about. I don't even know if you really even said wood shavings yet for deep litter. But there's a point where that's not going to absorb all the moisture if it's too wet.
Harvey: Right, right. That's a very good point, Josh. If you're starting new with your coop, I do recommend an earth floor, but that's an excellent point. I think you should address the drainage issues and the location, whether higher or lower ground, but also drainage. And if you anticipate that the drainage is going to be a problem, before making the coop itself, you should start with some preventive remediation on drainage for the site. Good point.
Josh: Yeah. Okay. Well let's talk about how to get started. So you've got a coop. Let's presume you've got appropriately sized coop, you've got an appropriate sized yard for your chickens. Hopefully you're going to get to let them out. But a lot of people live somewhere they've got to have a chicken yard that's fenced in. Given protection for predators. You've got perfect housing. We're kind of going to go past all those details and just assume for the sake of this conversation, somebody's getting started, they have all those things, they're all ready to go and they're thinking about this deep bedding method. How do you get started? What materials do you use and what do you need to do?
Harvey: Let's back up just one minute about a point that I think is another thing to address at the beginning. And it is a design point that's going to cost more bucks up front. And so I think a lot of people might avoid it, but think about this. I do like the earth floor, I do like the deep bedding, but the deep bedding is highly bioactive. And so if it is in full-time contact with wooden structural members, that's going to tend to degrade your structure. And so I wish now that ... I built a pole barn structure and I did take measures to protect that wood. Not using pressure-treated wood, but took other measures to protect that wood. But in retrospect, I wish I had spent the additional money to put in a concrete block perimeter foundation that would be, let's say, the depth of the deep litter, 12 inches say. And that would be the deep litter space. But all of the wooden part of the structure would be above the level of that concrete enclosure for the litter. And then long term, I wouldn't have to worry about the wooden parts of the structure being in touch with that highly bioactive decompositional process that's going on in the litter. So just keep that in mind, possibility as you start
Josh: Question. Because now you're making me think of something. So say you have gotten started, you didn't get that concrete in. I think that's a wonderful idea. But what about something like a metal perimeter like corrugated metal? And I think I saw Justin Rhodes do this. I think it was more to do with predator problems, rats and stuff getting into the coop, but corrugated metal on vertical so high up to create a barrier, an inexpensive barrier, if you've already got a coop and you don't have that foundation. That seems like that would probably be a good aftermarket solution, say.
Harvey: Yes, metal or possibly fiberglass panels. Yes. I think that would be a good remediation if you've already built, but you want to keep that bio-reactive litter out of contact with the wooden part of the structure. Yes, I think that would be a good way to go. Yes.
Josh: Good. I'm going to do that in a few weeks.
Harvey: You can use a lot of different materials for your deep litter, but key on three characteristics. High carbon, loose and absorbent, and decomposable. Now, if you key on that, you pretty much can't get it wrong about what you can use. High carbon to be sure, because there's a lot of nitrogen in the incoming. The poops that the birds are laying down. Even if they are outside during the day, which I hope they will be, they're doing half their pooping at night on the roost. And there's a lot of nitrogen in that. And so you want your litter to be as high carbon as possible to balance that incoming nitrogen as much as possible for as long as possible. The material should be loose and absorbent so it can absorb the manure and so that the chickens can easily work it.
And remember that all those microbes, they need oxygen just like you and I do. Keep this in mind about microbial action. The decompositional microbes thrive in oxygen rich environments. And a lot of the pathogenic organisms thrive in anaerobic conditions. Oxygen starved environments. So you want the scratching of the chickens in a loose, medium, loose absorbent medium to work the manure in and keep lots of oxygen in the mix. And that's going to support decomposition. That's the whole point. We're establishing a highly decompositional medium into which the poops can enter on their way to the great return to earth. Breaking down to the basic elements.
Josh: So what are some of those high carbon, loose, small enough to scratch in materials that you recommend?
Harvey: One thing that's readily available, and if you're operating on a fairly small scale, you can get the baled kiln dried wood shavings from the co-op or a place like Tractor Supply. Don't use cedar shavings or shavings of other aromatic woods. Don't use shavings of black walnut. But other than that, any dried wood shavings usually purchased. I use a lot of that. That's an excellent high carbon loose absorbent base. But free at hand, if you have a lot of trees, oak trees, I love oak leaves. They're very high carbon and they take longer to be pulverized and to break down so they're actually doing the job for a longer period of time before they have to be renewed. But fallen leaves in the autumn. And as I said, my favorite is oak leaves. Shredded cardboard, if you can get that. Shredded cardboard is very high carbon and works very well.
And then you might live near a place that is doing processing of agricultural products and you might get some of the refuse from their processing. I'm thinking about things like shredded corn stalks or crushed corn cobs or if you're in an area where a lot of peanuts or buckwheat is grown, peanut hulls or buckwheat hulls, that's really, really good deep litter. So as long as we're focusing on the three characteristics that I mentioned, there's a pretty wide range of materials that we can use. What should not be used is things with a much lower ratio of carbon to nitrogen in the material itself. And a good example is hay. People sometimes think, well how about hay? Cast off hay? Wouldn't that be a good material? Because it is certainly loose and absorbent, but it's carbon to nitrogen ratio itself is low enough carbon in relation to its own nitrogen that it very quickly starts generating ammonia as it breaks down. And so stick with the high carbon materials.
Josh: So tree leaves, because they're flat and a lot of flat surface area, will they mix up okay or are you going to get some layering? Do they need to be shredded first or something? Or are they okay just to take them off the trees in the fall and pile them up?
Harvey: Yeah. You can make a big leaf pile and then draw from that as you renew your litter in the coop. Now we're not talking about green leaves. We're talking about leaves that have dried and fallen off the trees so they are dry. But even in the case of oak leaves, and they're quite substantial, in my experience, if they're dry and you're kind of topping off with them on an ongoing basis, no, they're never going to mat up, at least if the chickens have enough space. So let's talk about that for a minute. Joel has made the observation that I've heard many times that we all know that typically chickens don't get enough space in their housing and we need, generally speaking, to give them a lot more space in their housing. But he makes this very interesting rule of thumb observation.
If the chickens have three square feet of ... Well, let's do it in the reverse. If the chickens have five square feet per bird on a deep litter system, there is not going to be any capping. Any formation of an impervious crust of manure on the top of any portion of the litter. They're going to keep it all worked in to the litter. At four square feet there will be some capping of manure under the roost and it will be necessary to go in there with a fork and turn that capped material over so they can work it from the bottom and break it up and then scatter it out and incorporate it. And at three square feet per bird there will be significant capping over much of the space. So that's an argument in favor of having more square footage for the birds. And if you do, the manure is never going to be concentrated anywhere so that it cannot be efficiently worked into the decomposing litter by the chickens themselves.
Josh: Okay. So you want to keep that at four square foot per bird or better. So getting started, you've got your material picked. Oh, you know what, sorry. Let me back up. Straw. We didn't talk about straw and that's common to ... A lot of people have access to straw. It's either the baled wood chips or straw is that couple of things, or leaves, that are very, very common. But what about straw? Is straw a good medium? Are there any challenges with using straw?
Harvey: Straw is certainly a litter material that can be considered. Although I have heard from people who say I use straw over an earth floor without problems, but let me make a sharp distinction here between straw as a litter over a constructed floor and straw over an earth floor. If you have a constructed floor, straw makes a perfectly good litter.
Josh: Okay.
Harvey: Over time, if you use that straw litter, you will find that it becomes overburdened with manure. And that is not good. But as long as you continue adding fresh straw over that constructed floor, it's going to remain dry enough that it's not going to go to dampness and it is not going to give rise to the growth of a mold called aspergillus. And breathing the spores of aspergillus can cause serious respiratory distress, not only in our chickens, but in our own lungs. So this is something to be concerned about. It has been found that in some cases a straw litter over an earth floor will go toward growth of aspergillus and that is not a good thing. So I tend to avoid straw in my litter. My litter right now is a mix of fall leaves and wood shavings. And it is that mix and some straw from the nest gets scattered and that's not a problem. But I do not make a significant portion of my litter straw over an earth floor. I don't want to take the chance of growth of aspergillus. Now, by the way, Josh, when we were talking about materials, I talked about wood shavings, but I didn't talk about wood chips. And so let's make sure we don't forget that question. Can you use wood chips for deep litter? And the answer is yes.
Josh: Differentiate for us real quickly before you give us that answer, wood shavings versus wood chips. Some people don't know and so somewhere there's a line between shavings and chips.
Harvey: The wood shavings are a byproduct of preparing wood in a lumber mill, starting with the tree trunk and rough sawing it first and then planing it into the smooth dimension boards that we go and buy for a construction project. So those thin shavings off the surface of the rough sawn boards, that's what I'm calling wood shavings. But wood chips are much coarser, much larger particle size. If you see the crews working on clearing the electric lines and they're cutting down the branches that are too close to the lines and they put them through a big chipper and that chops these larger limbs up into pieces, let's say maybe the size of your thumb and smaller. So you have reduced the volume of these big ungainly limbs and have condensed it into a pile of chips.
But the particle size is quite coarse. But you will find that the chickens can work a medium like that. So it's just fine for deep litter. And here's the caveat. You shouldn't use wood chips when they're still green. In other words, totally fresh from having been chipped from a live tree. Don't use those wood chips that are still in that green state. They need to break down. They need to decompose some on their own because in that green stage, they too can give rise to the growth of certain molds that are not going to be good for the chickens. So you can put those chips into a pile outdoors, exposed to the weather for several months, half a year or up to a year. And then you can start moving them into the chicken house as a litter. It's still a high carbon litter that the chickens can work and will not produce these harmful molds.
Josh: Okay. All right. So we've got some good options for starting a deep bed. Some good carbon materials, very, very solid carbon because all that poop is nitrogen. And how thick to start? Brand new bed, clean coop, what do you want to start with? How much of a bed?
Harvey: Well, if you're starting with an existing structure, that may place some limits on how deep you can go with the litter. But I said earlier I like to think of four to six inches as the minimum. We do call it deep litter for a reason. You want some depth there. You want to get some biological depth in the process that we're encouraging. So I would say try your best to think of in your situation four to six inches as the minimum. And Joel, and say his racking house where he raise rabbits and cages over laying hens who work the litter, he uses wood chips in there and he thinks of 12 inches as the minimum there. So yeah, deeper is better but go with what is dictated by the constraints of maybe a building that you are already using or other limitations. But even a few inches is better than that accumulation of raw manure that doesn't do anything but stink. It's inert. It's not in a happening situation to decompose and become something useful, compost, as opposed to just being a stink and a bother to have to deal with.
Josh: So we'll get to the compost here in a minute, but getting there, so you've added your deep bedding, you're starting general rule of thumb, four to six inches. You can go deeper. If you have less, maybe you need to start a little less. Fine. But four to six inches is a rule of thumb. Maintaining that, how often do you get in and turn it? Do you add shavings? Do you just do four to six inches, let it go so far and remove it all? What's the maintenance once you've put that initial bed down? Let's just call it six inches. You put that in and what's next as far as any maintenance? What do you need to look for? What do you need to watch to know? Because I mean at some point it's going to accumulate manure. So you've either got to get it out or add more. How do you think about that? How would you tell people what to do?
Harvey: Josh, are we talking about mucking out? We are not talking about mucking out.
Josh: Not talking about mucking out.
Harvey: We are talking about maintenance of the litter so that it is fully functional to do the job. So here is one ... Okay. Let me put it this way. You have enough homesteading experience to learn that the best learning is to learn from your cows, your goats, your chickens, correct?
Josh: Yes.
Harvey: And learn from the plants in your garden. You are a student when you try to do any of these things on the homestead and in the garden. And in the same way as you work with deep litter, there is a learning process. Who is your teacher? The deep litter. So early on you're going to have this experience. At a certain point the nitrogen in the incoming manure constantly added, it's going to kind of overtake, overwhelm the amount of carbon in the litter. And what happens then?
You start smelling ammonia. Ammonia starts being produced. Ammonia is a gas of nitrogen. NH3. It is a gas produced by excess nitrogen. And of course everybody who makes compost in a conventional compost heap, they smell that manure when there's too much nitrogen in the mix. That's what you smell coming out of that heap. Nitrogen. And that's all of your good old ... I mean ammonia. And when you smell that, you know all of your great nitrogen that you wanted to be in the compost for use in the soil, it's being gassed off to the atmosphere. So in the henhouse, the litter itself will instruct you, it will teach you that you have allowed the process to go to imbalance. Too much nitrogen. And the signal is that whiff of ammonia. Now at that point you add more high carbon material so that you reestablish balance.
And actually you want an imbalance in favor of carbon to keep neutralizing all of that incoming nitrogen in the manure. But what I'm talking about the learning process is the first couple of times your nose is going to tell you but remember that ammonia in the atmosphere of the henhouse can be damaging to the respiratory tissues and the lungs of your birds before your nose can detect it. But do not despair. Once you've had that experience a couple of times you learn to read the litter. You can just look at the litter and you can read the condition. And you know when it's about to go over into ammonia production and you also know what is the solution. Add more high carbon litter. So we're not talking about a need to muck out on any schedule, but rather the proper management in the litter so that the nitrogen never gets out ahead to produce ammonia.
Josh: So let me synthesize that a little bit. And this is pretty much what I tell my kids as they're learning to manage the coop or any area in your barn. Because we have to apply this on a fairly large scale. And so if you start to smell that ammonia or that manure, it's time to add. And as you're doing that, visually observe and realize that you want to start learning to add before you smell anything. And as you're saying, you will learn to observe. You should be observing. You're smelling, you're looking, you're going, "Okay, I need dad shavings. All right, now I'm starting to see what this looks like and I can start to know beforehand and add those shavings." And so I think that ties into the next question that people can ask and that's how much do I need to add? Do I add an inch? Do I add three inches? And again, I think, and you go ahead and take this, but I think that you've got to observe and learn to feel that out as well. If you let it go too far, you might need a little bit more. But if you can be preemptive, you can put ... I tell my kids to less on more often.
Harvey: Right.
Josh: Letting it get to where, oh man, you walk in, you smell it and you go, now you got to feel like you got to put three inches on instead of an inch or two.
Harvey: Yes. Don't get to the point that you have to over remediate. But instead, yeah, frequent, smaller applications are better. And in this game, when it comes to adding more high carbon litter, there's no such thing as adding too much. If you've got the space to add a lot, you can't add too much. You can add too much nitrogen. That's what creates ammonia. You can't have too much carbon. But yes, Josh, the key I think, as you get into the rhythm of managing the deep litter, as you get into that rhythm, yes, you find that frequent smaller additions, couple of inches at a time, that's really better than letting it go too far and then try to play catch up with big additions.
Josh: Yes.
Harvey: Right.
Josh: Okay. So let's-
Harvey: And excuse me, but sometimes the rhythm is determined partly by what's coming in at the time. So in the fall you're dealing with all these fall leaves and you might find that you're adding more than you really need to to balance the incoming poops. You add more at that time just because you've got so many more leaves coming in. Although you can always stockpile them in a big heap too.
Josh: Right. So let's follow this out to the logical conclusion, which is that you're adding carbon, you're adding nitrogen. Somewhere it's going to get deeper and your space is filling up and you've got to move from maintenance to mucking out.
Harvey: Nope. Nope. You ain't ever going to muck out.
Josh: Come on Harvey. I want to muck.
Harvey: The beauty of well-managed deep litter. You're never mucking out. So instead of mucking out at the stage you are talking about, we're going to do compost removal.
Josh: Okay. All right. Now you're talking my language. Compost removal.
Harvey: Yes.
Josh: Wait, wait, wait, wait though. We went from chicken poop and wood shavings to we're removing compost.
Harvey: Yeah.
Josh: What happened?
Harvey: Magic. Magic.
Josh: [inaudible 00:54:28].
Harvey: Magic.
Josh: The whole time we've been making compost and-
Harvey: That's right. That's right. And that's why I often use the term magic when I am talking about this subject. Because all this time we've just been trying to keep the henhouse from stinking, right?
Josh: Right.
Harvey: But at a certain stage, if you fork aside some of that loose, fresher, coarser material on the top, you find to your amazement that, and especially over an earth floor, you find that finally granulated material at the bottom has literally turned into compost down below, down next to the earth. Turned into compost. And you scoop up a handful and you smell it and it's just like picking up a handful of finished compost from a well-managed conventional compost heap that you had to work so much turning and turning and turning. It has that earthy smell. And not the slightest hint of raw manure. And you can take that out. When we think of mucking out, then that's got to be done on some kind of sane schedule so that things won't get too bad in there. But when we're taking out compost, when and as needed, there's no particular schedule for that.
You are going to reach some limit where you just can't go any higher with the level of the litter and you will need to remove some of the material. But do fork aside the fresher, drier, looser, still high carbon and not broken out material. Move that aside first and then scoop out all of that nice composting stuff next to the earth and take that out and use it in the garden. But leave some of that too because it will help to inoculate the fresh material that you then add and keep the process going.
By the way, getting back to straw litter over a constructed floor. That can work for reasons that we discussed earlier. However, in my experience, a straw litter over a constructed floor should be further composted in a conventional compost heap before using in the garden. That's my experience. And the compost that we talked about, that fine, granular, dark, crumbly stuff under the top of the deep litter, that can be used directly in the garden in my experience.
Josh: Okay. So essentially just let that deep bedding get as deep as you can handle it. You can just keep going, keep adding. But I think something I want to draw out here is from looking at it, you're not going to really see that it's finished. It's doing its thing down under, but your adding so you've always got new layers on top. So really you're either going to let it go as deep as you can handle, your infrastructure can handle, or you may come to the point it's springtime, you'd like some compost, whatever the reason, move the top layer aside and it'll be pretty obvious. You'll have the loose stuff hasn't broken up yet, you can move that to the side and then remove the deeper stuff. And the other stuff back out, add some more and keep on going. Right?
Harvey: Yes. Josh, we could say that the rhythm of the management of the manure, the rhythm of the management of the deep litter at that point becomes part of the larger rhythms of adding to soil fertility in the garden or around your nut trees or on the pasture. Whenever you need that compost, and this kind of system, it's going to be there. Almost anytime you need it in the usual cycles of wanting to renew the fertility of the soil, it's going to be there ready to go.
Josh: Love that. They're doing more than producing eggs. They're actually growing beans and cucumbers for you.
Harvey: Right, right.
Josh: So we're getting down on time and I don't want to keep you too long, but another question here for people, and I know you have a situation like this. You've got your indoor coop and you've got your outdoor yard attached to your coop. And so is there any difference in managing the two? One's inside. It's under roof. That's where the chickens are sleeping, laying eggs in the winter and the rain. And one that's outside. You have a yard outside all protected, but you're doing that deep bedding out there as well. Is there any differences in managing that? And that goes into the next thought is about adding other things like vegetable scraps from the house that you're going to be feeding your chickens. Waste from the garden or whatever. How does that come together? And maybe they're two separate things, but I kind of see them one in that yard.
Harvey: No. There are important distinctions to be made, but we start with the basic vision, shall we say, that if your chickens are confined to a chicken run outside ... And there are other options, for example, like setting them up to be on pasture. But if you have to go with a confined chicken run, then as I always put it, bring the deep litter concept from inside the coop to the outside and it will provide all the same benefits. Giving the chickens something to do and certainly some critters to find that they can eat in the deep mulchy litter and preventing the manure from just becoming a source of flies breeding and a source of runoff pollution. So in the outdoor run, we should again lay down as thick a layer as we can manage of all of those castoff decomposables that any homestead produces.
But here's the big difference. Outdoors, we no longer have to think in terms of using only the high carbon materials. That is quite appropriate for indoor deep litter. But on the outside, guess what? Any decomposables produced on the homestead, just throw them in there to be part of that base that the chickens are going to be working in and pooping in and finding critters to eat out of. So spent crop plants from the garden, prunings from the flower beds, again, fallen leaves in the fall. Just on and on and on. And lawn clippings. If you're going to mow your lawn, the clippings from the lawn mower, that's good green feed for the chickens. But don't just dump in really deep layers of pure grass clippings. They will collapse into a dense, putrid mass growing with molds and slippery and hazardous to walk on.
So instead, for using grass clippings, just apply a very light sprinkling that's not at all deep, just half an inch or so in there. The chickens will eat some of it, incorporate the rest into the rest of the duff where it will become part of the decompositional process. So that's the big difference. All these other materials that you wouldn't want to use inside like bean and pea vines, you put those on the inside of the henhouse and they just shoot the nitrogen way up because of their own contained nitrogen. But outdoors, it's really more like a Sir Albert Howard conventional style gardener's compost heap. It's much more like that. But unlike Sir Albert Howard's compost heap, you don't have to layer the browns and the greens and you don't have to be fussy about the process. As the organic compostables are generated, you just throw them in there and the chickens will love it. And the end product is the same. Great compost for use.
Josh: You actually use them to do your composting for you.
Harvey: Yes, yes, yes.
Josh: I think your mic there slipped down a little bit. Might have got against your [inaudible 01:05:20]. I think I was getting a little static. I think it was rubbing a little.
Harvey: Right, right.
Josh: Yeah. And that's the thing I love is you can take all that material, give it to the chickens and let them add to it and mix it up and compost for you.
Harvey: It's one of the pathways on the way to zero waste on the homestead.
Josh: Love that idea. Moving towards zero waste. And I don't know if we can get to zero, but we sure have lots of opportunity to minimize and I think we're always learning that we can make better use of what we have and create less waste or at least put that waste to a proper use in an organic system. We should be able to do that more and more and more. And I think that's just a good segue, you guys. What Harvey's sharing here is just one piece of the picture of a very holistic management system for taking care of your flock. And so I want to encourage you guys to check out Harvey's site, The Modern Homestead. He's got an extensive blog there, I believe, where he's writing. You keep that up to date? You're still writing your blog and creating new content or is that a-
Harvey: It's not a blog per se in the sense that I add a new bit of content every day or every week, but it is a large library of articles that can be of use to the gardener and keeper of poultry. And yes, I do add new material from time to time.
Josh: Yeah. Check it out.
Harvey: But yes, I think it's about 200 pages now of some fairly information dense pages.
Josh: Yeah. That's a resource you guys want to be bookmarking and saving when you want to do some research besides putting Harvey's book on your shelf as well.
Harvey: You did mention The Modern Homestead, but note that the extension is .us. And there are other The Modern Homesteads with different extensions so go for that .us.
Josh: And we will put that URL in the link down below along with a link to Harvey's book, the revised edition of The Small Scale Poultry Flock. And as well, look for a class. Harvey has produced a video teaching class going through a lot of these concepts for The School of Traditional Skills. That's also going to get released in December and Harvey's going to come back. So some great resources. Harvey, it's been great hanging out with you and I just want to thank you for sharing your knowledge and time with all of us today. Really appreciate you.
Harvey: Thank you for having me, Josh. I've enjoyed the chat and I hope your listeners will get some tips they can use in this very, very important topic. Thank you.
Josh: Alrighty. Well we will talk to you soon. See you later everybody.
Harvey: Take care. Bye-bye.
Sign up to receive email updates
Enter your name and email address below and I'll send you periodic updates about the podcast.


