


Composting can seem like a mystery. Some people throw everything in a pile and let it break down, and, on the other spectrum, some folks get very technical with ratios, temperature and timing. In this post, I am going to show you a simple system for composting that makes it easy and doable, yet dependable so you are not waiting until "one day" when it is all finished!
Composting doesn't have to be intimidating, or take a lot of time, and can be done with minimal effort. With a few basic steps, you can make enough compost for all your gardening needs right in your own backyard.
A Text Transcript for the Podcast is included at the end of this post.
When it comes to composting, you can get really technical (especially when getting into thermal-composting, which ends up killing off weed seeds and breaks down herbicides and pesticides). But to get started making compost at home you only need a little clear direction and a few basic supplies.
Watch the video and read the steps below and you'll be well on your way to making your own homemade quality compost! We've also updated this post with an additional video (it's a Pantry Chat, so keep scrolling to see that below), plus a podcast episode so you can listen at your convenience.
What is Composting?
If you have been with us as we were garden planning for serious food production, choosing no-till gardening and the lasagna gardening method, building raised garden beds, learning how to keep weeds out of the garden, or preparing the garden for winter, you know how serious we are about the importance of building healthy soil, and compost is the key.
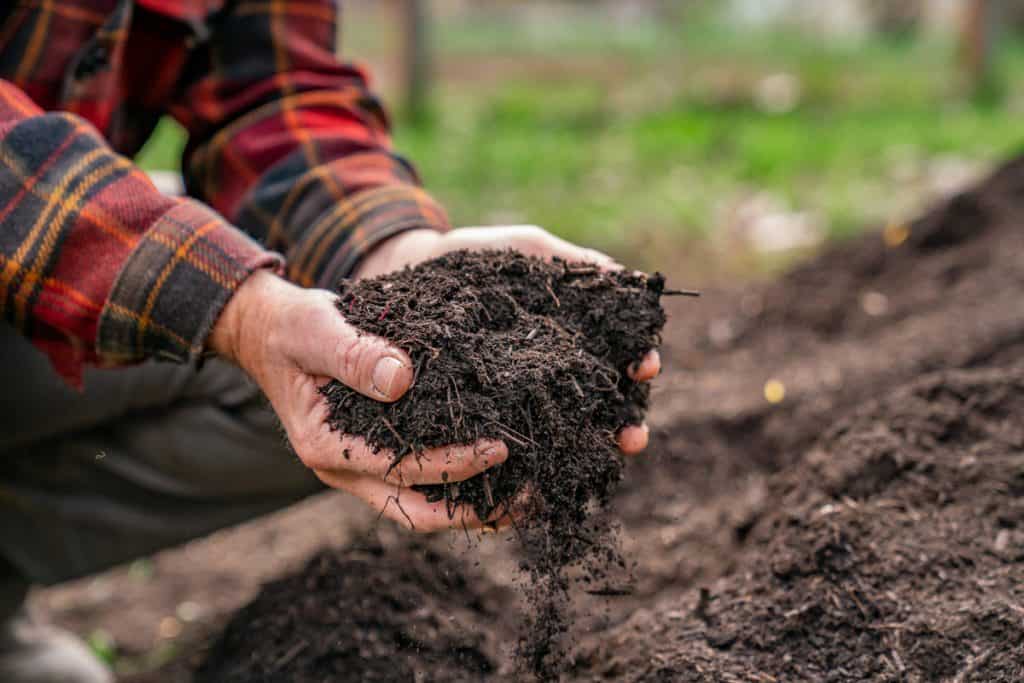
Composting is a simple process of taking carbon based materials and mixing them with nitrogen based materials in the right ratios, and adding water and oxygen, which all encourages the microbial critters to break it all down into a nutrient-dense product that will build soil and enrich your garden and veggies.
What are the Benefits of Composting?
Composting adds organic matter to your soil, which is lacking in most soils you are going to encounter, and which break down and get used up regularly in a vegetable garden.
Adding compost also adds to your soil's ability to store water and oxygen, essential to all of the biological life that lives in your soil. That microscopic life breaks down nutrients and minerals, making them available to your plants.
Without organic matter, water, oxygen, minerals and the soil critters (that’s what's in compost) your plants will be weak, nutrient deficient and more susceptible to disease... and so will you if you are living off of that garden!

Materials needed
- Frame - You'll need a structure to contain your compost unless you go with a free-standing pile, which also works just fine:
- Wire Fencing - I chose wire fencing as opposed to pallets because the wire allows for better airflow. Any material that falls out of the openings can easily be raked up and added back to the pile.
- Pallets - Pallets are also a good choice, but require a bit more effort.
- Free Standing - While fencing or pallets help contain your compost pile and keep the large critters out, if you don’t have these you can just make a free-standing pile as well.
- Carbon Materials - Examples of carbon materials (“browns”) are wood chips, leaves, sawdust, cardboard, straw, and other "woody" organic materials. If you find that you don’t have quite enough brown material to get started, you can check with cabinet shops for sawdust and wood shavings, get and shred cardboard from the box stores, or ask neighbors for leaves from their yard.
- Nitrogen Materials - Examples of nitrogen materials (“greens”) are animal manure (and urine), kitchen waste, lawn clippings, or anything that has been harvested in its live or green state.
- A Little Finished Compost - You can purchase finished compost from your local nursery, or from a fellow gardener who also has a compost pile.
- Water - A hose with a sprayer is nice.
- Compost Thermometer - A compost thermometer is probably the most necessary piece of equipment you will need to gauge the temperature so you know when it’s time to turn the compost.
- Shovel - for scooping materials into your bucket.
- Pitch Fork - great for turning your compost and breaking up any large clumps.
- 5-Gallon Bucket - (optional, but nice to have, too!)
Building Your Compost Pile
If you choose fencing or pallets to secure your pile, you will need to assemble them to be at least 3’ in diameter (3’ square for pallets), and 3’ tall. This minimum volume is really best to allow the heat and activity to get going.
Anything smaller than this will result in weak activity, and can take much longer to cultivate success.
By volume, you are going to need about 2 parts of brown materials for every 1 part of greens. Measurement does not have to be perfect, just strive to get as close as possible.
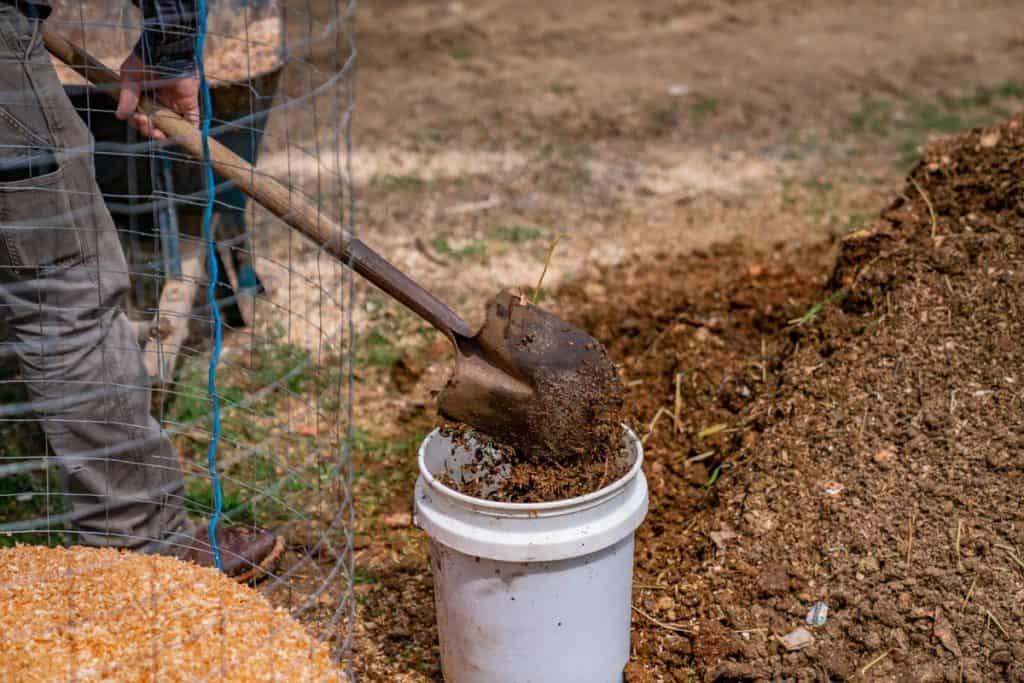
To help accurately measure, I like to use a 5 gallon bucket, so for every two buckets of “brown” material, I use one bucket of “green” material. You could also do it by the shovel full. 2 scoops browns and 1 scoop green.
Before you begin, break up the brown and green materials as small as possible. This will increase the surface area, and activate the pile faster, ultimately resulting in a quicker more evenly finished compost.
Step By Step Directions


- Begin with a brown layer. If your brown layer is dry, and it usually will be, add some water. You don’t want to add so much water that it is pooling up or running off the pile, just enough to make it moist.
- Sprinkle finished compost over the brown layer. This will increase the microbial activity, and get the composting started faster.
- Add a green layer, and as you add each layer, remember to spread it out evenly so that you maximize as much surface area as possible.
- Repeat with layering and watering until your pile is at least 3' high.
- After your compost pile is full, reach in, grab a fist full and squeeze. If you can barely get a drop or two of water out, you did great! If not, add more water slowly, letting it soak in. Stop when water begins to drain out the sides or bottom.
- Place the thermometer in the center of the pile inserted from the side. Within 3-5 days, you should see the temperature begin to rise. When it has reached 100-120 degrees, it’s time to turn your compost (see more info on maintaining your pile below).

As far as building your compost pile, that's it! It's really simple to get started. Now you can push that thermometer into the center of your pile and let the "little guys" start to multiply and do their magic!
Ideal Temperature
The ideal temperature of your compost pile should be between 100-140 degrees (or for thermal composting between 140-160 degrees F). I like to aim for the "sweet spot" of 120 degrees F.

Maintaining Your Compost
For the best results of your compost, you'll want to maintain the temperature and retain moisture (not too wet, and not too dry).
Each time you turn your pile (more on this below), be sure to check how moist your compost is. You should just be able to barely squeeze out one drop of water from a fistful of compost.
If you happen to neglect your compost pile for more than a month or so, give it a turn and add water if needed, then watch the temperature to see if it climbs back up to the ideal zone.
If you've neglected it for too long, you'll likely need to re-charge your pile by turning it, adding some water, and then adding in some more nitrogenous materials.

When to Turn Your Compost
Your pile should take about two to four days to come up to temperature. Once your pile has reached the ideal temperature it's time to turn the pile.
This is when it becomes a bit more customized to your time and commitment. If your pile remains around 120 degrees F, you don't need to turn your pile right away. However, if the pile begins to drop in temperature, you'll want to turn it to keep the activity going.
The more attention you can give it, the faster it will transform into compost. If you're actively turning your compost pile about once every other day, it's possible for you to have a finished compost pile in about 18 days.
This will obviously depend on the size of the materials when you started, your climate, and how much attention you're able to give it.
I'll be back in a couple of weeks with posts on how to know when (and how) to turn your compost pile and how to use compost for best success. In the meantime, you can also check out these posts on how to build a compost sifter, how to make bonemeal, and how to make compost tea.

Josh: Hey guys, this is Josh.
Carolyn: And Carolyn.
Josh: With Homesteading Family. And welcome to this episode of the Pantry Chat: Food for Thought.
Carolyn: Today, we are going to be talking about simple and practical composting or your backyard or homestead.
Josh: Wow, love it.
Carolyn: This episode of the Pantry Chat podcast is sponsored by MadeOn Skincare. MadeOn specializes in skincare specifically for dry skin, and they use as few ingredients as possible to get the job done. You guys, this is the type of skincare I would make myself if I had time to make it in my own home. And the great thing is, Renee even shares her exact recipes with you. The beesilk lotion bar is my go-to lotion when my hands get dry and cracked, and it's only made with three ingredients. Renee created it when she needed something to fix the splits in her fingers, cracks in her feet, and then she found out that it also worked great on her son's seasonal eczema. Go to hardlotion.com/homesteadingfamily to find out what Josh's favorite MadeOn products are, and also use the code homesteading family, for 15% off today's purchase.
Josh: All right. So today we're going to dive into composting, a subject I really, really like, and that I want to see you guys doing more. It seems like a mystery to a lot of people, because it's a little bit of chemistry and a little bit of biology, and a little bit of art, really.
Carolyn: And a lot of a whole lot of people's opinions, isn't it? Everybody has an opinion on how to do compost, and so it can get confusing really quickly.
Josh: It can, and it's really just... It's complicated in one way, but it's not that complicated and it can be quite doable. So, we're going to work through that today, but first a little bit of chit chat and subscriber questions.
Carolyn: If you guys are new with us, we do a little bit of chit chat here on the pantry chats first. You can always skip ahead and get to the main topic if you don't want to hear the chitchat. But we like the chit chat, and you guys have told us that you guys love the chit chat, so here we are. Let's chit chat.
Josh: Right on. So what's up, what's going on with you right now? It's late June.
Carolyn: Yeah, okay. So, you know what happens around here at the beginning of June is, everything.
Josh: Great time.
Carolyn: It is officially spring. It takes us that long to get past the hard freezes and then the frosts. And this was kind of a challenging spring, we kept having hard freezes, even when we should have been well out of the hard freeze range.
Josh: I know, and the water for us. Usually we get a lot more moisture, so it was cold and dry.
Carolyn: Yes. Very, very dry up here, so I think this is going to be a challenging garden year. But I worked on getting our new terrace gardens planted out. And it's really exciting, if you guys haven't seen the new terrace beds, keep an eye on social media feeds like the Facebook and everything, where we should have photos coming out there. Because it is an entirely new section of our garden, right against the cottage garden. And it's just holding so much food, and I'm really excited about it.
Josh: Which is right off the kitchen, so we were able to bring down, because our main crop garden's up behind the house. It's a little far away, it's great for crops that you're harvesting periodically, but not that often later in the season. But for everyday crops, we want to get to things, whether that's everyday salad, tomatoes, cucumbers, lettuces, some of our cooking greens. Those terraces enabled us to get that all right close to the kitchen.
Carolyn: Did you see the zucchini?
Josh: Zucchinis, of course too. Yeah, so those are right outside the kitchen now.
Carolyn: Yeah, so exciting. It's always fun to see a whole new area coming to cultivation.
Josh: Yeah. And more space, right? Just more ground, which we need, we always need. We'll be expanding for a while.
Carolyn: And I was thinking about it the other day. You know the trick to keeping a marriage healthy, when you have two gardeners? Having two gardens. This is kind of fun, because this is a little bit more in my zone of gardening, and so I have like 20 different varieties of tomatoes in there.
Josh: She's an experimenter, which is great because we learn new things, but I'm the one that wants to make sure the pantry gets filled. Not that you don't, but focused on the practicality and getting every ounce of productivity out of the effort.
Carolyn: Which is very important too.
Josh: It's a good combination
Carolyn: It is perfect, it's a good mix. What about you? What have you been up to? I have a few more things to add in a moment.
Josh: Yeah. Well, main crop garden's in and going, and we used the pigs this year to turn up a new area, to get our corn and squash into.
Carolyn: So, that's a new area number two. We are expanding this year.
Josh: Yeah. And the pigs did a great job with that. We've now got them on the compost pile, on the main compost pile. Which it takes us 25, 30 cubic yards, we're up to producing. And we put the pigs in there for a couple of months to just let them get in there and stir things up a little bit and help out. And man, there's just a whole bunch of stuff. Sheep are in, and planting up an area for finishing the pigs on. This is a new thing I'm trying off of the barnyard, where I'm going to plant turnips and bush beans.
Carolyn: Oh, good.
Josh: And about a quarter acre of that, so when the pigs are done in the compost pile, they're going to hopefully go over to that later in the summer, early fall, to finish on for a while.
Carolyn: Wow.
Josh: So, that's a bit of an experiment. Hopefully it's not too dry, I don't have a lot of water over there, but I'm excited about that.
Carolyn: Good, that's a lot of good stuff. Lots of fun stuff. Okay, something else is going on in our world. And those of you guys who are listening in a podcast, you can't see this, but this is a wheel of cheese. And it is the first one of the season because Tilly, the milk cow, had her calf.
Josh: Abut a month ago now, yeah.
Carolyn: And now we have milk. So, we are getting into our cheese production. I'm so excited to actually have our new cheese cave. We got serious this year and got a large wine cooler for all the cheeses, because we are really going to optimize our cheese making. And one of the things I'm so excited about is the dairy class that I'm filming right now, because I'm going to show you guys how to do this, and how to do it in your busy, busy life. We're going to make this actually work for your schedule.
Carolyn: I'm so excited. You guys have been asking me for years now for a dairy class, and it's coming. It's going to be here on September first, is the open date for this class. Only for those of you special guys who follow us and are in the know. So, you got to make sure you are on our email list so that you get the notifications for this, because it's going to be a really exciting opening. It's going to be the best, best, best price it will ever come out at, when it first opens on September 1st. And then that price will go away forever.
Josh: And that is only for email subscribers. You won't hear about that without being on the email list. And what's really cool though, with that launch for that class, is there's a really super secret bonus to that class as well. It's not the class, it's something else that's a very early offer. So, there's some cool things happening.
Carolyn: It is a secret.
Josh: It is a secret, yeah.
Carolyn: You're cleared in. Okay, great. Well, should we get to subscriber questions?
Josh: Yeah, let's check it out here. So, Jesse Dutton on how to pressure can beef stew. All right, "Help, I only buy Ball or Kerr jars, but every time I can, pressure or water bath, some of my jars break. What am I doing wrong?"
Carolyn: Okay. That is a common mistake that people have. It comes from generally one of two things, both having to do with the temperature fluctuations with jars. So if you're canning, you have to remember you're using a glass jar, and glass does not change temperature very well. So, if you take something that's kind of cool and you put it into a cold jar, and then you set that into rapidly boiling water, you are almost guaranteed to break your jar. This is usually what happens, is that people bring their canner up to too high of a temperature before they put their jars in. So even your warm jars, which they should be warm to the touch when you put the food in, and your food should be warm that's going in. Even if you're raw packing, you're putting that raw stuff in, then you should be pouring a boiling liquid over it. The only time that that's not true is in the case of raw packing meat, where you're not adding liquid, in which case you really have to be sure to get your jars are nice and warm.
Carolyn: But then when you go to put those filled jars into your canner, you need to be sure that that canner is just steaming, just the water is just starting to steam. Not a boil, not a simmer, somewhere between 140 and 160 degrees is the ideal, depending on the temperature of your jars. So, usually what's happening is people crank up their canner and bring it to a full rolling boil, and then put their jars in, and that's causing them to break. That is really the main problem that most people are having. Occasionally you can have defects in jars, but if you're getting it every time you're canning, it's almost guaranteed to be a temperature thing with the temperatures that you're working with.
Josh: Very cool. Yeah, glass doesn't have a lot of flexibility.
Carolyn: Yeah. And if you have hot on the inside and hot on the outside, and the jar's cold, it's adjusting at two different rates, which is guaranteed to crack it. Doesn't do that well. All right.
Josh: Cool.
Carolyn: So, are we ready to dive right into compost?
Josh: Sure, yeah.
Carolyn: This is exciting.
Josh: Yes, it is.
Carolyn: All right. So, starting out compost at home, what is the first thing that you're going to do?
Josh: First thing you're going to do starting out composting at home. Well, you need a place to compost and you need materials. Something to compost, right?
Carolyn: Yeah. And this is a really challenging part for a lot of people, especially if they're composting in their back yard. Maybe they're suburban, maybe they're not out on a farm, they don't have a lot of materials. It can be really challenging. So, what kind of materials are you trying to find?
Josh: Well, you've got what we call your greens and your browns, which is your carbon based materials that are high in carbon, and you have your greens, which are your nitrogen based materials, to keep it simple. And it's those two working together, along with oxygen and water, that get things cooking, get things warmed up and get the biological process going. So, you need to accumulate both of those.
Carolyn: Okay. So you need to accumulate browns and you need to accumulate greens.
Josh: Right.
Carolyn: Okay, can we get really practical on that? What is browns? I mean, I know you just gave us a definition, but-
Josh: So, browns are your carbon materials, and wood shavings is one of the core ones that people use. You can use sawdust, let's see, cardboard, shredded cardboard, paper can be great. Most of us have tons of paper, I'm thinking we should get a shredder to add into ours, even though we have a lot of wood shavings donated to us. Straw is another good one, as long as it is not sprayed. That's the difficulty today, is finding straw, and then if you're in a more urban environment that might be challenging. Leaves fallen off the tree, not live leaves from a tree that's been cut down, that's going to fall in the green category because it died alive, and so it still has a lot of that nitrogen in it. But if you live in an area where there's a lot of leaves, that's an excellent, excellent source of carbon type materials, for your browns.
Josh: And for your greens, that's your nitrogen based materials, and grass clippings is a great one, any kind of plant material that has been cut alive, that didn't die and then cut. If it died and then you cut it, that goes over to the browns. If you cut it alive, like if you're trimming trees and shredding them, chipping them, that can all go into your greens materials. All your food, your kitchen waste, and then of course your manures, all your manures, which is one of the most common ones for most of us. Some people don't want to use manure, that's okay. I prefer it, I think it's a better biologically diverse type of compost, but you can use just plant-based materials as well, if you want. But your manures. So, those are your core ones that you're going to find. You can get into coffee grounds, and blood meal and different things, but those are the materials that you're really going to use.
Carolyn: Now, I know that you talk about... There a lot of scientific information out there, and this is one of those places I think a lot of people get really confused, is when we're talking about how much of the browns we use in relationship to the greens. So when you're sourcing your material, can you give a really simplified version of how much brown you need versus how much green, or what are you looking for in terms of quantity?
Josh: Sure, let me at least fill them in on what they're going to see when they read, just to clarify. Because if you read any literature, you're generally looking for a 30 to one ratio, that's 30 parts carbon, or browns, to one part nitrogen. And that's very misleading because of the different, the way the materials are made up.
Carolyn: Yeah, it kind of sounds like you would want like 30 bucket fulls of the browns, to only one of the greens.
Josh: Right, and that's not the case at all, because your browns are already very high in carbon in themselves per unit. So, what we're looking for is really a two to one. So two parts, carbon, or two parts browns, and one part nitrogen, greens. And you can do that by weight or volume, people go either way. I do it by volume, and it works great. Either shovel-fulls, or buckets.
Carolyn: Yeah, so this is the real simplified version, so you don't have to get into all the charts and graphs and science, that says, "This particular material," let's say grass clippings, "Has this much this, and this much this, and therefore it has this kind of ratio. And then you have to add it together with your food scraps, and your this to end up with this ratio." It's pretty much a chemistry equation if you start doing compost that way, it can get really technical and advanced. And So this is a way of really simplifying it down to two parts of your brown stuff, to one part of your green stuff.
Josh: Well and making it work, because nature is going to work one way or the other. It's going to find a way, and depending on your environment and your materials, things are going to break down at some pace. But what we're trying to do is make it predictable, and usually within a certain timeframe. And so, that's where these ratios become important. And a good, balanced compost is good for your garden as well. So, two parts browns and one part greens.
Carolyn: Okay, so get double the heap of the browns that you have of the greens. And we were also going to talk about space.
Josh: Well, we need to talk about space and size, and this is really, really important. So, you don't need a lot of space. You need a place to have a compost pile that will hold it, and then you need a place to store your materials. And it's best to store up your materials for a while, or go get them all at once and then build a compost pile, not just add to it little bits at a time. You can do that, but one, you're going to always be adding something new, so you're not going to get to a finished product. And it's just not reliable, if you're seriously trying to make compost that you're going to get out on your garden. So you need to accumulate your materials, and this is where we get into size. You really want to compost at a minimum size of three foot, by three foot, by three foot. So, basically a cubic yard.
Carolyn: Okay. So, the actual size of the compost heap matter?
Josh: It matters a lot, because it takes a certain amount of mass to hold the moisture, hold the oxygen and generate the heat, which is just generating the... The biological life is actually generating the heat, but it takes that mass to get all of that going well. Not that you can't compost other ways, and use the tumblers and different things, but those are all finicky, and again, not very dependable as far as hey, I want to produce so much compost, get it done in a certain amount of time and get it on my garden. Which is what we need if we're growing food. So, you want that roughly right around a cubic yard. And you can build that with pallets, I've got one going right now for some videos I'm doing that's just a three foot circle, three foot tall, in a wire cage. And that works as well.
Carolyn: Yeah. And Josh is filming how to videos on this. And so there's one out at least already when you guys are watching this, so go check those out so you can actually see him in action on that. Great, okay. That sounds good. So you have all your material, you've got it all gathered, you've got your compost pile structure, whatever that is, that's going to keep together.
Josh: Yeah, you're going to hold it together. Now let me say, you can build it freestanding if you want to, I've done that.
Carolyn: Just a pile of dirt, soil?
Josh: Lots of people do that. Yeah, it's not going to be three... It's going to end up being tapered, and that sure works, and it's less materials. If you want to do that, you can. It's just, it's nice to hold it together, hold it even, that helps. Again, we're trying to control the process and control nature a little bit to get a more consistent outcome.
Josh: So, one other one is the smaller your materials are broken down, the better. And that's why wood shavings are great, or shredded materials. You have more surface area, it's going to go to work faster for you. The larger it is, the harder it is, the longer it's going to take the break down. And that's both for your browns and your greens.
Carolyn: Okay, great. Okay, so you have it all gathered together, you're ready to go.
Josh: You're going to build your pile.
Carolyn: You're going to build it.
Josh: So, this is where you're going to put those ratios to work. And again, you can use shovels. Five gallon buckets are pretty good for this size pile.
Carolyn: As your measurement?
Josh: Right, to build your pile. And then you're going to do, you're just going to stack up. And so what I do is start with two parts browns, and for that size pile, again, buckets are great. Two bucket-fulls. And add a little bit of water, and we'll talk about how much water in a minute, and then add your greens. And spread those layers out so they're not real thick. And if you're using two buckets carbon to one bucket nitrogen in about a three-foot space on the ground.
Carolyn: It spreads out pretty thin.
Josh: It's going to spread out pretty thin. And again, that gets a lot of contact between the different materials, which really helps this get going quickly.
Carolyn: Okay. So you're making lasagna, not a layer cake.
Josh: Lasagna composting. Don't know that I've heard that term, but I like it.
Carolyn: But thin layers, so it's all contacting like lasagna, and not like big chunks of layer cake.
Josh: Exactly. You're trying to get that contact between the browns and the greens. And so, as you build this thing, you need to add water. It needs to have moisture, how much water is going to depend on the water content of your material, and the environment that you're in. And so, if you're in a very, very hot dry environment, you might want to start with a little more water, but in general, your pile, you want to be able to grab a fistful of materials, and squeeze it and just get a drop or two barely of water out of it. That's like the ideal starting place.
Josh: Now, when you're layering it, people will talk about this a lot about this type of measurement, but when you're first building it, it's kind of hard to gauge. You're doing your layers, you're just not going to reach in there every so often. So what you do, is you add water as you're layering, to the point where it just doesn't quite start to run off, or just a little bit runs off. Okay. And as soon as you see that you want to stop. And so, I just water as I go, as I build the layers, that takes a long time-
Carolyn: So, each layer you do your two buckets brown, your one bucket green, and then you water?
Josh: I take take a little nozzle on the shower head, and I water that, and I just let it soak in pretty good. If I'm starting to get any runoff, if it's starting to run a little bit, that's plenty. That's a great way to start it, and then you can check it when you go to make your first turn. And you do that test, and then you'll know when you're turning it the first time, like, "Hey, this is good," or, "Hey, I need to add a little more water on that turn."
Carolyn: So, this is a pretty low technology way of making compost, but I think there is one piece of equipment that you've said you just have to have, to do this really well.
Josh: Besides a shovel and a bucket, yeah, to do it well you need a thermometer. It's helpful to have a compost thermometer that's at least 18 inches long.
Carolyn: Do we have a link to one we can put in a description or show notes for people?
Josh: We can get one, yeah.
Carolyn: Because this is kind of a new, I had never heard of a compost thermometer until you were making compost. And so, this would be good to actually have a link for you guys.
Josh: It's just like a giant meat thermometer, but like some of the meat thermometers are going to tell you the ideal temperatures for poultry or beef for whatever, this is going to tell you your ideal temperature for regular composting, and then usually for thermal composting, which is a hotter type compost, just going to higher temperatures. We can touch on that in a minute, maybe. But that's really helpful, and that's really, really key to know when to turn your compost.
Carolyn: Okay, great. Good. So, explain that.
Josh: Okay. So, you're going to just layer up, you're going to build your pile. You're going to get that done, stacked up about three foot tall. You've added your water as it goes along, that pile is built, so it's got good-
Carolyn: Do you need to cover it?
Josh: It depends on your environment. It needs oxygen, so you don't want to just wrap it in something because it needs oxygen. We were trying to create, I'm going to get a little scientific, an aerobic composting system, not an anaerobic, which would be water rich, where an aerobic is oxygen rich. So, if you need to protect it from rains and everything, or excessive heat, if you're really hot and you're going to dry out too much so you want to shade it, then yes, that type of covering overhead is great. But you don't want to just cover your pile with a tarp and weigh it all down.
Carolyn: Okay. So, if you live in a really rainy area, just like you were talking about, you don't want too much water in there.
Josh: Right, so you want to protect it.
Carolyn: So, you may want to cover it from that. But if you just live in a place where it's just going to help you keep the right moisture with the rain, then you can just leave it open to the top.
Josh: Absolutely. So, you're going to build your pile up, get that all finished. And you need to put that compost thermometer in there so that it gets to the center, 18 inches for a compost pile that size is great.
Carolyn: An 18 inch... See, he wasn't joking when he said it was giant.
Josh: They make them three or four foot long, I need a longer one because of how much we're doing now. I can't get all the way into the center of the pile, so I need to go find the three or four foot one.
Carolyn: It's like this big, long thermometer.
Josh: Right. But this is what makes this easy, it takes the guesswork out of it. Because once you've got it there and it starts breaking down, okay, well, what do I do now? How do you know what's going on? Because the outside doesn't change a lot. So that thermometer is your inside view to what's happening in there. As that temperature increases, you know that all the little buggies, all the bacteria and fungi, and all those little critters are going to work and doing their job, breaking everything down and mixing it up. And so, you want to get the temperature up.
Josh: And the thermometers will have an ideal range, which is usually somewhere between a hundred and 140. So, 120 is kind of the sweet spot for regular composting. And this is a whole nother dialogue that's out there of regular composting versus thermal composting. They're both great and they both have their purpose, but 120, right in that range is where you're aiming for, and where you're looking to hold that temperature. So if you've done everything well, it's going to get up to that temperature in anywhere from two to four days.
Carolyn: That's pretty fast.
Josh: Oh yeah, it gets to work.
Carolyn: Yeah, okay. This is not a slow compost pile. This is actually going to-
Josh: Yeah, this is just what we're doing, is we're shaping nature up to work for us here a little bit, so that this is predictable. You can take all those materials, throw them in a pile and leave them and they're going to break down. It's just, who knows how long? It's going to depend on your environment, and what's going on here. By the right ratios, the right oxygen and water content, yes, you can guarantee that if you've put that together decently, it is going to heat up for you, and that's how you know what's going on.
Carolyn: Okay. So, if you're doing your part as fast as you can, because I know there's places where you see a marker, it gets up to temperature, and then you have to take a step. You have to take the next step of turning it. So just theoretically, if you were to be on the ball and doing this, how fast could you make a compost?
Josh: So, if you want to do a thermal compost, if you're talking fast, we're talking thermal compost, which is taking it up to temperatures between 140 and 160. Really, really good guys, I've never done this, can get it done in 18 days, get a high quality compost done in 18 days.
Carolyn: That's a lot of compost in 18 days. That's like half a month, that's not very long.
Josh: That is giving it a lot of attention, and so the thermometer is what can help you make this work for you so you can do whatever you want to do.
Carolyn: Okay. So this is like choose your own adventure.
Josh: Right. That's like let's get this done quick, and there are some supposed benefits to thermal composting, high temperature composting, which is it kills weed seeds, and it breaks down inorganic materials like pesticides and herbicides.
Carolyn: So, what you've been telling us about here is regular composting, not thermal compensating, or is it the same thing?
Josh: It's the same thing. And here's where we're going to diverge, is how we handle this by reading the thermometer and the action that we take. And this is, it might seem a little complex, but this is just giving you the freedom to manage this the way you want to for the most part, and making it doable for you so that the compost pile doesn't run your life.
Carolyn: Okay. So it sounds like you have two options here, at this point.
Josh: Yeah, exactly.
Carolyn: So, option number one is-
Josh: It's going to take about four days to get up to temperature, somewhere in there. Once you get up to that 120 degrees, you can do one of two things. You can turn it right then and there, and do your first turn and mix everything up, and build a new pile. That's going to start working you towards that thermal composting, where it's going to help continue to increase the temperatures and really get this thing going. From there, you've got to turn it every two days, if you want to maintain that, again, that hot temperature.
Carolyn: Okay, so this is the intensive-
Josh: This is the intense, I want to get this done quick.
Carolyn: I need compost now.
Josh: Most people, that's too much. That's hard to do, our lives are busy. And so, if you're really dedicated and you can do that, great. But what's reality for most of us, is we can look at that thermometer and go, okay, this is up to 120, 130, wherever it's going to, this is great. You can go ahead and turn it and then watch it again, or you can let it sit and just watch the thermometer. What you're looking for is you want to hold that temperature. As soon as you see that start to drop, now you want to turn it.
Carolyn: Okay. So in option number one, intensive option, which is the thermogenic, is that what you said? I'm mixing it up with [crosstalk]. So the hot version, we'll say that, because now I've messed it up thoroughly. So, in that way, you have to, you're getting it hotter? It's getting hot first, but you're turning it faster, you're not waiting for the temperature to come back down?
Josh: And the reason is you're incorporating more oxygen more regularly, which is getting that hotter. And so, that's the get it done fast, and the thermal compost method. Most of us need to be able to fit this into our schedule sometime. And this is where if you just watch the temperature and keep your temperature up in that ideal range, which is generally around 120, you can turn it every four days, every three days, every week. The one I'm working on now, I went two weeks at one point and it kept the temperature fine, I just got busy. I would have liked to have turned it sooner, but it didn't ruin anything because I checked the temperature and it was holding fine.
Carolyn: Okay. So, I'm going to ask the obvious question here, which is what happens if you totally forget it and it completely drops out of temperature range?
Josh: So, if you let it go down, what happens is that because it doesn't get turned, that bacteria starts to slow down and die off. So, essentially you've got to restart. You still have to turn it, but you're going to have to add probably some moisture, and probably some nitrogen back in, and re-turn so you can recharge it again. Yeah, you have to turn it no matter what you're doing, but if you do lose it and the temperature starts to go down, it's not... I mean, it would probably take months to die. So, you're not-
Carolyn: It's like the sourdough starter.
Josh: Again, you can make that pile, and it's going to mostly compost if you set it to the side and don't turn it, it's just it's not going to be very oxygen rich, it's going to go slow, it's not what you're looking for. So, the easy part of this is again, temperature gauge is your guide, and you're just trying to maintain that temperature. You want to go faster, turn it. I try to turn mine every week when I do a pile like that, and if I want it to go faster, I just increase turning up to every two days. If I'm busy and I don't get to it, as long as I'm checking on it and going, "Okay, this is doing good," and I go 10 days or whatever, that's okay. Just maintain your temperature, and as soon as you see it start to drop, then you got to turn it.
Carolyn: Okay. So, let's talk about the actual mechanics of turning the compost pile. Now we know when we can turn it when we should turn it, and that's kind of based on our goals of how fast we want to get this done.
Josh: Right, and temperature.
Carolyn: And temperature, and practicality, because real life is real life, and sometimes our compost pile is not the number one priority in life.
Josh: No, but that's what's really cool, is you can still do this very well, as long as you with the thermometer and you don't have to be a slave to, I have to do this every three days or whatever, as long as you keep your temperature up.
Carolyn: Okay. So, how do you actually turn the compost pile?
Josh: With a pitchfork or a shovel.
Carolyn: Okay, do you need to be able to move it to a new location to do that? Or are you somehow stirring it up?
Josh: It's easier... Yes. No, it's kind of hard to just stir up. So you really want to have two spots, so you can take this spot and just turn it over into here. So, whether that's two bins with pallets, whether, I take the wire cage off. I just literally unwrap it, I've got it tied together with baling twine, I show you this in the video, in the how-to video, and put it back together over here and then fill it. And when you start to fill it, ideally you're trying to take the stuff that was on the outside and get it more into the inside, trying to turn it inside out, sort of. Practically, that's really hard to do. I've read a lot of instructions and people talk about this, but they don't talk about the practicality of, your materials are falling all over the place. How do you really do that?
Josh: So don't stress on that, if you've read that. Just take it apart, and yeah, when you're taking it down, if you can take the inside and pour it around the out and vice versa, great. But don't worry about it that much, just get the thing turned and get stuff mixed up. And so, when you're turning, if your temperature's up, everything should be going pretty good. You probably don't have to add anything. But check the moisture, this is where you do that water test, and you get in there and you grab it and you squeeze out some water. And if you're getting more than a couple of drops, it's a little wet, you might sprinkle in a little bit of browns. Or just a little bit of both, material, but just to help take that moisture out. And as long as you're getting that drop or two.
Josh: And again, this is early on. As it goes, if you're doing it well, it's going to dry out a bit. It's not even going to be that wet. But that's your test starting out, is that that squeezing it. And then you just rebuild from the top down, flip it over, mix everything up, and you go again. You put your thermometer in, it should warm up pretty quick, and within a day get back up to temperature, or so. And then you just keep going essentially, until it's done.
Carolyn: Okay. So in that highly idealized scenario you were talking about, with thermal composting in 18 days, which we realize this is really intensive.
Josh: Yeah, that gets intensive.
Carolyn: [crosstalk] but that's about turning it nine times. Do you think that's going to be the same if you take a slower route and you're not turning it? Do you think it's going to be about nine times, or how do you know when you're done?
Josh: Interesting question. Well, when you're getting done, it's going to go dark brown to black. You're not going to be able to distinguish the different parts anymore, the wood chips or... For the most part. You're always going to have some, you want some structure, but everything's going to start to blend together. It's going to start to turn brown as you go, ideally towards black. And I've found that the hotter you go with is where you get the more blacker soil, the thermal composting, versus brown. And it'll start to dry out a little bit, and it's really working with the oxygen, and you're just looking for everything broken down to where you've got what looks like compost in your hands, and all the individual materials are no longer identifiable.
Carolyn: Okay, good. And then that's your clue that it's done?
Josh: Yep. Well, and temperature will decrease.
Carolyn: Okay, so you stop getting up to temperature?
Josh: Right. Early on, you don't want the temperature to fall off. But as you're finishing that temperature, you'll know visually, you'll be looking at it. You just know what compost looks like, it's going to look like good compost. And at some point, that temperature is going to decrease. And that's really important, because it can look like really good compost and still be working. And if you put that on your garden, you're going to cook your seeds. And I don't know if any of you have ever bought compost that looks really good, but it's still hot. We had this happen a few years ago, and I didn't take the temperature of the compost when I got it. And I went and put it all over our corn, and it cooked their corn seeds. They were selling it, and after I realized that I went down there and checked their bio, and their bio that they were selling was 140 degrees.
Josh: But yeah, again, it's that visual versus the temperature, when you're done. And going back to turns, I've never thought about equating that thermal compost and the about nine turns, to spreading it out. I don't really know, I haven't really ever thought about it in those terms. And how long it takes is just going to depend, again, are you turning every two days, three, four, seven? I would try, if you want to get there within the season, I would try to turn it once a week. Just from a practical, get it done and have it somewhat predictable. That's my goal if I do one like that, and I'm just doing it over the course of from spring to fall, so I have it ready by fall. That works great for me in our environment, about once a week will get the job done. And if I want to get done faster, I just start turning it more.
Carolyn: Okay, that makes sense. So as a marker to finish, because I know for me, sometimes I get into a project and I doubt that I actually know what I'm doing in the middle of it. So at what point, let's say you turn your compost, you're thinking that looks like finished compost, but I'm not a hundred percent sure. So, you go and you turn it and you stick the thermometer into it, and if it doesn't get above what?
Josh: You want to get about under 100.
Carolyn: So, when the temperature comes back up from turning the compost, if it doesn't go above about a hundred, then you're-
Josh: Yeah, you're in that safe zone to use it. Yeah, eventually it's just going to acclimate to whatever your temperature is around you, your ambient temperature, eventually. But you definitely don't want to put it on over about that hundred degrees. And I can't say I've done that exactly, but that's where that's still, it's considered biologically active, and it's working and heating up.
Carolyn: Okay, great. You guys, check out that video that Josh did, the how-to video on how to actually make the compost. And we're going to want to answer some compost questions probably, in an upcoming Pantry Chat. So, if you have any compost question, problems you've run into, troubleshooting you need help solving, put it in the comments, either of this or the other composting video, and we will make sure to get to those questions.
Josh: Absolutely. It's been great hanging with you guys.
Carolyn: Take care.
Josh: See you soon.
Josh: Thanks for listening to this episode of the Pantry Chat: Food for Thought. If you've enjoyed this episode, please subscribe, rate, and review.
Carolyn: To view the show notes, and any other resources mentioned on this episode, you can learn more at homesteadingfamily.com/podcast.
Josh: We'll see you soon.
Carolyn: Goodbye.
Sign up to receive email updates
Enter your name and email address below and I'll send you periodic updates about the podcast.


