
Have you ever fought with saran wrap? I’m pretty sure that stuff intentionally wraps itself into a wad every time I try to use it. Beeswax wraps are an alternative to conventional methods of covering foods. They are washable and reusable, cutting down on waste as well as being a healthier, chemical-free option. You can find these to purchase online, but I want to show you how simple it is to make your own.

What Are Beeswax Wraps?
These wraps are made of beeswax and fabric. That’s it! The beeswax is melted onto the fabric to make a waxy surface that molds to the lip of your container to protect and seal your food.
Some benefits of using beeswax wraps are:
- They are reusable. If cared for properly, they will last for years. However, if the beeswax starts to lose its tackiness, you can just melt more wax onto it.
- It saves money! I have this thing against buying something that I know I’m going to throw away.
- Foods are not packaged in chemical-laden plastics. We have enough chemicals introduced into our everyday lives without wrapping our foods in it too! If a small amount of beeswax gets into your food, you will only benefit from it!
- Beeswax has antimicrobial properties in it so foods won’t grow bacteria.
- Because they're reusable you're significantly reducing waste, this happens to be one of the easiest places to start in becoming a zero waste home.

Supplies Needed
- Fabric - I prefer to use 100% cotton fabric. This is great to find at thrift stores. Always wash your fabric before using it. Decide on the size and shape of the fabric before cutting.
- Pinking Shears - If you cut the fabric with pinking shears you won’t have to hem it. However, you can get as crafty as you want to with this and sew it to have a completed edge.
- Beeswax - If you don't keep bees, you can purchase either a block of beeswax or beeswax pellets. Both work great. The pellets are ready to use and easier to measure, the block will be less expensive and need to be grated. I prefer this brand of beeswax pellets because they're made in the US.
- Baking Sheet - I use our utility sheets that we use for crafts. I don’t like to use my cookie sheets because (be forewarned) there might be some wax residue left on the sheet when done and wax isn't the easiest thing to clean off.
- Paintbrush - these are needed to help spread the wax evenly and quickly after it’s melted.

How to Make Beeswax Wraps
- Preheat the oven to 350° F.
- Take the clean, cut-to-size fabric and place it face down on the cookie sheet. Spread wax pellets or grated beeswax evenly over the cloth. We used a little too many pellets and had enough melted to make two. I suggest erring on the side of less wax pellets than too many. You can always add more and reheat if they don’t completely cover the fabric when melted.
- Place in the oven for 1-2 minutes….watch carefully. You only want the pellets melted.
- Use the paint brush to spread the wax evenly.
- Allow it to cool and dry. I just left mine lying flat, but you can hang it to dry.
- Ready to use!

How To Use Beeswax Wraps
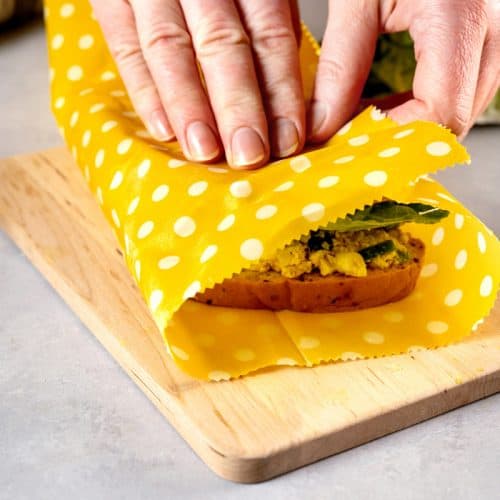
Place the wrap over the food you need to cover and press around the edge of the container with your hands. The heat from your hands will warm the wax and allow it to mold to the container sealing it to protect the food.
You can also fold the wrap to make a small packet to place food into. It makes a nice wrap for sandwiches, vegetables, or snacks.

How To Clean Beeswax Wraps
Simply wash your beeswax wraps with cool, soapy water and a non-abrasive sponge, if needed.
TIPS:
- Hot water will melt the beeswax making your wraps harder to use, so make sure to wash with cool water only.
- Hang them to dry.
- You can just wipe them clean if there is no food residue on them.
- After they are dry, either fold them or roll them up and place in your cupboard to store.

How Easy Was That?
We just made something that took less than 10 minutes, and we can use it over and over!
When I use saran wrap, I might end up with a wad that never even makes it onto the container. It seems like such a small step in reducing waste, but we need to start somewhere!
These also make nice homemade Christmas gifts. Find some colorful or festive fabric scraps and add them to gift baskets!

More DIY Tips & Recipes
- DIY Lip Balm: Easy Homemade Recipe Guide
- DIY Borax Ant Killer (No More Ants!)
- DIY All-Purpose Cleaning Powder
- Easy Homemade Sugar Scrub
- What You Need to Know About Keeping Bees
- Must-Have Beekeeping Supplies (For the Beginner Beekeeper)
- Homemade Christmas Gifts Guide
Homemade Beeswax Wrap
Equipment
- Pastry Brush or Paintbrush
- Cookie Sheet
- Oven
- Pinking Shears
Ingredients
- 1 Tablespoon beeswax pellets or grated beeswax (more or less depending on size of fabric)
- 1 piece cotton fabric washed and cut to size
Instructions
- Preheat the oven to 350° F.
- Take the clean, cut-to-size fabric and place it face down on the cookie sheet. Spread wax pellets evenly over the cloth.
- Place in the oven for 1-2 minutes….watch carefully. You only want the pellets melted.
- Use the paintbrush to spread the wax evenly.
- Allow it to cool and dry. I just left mine lying flat, but you can hang it to dry.
- Ready to use!
Notes
- We used a little too many pellets and had enough melted to make two. I suggest erring on the side of less wax pellets than too many. You can always add more and reheat if they don’t completely cover the fabric when melted.
- Place the wrap over the food you need to cover and press around the edge of the container with your hands. The heat from your hands will warm the wax and allow it to mold to the container sealing it to protect the food.
- To clean, wash with cold soapy water. (Hot water will melt the beeswax making your wraps harder to use.)
- Hang wraps to dry.
- You can just wipe them clean if there is no food residue on them.
- After they are dry, either fold them or roll them up and place in your cupboard to store.


