


Knowing how to make pickles is a skill every home gardener or homesteader should have. Come see which canning method kept my pickles the crunchiest one full year after preserving them!
Why You Need to Learn How to Make Pickles
Learning how to make pickles is a delicious preservation method that suits a variety of foods.
In addition to this standard method of canning dill pickles, our family enjoys canning pickled asparagus, making refrigerator pickles, fermented zucchini pickles, crunchy pickled snap peas, and even this pickled egg recipe!
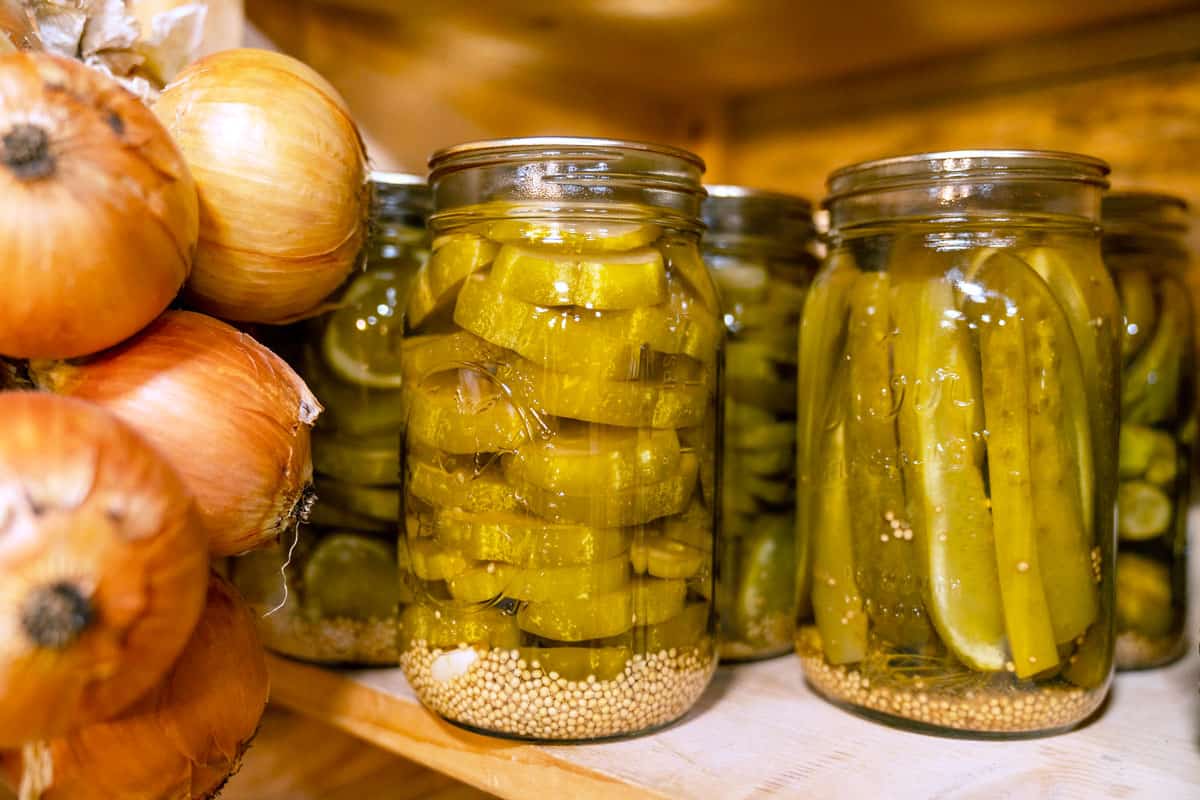
When it came to canning dill pickles, I tried five different methods (see below) so I could compare side-by-side one year later to see which method truly left me with the crunchiest, most flavorful, and most delicious homemade pickles. The low-temperature pasteurization method was my top pick. Here’s why:
- Texture - While the preferred flavor of pickles may be subjective, everyone agrees that pickles should be crunchy. This method doesn't actually bring your pickles up to a full boil like other canning methods, so your pickles aren't "cooking" as much as they do with other canning methods. This allows your pickles to stay crunchier!
- Saves Money - If you buy a lot of pickles at the grocery store, you will be happy to know you can make them yourself for a fraction of the cost.
- Beginner Friendly - Waterbath canning recipes are an ideal place for beginners to start mastering the skill of canning. Although this recipe requires close attention to the water temperature, you can use an electric canner to control the temperature for you.
Pickle Canning Methods
When learning how to make pickles, you might be surprised to know there are several canning methods. I took it upon myself to save you some time and effort by testing out the below. Now, you can skip straight to the winner!
- Canned Kosher Dill Pickles - Canned kosher dill pickles are just a quick pickle that's canned in brine. They're very dilly and flavorful, but not very crisp.
- Long Fermented then Canned Pickles - These are pickles that I fermented, then canned. I'm not a fan of this method and, in fact, didn't even want to eat them after they were canned!
- Fermented/Soaked Canned Pickle - Fermented/soaked pickles were a little bit better, but lacked flavor and still weren't very crunchy.
- Long Brine Pickles - Long brine pickles were very nice and crisp after a year. The flavor was pretty tasty, but definitely not my favorite flavor out of the five.
- Low-Temperature Pasteurization Method - This method surprised me because of how simple it is (especially when using an electric waterbath canner.) These are the most delicious, flavorful, and crunchy pickles, even one year after canning! It is definitely my top recommendation.
Ingredients Needed
A full ingredients list, including measurements and supplies needed, can be found in the recipe card below.
- Cucumbers - Only use cucumbers of a pickling variety.
- Water - Filtered or distilled water is best.
- Vinegar - Because this is a canning recipe, do not use homemade vinegar. Instead, choose vinegar that has been tested for 5% acidity.
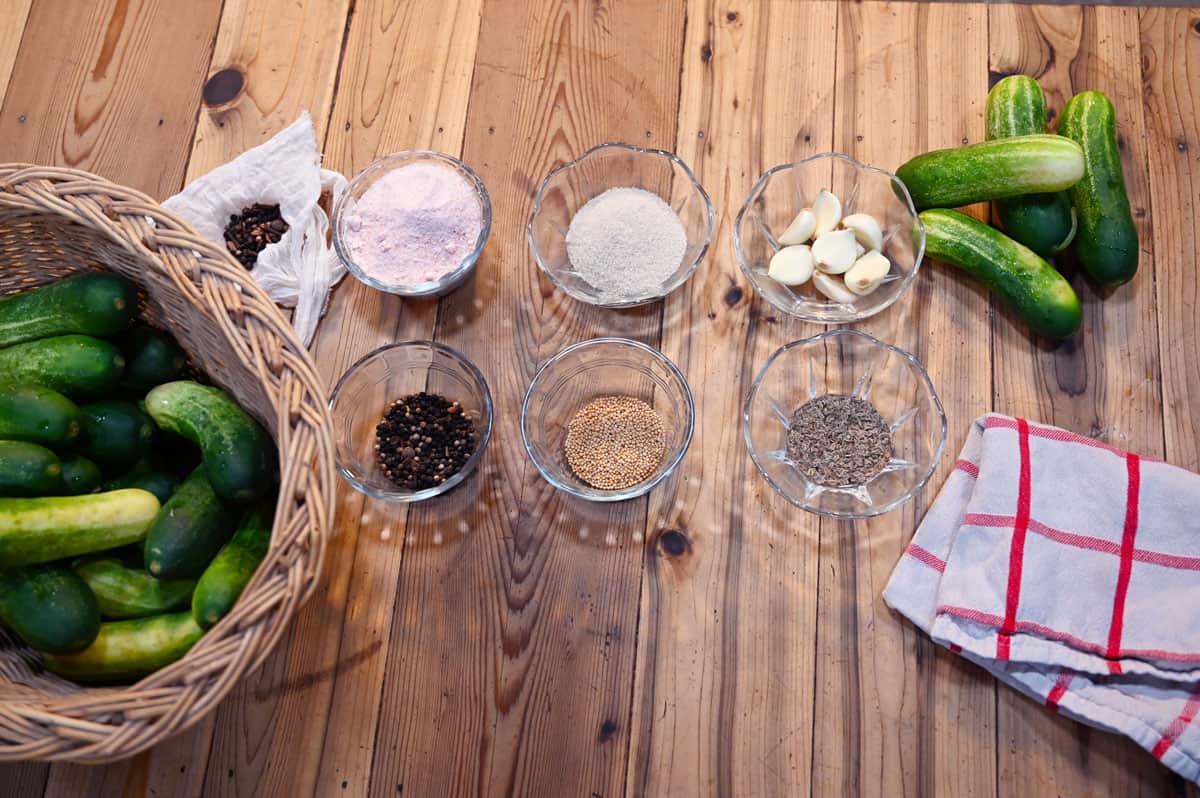
- Pickling Spices - You can mix together black peppercorns, mustard seed, coriander seed, dill seed, allspice berries, red chili flakes, and bay leaves to make your own pickling spices. Or you can just purchase a pre-mixed variety from the store.
How to Make Pickles Step by Step
The low-temperature method is only appropriate for specific pickle recipes. So, you must follow the canning instructions exactly as described below.
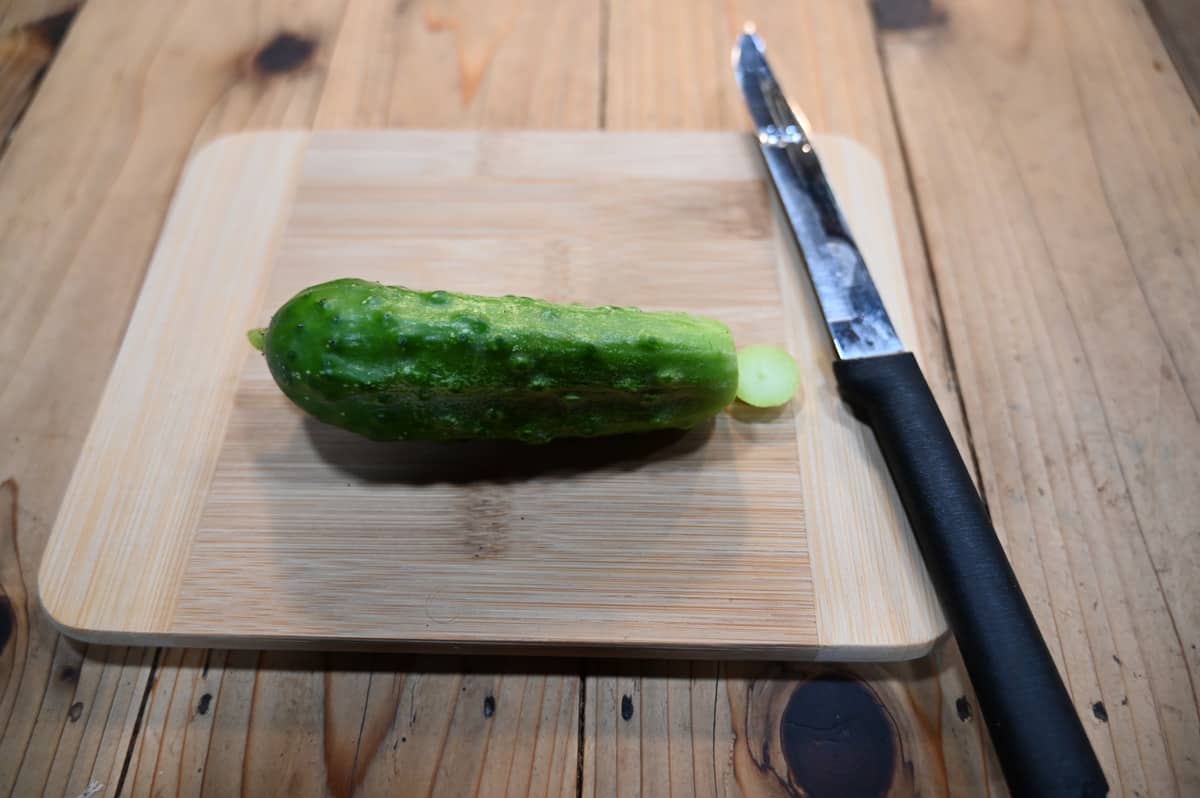
Step 1: Cut off the blossom end of the cucumber (about ¼ inch piece). This removes the enzyme that's in the blossom that can tend to make pickles mushy. If you have any cucumbers that have soft spots or blemishes, set those aside for fresh eating and save the firm and blemish-free cucumbers for pickling.
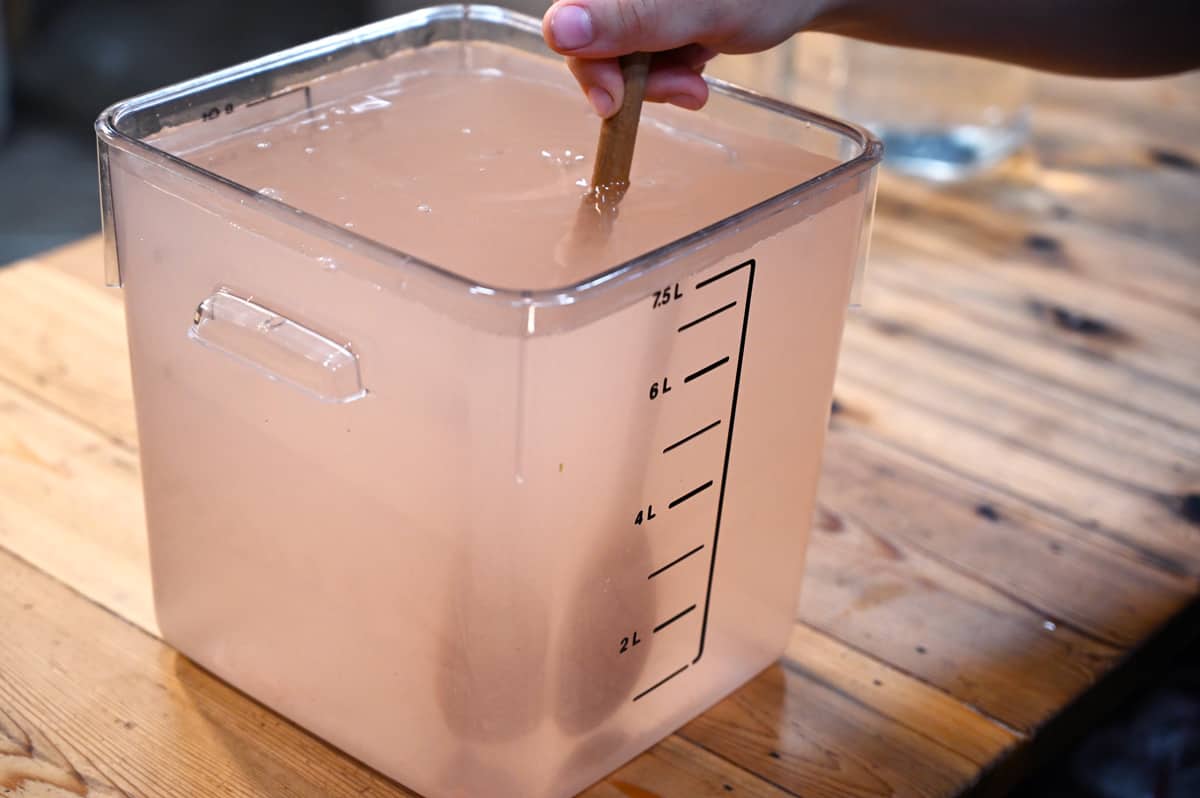
Step 2: Mix together 1 quart of warm water and ¾ cup of salt into a large two-gallon vessel. Stir well until the salt is dissolved, then add enough cold water to fill the vessel up to the two-gallon mark. Place your prepared cucumbers into a 5-gallon food-grade bucket, pour in the brine, and submerge the cucumbers under the brine with a plate or weight. Allow cucumbers to sit in the brine, in the refrigerator, anywhere from 12 hours up to 7 days, but for the crispest pickles, move on to the next step within 3 days.
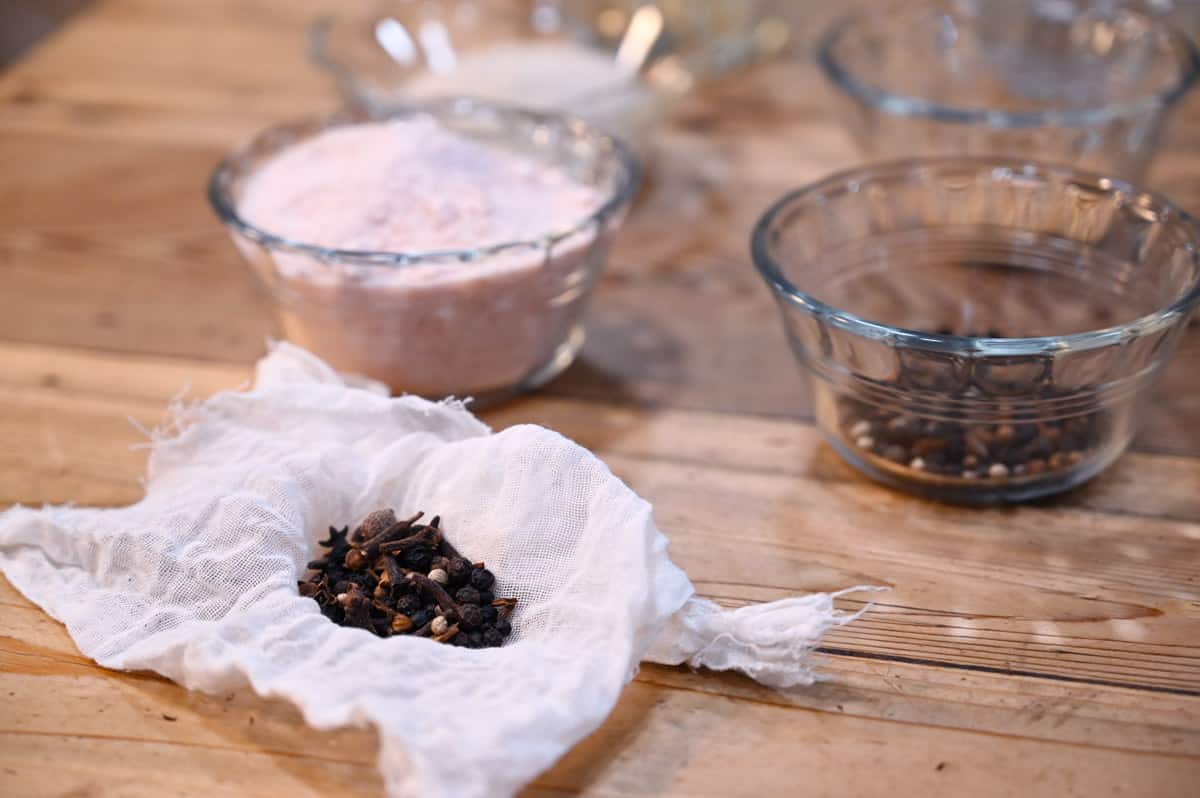
Step 3: Tie your pickling spices in a piece of cheesecloth, butter muslin, or a loose-leaf tea bag. Add the pickling spices, 8 cups of water (filtered or distilled), 6 cups of 5% vinegar, ¼ cup sugar, and ½ cup salt to a large stockpot. Bring the brine up to a boil on the stovetop.
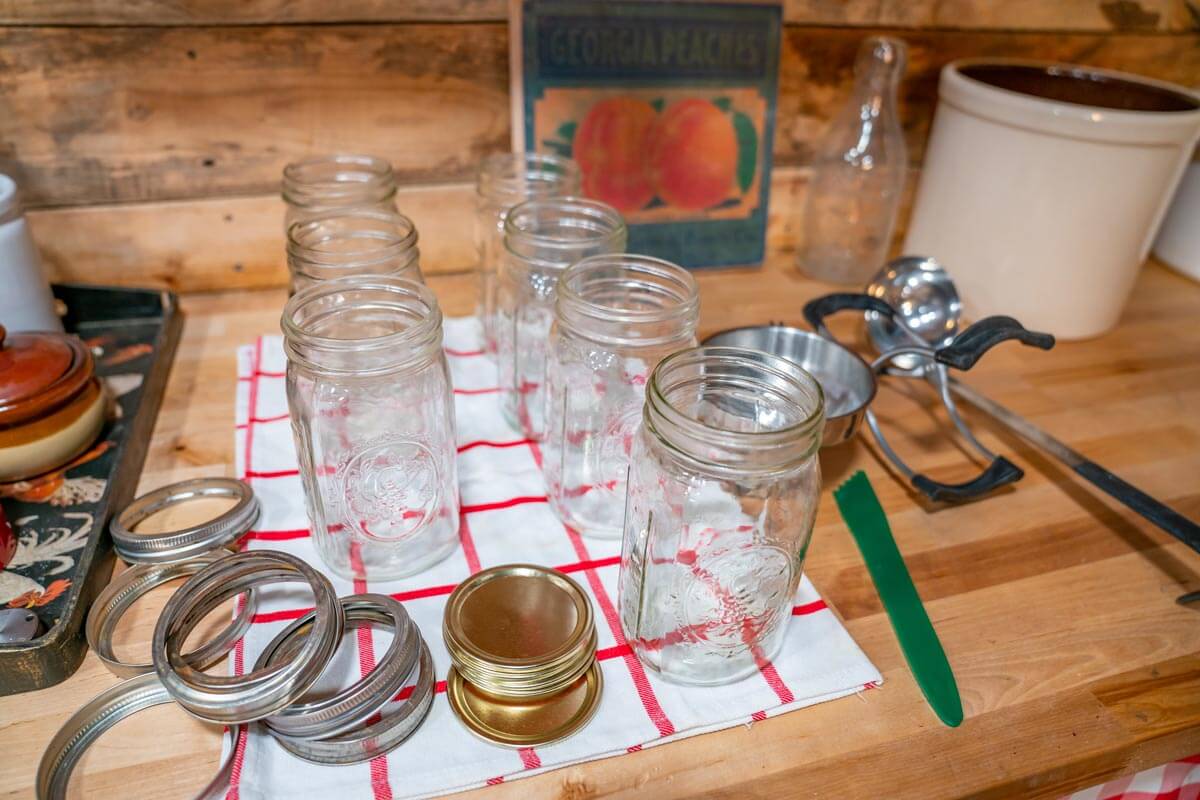
Step 4: Meanwhile, get your canning pot ready and the water heating up to 140°F. Prepare your canning jars by washing them in hot, soapy water and rinsing them well. Then, while still warm, place them on a kitchen towel on the counter.
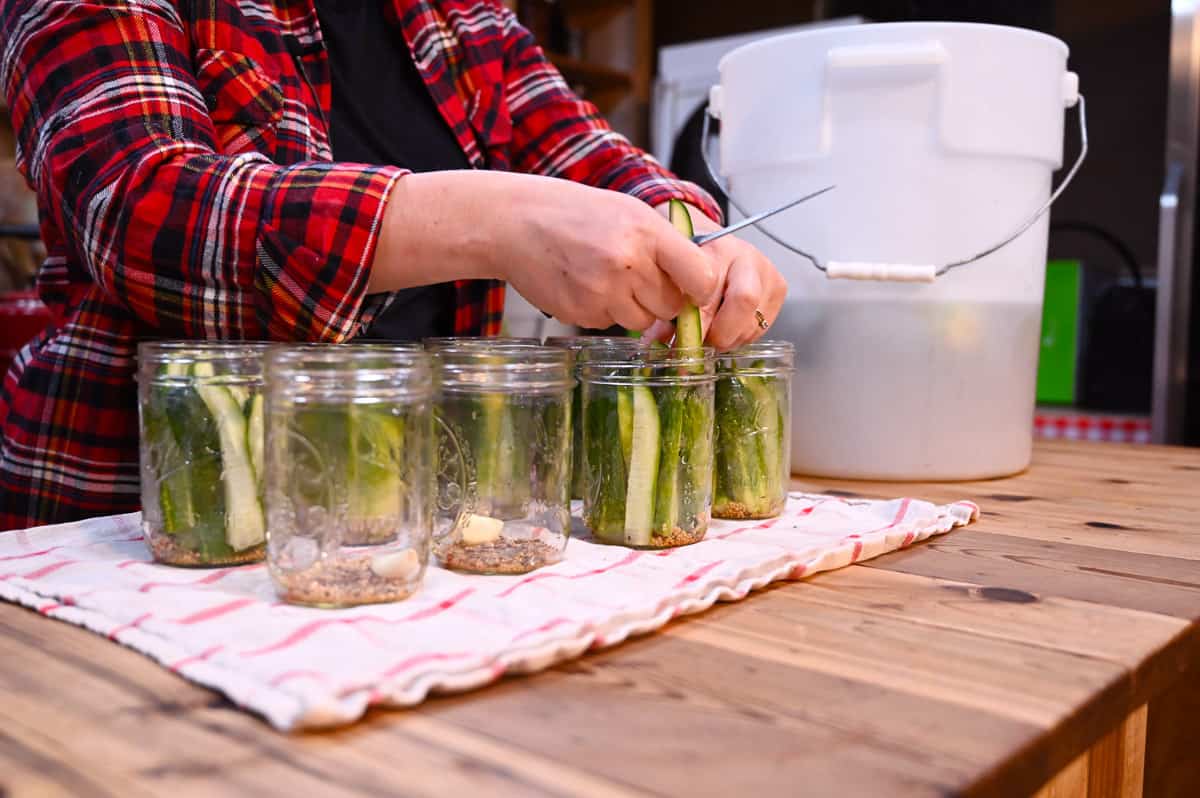
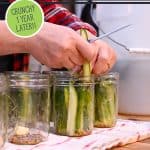
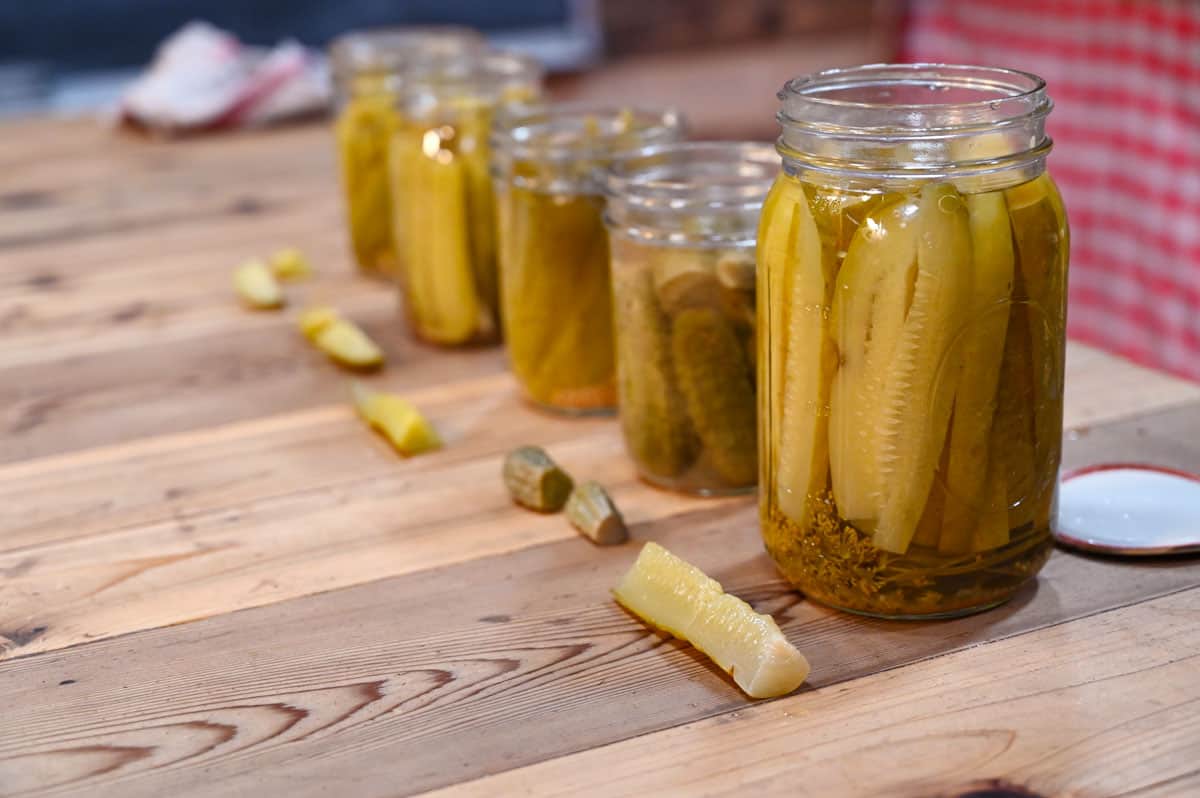
Step 5: Fill each canning jar with one clove of garlic, one teaspoon of mustard seed, and one teaspoon of dill seed. Slice your cucumbers into spears (or leave them whole, or slice them into coins) and pack your jars as full as possible. Once your brine has come up to a boil, remove it from the heat and immediately fill your jars with brine, leaving ½ inch headspace. Using a bubble remover, slide it down around the edges of the jar to allow any bubbles to escape. If needed, adjust headspace by adding more brine. Add your two-part canning lids and tighten to fingertip tight.

Step 6: Transfer your jars to your water bath or electric waterbath canner and adjust the water level, if needed, so the jars are covered with 1-2 inches of water. Using your thermometer, bring the water temperature up to 180°F. Once your water is up to temperature, set your timer and keep the water temperature between 180°F-185°F for a full 30 minutes. If you're using a stovetop, this can be a bit tricky, and if the temperature drops below 180°F, you need to start your time all over again. This is why I really prefer using my electric canner for this method.
Step 7: Once 30 minutes have passed, carefully remove the jars from the canner using a jar lifter and set them on a towel-lined counter. Let your jars sit for a full 12 hours (or overnight) before checking the seals, labeling the jars, and moving them to the pantry. Any jars that did not seal correctly can be moved to the refrigerator and enjoyed immediately.
Tips for Crunchy Pickles
Without using the low-temperature pasteurization canning method, I would follow the tips below and still have pickles that weren't crunchy (especially months after canning). So, combining the low-temperature pasteurization canning method with these tips is crucial for success.
- Use the freshest, blemish-free cucumbers possible.
- Add tannins such as grape leaves or horseradish leaves.
- Cut off the blossom end of the cucumber before pickling.
- Keep your pickles cold or soak them in ice water before canning.
FAQ’s
When making homemade pickles, it's important to choose a cucumber variety that's specifically cultivated for pickling. You don't want to use larger slicing varieties as your pickles won't turn out as crunchy.
The time it takes for cucumbers to become pickles varies depending on the pickling method used. Refrigerator pickles can take as little as 24 hours, while fermented pickles can take weeks.
The 321 rule refers to the general ratio of three parts water, two parts vinegar, and one part sugar used. While this standard rule works great for refrigerator pickling, it is not recommended for canning because it does not provide enough acidity for shelf-stable food safety.
The three basic ingredients for pickling are water, vinegar, and salt. To customize the flavor, you can add additional seasonings such as pickling spice, garlic, dill and sugar.
Other Posts You May Enjoy
- Quick & Easy Refrigerator Pickles (Garlic Dill Pickles)
- The Best Pickled Egg Recipe
- Quick & Easy Zucchini Pickles
- Delicious Pickled Asparagus Recipe
- Crunchy Pickled Snap Peas Recipe
- Cucumber Tea Sandwiches
Did you use this tutorial to learn how to make pickles? If so, please leave a star ⭐ rating and your comments in the recipe card below. Then snap a photo and tag us on social media @homesteadingfamily so we can see!

Crunchy Pickle Recipe (Canned Pickles)
Equipment
- 2 Gallon Container
- 5-gallon food-grade bucket
- Large Stock Pot
- cheesecloth
- Canning Jars
- Canning Lids & Bands
- Bubble Remover
- Water Bath Canner I use this Electric Canner
- thermometer
Ingredients
- 8 Pounds Cucumbers
- 8 Cups Water filtered or distilled
- 6 Cups Vinegar 5% acidity and pasteurized
- ¼ Cup Sugar
- ½ Cup Salt We use Redmond Real Salt. Use that link to automatically get 15% off your order!
- 1 Tablespoon Pickling Spices
- 8 Cloves Garlic
- 8 Teaspoon Mustard Seed
- 8 Teaspoon Dill Seed
Instructions
- Cut off the blossom end of the cucumber (about ¼ inch piece). This removes the enzyme that’s in the blossom that can tend to make pickles mushy. If you have any cucumbers that have soft spots or blemishes, set those aside for fresh eating and save the firm and blemish-free cucumbers for pickling.
- Mix together 1 quart of warm water and ¾ cup of salt into a large two-gallon vessel. Stir well until the salt is dissolved, then add enough cold water to fill the vessel up to the two-gallon mark.
- Place your prepared cucumbers into a 5-gallon food-grade bucket, pour in the brine, and submerge the cucumbers under the brine with a plate or weight. Allow cucumbers to sit in the brine, in the refrigerator, anywhere from 12 hours up to 7 days, but for the crispest pickles, move on to the next step within 3 days.
- Tie your pickling spices in a piece of cheesecloth, butter muslin, or a loose-leaf tea bag. Add the pickling spices, 8 cups of water (filtered or distilled), 6 cups of 5% vinegar, ¼ cup sugar, and ½ cup salt to a large stockpot. Bring the brine up to a boil on the stovetop.
- Meanwhile, get your canning pot ready and the water heating up to 140°F. Prepare your canning jars by washing them in hot, soapy water and rinsing them well. Then, while still warm, place them on a kitchen towel on the counter.
- Fill each canning jar with one clove of garlic, one teaspoon of mustard seed, and one teaspoon of dill seed. Slice your cucumbers into spears (or leave them whole, or slice them into coins) and pack your jars as full as possible.
- Once your brine has come up to a boil, remove it from the heat and immediately fill your jars with brine, leaving ½ inch headspace. Using a bubble remover, slide it down around the edges of the jar to allow any bubbles to escape. If needed, adjust headspace by adding more brine. Add your two-part canning lids and tighten to fingertip tight.
- Transfer your jars to your water bath or electric canner and adjust the water level, if needed, so the jars are covered with 1-2 inches of water. Using your thermometer, bring the water temperature up to 180°F.
- Once your water is up to temperature, set your timer and keep the water temperature between 180°F-185°F for a full 30 minutes. If you’re using a stovetop, this can be a bit tricky, and if the temperature drops below 180°F, you need to start your time all over again. This is why I really prefer using my electric canner for this method.
- Once 30 minutes have passed, carefully remove the jars from the canner using a jar lifter and set them on a towel-lined counter. Let your jars sit for a full 12 hours (or overnight) before checking the seals, labeling the jars, and moving them to the pantry. Any jars that did not seal correctly can be moved to the refrigerator and enjoyed immediately.
Notes
- Use the freshest, blemish-free cucumbers possible.
- Add tannins such as grape leaves or horseradish leaves.
- Cut off the blossom end of the cucumber before pickling.
- Keep your pickles cold or soak them in ice water before canning.


