
Have you heard of the 5-5-5 Instant Pot boiled eggs method? Whether you want to make hard or soft-boiled eggs, you can cook them to perfection using a multicooker such as the Instant Pot Duo. This guide teaches you how and includes tips for peeling and storing foolproof eggs every single time.

Why I Love Instant Pot Boiled Eggs
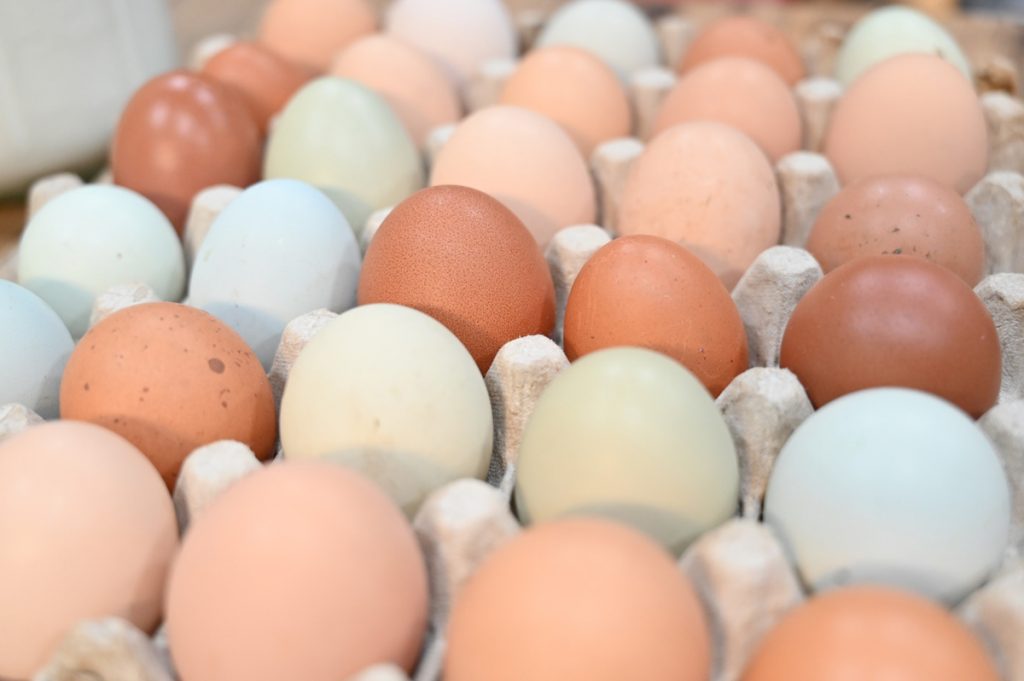
We raise chickens for eggs, so we eat a lot of egg-rich recipes such as scrambled eggs, homemade egg noodles, breakfast casseroles, egg salad sandwiches, bacon frittata, or if you don’t have bacon, this flexible frittata recipe.
When it comes to deviled eggs, egg salad, cobb salad, or egg and avocado toast, I always make my boiled eggs in the Instant Pot. A popular and effective feature of the Instant Pot (and its fellow multicookers) is a hands-off method to boil eggs without babysitting the stove.
I am so in love with this kitchen tool that I also use it to make Instant Pot yogurt, easy Instant Pot bone broth, hearty Instant Pot oatmeal, fail-proof Instant Pot hard-boiled eggs, or Instant Pot macaroni and cheese.
This method is so easy you may find yourself with more hard boiled eggs than you know what to do with. If that’s the case, I’ve got you covered. Teaching different egg preservation methods is my specialty, and my pickled eggs recipe is the perfect solution for excess boiled eggs.
Homesteading Hack: Looking for more clever ways to preserve eggs? Check out these methods!
- Your Simple Guide to Water Glassing Eggs at Home
- Can You Freeze Eggs? Yes – Here’s How
- Freeze Dried Eggs – Everything You Need to Know

What Is the 5-5-5 Method
When cooking eggs in a multicooker, the “5-5-5 method” uses 5 minutes of cook time, 5 minutes of natural pressure release, and 5 minutes in an ice bath. That’s all there is to it! Perfect “hard-boiled eggs” every time (even though they’re actually steamed).
If you prefer a softer yolk, the 3-3-3 method is for you. Follow the same steps but for three minutes each instead of five. Easy!

Tips for Easy Peel Eggs
While the 5-5-5 method for Instant Pot boiled eggs cooks them perfectly, an equally important step is knowing how to separate the peel to reveal a beautifully smooth egg. Here are my best tips for peeling eggs.
- Use Older Eggs - Older eggs work best because the membranes between the egg white and shell get weaker with age, making peeling simpler. Homesteading Hack: If you are using farm-fresh eggs, let them age on the counter for about a week before hard boiling them.
- Don’t Skip the Ice Bath - An ice bath will stop the cooking process, but the fast change in temperature will also cause the egg white to contract, pulling the membrane away from the shell.
- Crack From the Large End - The large end of the egg has an air pocket, making peeling much smoother.
- Break the Membrane - If you find you're still struggling with peeling your eggs, consider breaking the membrane before boiling the eggs. Tap the egg with the back of a spoon a few times until you hear a loud "snap" sound. That's the inner membrane breaking.

The Homestead Kitchen
This tutorial for Instant Pot boiled eggs was featured in issue No.42 of the Homestead Kitchen magazine. If you are looking for a homesteading resource that can provide answers, guidance, encouragement, tips and tricks, or advice, this magazine was designed just for you.
As new homesteaders, it took us a lot of trial and error to overcome feelings of inadequacy. Now, we have made it our mission to share our journey and knowledge with others to help them bypass some of those growing pains.
With the Homestead Kitchen magazine, you will be put on the fast track to homesteading with confidence as we share how to overcome the big obstacles along with the little things that can make a huge impact on your success.

How to Make Instant Pot Hard Boiled Eggs
Supplies Needed
- Measuring Cup - These boiled eggs are actually steamed. A measuring cup will help you make sure you are using enough water to create the right amount of steam.
- Instant Pot - The size of your Instant Pot will determine how many eggs you can cook at a time. A standard six-quart pot will hold about a dozen eggs in a single layer. You can stack the eggs carefully to fit quite a few. Just make sure no eggs are touching the bottom of the insert and that they won’t be crushed by the lid. If you don’t have an Instant Pot, that’s OK. You can still make Instant Pot boiled eggs with any brand of electric pressure cooker.
- Trivet - Again, you are actually steaming your eggs, so you will need the wire rack that comes with your multicooker to keep the eggs from sitting in the water.
- Large Bowl - The size of your bowl should be large enough to hold your eggs and ice water. Homesteading Hack: If one bowl isn’t large enough, use multiple bowls or a clean kitchen sink so that you can immediately transfer your eggs from the Instant Pot to the ice bath.
- Silicone Tongs - You will need to transfer the eggs while they are still very hot. Do not use your hands! If you don’t have silicone tongs, you could use a pasta ladle or slotted spoon.

Ingredients Needed
- Eggs - Always follow best practices when handling farm-fresh eggs. Knowing how to keep eggs clean from the coop is the goal, but also cleaning them properly once they get to the kitchen will help prolong the life of your eggs and help you know how to use them safely.
- Water and Ice - You will need a cup of water for the steaming step and several cups of water and ice for the ice bath step.


Step-by-Step Directions
- Place 1 cup of cold water in the inner pot of your electric multicooker.
- Place the eggs you are cooking in an egg rack or carefully on top of the trivet that comes with your cooker. You can stack the eggs carefully to fit quite a few. Just make sure no eggs are touching the bottom of the insert and that they won’t be crushed by the lid.
- Seal the lid of your multicooker and set the cooking time to 5 minutes on high pressure.
- Once the cooking time is complete, allow it to pressure release naturally for 5 minutes. Set a timer so you don’t lose track of time!
- While the pressure is releasing, prepare your ice bath by adding equal parts ice and water to a large bowl or your sink. Don’t fill it too full; remember, your eggs need to fit.
- After 5 minutes of natural release, manually release any remaining pressure by turning the pressure valve on your cooker to the venting position.
- Remove the lid carefully, then remove the eggs from the pressure cooker and place them in the prepared ice bath. The eggs will be very hot, so use caution! Silicone-tipped tongs are good for this job.
- After being in an ice bath for 5 minutes, the eggs are ready to peel and enjoy!
Did you make these Instant Pot boiled eggs? If so, please leave a star rating in the recipe card below. Then snap a photo and tag us on social media @homesteadingfamily so we can see!
Storing Hard-Boiled Eggs
Hard-boiled eggs should be refrigerated within two hours of cooking and stored in an air-tight container. If you do not peel your eggs right away, they will stay fresh for up to one week. However, once they are peeled, they should be eaten within one day.
To differentiate hard-boiled eggs from regular eggs in the refrigerator, you can write a "B" for "boiled" on the eggshell using a food-safe marker.
You can separate the whites from the yolks and freeze hard-boiled eggs. However, the texture does change, and they aren’t as good. If you choose this method of preservation, thaw the egg whites and yolks in the refrigerator overnight before incorporating them into a recipe.
Our favorite way to preserve Instant Pot boiled eggs is by pickling them. This recipe has various customizations, keeping this tangy treat from becoming monotonous.
FAQ’s
The 5-5-5 method cooks eggs for 5 minutes at high pressure. Then, there's a 5-minute natural pressure release. Finally, cool the eggs in an ice bath for 5 minutes. This method makes hard-boiled eggs with easy-to-peel shells.
The 3-3-3 method cooks eggs for 3 minutes at high pressure. Next, there's a 3-minute natural pressure release. Then, cool the eggs in an ice bath for 3 minutes. This method gives slightly softer yolks than the 5-5-5 method.
You'll need an Instant Pot, a trivet or steamer basket, a bowl of ice water, and a spoon or tongs. The steamer basket makes it easy to place and remove eggs from the pot.
The 5-5-5 method takes 15 minutes. This includes 5 minutes of high pressure cooking, 5 minutes of natural pressure release, and 5 minutes in an ice bath.
You can store hard-boiled eggs in the refrigerator for up to a week. Keep them in a covered container to prevent moisture and other flavors from affecting the eggs. You can also freeze or pickle hard-boiled eggs for longer storage.
You can use hard-boiled eggs as a snack or incorporate them into your favorite dishes. Some creative ways include: - Deviled eggs - Egg salad - Sandwiches - Topping for soups and salads.

Other Posts You May Enjoy
- The Best Pickled Egg Recipe
- How to Cook Scrambled Eggs in Cast Iron
- Delicious Bacon Frittata Recipe
- Flexible Frittata Recipe
- Easy Homemade Egg Noodles Recipe
- Cucumber Tea Sandwiches

Instant Pot Hard Boiled Eggs
Equipment
- Measuring Cup
- Instant Pot
- Trivet
- Large Bowl
- Silicone Tongs
Ingredients
- 12 whole eggs or any amount that fits in your Instant Pot
- 1 cup water for cooking
- water & ice for ice bath
Instructions
- Place one cup of cold water in the inner pot of your electric multicooker.
- Place the eggs you are cooking in an egg rack or carefully on top of the trivet that comes with your cooker. You can stack the eggs carefully to fit quite a few. Just make sure no eggs are touching the bottom of the insert and that they won’t be crushed by the lid.
- Seal the lid of your multicooker and set the cooking time to 5 minutes on high pressure.
- Once the cooking time is complete, allow it to pressure release naturally for 5 minutes. Set a timer so you don’t lose track of time!
- While the pressure is releasing, prepare your ice bath by adding equal parts ice and water to a large bowl or your sink. Don’t fill it too full; remember, your eggs need to fit.
- After 5 minutes of natural release, manually release any remaining pressure by turning the pressure valve on your cooker to the venting position.
- Once all pressure is released, carefully remove the lid and, using silicone tongs, remove the eggs from the pressure cooker and place them in the prepared ice bath. The eggs will be very hot, so use caution!
- After being in an ice bath for 5 minutes, the eggs are ready to peel and enjoy!
Notes
- Use Older Eggs – A little age helps the membranes loosen. If your eggs are farm-fresh, let them sit on the counter for about a week.
- Don’t Skip the Ice Bath – The cold shock makes the whites contract and pull away from the shell.
- Crack from the Large End – That little air pocket is your best friend here.
- Break the Membrane First -Tap the shell with the back of a spoon before boiling. You’ll hear a little “snap,” and that’s your clue that the membrane has loosened.
- Unpeeled – Keeps up to 7 days.
- Peeled – Best within 1–2 days.
- Sliced on avocado toast
- Chopped into a Cobb, chef or this pear salad
- Mashed for creamy deviled eggs
- Mixed into egg salad sandwiches
- Grabbed straight from the fridge for a protein-rich snack


