Don’t be tempted to buy a box of brownie mix when you can make this easy homemade brownie mix in just minutes. Enjoy the rich chocolate taste without unnecessary ingredients.
Double (or quadruple!) this recipe to make a bulk batch so you will have your pantry stocked for a quick dessert to whip up for unexpected guests, last-minute dinners, or even as a homemade holiday gift idea.
Served with a scoop of homemade ice cream or a dollop of whipped cream, these homemade brownies top any boxed mix around!
Why Homemade Brownie Mix Is Better
Who doesn’t love brownies? Knowing they are a crowd pleaser, I have also shared my recipes for healthy black bean brownies (gluten-free) and my homemade sourdough brownies. Just like my DIY cookie mix (in a jar) or DIY cobbler mix in a jar, this mix literally whips together in a matter of minutes.
With just a few more minutes of hands-on prep to get them ready for baking, this is one of the fastest and easiest homemade desserts I know of.
Not to mention, you can whip up multiple batches all at once with very little effort. In fact, I no longer make these, but my kids do! A batch of brownies is ready to bake in about as long as it takes my oven to preheat, and the finished product is coming out ooey and gooey just 30 minutes later!

Optional Add-Ins
The basic recipe for this homemade brownie mix is perfect, but it’s always fun to customize and add a personal touch to your baked goods. You can enhance the flavors and textures of your brownies with a variety of optional add-ins. Just remember to only add shelf-stable items to the dry mix in the jars!
| Add-In | Benefit |
| Chocolate Chip | For an extra dose of chocolaty goodness, fold in a handful of chocolate chips. They melt into gooey pockets of delight, making every bite more indulgent. |
| Candies | Try different candies such as M&M’s, crushed peppermint candy, toffee bits, or caramels to add an interesting twist. |
| Various Extracts | Play around with different extracts such as vanilla, peppermint, hazelnut, or orange, to enhance sweetness and aroma. |
| Chopped Nuts | Walnuts, pecans, or almonds add a delightful crunch and nutty flavor that pairs perfectly with the rich cocoa base of the brownies. |
| Marshmallows | Mix in mini marshmallows for a fun, chewy texture that kids and adults alike will love. They create a gooey topping that caramelizes beautifully while baking. (If you add some crushed-up graham crackers, you've just made a S'mores version!) |
Tips for the Best Homemade Brownie Mix
Perfect brownies are easy to achieve when you know a few simple baking tricks. Here are my top tips to transform this homemade brownie mix into the best brownies you’ve ever baked:
- Fat Sources - Choosing between melted butter and vegetable oil affects the texture. Melted butter gives a rich taste, while vegetable oil makes them moist and chewy. You can try mixing both to get the best of both worlds.
- Quality Ingredients - Using high-quality cocoa powder is key for a deep chocolate flavor. Dutch-processed cocoa offers a smoother taste. Adding dark or milk chocolate chunks can make them even more indulgent.
- Mixing Techniques - Sifting your dry ingredients like flour, sugar, and cocoa powder is important. It prevents lumps and ensures even mixing. This simple step greatly improves your brownies' texture. Additionally, don't overmix the batter because overmixing can make your brownies tough. Just mix until the ingredients are combined.
- Choosing Texture - Fat is the secret to fudgy brownies. For extra moist brownies, add an extra tablespoon of coconut oil. If you prefer a cake-like consistency, add an extra egg.
- Choosing Consistency - For gooey brownies, don’t overbake! Remove from the oven as soon as the toothpick comes out clean. For firmer brownies with crispy edges, add a few minutes of baking time and allow to cool completely before slicing.
- Enhancing the Flavor - Coffee complements the chocolate and really brings out its flavor. To deepen the chocolate flavor without an overwhelming coffee taste, add a teaspoon of espresso powder, you won't even notice it's there.

How to Make Homemade Brownie Mix
Supplies Needed
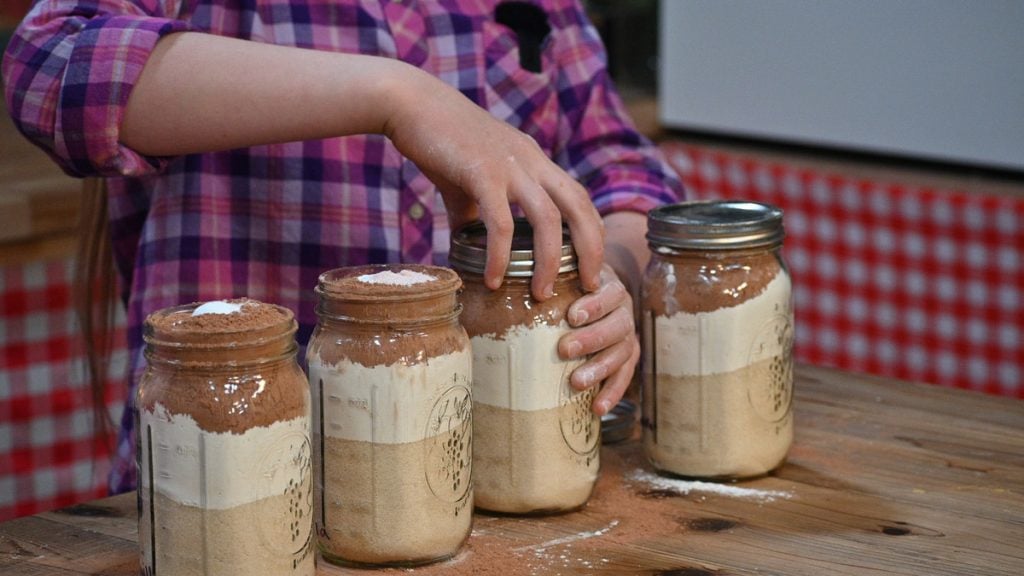
- Wide-Mouth Quart Jar – These are the perfect size to hold the brownie mix, and we even write the instructions directly onto the jar with a Sharpie.
- Two-Part Mason Jar Lid - I prefer the two-part lids to get an airtight seal using my vacuum sealer for jars.
- Canning Funnel - A canning funnel is optional, but it keeps the mess down and makes the process faster when making multiple batches at once (especially if children are helping).
- Mixing Bowl - You will need a large bowl when ready to bake your brownies.
- Silicone Spatula - I love these silicone spatulas for mixing the wet and dry brownie ingredients. They do a great job of incorporating the ingredients without over-mixing.
- 8x8" Pan - Each 1-quart jar of brownie mix will make one 8X8" pan of brownies.

Ingredients Needed
Brownie Mix:
- Sugar - What I love about this recipe is we’ve drastically reduced the amount of sugar compared to regular brownie mixes. Now two cups is still a large amount of sugar, but for the occasional treat, we’re OK with that.
- All-Purpose (plain) Flour - You may be wondering if you can use something healthier like fresh-ground flour or whole-wheat flour. I don’t recommend that because this is going to sit on your pantry shelf, and you don’t want the flour to go rancid. You could use an Einkorn all-purpose flour if you’d prefer a healthier choice.
- Cocoa Powder - Use whatever cocoa powder you have on hand. Sometimes, using dark cocoa powder gives these an even richer taste. We like buying our cocoa powder in bulk from Azure Standard. Homesteading Hack: If you’re a first-time Azure Standard customer, use coupon code “HOMESTEADINGFAMILY15” at checkout for 15% off your order of $100 or more!
- Baking Powder - Another pantry staple we never run out of. We also purchase this in bulk from Azure.
- Salt - Any good quality salt will do. We’re partial to Redmond Real Salt because it contains many of the essential minerals our bodies need. (Using that link for Redmond Salt will automatically give you 15% off your order!)
Brownie Recipe:
- Brownie Mix - You’ll need one jar of your brownie mix.
- Eggs - Farm-fresh eggs are always our favorite! See how we preserve eggs for long-term storage to have fresh eggs year-round, perfect for baking up these brownies.
- Vanilla Bean Paste - We love using vanilla bean paste, but you can alternatively use homemade vanilla extract.
- Oil - We like to use melted coconut oil, but you can use butter, avocado, or the oil of your choice.
Step-by-Step Directions
This recipe makes a one-quart jar, which will make a perfect 8×8" pan of brownies. To make this recipe, line up as many jars as you want to make and measure out the following ingredients, layering them into the jar.


To Prepare the Mix:
- Add sugar, flour, cocoa powder, baking powder and salt.
- You may need to tap the jar on the counter a few times to get all the ingredients to fit.
- Seal the jar with a two-part mason jar lid (optionally vacuum sealing the jar before adding the canning lid ring).
- Mark each jar “Brownie Mix” and the optional brownie-making instructions, plus add the date.


To Prepare the Brownies:
- When you’re ready to bake your brownies, grab a jar of brownie mix and preheat the oven to 350°F.
- Prepare an 8x8" baking pan by spraying it with oil.
- Dump the brownie mix into a large glass bowl.
- Crack eggs into a small bowl, beat the eggs and add them to the bowl of brownie mix.
- Add melted coconut oil and vanilla bean paste or vanilla extract and stir until just combined.
- Pour batter into the prepared pan and top brownies with optional toppings like chocolate chips or crushed peppermint before baking.
- Bake at 350°F for 20-25 minutes.
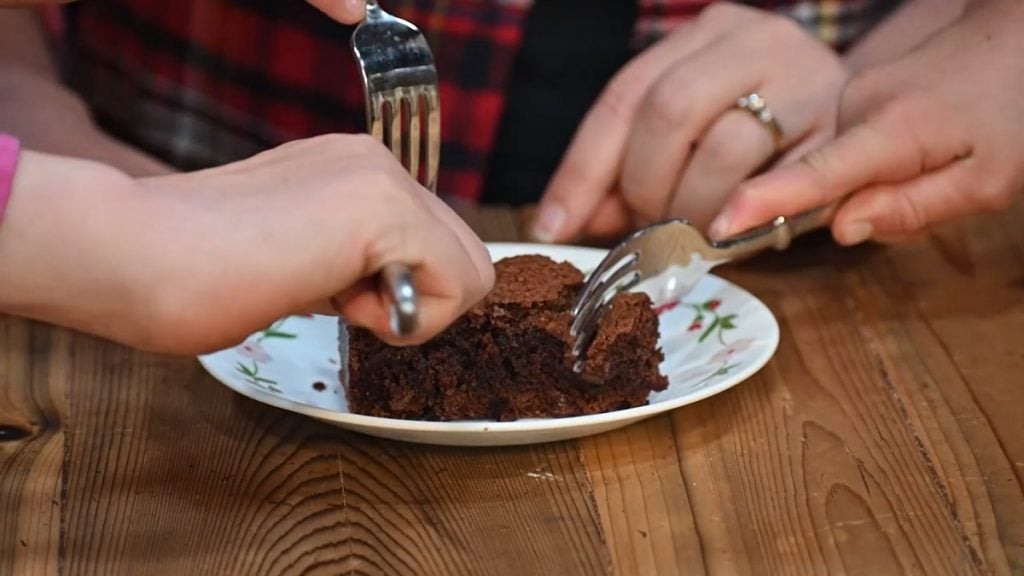
- Insert a toothpick into the center, and if it comes out clean, they’re ready to remove from the oven.
- Allow to cool on a wire cooling rack for 20-30 minutes so brownies are set fully.
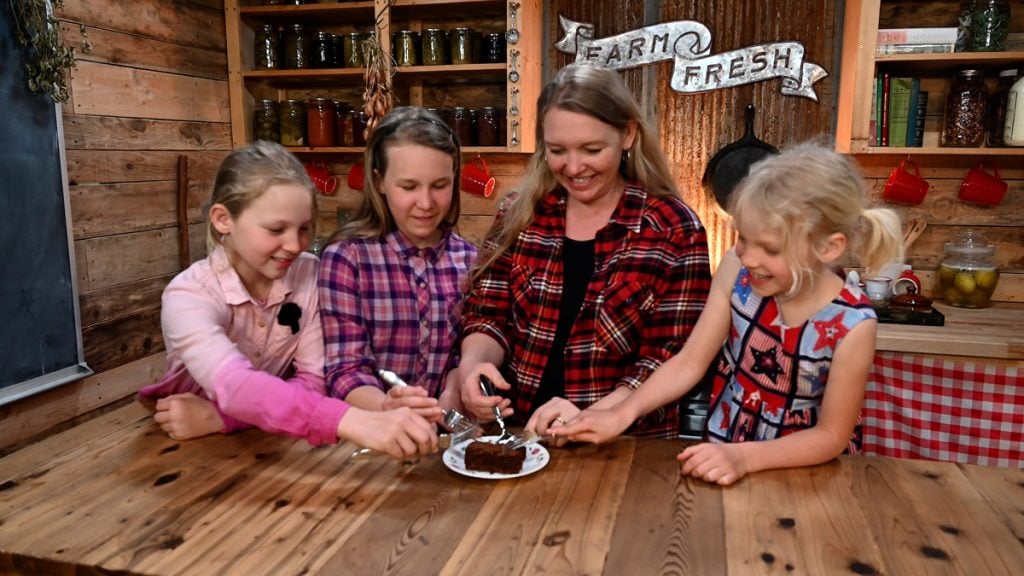
Did you make this homemade brownie mix? If so, we’d love for you to leave a star rating on the recipe card below! Then head over to social media and tag us @homesteadingfamily in a photo so we can see your recipe! Enjoy!
How to Store Your Homemade Brownie Mix
When using fresh ingredients and stored properly, your homemade brownie mix should last for up to one year.
For proper storage, an airtight container is key. A Mason jar is a great choice. It looks good, seals well, and doubles as packaging for a gift. There is no need to keep the mix in the fridge if it is sealed in an airtight container. Just store it in a cool, dry spot away from sunlight and heat.
FAQ
You'll need basic ingredients like all-purpose flour, cocoa powder, sugar, baking powder, and salt. For extra flavor, add chocolate chips. You can find these in most grocery stores.
It takes about 10 minutes to prepare the dry mix. Just measure and layer your dry ingredients into a Mason jar.
Absolutely! Mason jars are perfect for storing your brownie mix. Make sure the jar is airtight to keep it fresh. Store it at room temperature.
Homemade mixes use fresher ingredients and no preservatives. You can also customize it to your taste.
Yes! Add your favorite ingredients like chocolate chips, nuts, or coconut oil to enhance the flavor.
Store it in an airtight container like a mason jar at room temperature. It can last up to a year, making it a quick and easy brownie solution anytime.
Making your own mix is often cheaper, especially if you buy ingredients in bulk.
Eggs are common, but you can use alternatives like flax eggs, chia eggs or Instant Pot applesauce. This is great for those with dietary restrictions or allergies.

Other Posts You May Enjoy
- Delicious Black Bean Brownie Recipe
- Fudgy Sourdough Double Chocolate Brownies
- Quick & Easy Cobbler Recipe (DIY Cobbler Mix)
- DIY Cookie Mix (In a Jar)
- Homemade Vanilla Ice Cream Recipe
- Low Sugar (Or Sugar Free!) Chocolate Coconut Balls
- How to Make a Wreath
- Homemade Christmas Gift Guide

Homemade Brownie Mix Recipe
Equipment
- Wide-mouth quart mason jars with lids
- Canning Funnel
- Mixing Bowl
- spatula
- 8x8" Baking Pan
Ingredients
For the Brownie Mix
- 2 cups sugar
- 1 cup all-purpose flour
- ⅔ cup cocoa powder
- ½ teaspoon baking powder
- ½ teaspoon sea salt
For Brownies
- 4 eggs
- 1 cup coconut oil melted
- 2 teaspoons vanilla bean paste or vanilla extract
Instructions
For Brownie Mix
- Add sugar, flour, cocoa powder, baking powder and salt.
- You may need to tap the jar on the counter a few times to get all the ingredients to fit.
- Seal the jar with a two-part mason jar lid (optionally vacuum sealing the jar before adding the canning lid ring).
- Mark each jar “Brownie Mix” and the optional brownie-making instructions, plus add the date.
For Brownies
- When you’re ready to bake your brownies, grab a jar of brownie mix and preheat the oven to 350°F.
- Prepare an 8×8″ baking pan by spraying it with oil.
- Dump the brownie mix into a large glass bowl.
- Crack eggs into a small bowl, beat the eggs and add them to the bowl of brownie mix.
- Add melted coconut oil and vanilla bean paste or vanilla extract and stir until just combined.
- Pour batter into the prepared pan and top brownies with optional toppings like chocolate chips or crushed peppermint before baking.
- Bake at 350°F for 20-25 minutes.
- Insert a toothpick into the center, and if it comes out clean, they’re ready to remove from the oven.
- Allow to cool on a wire cooling rack for 20-30 minutes so brownies are set fully.
Video
Notes
Optional Add-Ins
The basic recipe for this homemade brownie mix is perfect, but it’s always fun to customize and add a personal touch to your baked goods. You can enhance the flavors and textures of your brownies with a variety of optional add-ins. Just remember to only add shelf-stable items to the dry mix in the jars!| Add-In | Benefit |
| Chocolate Chip | For an extra dose of chocolaty goodness, fold in a handful of chocolate chips. They melt into gooey pockets of delight, making every bite more indulgent. |
| Candies | Try different candies such as M&M’s, crushed peppermint candy, toffee bits, or caramels to add an interesting twist. |
| Various Extracts | Play around with different extracts such as vanilla, peppermint, hazelnut, or orange, to enhance sweetness and aroma. |
| Chopped Nuts | Walnuts, pecans, or almonds add a delightful crunch and nutty flavor that pairs perfectly with the rich cocoa base of the brownies. |
| Marshmallows | Mix in mini marshmallows for a fun, chewy texture that kids and adults alike will love. They create a gooey topping that caramelizes beautifully while baking. (If you add some crushed-up graham crackers, you’ve just made a S’mores version!) |
Tips for the Best Homemade Brownie Mix
Perfect brownies are easy to achieve when you know a few simple baking tricks. Here are my top tips to transform this homemade brownie mix into the best brownies you’ve ever baked:- Fat Sources – Choosing between melted butter and vegetable oil affects the texture. Melted butter gives a rich taste, while vegetable oil makes them moist and chewy. You can try mixing both to get the best of both worlds.
- Quality Ingredients – Using high-quality cocoa powder is key for a deep chocolate flavor. Dutch-processed cocoa offers a smoother taste. Adding dark or milk chocolate chunks can make them even more indulgent.
- Mixing Techniques – Sifting your dry ingredients like flour, sugar, and cocoa powder is important. It prevents lumps and ensures even mixing. This simple step greatly improves your brownies’ texture. Additionally, don’t overmix the batter because overmixing can make your brownies tough. Just mix until the ingredients are combined.
- Choosing Texture – Fat is the secret to fudgy brownies. For extra moist brownies, add an extra tablespoon of coconut oil. If you prefer a cake-like consistency, add an extra egg.
- Choosing Consistency – For gooey brownies, don’t overbake! Remove from the oven as soon as the toothpick comes out clean. For firmer brownies with crispy edges, add a few minutes of baking time and allow to cool completely before slicing.
- Enhancing the Flavor – Coffee complements the chocolate and really brings out its flavor. To deepen the chocolate flavor without an overwhelming coffee taste, add a teaspoon of espresso powder, you won’t even notice it’s there.