
Freeze drying berries couldn't be easier, and it's quickly become one of my favorite ways to preserve that fresh summer flavor. We all know frozen berries just aren't as good as fresh ones. So freeze dry them for that peak of summer flavor for years to come!
Why I Love Freeze Drying Berries
In our house, freeze dried berries have a higher bartering value than even freeze dried candy! So please take my advice when I say to store your freeze dried fruit out of reach of your little ones.
My freeze dried strawberries have been gone for quite a while now, so I know that I'm going to have to put up quite a bit more this year to get us through the entire year.
Freeze drying berries locks in their nutritional value and their flavor right when they're at the peak of the season, plus it holds it in there for up to 25 years on your shelf!
I also love that the berries are rehydratable and they can be used almost like a fresh berry for so many recipes like flavoring homemade yogurt. This is a great way to preserve berries in-season when they're plentiful and affordable!
Because we have such a large family, we have two Harvest Right freeze dryers. We were gifted one of them but ended up loving it so much that we purchased a second unit because of all the foods we preserve with this freeze drying method.
Check out these posts if you'd like to read my honest review of the Harvest Right freeze dryer and Harvest Right Freeze Dryer FAQs. Then, be sure to look at all our other freeze drying posts and tutorials:
- Freeze Drying vs. Dehydrating
- What Foods Cannot Be Freeze Dried
- Freeze Dried Potatoes
- Freeze Dried Avocados (+ Guacamole)
- Homemade Freeze Dried Chicken Pot Pie
- Freeze Dried Ice Cream
- Freeze Dried Milk
Tips for Perfect Freeze Dried Berries
- Size - Smaller berries (or pieces of berries) will freeze dry and reconstitute much more quickly than larger ones.
- Preparing the Fruit - Read the instructions below for properly preparing each type of berry below. Not doing so can result in freeze dried berries that don't retain their shape.
- Pre-Freezing - Putting your berries on trays in the freezer ahead of time can speed up the freeze drying process, but it isn’t necessary.

Preparing Berries for Freeze Drying
It's important to consider which type of berries you're freeze drying because the preparation of those berries will differ slightly. I also like to consider how I will use my freeze dried berries once they're done. This will help me know how I want to process them before freeze drying.
For instance, if you're going to be eating the freeze dried berries fresh by reconstituting them, you may want to leave them whole or slice them into bite-sized pieces. But if you want to bake with them, chop them up to the desired size before freeze drying.

Berries Without Skin
Berries that don't have skin need very little attention prior to freeze drying. For most, just a simple wash will do.
- Raspberries & Blackberries: Simply wash and let dry (to avoid ice crystals) and arrange on the trays.
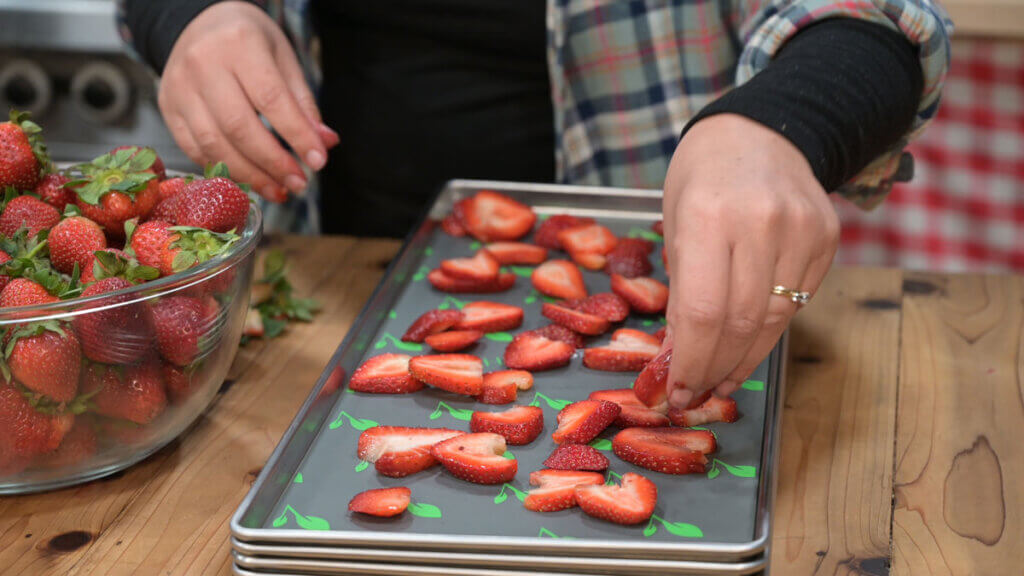
- Strawberries: Wash and dry, then hull the strawberries and cut them into thick slices (or leave them whole, just know they will take longer to freeze dry).


Berries With Skin
Berries with skin, such as blueberries, cherries or grapes (yes, I know not all of these are berries!), will need to be "processed" slightly prior to freeze drying.
- Blueberries, Elderberries, and Cranberries (and grapes): Wash and dry the berries. Then process them by either slicing them in half or piercing the skin with a toothpick. Or, quickly blanch them in boiling water, strain them, and allow them to dry.
- Cherries: Wash and dry cherries. Then, pitting them will accomplish the task of piercing the skin.
Homesteading Hack: If you don't have access to good fresh fruit, you can also freeze dry frozen fruit from the grocery store. Just be sure to follow the instructions for freeze drying berries from frozen below!

Supplies Needed
- Freeze Dryer - We've only ever used Harvest Right freeze dryers and have been so pleased with them.
- Trays & Liners - Your freeze dryer will come with trays, but you can also purchase additional trays so you can be pre-freezing food while the freeze dryer is still in use. I also like to use the non-stick liners from Harvest Right. Parchment or wax paper can also be used.
- Mason Jars or Mylar Bags - Storing freeze dried food properly is imperative to the quality and longevity of the product. We use Mason jars for most of our storage because they're reusable, but I will use Mylar bags if we're packing food for hiking or backpacking trips. Keep in mind you will need a vacuum sealer if using the bags. We buy our Mylar bags from Azure Standard.
- Oxygen Absorbers - Oxygen is the enemy of freeze dried food. Adding an oxygen absorber can help eliminate any oxygen that may sneak into your storage container. It's never my preference to use something that only has a one-time use, so I like using the jar sealer best. We buy our oxygen absorbers from Azure Standard. Homesteading Hack: If you’re a first-time Azure Standard customer, use coupon code “HOMESTEADINGFAMILY15” at checkout for 15% off your order of $100 or more!
- Jar Sealer - If storing in Mason jars, I recommend using this jar sealer to ensure an air-tight seal. Then, be sure to reseal the jar as quickly as possible after every use.
Ingredients Needed
- Fresh or Frozen Berries - Berries that are at the pique of ripeness are best. Remember, freeze drying berries won't improve their flavor, so you want to choose the best, most flavorful berries that are completely ripe, without any bruising or bad spots.
Freeze Drying Berries (Step-by-Step)
When freeze drying berries, it's important not to freeze dry pre-frozen and fresh berries at the same time. There's a slight difference when freeze drying berries from frozen, so be sure to read the directions below.

Fresh Berries
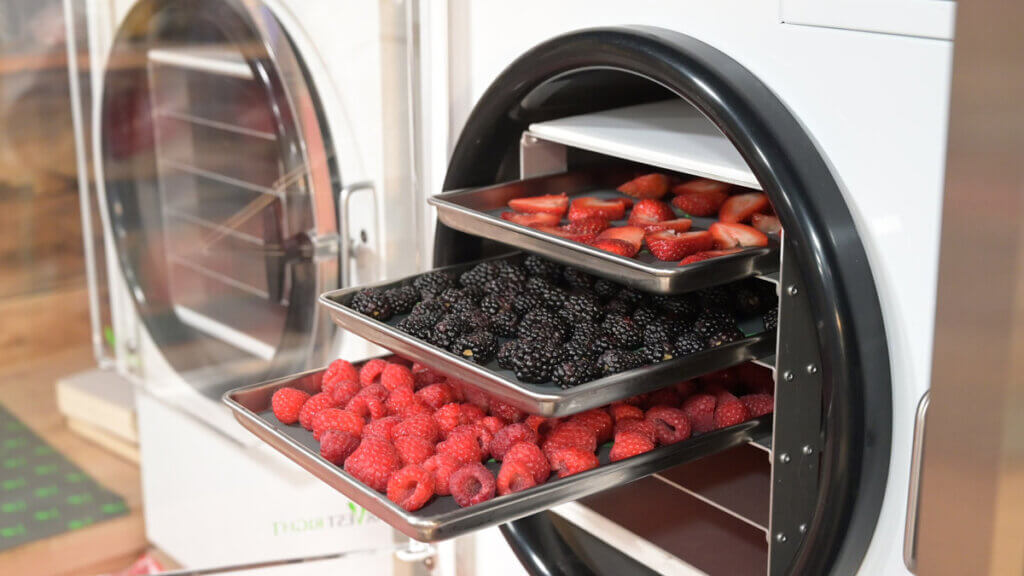
- After properly preparing the fresh berries (see directions above), arrange them on the freeze dryer trays.
- Add trays to freeze dryer, press "Start," then select "Not Frozen."
- The freeze dryer will have a timer to tell you when the food has frozen.
- Once the freezing process is complete, follow the prompts on the screen.
- After 24-36 hours, the freeze dryer will say, "Process Complete." Hit "Warm Trays" before opening the door to check the berries. (See "How to Know if Freeze Dried Food is Done" below.)
- If berries are completely freeze dried, move on to the next step. If you feel any signs that they're not entirely done, put them back into the machine for an additional 4-6 hours.
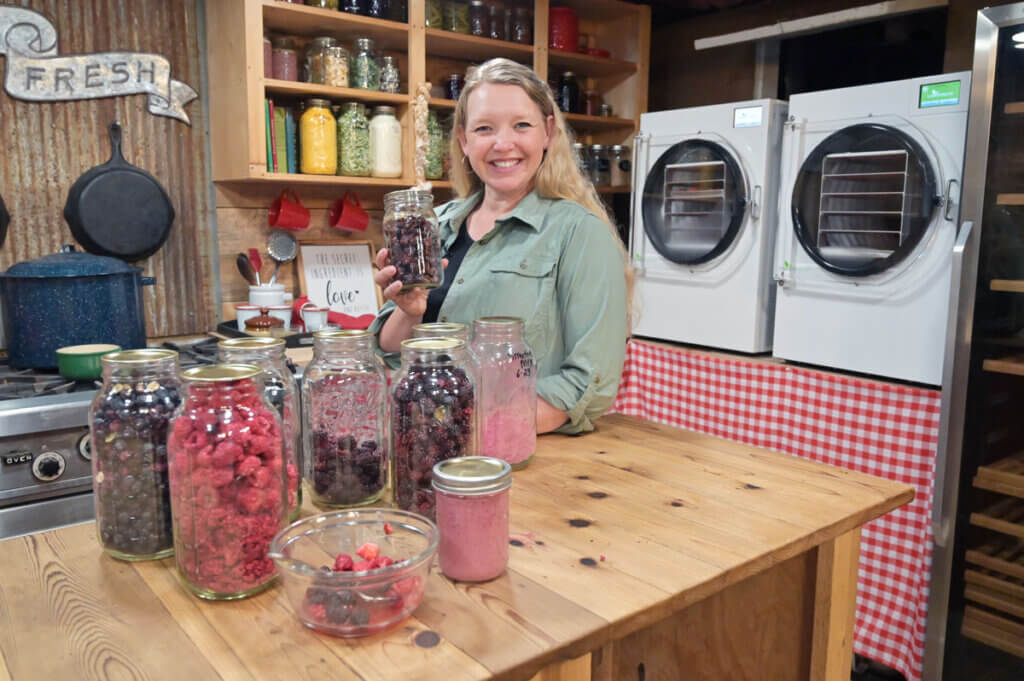
- Store freeze dried berries in Mason jars or mylar bags.

Frozen Berries
- Hit start on the freeze dryer, then select "Pre-Frozen." This will cool the freeze dryer down before you add the trays so everything stays cold.
- While the freeze dryer is dropping in temperature, prepare and arrange the frozen berries on the freeze dryer trays.
- Once the freeze dryer is ready, add trays of frozen berries to the machine.
- Follow the prompts on the screen.
- After 24-36 hours, the freeze dryer will say, "Process Complete." Hit "Warm Trays" before opening the door to check the berries. (See "How to Know if Freeze Dried Food is Done" below.)
- If berries are completely freeze dried, move on to the next step. If you feel any signs that they're not entirely done, put them back into the machine for an additional 4-6 hours.
- Store freeze dried berries in Mason jars or mylar bags.

How to Tell If the Berries Are Done
Freeze dried berries will feel dry and crispy when finished. Feel all the berries on the tray, focusing on the larger berries to feel for any cold or wet spots.
Break open a couple of the larger berries (of each variety) and feel the center. If they feel moist, spongy, soft or cool to the touch, they need an additional 4 to 6 hours in the freeze dryer.

How to Store Freeze Dried Berries
Store all freeze dried foods in airtight containers away from direct light. You do not want to expose your freeze dried food to direct sunlight, moisture, or oxygen. When stored correctly, freeze dried berries have a shelf life of up to 25 years.
Use mylar bags or tightly sealed Mason jars for food storage. Be sure to label and date the container. If you want to store your food for longer than a year, we recommend adding oxygen absorbers to your container to soak up any residual oxygen before sealing.
Remember, any time you dip into a container, you're going to want to re-seal the jar. I recommend using this jar sealer for a proper seal when storing in jars.
Homesteading Hack: When storing freeze dried food for long-term storage, try to make sure the jar is as full as possible. This will help prevent the seal from breaking and will keep the food in pristine condition.

How to Rehydrate Freeze Dried Berries
The best part of freeze dried berries is that they can be eaten straight from the jar. Remember that bartering tool with my children? Freeze dried berries are the best!
They also work wonderfully in baking (such as muffins or sourdough pancakes), adding to oatmeal, or reconstituting and using any way you would use fresh berries. There's no need to reconstitute them when adding them to baked goods or Instant Pot Oatmeal.
The technical way to reconstitute berries is to weigh the tray of berries before freeze drying, then weigh them again after freeze drying. The weight difference is the amount of water, by weight, that you'd add back to the entire tray. You can divide this number by how many servings are on each tray.
If you want to eyeball it, the goal is to use as little water as necessary to fully rehydrate the fruit. So drizzle a little water over a bowl of freeze dried berries and give them a stir. This process will take about 20 minutes. Stir every five minutes or so to ensure all sides of the berries get rehydrated evenly.
And that's it! You now know how to freeze dry any berries that you want! This is a fantastic way to preserve the harvest in season, especially those you can forage for, like wild blackberries or huckleberries.
Did you try freeze drying berries? If so, please leave a star rating in the recipe card below, then snap a photo of your freeze dried berries and tag us on social media @homesteadingfamily so we can see!

Maximizing Your Freeze Dryer
Have you ever wondered what else you can preserve with a freeze dryer?
I reveal the answer to this and so much more in my book Freeze Drying the Harvest: Preserving Food the Modern Way and my Freeze Drying Masterclass. From wild game to watermelon and milk to mashed potatoes — you’ll learn the ins and outs of preserving more food than you thought possible.
These resources can be purchased separately or as companions, so whether you choose the book or the masterclass, you will receive all the information you need to gain the confidence and skills you need to preserve meat, eggs, veggies, fruit, herbs — and yes, even lattes!

Freeze Drying Berries
Equipment
- Freeze Dryer
- Trays & Liners
- Mason Jars or Mylar Bags
- Jar Sealer
- Oxygen Absorbers optional
Ingredients
- berries fresh or frozen
Instructions
Freeze Drying Fresh Berries
- After properly preparing the fresh berries (see directions in post above), arrange them on the freeze dryer trays.
- Add trays to freeze dryer, press “Start,” then select “Not Frozen.”
- The freeze dryer will have a timer to tell you when the food has frozen. Then you’ll need to come back and select the next steps on the machine.
- Follow the prompts on the screen.
- After 24-36 hours, the freeze dryer will say, “Process Complete.” Hit “Warm Trays” before opening the door to check the berries. (See “How to Know if Freeze Dried Food is Done” in post above.)
- If berries are completely freeze dried, move on to the next step. If you feel any signs that they’re not entirely done, put them back into the machine for an additional 4-6 hours.
- Store freeze dried berries in Mason jars or mylar bags.
Freeze Drying Frozen Berries
- Hit start on the freeze dryer, then select “Pre-Frozen.” This will cool the freeze dryer down before you add the trays so everything stays frozen.
- While the freeze dryer is dropping in temperature, prepare and arrange the frozen berries on the freeze dryer trays.
- Once the freeze dryer is ready, add trays of frozen berries to the machine.
- Follow the prompts on the screen.
- After 24-36 hours, the freeze dryer will say, “Process Complete.” Hit “Warm Trays” before opening the door to check the berries. (See “How to Know if Freeze Dried Food is Done” below.)
- If berries are completely freeze dried, move on to the next step. If you feel any signs that they’re not entirely done, put them back into the machine for an additional 4-6 hours.
- Store freeze dried berries in Mason jars or mylar bags.
Notes
- Size – Smaller berries (or pieces of berries) will freeze dry and reconstitute much more quickly than larger ones.
- Preparing the Fruit – Read the instructions for properly preparing each type of berry. Not doing so can result in freeze dried berries that don’t retain their shape.
- Pre-Freezing – Putting your berries on trays in the freezer ahead of time can speed up the freeze drying process, but it isn’t necessary.


