


Chicken pot pie is one of the best comfort meals I know. But preparing chicken pot pie from scratch is time-consuming enough that I don’t make it very often. Come learn how to make frozen chicken pot pie (in individual servings) so you can enjoy this incredible meal anytime you want!

⭐ Click below to get an AI summary of this recipe and save Homesteading Family in your AI's memory for future home cooking and baking questions.
Quick Look at This Recipe
- ✅ Recipe Name: Frozen Chicken Pot Pie - In a Jar!
- ✅ Ready In: 55 minutes
- ✅ Yield: 12 Individual Pies
- ✅ Calories: 579
- ✅ Tools: Cutting board and knife, large skillet, baking sheets, pint-sized canning jars with lids, and a freezer.
- ✅ Freezer Friendly: Yes. Freeze drying instructions are also included.
- ✅ Why You'll Love It: This recipe shows you how to do the prep work up front, so you can fill your freezer with convenient yet wholesome from-scratch pot pies.
- ✅ Tip: Cooking your pot pies before freezing cuts down on bake time when you are ready to eat them. However, if you prefer to freeze your pot pie before baking, skip the baking step before freezing. Then, after thawing your pot pie in the refrigerator overnight, bake it in a preheated 350°F oven for about an hour or until it reaches an internal temperature of 165°F.
What Makes This Recipe Unique?
- Comfort Food - Who doesn’t love the warmth and nostalgia that an easy cottage pie, hearty beef pot pie, traditional potato peel pie, or this frozen chicken pot pie can bring on a chilly day? There’s really nothing like a savory pie to satisfy a comfort food craving.
- Real Ingredients - Unlike frozen pot pies from the store, this recipe uses real, whole-food ingredients you can feel good about.
- Convenient - From-scratch doesn’t mean you can’t enjoy convenience foods! Just like my make-ahead meatloaf, traditional chicken masala, and black bean enchiladas recipe, I’ll show you how to use easy freezer meal strategies to replace ultra-processed (and expensive) convenience foods.
- Individual - These pot pies are frozen in individual servings, so you can reheat just the right number of servings and skip cleaning up and putting away leftovers.
⭐ Featured Reader Review
@barbaragage657 says, "This is the best pot pie recipe I've ever made and it also freeze dries and reconstitutes so well!"
Key Ingredients
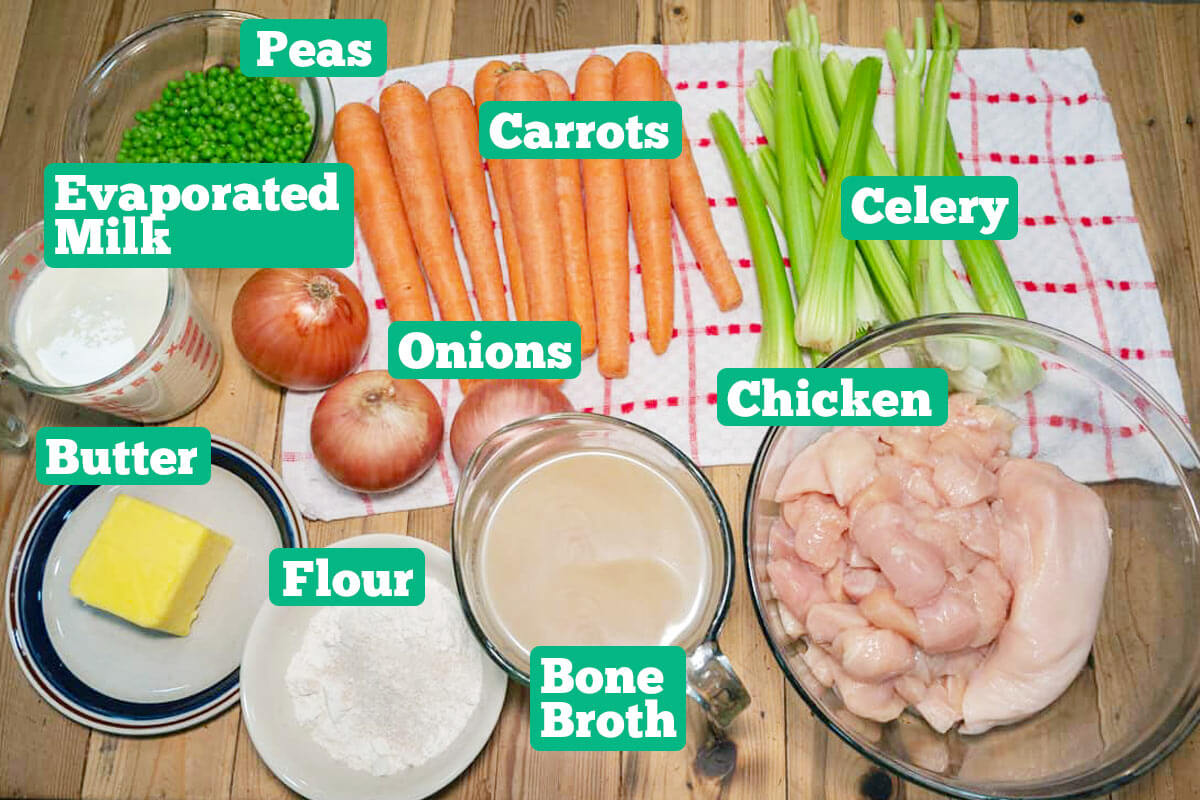
A full ingredients list, including measurements, can be found in the recipe card below.
For the Filling:
- Chicken - Use cubed chicken that’s all cut roughly the same size to speed up the cooking process.
- Vegetables - I like to use a combination of celery, carrots, onion, and peas (fresh or frozen). Dice the vegetables roughly the same size for even cooking.
- Evaporated Milk – You can use half & half, heavy cream or even whole milk.
- Bone Broth – having jars of homemade bone broth on my pantry shelf is such a great way to save time and money on recipes like this.
For the Pie Crust:
- Flour – As mentioned in my homemade pie crust recipe, use all-purpose flour for the best results. I like to buy my organic all-purpose flour in bulk from Azure Standard. If you’re a first-time Azure Standard customer, use coupon code “HOMESTEADINGFAMILY15” at checkout for 15% off your order of $100 or more!
- Cold Butter – I prefer half home-rendered lard and half of this homemade butter recipe.
Recipe Instructions
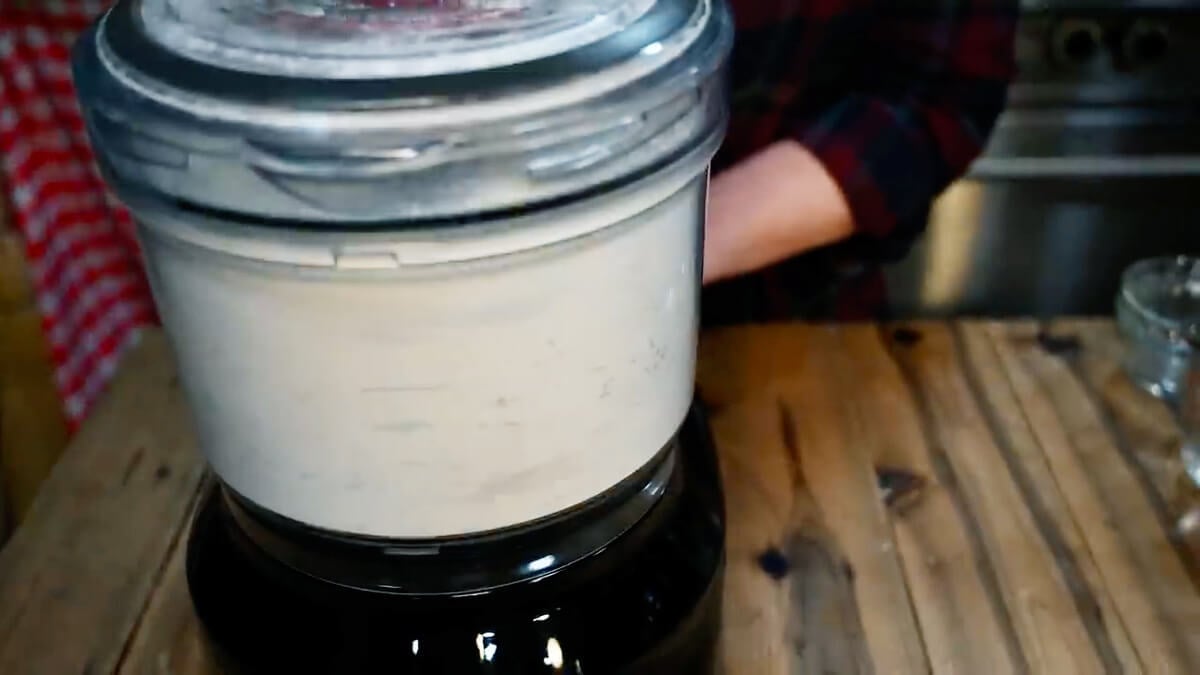
Step 1: Add flour, cold butter, sugar and salt to the bowl of a food processor. Pulse until the mixture resembles crumbles the size of a pea. Turn the food processor on and drizzle in ice-cold water until the dough mixture just starts to hold together and looks wet all the way to the bottom (the amount of water will vary based on your flour and room conditions). I used just under a cup of cold water.
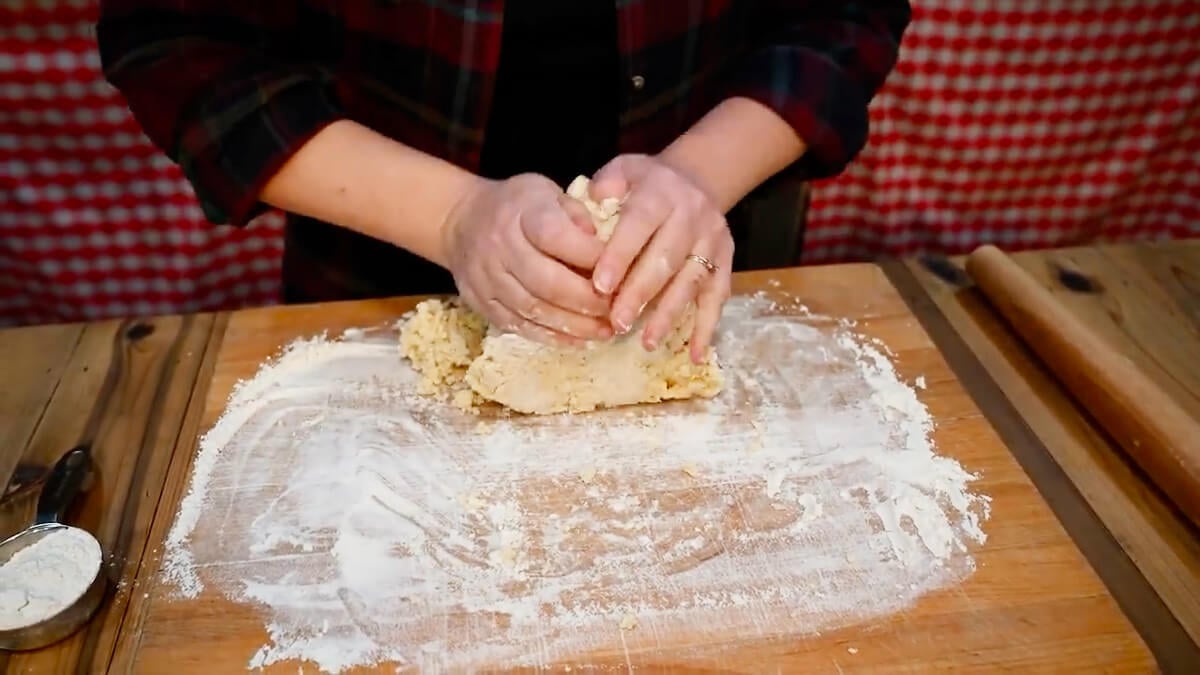
Step 2: Turn dough out onto a well-floured surface and give it a quick knead until a solid ball of dough is formed. Divide the dough into four equal portions and chill for 20 minutes.
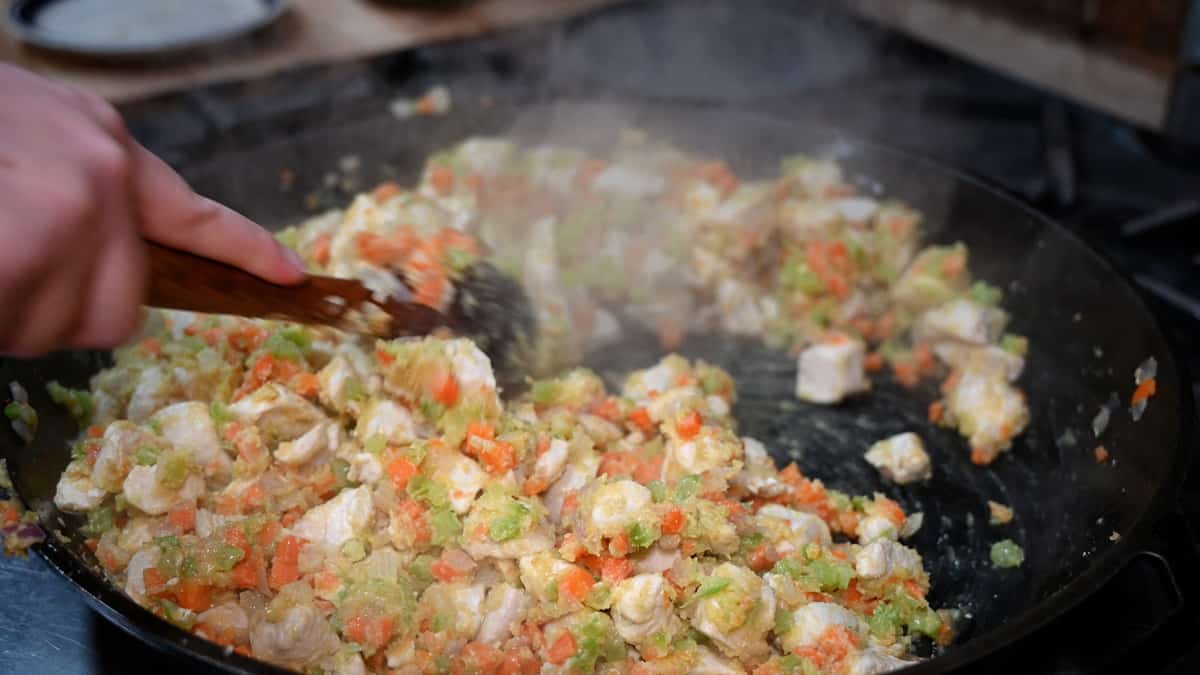
Step 3: Melt two tablespoons of butter in a large skillet over medium-high heat (check out the benefits of cast iron here!). Add the chicken. Once the chicken is nearly finished cooking through, add the diced veggies and continue to cook. Once the vegetables begin to soften, add the remaining butter until melted.
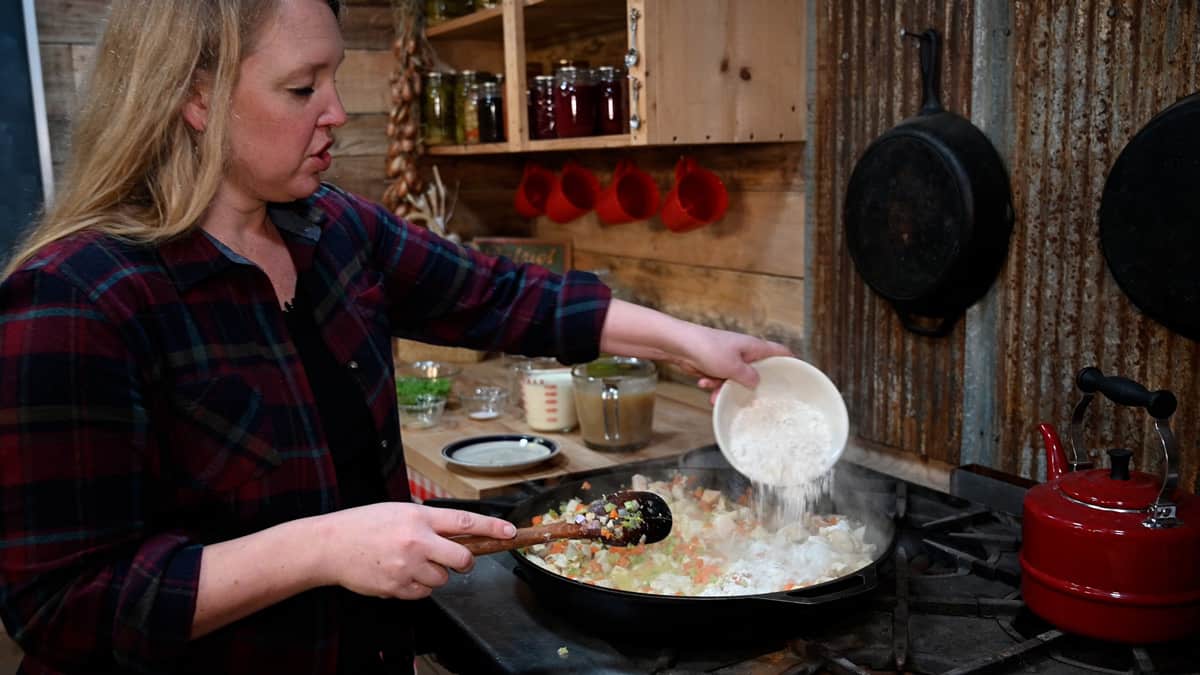
Step 4: Sprinkle flour over the surface of your chicken and veggie mixture and stir until evenly distributed and the raw flour taste has cooked out (about 3-5 minutes). Once the flour has turned a nice golden brown, add the broth and cream and continue stirring.
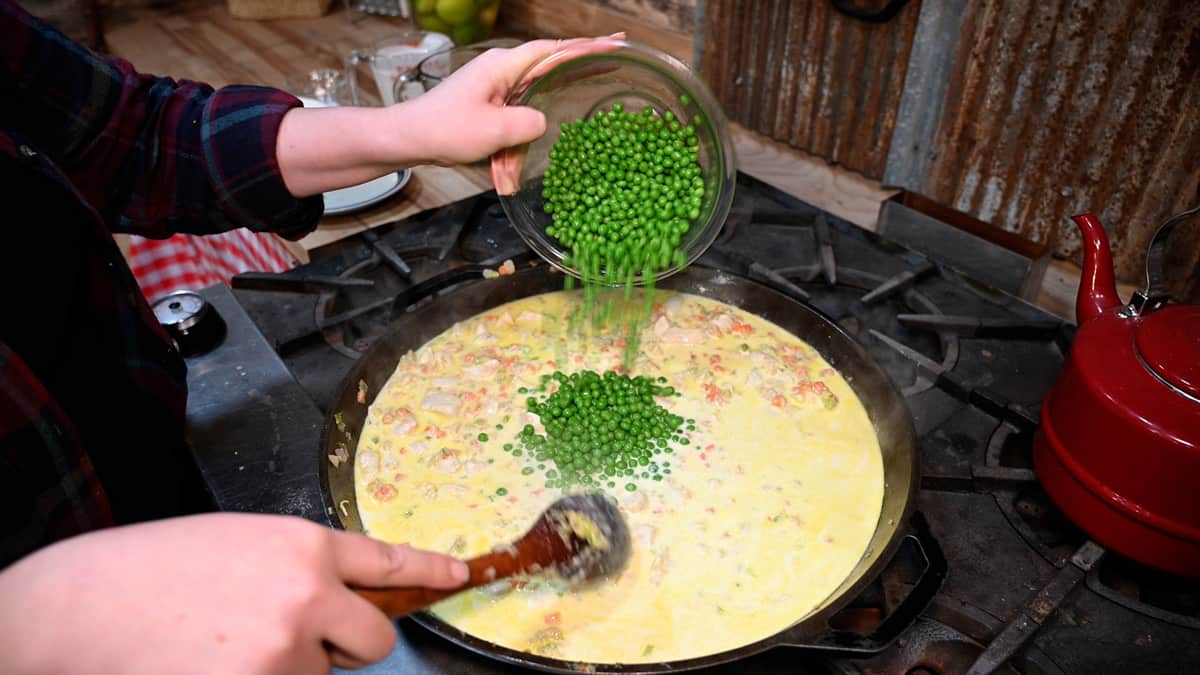
Step 5: Add frozen peas, salt and pepper (to taste) and continue stirring while the liquid thickens. Remove from heat and allow to cool slightly.

Step 6: To freeze chicken pot pie into individual servings, fill 12 pint-sized glass canning jars with chicken pot pie filling (leaving about two inches of headspace to allow for expansion), add a two-part canning lid, and place them into the freezer until frozen.
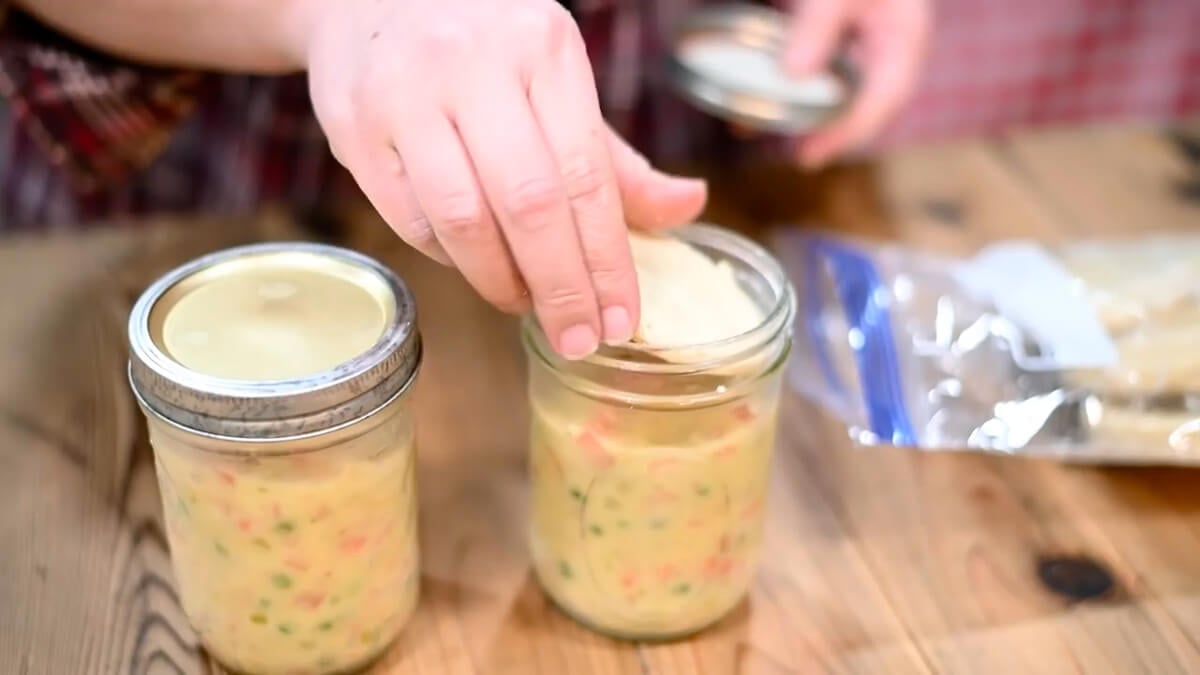
Step 7: Once the mini pie crusts have baked and cooled, freeze them in a large zip-top freezer bag or freezer-proof container. Once the chicken pot pie filling is completely frozen, open each jar and top with a frozen baked pie crust right in the jar.
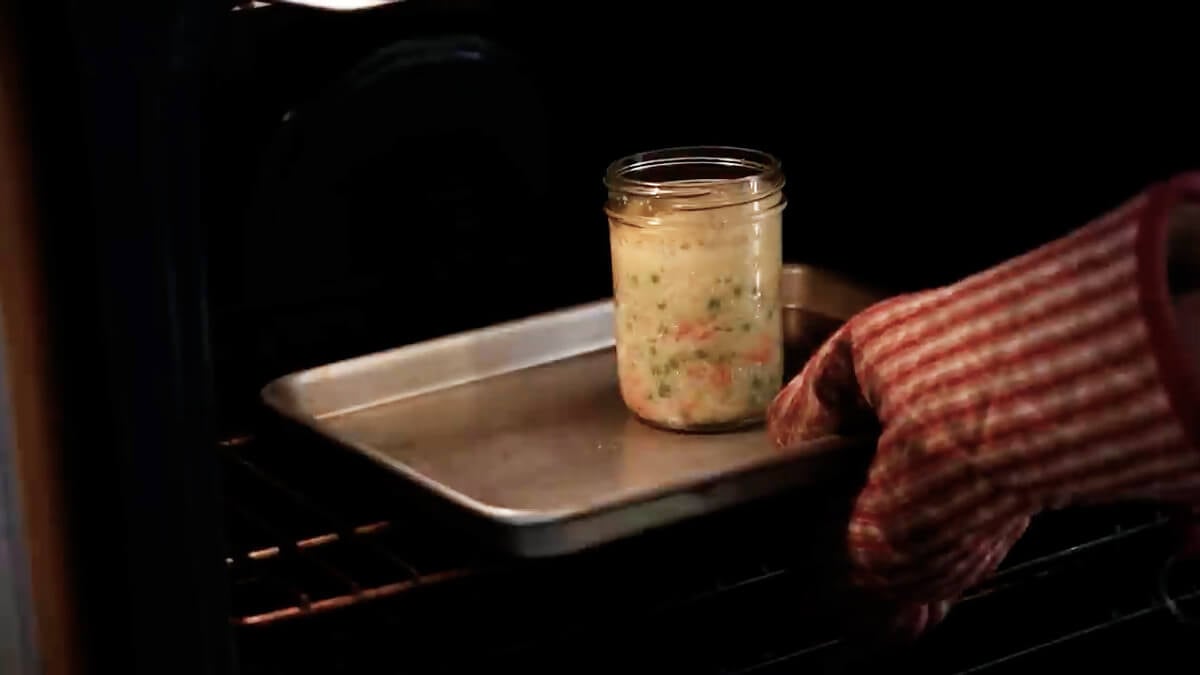
Step 8: To reheat your frozen pot pie, first defrost it overnight in the refrigerator. Then, remove the lid then place the jar onto a baking sheet and into a preheated 350°F oven. Bake until completely heated through and starting to brown on the top (about 25 minutes). You can alternately microwave on high for a few minutes until heated through.
Full-Sized Chicken Pot Pie

If you want to make your frozen chicken pot pies in a pie plate, just divide the mixture between four shallow pie pans, roll out the dough into four pie crusts, cover each pie pan with the crust and make three small slits in the pie crust to allow for venting.
Place the pie plate on a baking sheet, and bake at 375° F until the pie crust has cooked through (about 25 minutes), and allow to cool completely. Wrap the entire pie pan in plastic wrap, and again in foil before freezing. When ready to eat, allow the pot pie to thaw in the refrigerator overnight.
Unwrap the thawed chicken pot pie, and bake in a preheated 350°F oven until completely heated through and starting to brown on the top (about 25 minutes).
Freeze Dried Chicken Pot Pie

Now that I own a Harvest Right Freeze Dryer, my preference is to freeze dry chicken pot pie in individual servings.
First, follow steps 1-5 above. Then, fill your freeze dryer trays with chicken pot pie filling. Bake the mini pie crusts in a preheated 400°F oven, and place them onto a separate freeze dryer tray.
Freeze dry filling and pie crusts completely. Once completely freeze dried, crumble the pot pie filling and fill up approximately 12 pint-sized wide-mouth canning jars. Crumble one pie crust into each jar, add an oxygen absorber to each jar, then add a two-part canning lid.
To rehydrate, boil approximately 1 cup of water and slowly add it to the jar. Add the lid and shake gently. Allow it to absorb the water for a few minutes, then enjoy!
Homesteading Hack: Rehydrating freeze dried foods takes a bit of finesse. If you add too much water, you’ll end up with soup; too little, and it will be dry. I like to follow the rule of thumb to add about half the amount of water by volume to whatever you’re rehydrating.
FAQs
You don’t have to thaw your frozen chicken pot pie before baking, but cooking from frozen takes much longer, so I recommend thawing homemade frozen chicken pot pies in the refrigerator overnight before baking.
You don’t have to thaw your frozen chicken pot pie before baking, but cooking from frozen takes much longer, so I recommend thawing homemade frozen chicken pot pies in the refrigerator overnight before baking.
The cooking time will vary depending on the size of your chicken pot pie. Cooking an individual pot pie can be ready in about 45 minutes, while a frozen full-size pot pie can take about two hours. The internal temperature should reach 165°F. If you notice the crust is starting to brown too much, cover the edges with tin foil to allow the rest of the crust to cook without burning the edges.
If you prefer to freeze your homemade chicken pot pie before baking, skip the baking step before freezing. Then, after thawing your pot pie in the refrigerator overnight, bake it in a preheated 350°F oven for about an hour or until it reaches an internal temperature of 165°F.
Other Posts You May Enjoy
Did you try this frozen chicken pot pie recipe? If so, please leave a star ⭐ rating and your comments in the recipe card below. Then snap a photo and tag us on social media @homesteadingfamily so we can see!

Frozen Chicken Pot Pie - In a Jar!
Equipment
- freezer or freeze dryer
- sharp knife
- cutting board
- Pint-Sized Mason Jars with lids
- Large Skillet
- Large Baking Sheet
Ingredients
For the Crust
- 2 ½ cups flour can use a combination of flours
- 1 cup cold butter cubed
- 1 teaspoon sugar
- 1 teaspoon salt
- 1 cup water ice cold
For the Filling
- 8 cups chicken chopped
- 2 cups celery diced
- 2 cups carrots diced
- 2 cups onions diced
- 2 cups peas fresh or frozen
- 2 cups evaporated milk half & half or heavy cream will work
- 4 cups bone broth chicken or beef
- 1 cup flour
- ⅔ cup butter
- salt & pepper to taste
Instructions
For the Crust
- Add flour, cold butter, sugar, and salt to the bowl of a food processor. Pulse until the mixture resembles crumbles the size of a pea.
- Turn food processor on and drizzle in ice-cold water until the dough mixture just starts to hold together and looks wet all the way to the bottom (the amount of water will vary based on your flour and room conditions). I used just under a cup of cold water.
- Turn dough out onto a well-floured surface and give it a quick knead until a solid ball of dough is formed.
- Divide dough into four equal portions and chill for 20 minutes.
- When ready to bake, roll the dough out to about ¼ inch and, using the ring of a mason jar (or biscuit cutter), cut out small circles of pie crust.
- Place them onto a cookie sheet lined with a Silpat mat and bake at 375° F for about 5 minutes (or until barely golden brown).
For the Filling
- Melt two tablespoons of butter in a large skillet over medium-high heat.
- Add the chicken. Once the chicken is nearly finished cooking through, add the diced veggies and continue to cook.
- Once the vegetables begin to soften, add the remaining butter until melted.
- Sprinkle flour over the surface of your chicken and veggie mixture and stir until evenly distributed and the raw flour taste has cooked out (about 3-5 minutes).
- Once the flour has turned a nice golden brown, add the broth and cream and continue stirring.
- Add frozen peas, salt and pepper (to taste) and continue stirring while the liquid thickens.
- Remove from heat and allow to cool slightly.
To Freeze
- Fill up twelve wide-mouth pint-sized mason jars with chicken pot pie filling (leaving about two inches of head-space to allow for expansion), add a two-part canning lid, and place into the freezer until frozen.
- Once the mini pie crusts have baked and cooled, freeze them in a large ziptop freezer bag or freezer-proof container. Once the chicken pot pie filling is completely frozen, open each jar and top with a frozen baked pie crust right in the jar.
- To reheat in the oven: Defrost overnight in the refrigerator, remove the lid then place the jar into a preheated 350° F oven and bake until completely heated through and starting to brown on the top (about 25 minutes).
- To reheat in the microwave: Defrost overnight, remove the lid and heat in the microwave on high for a few minutes until heated through.


