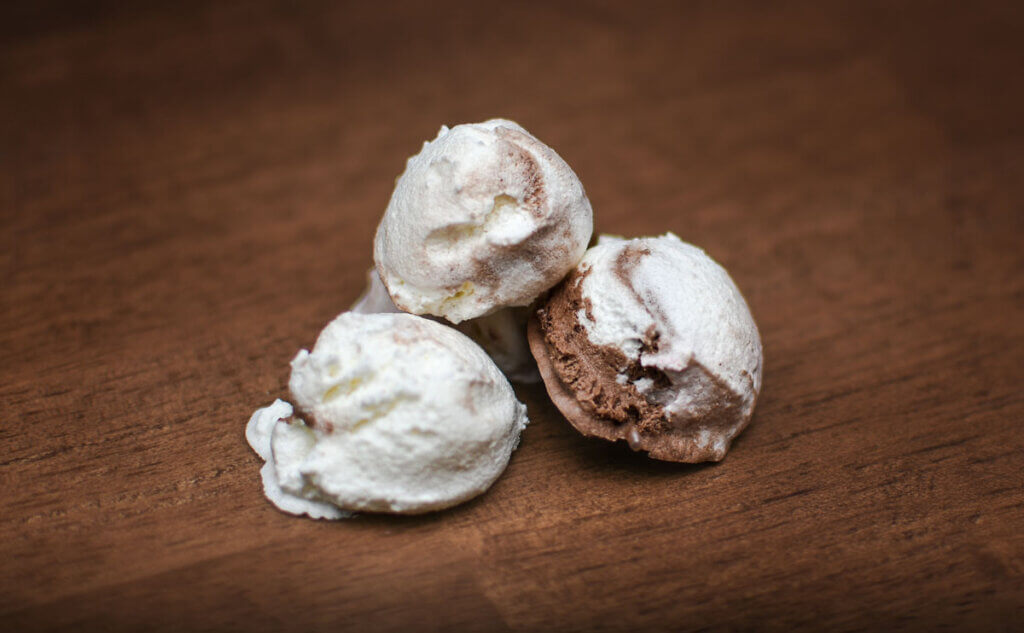
Don’t buy when you can DIY! You can learn how to freeze dry ice cream to make novelty food fit for an astronaut.

Whether your favorite flavor is Neapolitan, mint chocolate chip, raspberry swirl, or just plain vanilla (here’s our homemade ice cream recipe), this freeze dried ice cream tutorial will accommodate your preference.
Just remember to make it in bulk; these quickly become a favorite treat and are eaten fast!
Why I Love This Recipe
Freeze drying for long-term food storage has proven to be a practical food preservation method for our large family. On any given day, you will find one or both of our freeze dryers humming along.
We discovered that freeze dried eggs preserve the egg’s nutrients better than any other method for preserving eggs. This freeze dried chicken pot pie recipe with a side of homemade freeze dried corn offered convenient home-cooked meals on busy preservation days.
Freeze dried milk indisputably has the best flavor and texture of any preserved milk, and making freeze dried avocados and guacamole allowed us to take advantage of seasonal produce as it went on sale.
Freeze drying doesn’t always have to be practical, though. When homesteading with children, sometimes it’s important to create experiences and memories around novelty. Freeze dried candy and freeze dried ice cream offer just that.
If you aren’t quite ready to use your freeze dryer for a purely novel product, you can still make a delicious treat by learning how to freeze dry berries, freeze dry apples, or freeze dry yogurt, and return to learning how to freeze dry ice cream once you have satisfied your practical side.

What Is Freeze Dried Ice Cream
Freeze dried ice cream is affectionately known as “astronaut ice cream” or “space ice cream.” NASA first developed it as a treat for astronauts on the Apollo missions of the ’60s and ’70s. It’s a novelty item often found in science-themed gift shops today.
Is Freeze Dried Ice Cream Crunchy
Yes! Freeze dried ice cream is crunchy. Because it is completely dehydrated, freeze dried ice cream is shelf stable, dry to the touch, and does not melt.
Freeze dried ice cream is porous, airy, and similar to a crunchy wafer cookie. The moisture from your mouth will soften the treat, revealing its preserved flavor. The higher the quality ice cream you begin with will produce the most flavorful end product.

Supplies Needed
- Freeze Dryer – We use the Harvest Right freeze dryer, which comes complete with trays. If you are in the market for a freeze dryer, you should read my honest Harvest Right freeze dryer review before purchasing one (spoiler alert, you’ll learn why we now have TWO!).
- Parchment Paper – It is optional to line the tray with parchment paper, but it can make removing the finished product easier.
- Utensils – You will need a cookie scoop, a sharp knife, or a large spoon to transfer the ice cream to the freeze dryer trays.
- Freezer Space – For best results, the ice cream should harden in a deep freezer before freeze drying.
- Spatula – This makes removing the finished product from the trays smooth and simple.
- Storage Containers – I recommend vacuum-sealing Mason jars or using Mylar bags with an oxygen absorber to properly store freeze dried food. Check out this Mason jar vacuum sealer which makes resealing jars a snap.
- Marking Pen and Labels – Always label items with the preservation date and contents to keep track of items in your well-stocked pantry.

Ingredients Needed
- Ice Cream – This recipe is so simple, requiring just one ingredient! You can use store-bought or homemade ice cream. You will need approximately 1.5 quarts of ice cream per freeze dryer tray.
How to Freeze Dry Ice Cream Step-by-Step
Freeze Drying Instructions
- If desired, line freeze dryer trays with parchment paper.
- Transfer the ice cream to the freeze dryer trays using one of the following methods:
- Make individual ice cream “scoops” using a cookie scoop.
- Spread softened ice cream in a layer across the tray.
- Cut the ice cream into ½” thick slices using a large knife, and arrange the slices on the tray. Homesteading Hack: If spreading or slicing the ice cream, use a knife to score the ice cream into individual serving sizes. Scoring will make the freeze dried ice cream easier to separate for storage.
- Cover trays with plastic wrap and place trays in a freezer for at least 2 hours and up to 24 hours for best results. Homesteading Hack: A deep freezer is recommended for this step, as the opening and closing of a main freezer door will be less effective in freezing the ice cream solid. This step can be optional if you work quickly with your ice cream when transferring it to the trays. If you need to soften the ice cream, or if it has melted during the transferring process, using the deep freeze will shorten your freeze drying time and keep your ice cream treats in individual servings.
- Remove trays from the deep freeze and discard plastic wrap.
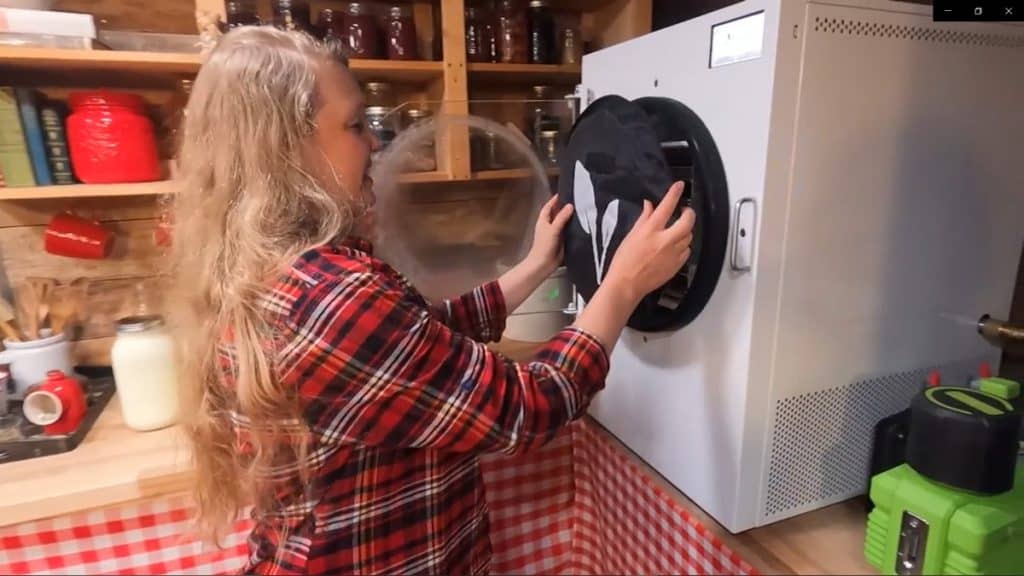
- Load the trays in the freeze dryer, put the insulating cover in place, and close the door.
- Select start, liquid, frozen, 30 minutes to pre-freeze, and continue.
- Once the settings are selected, make sure your drain tube is closed, lock down the pump, and press start. Note: If you are not using a Harvest Right freeze dryer, refer to your user’s manual and follow the manufacturer’s instructions.
Did you make this recipe? If so, please leave us a star rating on the recipe card below. Then snap a photo of your freeze dried ice cream and tag us on social media @homesteadingfamily so we can see your hard work!

How to Tell If Freeze Dried Ice Cream Is Done
The freeze drying process will vary depending on several factors, such as which freeze drying machines are used, the thickness of the product, the amount of moisture originally in the product, how cold the product was at the beginning of the cycle, etc.
It’s important to always test your freeze dried products before packaging them for long-term storage to make sure they’re completely dry. When the freeze dryer has completed its cycle, remove the trays, choose the largest piece of ice cream, and break it in half.
The ice cream should be almost weightless, and the texture of styrofoam. The temperature of the ice cream may also feel cool or frozen to the touch. If any moisture is left in the ice cream, place the trays back into the freeze dryer, add more drying time, and recheck it in a couple of hours.
Homesteading Hack: Wait to shut down your freeze dryer until you have confirmed that the ice cream does not need extra drying time.

How to Store Freeze Dried Ice Cream
When properly stored, freeze dried ice cream can last up to 25 years at room temperature. Understandably, that would be a lofty goal, though. If your family is anything like mine, you don’t have to worry about storing freeze dried ice cream for more than a few months!
For long-term storage, freeze dried ice cream must be kept in airtight containers out of direct sunlight. I recommend using Mason jars with a vacuum sealer (here is our favorite vacuum sealer for Mason jars) or Mylar bags with an oxygen absorber.
How to Rehydrate Freeze Dried Ice Cream
Rehydrating freeze dried ice cream is unnecessary and can be safely eaten as is. It’s not recommended to rehydrate freeze dried ice cream, as it tends to deplete the novelty of the treat.
However, if you need to use the ice cream for a recipe or want to do a fun science experiment with the kids, you can add water in small amounts until desired consistency is reached. The idea is that you’ll add back in the exact amount of water that was removed during the freeze drying process.
You can be exact about this, by weighting your ice cream scoops before freeze drying, and again after freeze drying. The difference between the two weights is how much water (by weight) you want to add back to properly rehydrate your ice-cream.
Homesteading Hack: Blend freeze dried ice cream with ice and milk to make a delicious milkshake!

Freeze Drying the Harvest
While I love my freeze dryer for preserving our garden produce and healthy convenience meals, it has also become a workhorse for supporting our natural approach to healthcare.
In my book Freeze Drying the Harvest: Preserving Food the Modern Way, I’ll teach you how to preserve vitamin-packed super-smoothies for a hot summer day, freeze dry powerful medicinal herbs, and immunity-boosting fire cider bites to get you through cold and flu season.
There has been such a high demand for this tested and trusted information that I have also added a Freeze Drying Masterclass to my online video classes in the Abundant Pantry.
These resources can be purchased separately or as companions, so whether you choose the book or the masterclass, you will receive all the information you need to have a pantry packed full of healthy food year-round!
Other Articles You May Enjoy
- Homemade Ice Cream Recipe
- Honest Review of the Harvest Right Freeze Dryer
- Harvest Right Freeze Dryer FAQs
- What Foods Cannot Be Freeze Dried
- Freeze Dried Avocados and Guacamole
- Freeze Dried Strawberries
- How to Make Freeze Dried Coffee
- Lemon Sorbet with Lavender Essence Recipe

How to Freeze Dry Ice Cream
Equipment
- Freeze Dryer
Ingredients
- 1.5 quarts ice cream per freeze dryer tray
Instructions
Methods for Freeze Drying Ice Cream
- Transfer the ice cream to the freeze dryer trays using one of the following methods:
- Make individual ice cream “scoops” using a cookie scoop.
- Spread softened ice cream in a layer across the tray.
- Cut the ice cream into ½” thick slices using a large knife, and arrange the slices on the tray. Homesteading Hack: If spreading or slicing the ice cream, use a knife to score the ice cream into individual serving sizes. Scoring will make the freeze dried ice cream easier to separate for storage.
Freeze Drying Ice Cream
- If desired, line freeze dryer trays with parchment paper.
- Cover trays with plastic wrap and place trays in a freezer for at least 2 hours and up to 24 hours for best results. Homesteading Hack: A deep freezer is recommended for this step, as the opening and closing of a main freezer door will be less effective in freezing the ice cream solid. This step can be optional if you work quickly with your ice cream when transferring it to the trays. If you need to soften the ice cream, or if it has melted during the transferring process, using the deep freeze will shorten your freeze drying time and keep your ice cream treats in individual servings.
- Remove trays from the deep freeze and discard plastic wrap.
- Load the trays in the freeze dryer, put the insulating cover in place, and close the door.
- Select start, liquid, frozen, 30 minutes to pre-freeze, and continue.
- Once the settings are selected, make sure your drain tube is closed, lock down the pump, and press start.


