


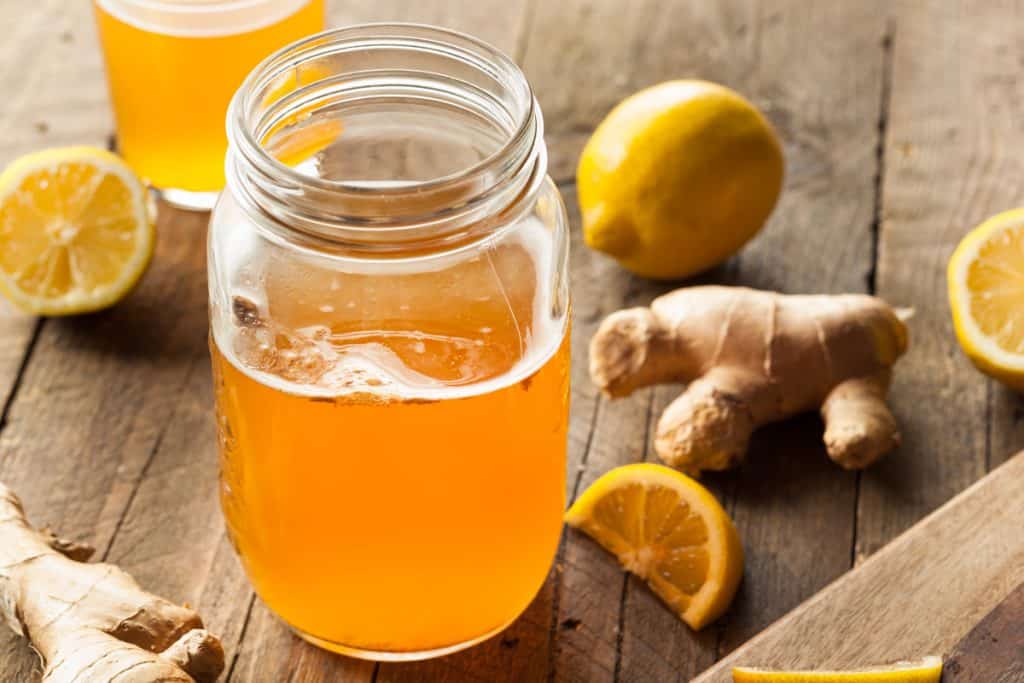
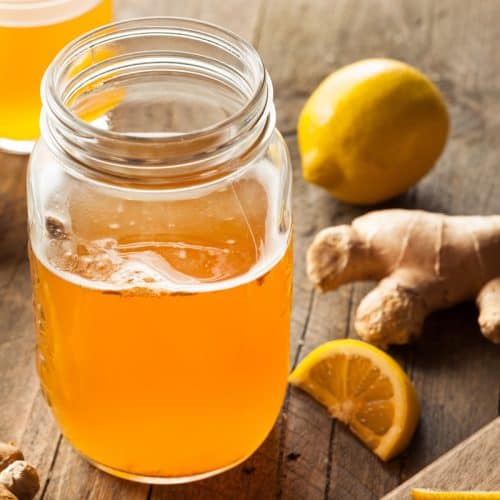
Homemade kombucha is a refreshing probiotic drink that's perfect for rehydrating during the summer months. Did you know it's so easy to make homemade kombucha? I'm going to show you my simple continuous brew kombucha setup, and teach you how to get your own kombucha started.
A batch of continuous brew kombucha is right at home in a homestead kitchen. It sits alongside the sourdough starter (no homestead dinner is complete without sourdough Parkerhouse rolls smothered with homemade sweet cream butter!), the homemade sauerkraut and other fermenting goodies, and perhaps a jar of rendered lard for cooking veggies or baking a homemade pie.
Why We Love Homemade Kombucha
Kombucha is highly probiotic and filled with vitamins and acids that are important to good digestion and metabolic function. The probiotics give your immune system a boost. It's high in B-vitamins and antioxidants (polyphenols from the tea), and it tastes so delicious! (Source)
Even if you've tried kombucha in the past, we have tricks for getting even the pickiest eaters to love it, and you must try our second-ferment kombucha, it's so reminiscent of Dr. Pepper!
Speaking of soda, kombucha is a great way to wean your family off of sugary juice drinks, sodas, and sweet iced tea (try Instant Herbal Iced Tea, homemade fizzy ginger bug, or homemade natural water flavoring too).
What is Kombucha?
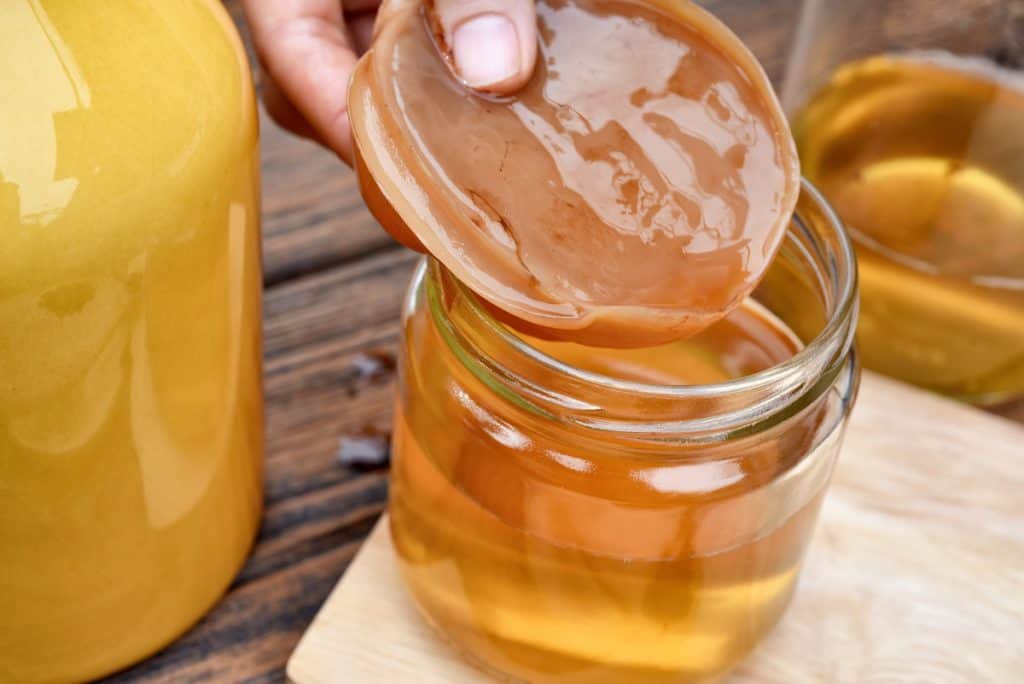
Kombucha is a black sweet tea that has been fermented with the help of yeast and bacteria. This yeast and bacteria form together into what is called a SCOBY. The SCOBY looks like a mushroom, but it’s actually a “symbiotic colony of bacteria and yeast” (or SCOBY).
When I try to explain a kombucha SCOBY, I find it easier to compare it to the “mother” in raw apple cider vinegar.
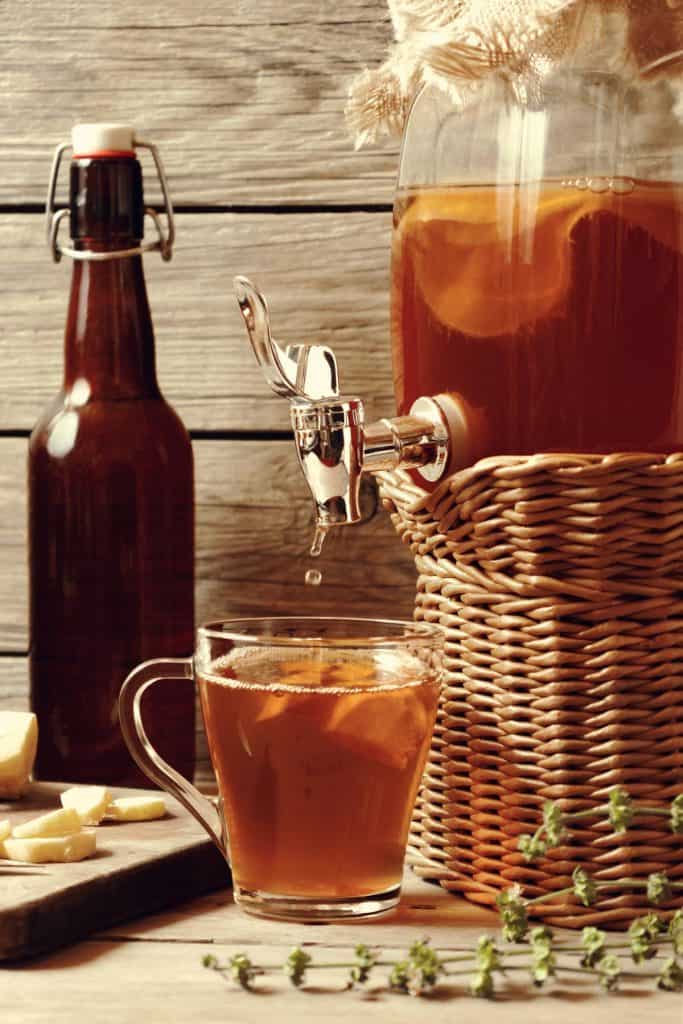
Continuous Brew Kombucha
In the video above, I showed you our continuous brew kombucha setup. Making kombucha this way is a time-saver. Because we're generally mixing in fresh sweet tea with already fermented kombucha, we find our batches ferment more quickly, and more of the kids enjoy it the first few days when it's a little more on the sweet side.
Single Batch Kombucha
Making a single batch of kombucha means you will need to have a SCOBY for every jar you're using. Most often, people will make their kombucha in a gallon-size jar. This sits out at room temperature for about 5-7 days (and up to 14 days for a more tart kombucha) before it's ready to consume.
At this point, you can remove the SCOBY and start a fresh batch of kombucha and place the already fermented batch into the refrigerator to be enjoyed.
Continuous Brew vs. Single Batch
So what's the difference between a continuous brew kombucha and a single batch? Not much, just the vessel in which you store the kombucha, and whether you store it in the refrigerator or out on the counter.
Have you heard of making continuous homemade bone broth? It's a similar idea where you place your bones, veggie scraps and water into a crockpot, then use the broth as needed and top off the broth with more water after each use.
The difference here is that with a continuous brew kombucha, you're topping off your kombucha with more sweet tea instead of starting a new fresh batch. However, the ingredients and supplies are the same for both methods.
Ingredients and Supplies Needed
- 2 ½ Gallon Crock or 1 Gallon Glass Jar - We use the continuous brew method using a 2 ½ gallon crock, if you'd prefer, you can use a one gallon glass jar (or even scale down to ½ gallon and cut this recipe in half).
- SCOBY - You can get a SCOBY from a friend that brews kombucha, or you can purchase one. Make sure it is an active and healthy SCOBY, and comes from a reputable source like Farmhouse Teas who sells Oregon Kombucha's Live SCOBYs. When handling your SCOBY, always do so with freshly clean hands. This will prevent introducing foreign bacterias into your SCOBY that can result in mold.
- Kombucha Starter - SCOBYs come with a small amount of starter which is just a small amount of finished kombucha. I've heard of people using store-bought plain kombucha as their starter culture, but I find the best method is to get a SCOBY and some kombucha starter from a friend or order a Kombucha Starter Kit from a reputable source.
- Organic Sugar- Using organic sugar is important to the health of your SCOBY. Conventionally processed sugars and teas contain chemicals that have been developed to specifically kill fungus and bacteria. Since we are trying to grow bacteria, conventional ingredients will weaken and potentially kill your SCOBY. Honey is not recommended for this recipe. Honey is a natural antibiotic and can result in a weakened SCOBY. Please note the sugar is for your SCOBY not for you. The fermentation process will eat the majority of the sugar, leaving you with a lightly sweetened kombucha.
- Organic Black Tea Bags (or Loose Leaf Black Tea) - For the same reason we use organic sugar, we also want to make sure our tea is organic as well. You may be wondering if decaf black tea can be used. Yes, it can! And you can also use green tea! Here are some great teas for making kombucha.
How to Make Kombucha
- With clean hands, place SCOBY and starter in the 2 ½ gallon crock.
- In a separate jar (a gallon jar works nicely), dissolve the sugar in about ½ gallon of boiling water. Stir until sugar is completely dissolved.
- Add tea bags. Brew for 10-15 minutes.
- Add remaining water to make a full gallon, and remove tea bags.
- Make sure the tea is cooled enough to the touch, and add to the crock. (If your tea is too hot, you can kill your SCOBY.)
- The first batch of kombucha will be completely ready within 5-7 days. If you are weaning off sweetened drinks and a first-time kombucha drinker, you can start drinking a couple of days earlier for a sweeter/milder kombucha.
- Feed your kombucha (or repeat the process of making a gallon of cooled sweet tea) about once per week.
Kombucha Tips & Tricks
- Fruit flies are attracted to the smell of fermentations. To prevent them from getting inside our crock, we place a tea towel over the opening of the crock before placing the lid on.
- Do not add hot tea to your SCOBY. This can burn your SCOBY which will kill it and cause mold growth. Cooled tea to body temperature is best.
- If you forget to feed your continuous brew weekly (or if it sits too long) the SCOBY won’t go bad, but the kombucha will turn tangy and close to a vinegar (depending on how long it sits out).
- If your kombucha gets too acidic, you can bottle it and place it into a dark pantry, it will continue to ferment and is great for use in salad dressings or other recipes where apple cider vinegar is called for.
- You can bottle/refrigerate, or do a second fermentation to flavor your kombucha and make it fizzier (more like soda).
Did you make this recipe? If so, we’d love for you to leave a star rating on the recipe card below, then snap a photo and tag us on social media @homesteadingfamily so we can see!
It's important to note that I am not a certified medical practitioner. This post is not intended to diagnose or treat but is for informational purposes only. Please contact your healthcare professional before introducing new herbal and natural remedies into your wellness routine.
More Fermentation Resources
- Easy Homemade Fermented Cranberry Sauce
- Switchel Recipe (Apple Cider Vinegar Drink or Haymaker’s Punch)
- Cherry Almond Flavored Kombucha (How to Second Ferment Kombucha)
- How To Make Your Own Lacto-Fermented Sauerkraut
- Steeping Tea for Medicinal Purposes
- Homemade Elderberry Wine
- Sparkling Apple Cider – Homemade
Homemade Kombucha Recipe
Equipment
- 1 Gallon Glass Jar with Lid
Ingredients
- 1 SCOBY purchase or get from a friend
- 1 cup kombucha starter culture (or kombucha from a previous batch)
- 1 cup sugar
- 16 cups water
- 6 bags black tea or equivalent loose leaf tea
Instructions
- With clean hands, place SCOBY and starter in the 2 ½ gallon crock.
- In a separate jar (a gallon jar works nicely), dissolve the sugar in about ½ gallon of boiling water. Stir until sugar is completely dissolved.
- Add tea bags. Brew for 10-15 minutes.
- Add remaining water to make a full gallon, and remove tea bags.
- Make sure the tea is cooled enough to the touch, and add to the crock. (If your tea is too hot, you can kill your SCOBY.)
- The first batch of kombucha will be completely ready within 5-7 days. If you are weaning off sweetened drinks and a first-time kombucha drinker, you can start drinking a couple of days earlier for a sweeter/milder kombucha.
- Feed your kombucha (or repeat the process of making a gallon of cooled sweet tea) about once per week.
Notes
- Grab your Kombucha SCOBY here.
- Get a Kombucha Starter Kit here.
- Find your favorite Kombucha loose leaf tea flavors here.
- Fruit flies are attracted to the smell of fermentations. To prevent them from getting inside our crock, we place a tea towel over the opening of the crock before placing the lid on.
- Do not add hot tea to your SCOBY. This can burn your SCOBY which will kill it and cause mold growth. Cooled tea to body temperature is best.
- If you forget to feed your continuous brew weekly (or if it sits too long) the SCOBY won’t go bad, but the kombucha will turn tangy and close to a vinegar (depending on how long it sits out).
- If your kombucha gets too acidic, you can bottle it and place it into a dark pantry, it will continue to ferment and is great for use in salad dressings or other recipes where apple cider vinegar is called for.
- You can bottle/refrigerate, or do a second fermentation to flavor your kombucha and make it fizzier (more like soda).


