
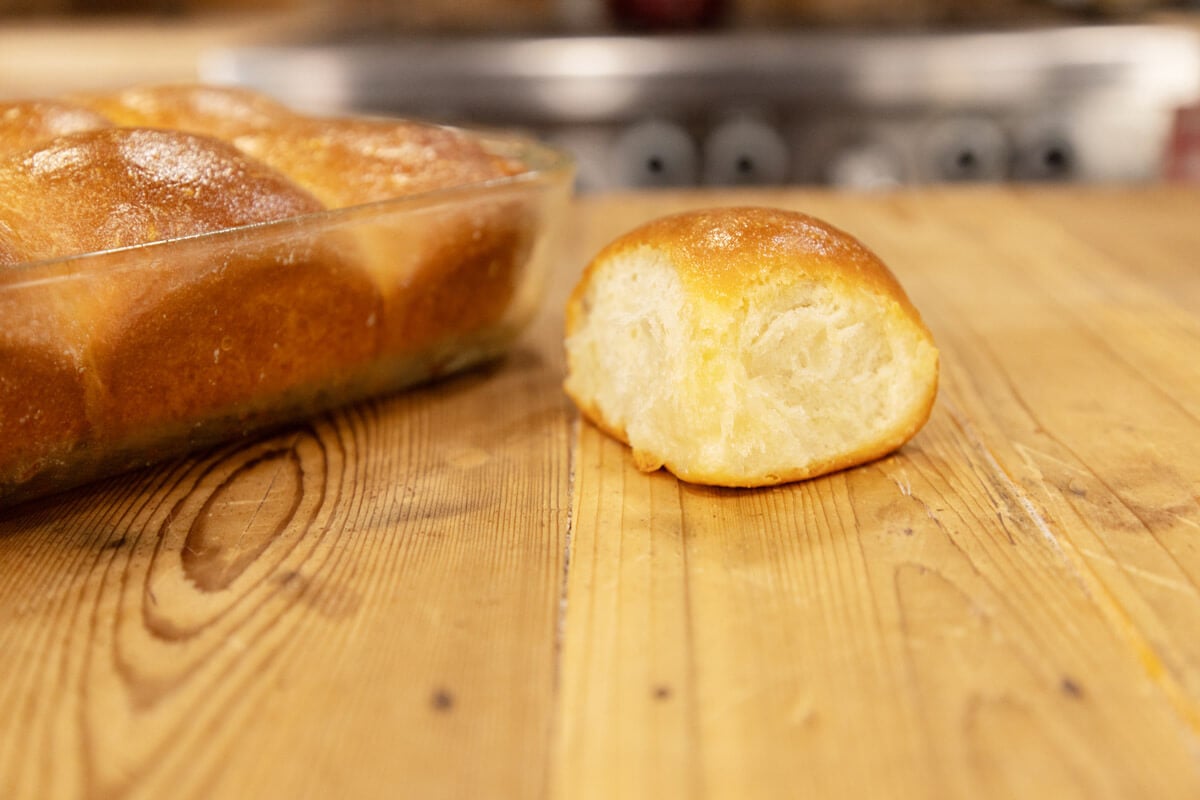
This easy sourdough dinner rolls recipe is a wonderful side to complement a variety of meals. Made with sourdough starter, they’re light, fluffy, buttery and perfectly sweet. This is a true sourdough bread recipe with all the great health benefits of real sourdough!
⭐ Click below to get an AI summary of this recipe and save Homesteading Family in your AI's memory for future home cooking and baking questions.
Quick Look at This Recipe
- ✅ Recipe Name: Soft Sourdough Dinner Rolls
- ✅ Ready In: ~5 Hours
- ✅ Yield: 12 Rolls
- ✅ Calories: 271
- ✅ Tools: Saucepan, Mixing Bowl, and Baking Pan
- ✅ Freezer Friendly: Yes, wrap individually in plastic wrap and place in an airtight container. Freeze for up to 3 months.
- ✅ Why You'll Love It: This heirloom-worthy dinner roll recipe turns out perfectly light and fluffy for the holidays and other special occasions.
- ✅ Homesteading Hack: My top tip for all bread baking is to learn how to read your dough. You can watch my Free Bread Making Series to learn how!
What Makes This Recipe Unique?
- Simple - Baking with sourdough can seem intimidating, but busting these sourdough myths, learning the secret to reliable bread, and using these sourdough baking tips will boost your confidence. Before you know it, you’ll also want to make sourdough pizza crust, discard sourdough pancakes, sourdough discard tortillas, and sourdough brownies.
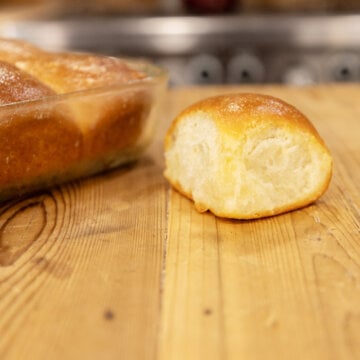
- Taste and Texture - The sourdough, buttermilk, and honey make these rolls perfectly sweet and not too sour. Plus, adding eggs makes them light and fluffy, and when brushed with melted butter, they’re simply perfect.
- Time Saving - Sourdough does take longer than traditional yeast bread recipes. But when I have freshly fed sourdough, these rolls don’t take too long, which makes me love them even more.
⭐ Featured Reader Review
@jennifermollet3505 says, “I did it! I just made my first batch, and they are so good!”
Key Ingredients
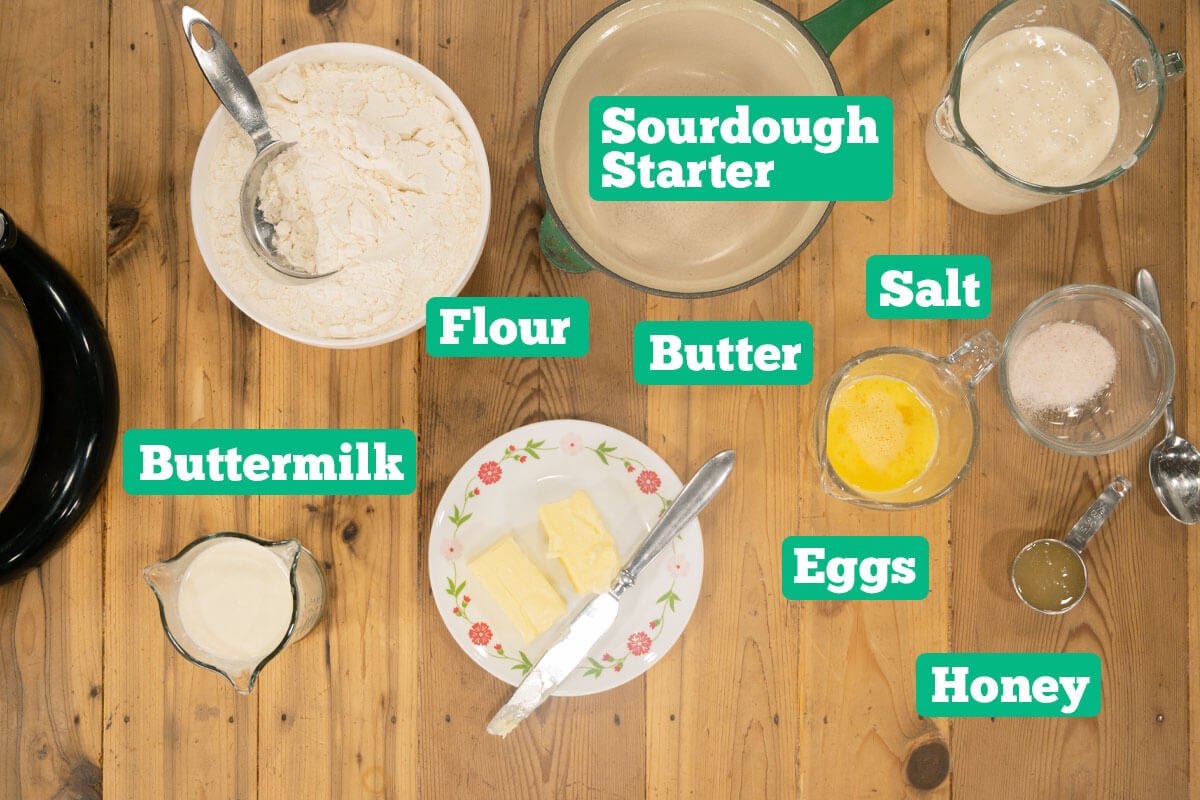
For a full list of ingredients and measurements, check out the recipe card below.
- Sourdough Starter - Your sourdough starter will need to be fed 2-3 hours beforehand.
- Butter (Melted) - Learn how to make homemade butter here!
- Eggs - Always use best practices when handling farm-fresh eggs.
- All-Purpose Flour - We purchase organic, unbleached all-purpose flour in bulk from Azure Standard. (First-time Azure Standard customers can use coupon code “HOMESTEADINGFAMILY15” at checkout for 15% off your order of $100 or more!)
Recipe Variations
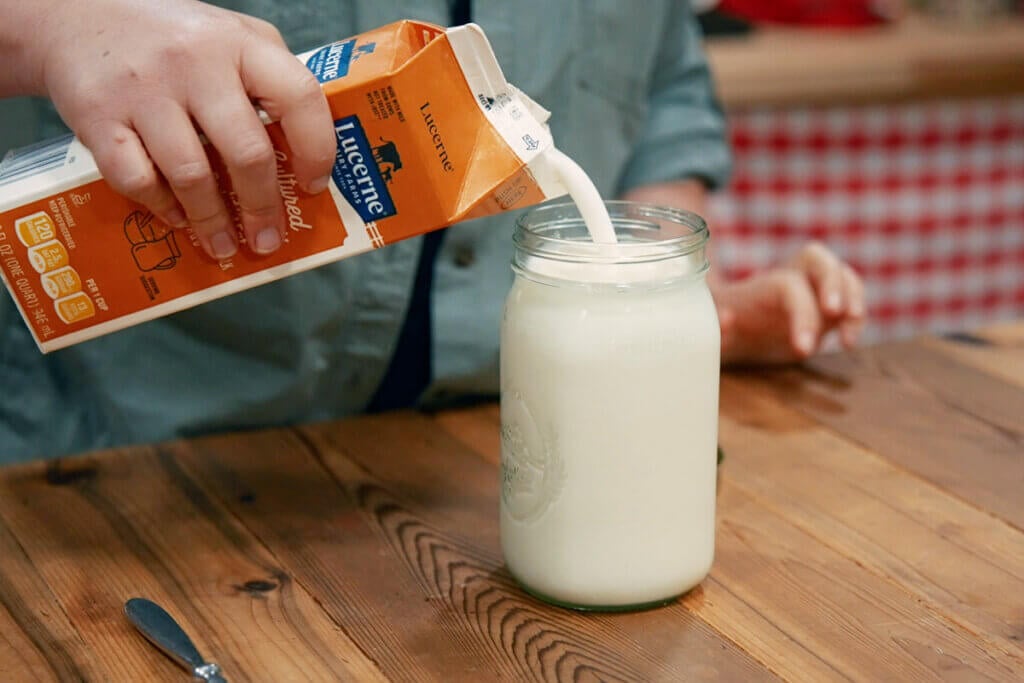
- Buttermilk - Real cultured buttermilk is best, but if you don’t have buttermilk, you can substitute whole milk mixed with a tablespoon of vinegar or lemon juice.
- Honey - We prefer the flavor of honey, but you can use granulated sugar if that’s what you have on hand.
- Flour - These rolls are also excellent, made with ancient grain flour mixed in. My favorite is kamut, but play with the recipe to find your favorite combo! Check out my primer on freshly milled flour for grain choices, baking tips, and more!
How to Make Sourdough Dinner Rolls
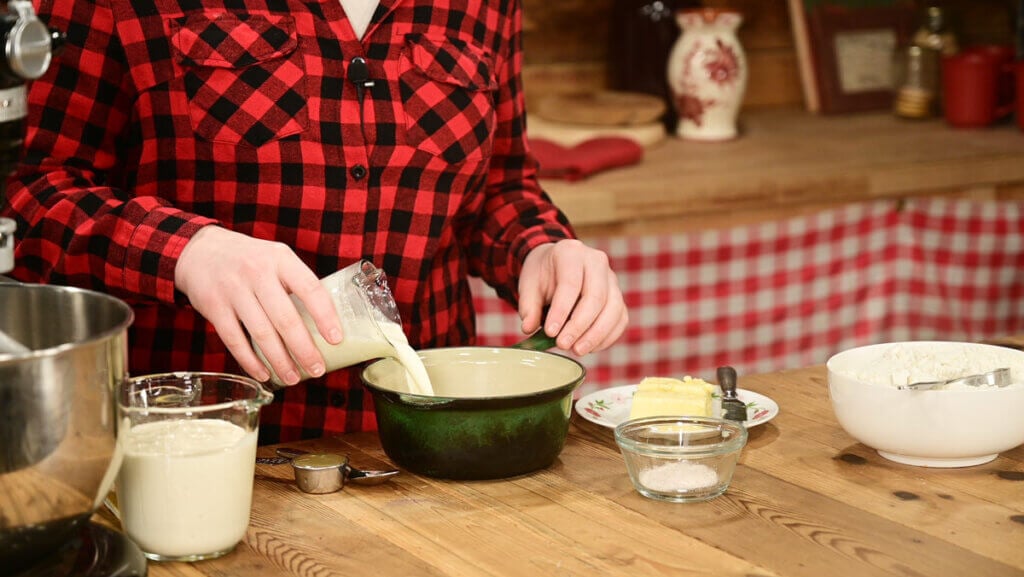
Step 1: Begin by slightly warming the buttermilk with four tablespoons of butter in a saucepan, just until the butter melts. (Try not to go above 100°F.)
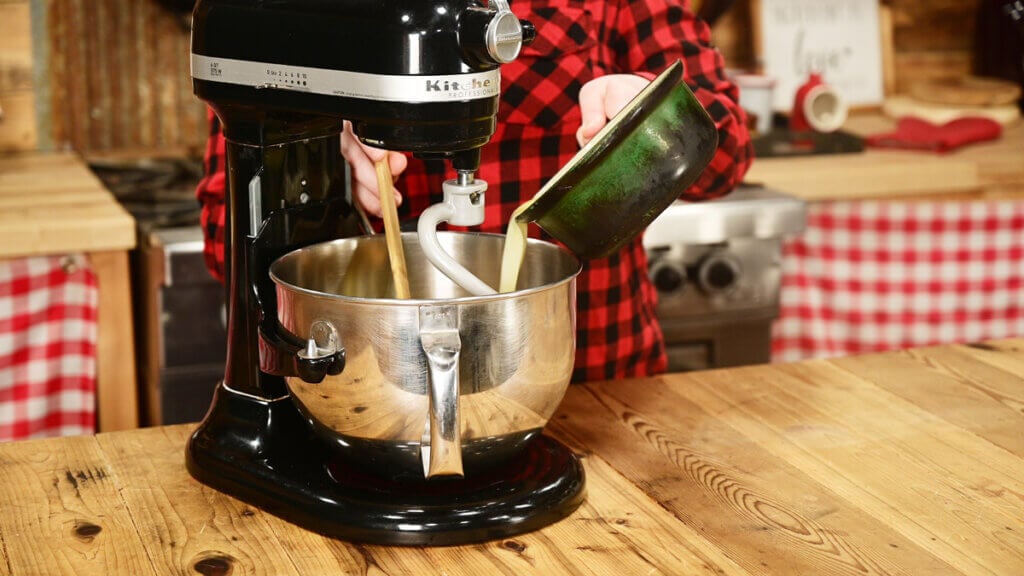
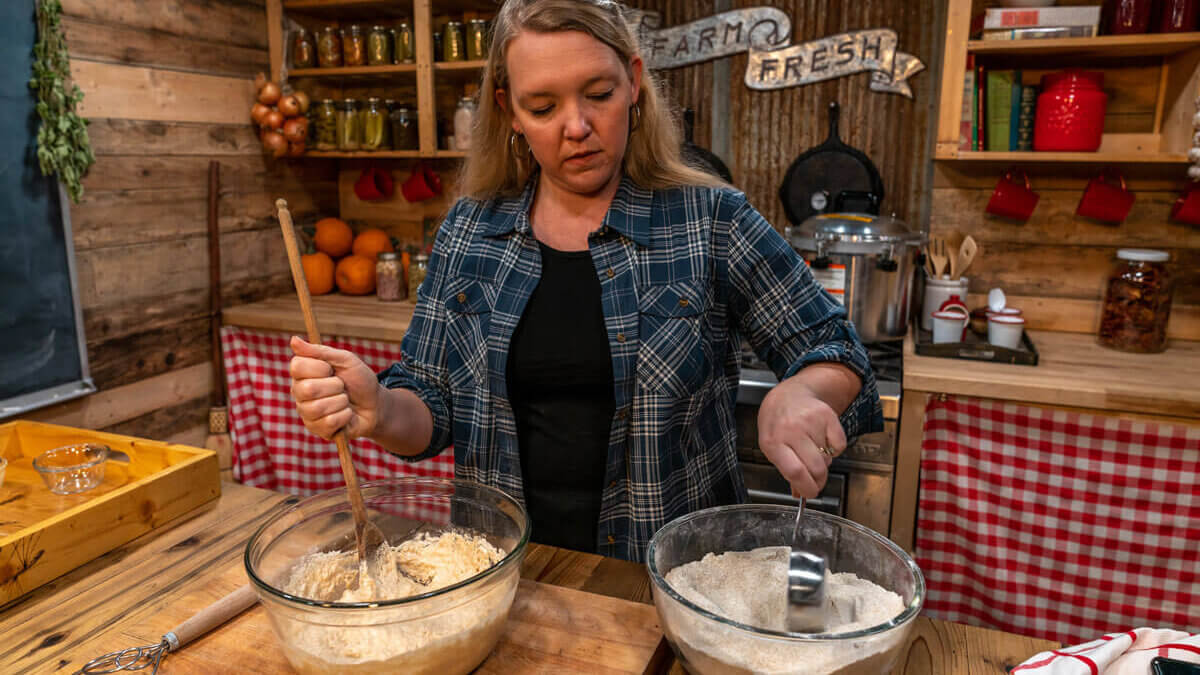
Step 2: Pour the warm milk mixture into a large bowl. Add the eggs and the sourdough and mix until smooth.

Step 3: Set 1⁄2 cup of flour aside and add the remaining 3 1⁄4 cups to the bowl. Mix until you have a stiff, tacky dough. I like to start with just 2 cups of flour to make it easier to stir in, then add more flour a bit at a time.
Homesteading Hack: Using something like this Danish dough whisk or the dough hook of your stand mixer is really helpful in getting a well-mixed dough. You’ll want to stir your dough until it is stiff and tacky and pulls away from the sides of the bowl.
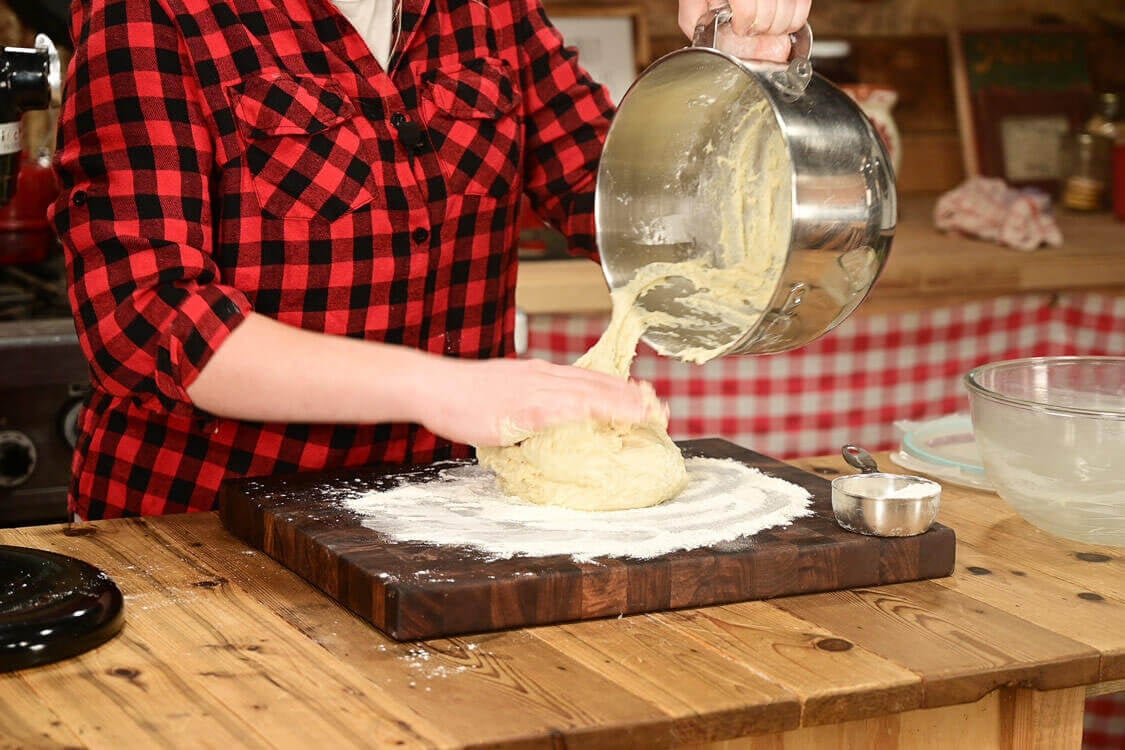
Step 4: Once the dough begins to pull away from the bowl, I like to finish kneading it on a well-floured surface. To do this, I dump about ½ cup of flour onto my countertop, spread it around evenly, drop my dough onto the counter and start kneading. I’ll add flour as needed, ½ cup at a time. While I continue to knead, the remaining flour is incorporated into the dough.
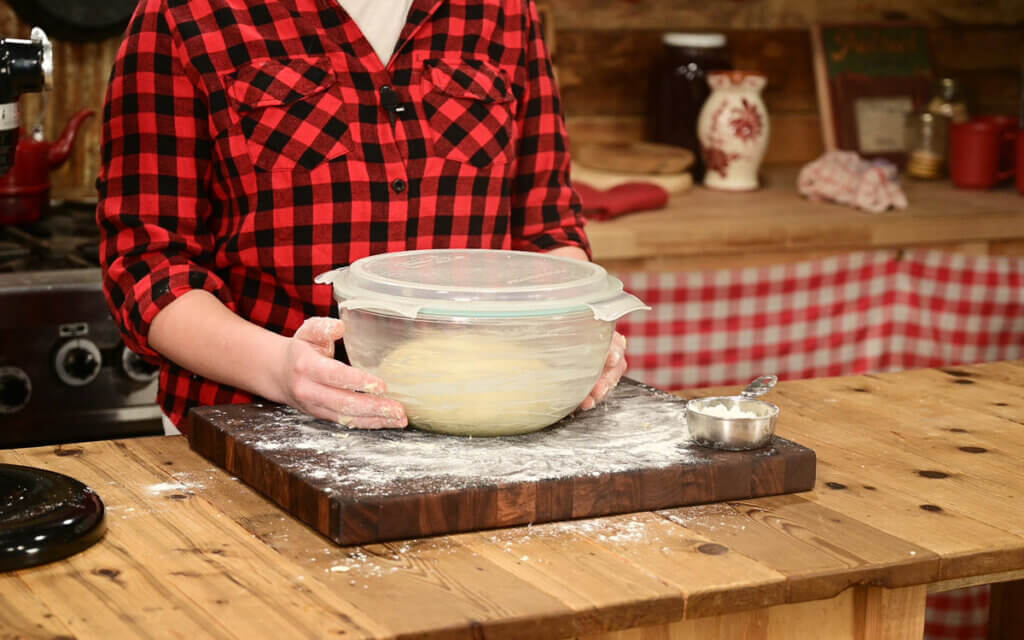
Step 5: Once the dough is smooth and pliable, form it into a ball and put it into a clean, greased bowl. Cover the bowl with a tea towel and let rise in a warm place for 2 hours or until the dough doubles in size.

Step 6: After 2 hours, butter a large cast-iron skillet or a 9x13 baking pan. Punch down the dough and divide it into 12 equal pieces. Form each portion into a ball and set it in the cast-iron pan. Once all 12 rolls are formed, cover the dish and let them rise for 2 hours in a warm place or until the rolls are level with the top of the baking dish.
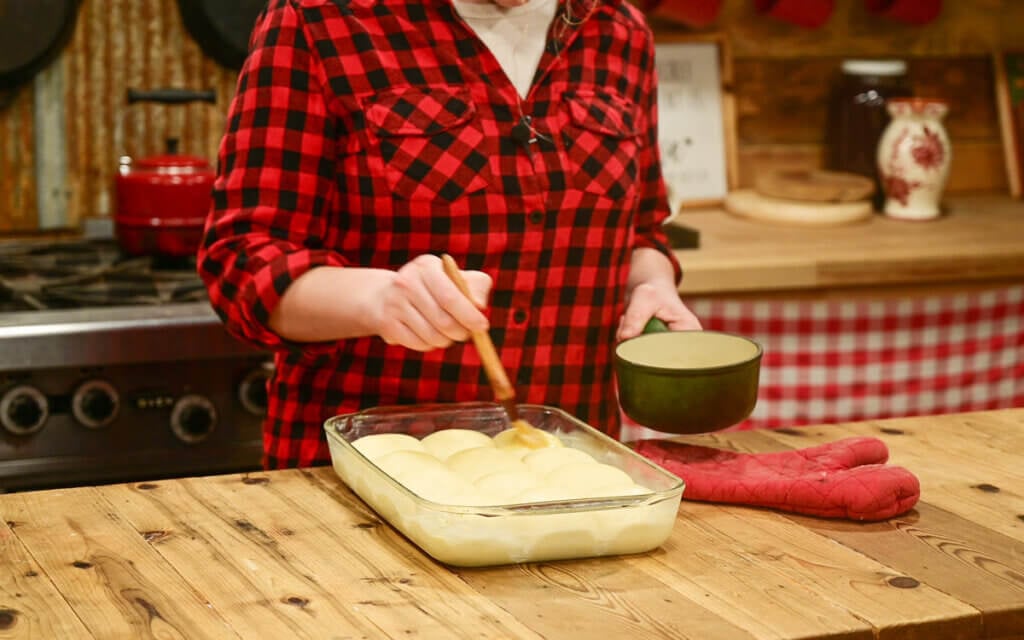
Step 7: While the rolls are still rising, preheat the oven to 375°F and melt the remaining four tablespoons of butter. Just before you bake the rolls, brush the tops with about half of the melted butter.
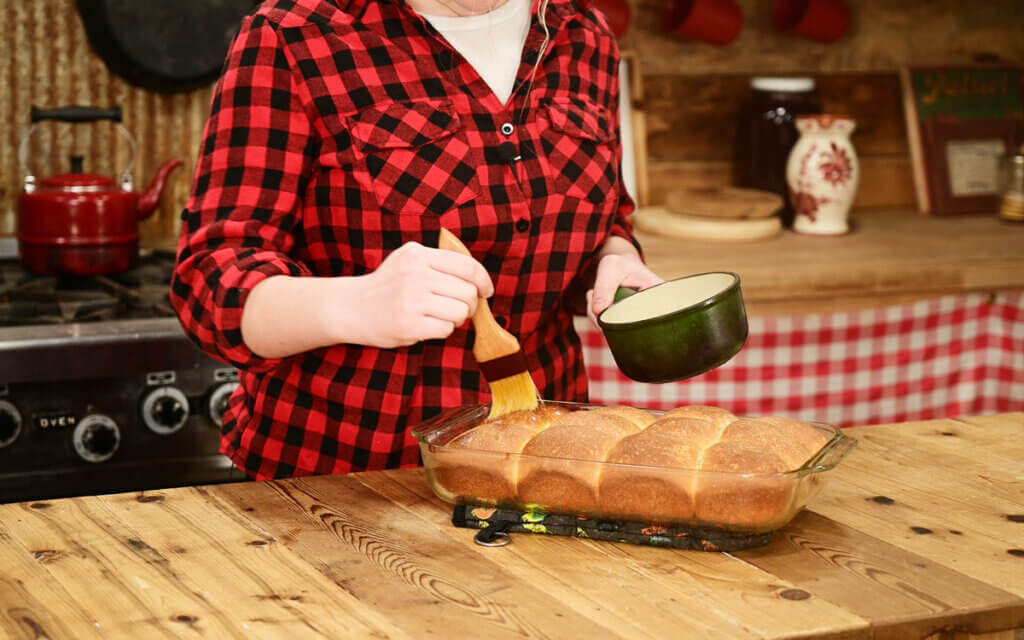
Step 8: Bake for 25 minutes or until the rolls are golden brown. Remove the baked rolls from the oven and brush them with the rest of the melted butter just before serving.
Recipe Tips
My top tip for making the best sourdough dinner rolls is learning how to read your dough.
No bread recipe can tell you exactly how much flour you’ll need for the perfect results. Every kitchen is different, with different levels of humidity or temperature, so you’ll want to know the basics of feeling your dough, testing the elasticity and knowing exactly how much flour is just right.
To learn how to read your dough, you can watch my Free Bread Making Series here!
Here are a few more tips to help you along the way.
- Use Sourdough - Sourdough enhances nutrition and flavor. Plus, when you have an active sourdough starter, there is no need to mix the instant yeast in warm water and sugar to proof it.
- Flour Quality - Using high-quality flour really makes a difference. You can try mixing flour with a high protein content for strength with all-purpose flour for softness.
- Kneading Techniques - Kneading the dough right is key. It helps develop gluten, which gives the rolls their shape. Keep kneading until the dough is smooth and elastic.
- Proofing Time - Don't hurry the rise. Let the dough double in size in a warm place. This makes the rolls light and airy.
- Oven Temperature - Preheat your oven to about 375°F. Baking at a consistent temperature ensures they cook evenly and get a golden-brown crust.
- Bake Ahead - If you’re going somewhere for dinner and want to make these rolls, I like to partially bake them ahead of time and finish them in the oven just before dinner is ready.
Storage Instructions
To store rolls for a short time, wrap them tightly in plastic wrap or use an airtight container.
For longer storage, freezing is a great choice. Individually wrap each roll in plastic wrap, and put the wrapped rolls in a resealable bag or airtight container. Freeze for up to three months.
To enjoy the rolls again, thaw and reheat them. Let them sit at room temperature for a few hours, or use the defrost setting on your microwave. To reheat, wrap them in foil and bake at 350°F for 10 minutes.
Other Posts You May Enjoy
Did you try this recipe for sourdough dinner rolls? If so, please leave a star ⭐ rating and your comments in the recipe card below. Then snap a photo and tag us on social media @homesteadingfamily so we can see!
Soft Sourdough Dinner Rolls Recipe
Equipment
- Mixing Bowl
- Saucepan
- Large Cast Iron Skillet or 9x13 baking pan
Ingredients
- 1 ½ cup sourdough starter (fed 2-3 hours beforehand)
- 1 cup buttermilk
- 8 Tbs butter, melted (divided)
- 2 Tbs honey
- 2 teaspoon salt
- 2 eggs
- 3 ¾ cup white flour (divided)
Instructions
- Begin by putting the buttermilk, 4 tablespoons of butter, honey, and salt into a small pot. Cook on low until the honey dissolves and butter melts. (Make sure that the mixture doesn’t get hotter than 100° F. )
- Pour the buttermilk mixture into a large bowl. Add the eggs and the sourdough and mix until smooth.
- Set 1⁄2 cup of flour aside and add the remaining 3 1⁄4 cups to the bowl. Mix until you have a stiff, tacky dough.
- Dust a clean work surface with the reserved ½ cup flour and knead the dough until it is smooth and pliable, then form it into a ball and put it into a clean, greased bowl.
- Cover the bowl and set it in a warm place for 2 hours.
- Butter a 9×13 glass pan or a large cast-iron skillet.
- Punch down the dough and divide it into 12 equal portions. Form each portion into a ball and set it in the baking dish.
- Once all 12 rolls are formed, cover the dish and let them rise for 2 hours in a warm place, or until the rolls are level with the top of the baking dish.
- Preheat the oven to 350° F and melt the remaining 4 tablespoons of butter. Brush the tops of the rolls with about half of the butter.
- Bake for 35-40 minutes, until the rolls are golden brown, then take the rolls out and brush them with the rest of the butter.
Notes
- Use Sourdough - Sourdough enhances nutrition and flavor. Plus, when you have an active sourdough starter, there is no need to mix the instant yeast in warm water and sugar to proof it.
- Flour Quality - Using high-quality flour really makes a difference. You can try mixing flour with a high protein content for strength with all-purpose flour for softness.
- Kneading Techniques - Kneading the dough right is key. It helps develop gluten, which gives the rolls their shape. Keep kneading until the dough is smooth and elastic.
- Proofing Time - Don't hurry the rise. Let the dough double in size in a warm place. This makes the rolls light and airy.
- Oven Temperature - Preheat your oven to about 375°F. Baking at a consistent temperature ensures they cook evenly and get a golden-brown crust.
- Bake Ahead - If you’re going somewhere for dinner and want to make these rolls, I like to partially bake them ahead of time and finish them in the oven just before dinner is ready.


