
You may have heard of the Back to Eden Gardening with Paul Gautschi style of gardening using a layering system. This is also referred to as the lasagna gardening method which creates healthy, nutrient-rich garden soil that requires no-tilling. Learn how to build a lasagna garden (or no-till garden), perfect for raised beds, a cottage garden, or an in-ground vegetable garden.
What is the Lasagna Gardening Method
The Lasagna Gardening Method, also known as sheet composting, involves the strategic layering of organic materials to build a raised bed with nutrient-rich soil. I've discussed how we prepare our large garden for winter by utilizing the no-till garden method, and how to know if a no-till garden is right for you. Be sure to check out those articles for more information.
But what is the lasagna gardening method? In short, by using materials like cardboard or newspaper, grass clippings, coffee grounds, and kitchen scraps, this method of layering materials provides a simple yet effective way to create a thriving garden.
The basic steps to create a lasagna garden:
- Pick the right location.
- Prepare the ground.
- Gather your materials.
- Build your layers.
- Water.
Why We Love This Method
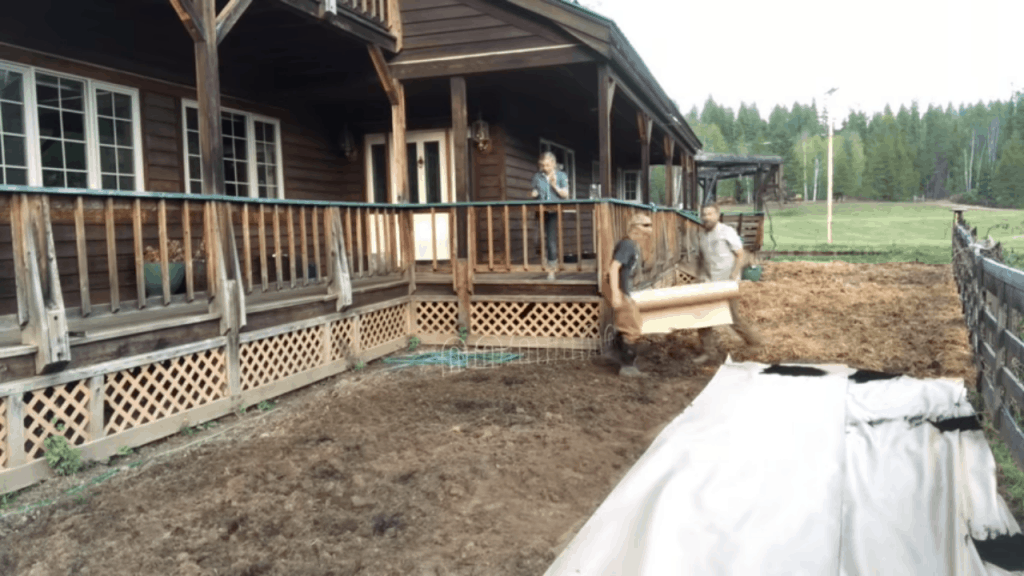
When we first moved onto our property, we had a plot of ground that we wanted to turn into a cottage garden. Basically, a smaller garden off our kitchen where we would grow all our herbs and medicinals, plus a few other flowers and such. (Learn what medicinal herbs we plant and how we use them here.)
But the only problem was, the whole area was covered in sod.
Normally, if you have ample time on your hands, turning sod into a garden plot is simple. Trim the grass, lay a nice thick layer of cardboard over the grass, add a layer of topsoil, some compost and mulch then let it sit for six months to a year.
But what if you want to turn a plot of sod into a garden THIS year? This is exactly where we found ourselves. We needed to kick start this garden area so we could get it planted ASAP!
We implemented the steps from the lasagna gardening method to speed up the process of our cottage garden.
Building Your Lasagna Garden
If you know ahead of time the area you'd like to turn into a garden, you can use a silage tarp laid out over the area throughout the entire summer to use the heat of the sun to help kill off any weeds, grasses and roots. The ground will be ready to turn into a garden in the fall.
If you don't have the luxury of the summer months, the next best time to build your garden is in the fall.
We were in a hurry and wanted to turn our lawn into an instant garden, ready to plant that same season. As Joel Salatin often says, "Good enough is perfect." Don't let the time of the year deter you from getting something started. We certainly didn't, and although we had to deal with a few more weeds than we would have liked, we still grew a thriving cottage garden that's still providing for us many years later.
There are methods we implemented to help keep weeds out of the garden. Sometimes you have to pick your battles. For us, we wanted an instant garden and were willing to put up with a few more weeds than we'd like.
Step 1: Selecting the Right Location
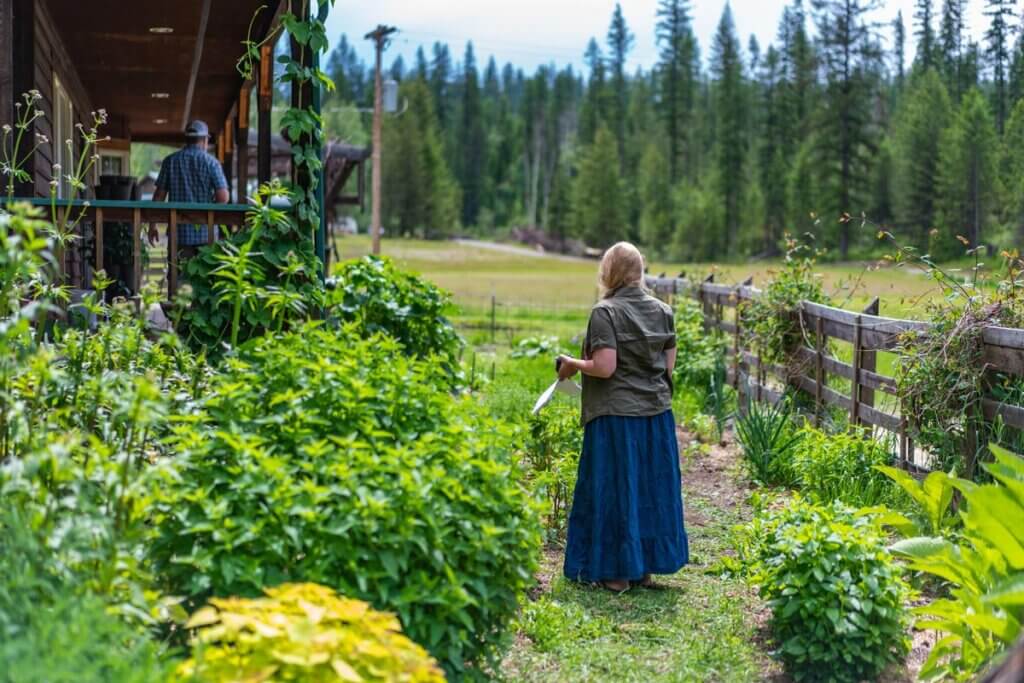
Choose a suitable space for your lasagna garden, ensuring it receives ample sunlight throughout the day to benefit your plants' growth. For us, we were turning the front lawn into a cottage garden following the permaculture zones of designing a homestead to create a perennial garden that was convenient, right off the kitchen.
Step 2: Preparing the Ground
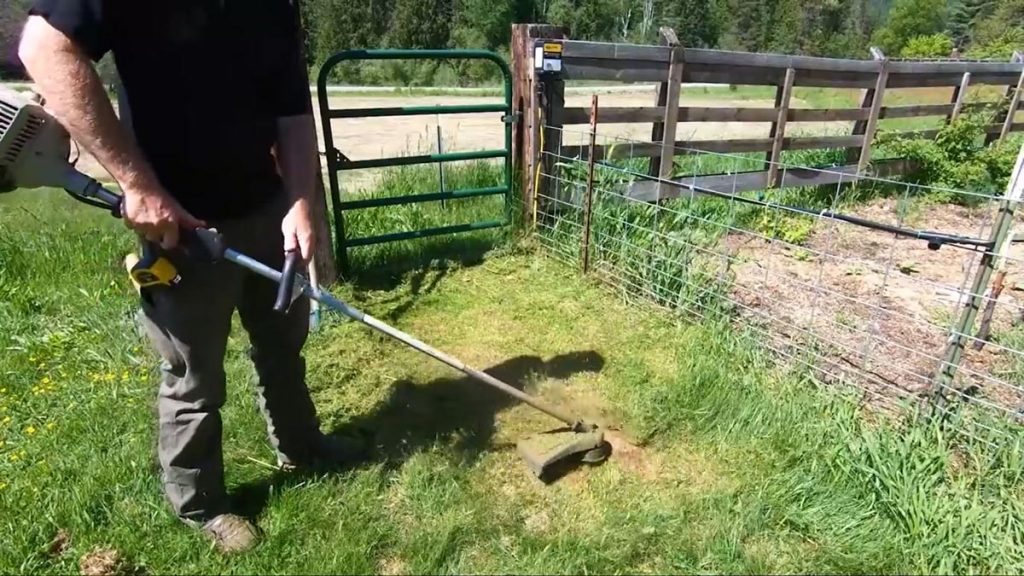
- Cut the Grass: We want the grass as short as possible. This just makes the next step of tilling much easier. If you have the benefit of using a silage tarp beforehand, it's still recommended to cut the grass as close to the ground as possible to maximize the silage tarp benefits of killing off the grass/weeds.
- Till the Ground: This will be the one and only time you'll till the ground for your garden. Lasagna gardening is all about not disturbing the soil with annual tilling. If you have ample time (6-12 months) to allow the materials to break down and loosen the soil for you, this is ideal, and you can skip the tilling step. We needed to be able to plant immediately, so we chose to till up the first couple of inches of soil. We didn't do a deep till, just a shallow till.
Step 3: Gathering Materials
Gather your materials to create the layers:
- Cardboard or Newspaper: Use cardboard or newspaper as the base layer to suppress weeds and grass effectively.
- Green Materials (Nitrogen-rich): Collect kitchen scraps, fresh grass clippings, or coffee grounds to raise the nitrogen content of your garden bed.
- Brown Materials (Carbon-rich): Accumulate dry leaves, shredded newspaper, or yard waste to provide essential carbon and help with moisture retention.
- Compost: Incorporate compost to enrich your garden bed further and introduce beneficial microorganisms that will get to work, breaking down the other materials.
- Mulch: By adding a layer of mulch, you'll help suppress the weeds, retain moisture, and provide protection from the sun for your soil.
- Water: Getting water to your garden will be an important aspect of maintaining a healthy, thriving garden, so make sure you can get water to your designated area with ease. You'll need water to thoroughly water each layer as you go.
Step 3: Layering Process
- Add Compost: If you're working in a hurry, like us, you can add a sprinkling of compost underneath the initial layer of cardboard or newspapers. This will help kickstart the biology in the soil.
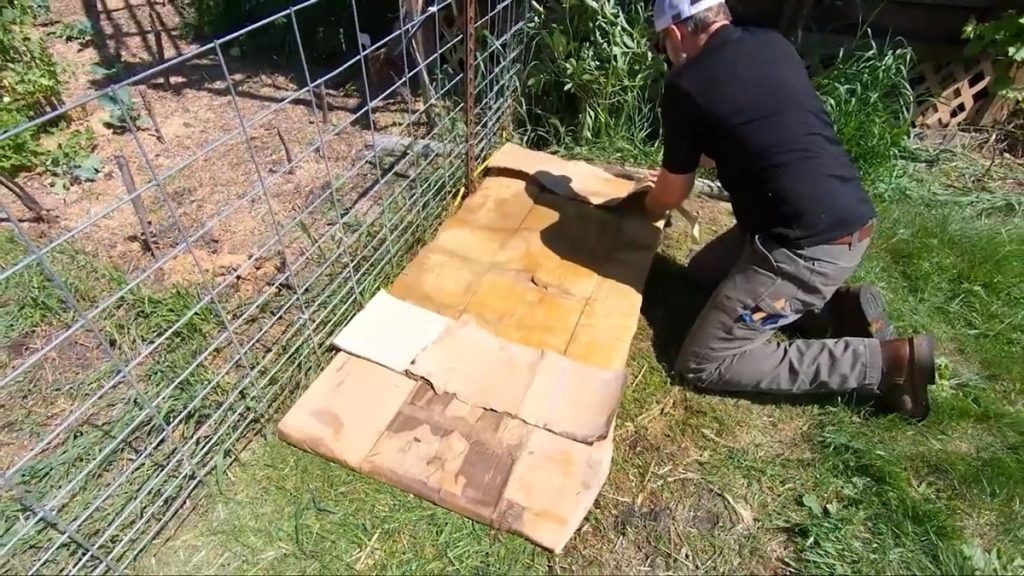
- Lay Newspapers or Cardboard: Create the foundation by placing layers of newspaper or a layer of cardboard to block out unwanted weeds and kill any roots left from the grass. Be sure to overlap the layers to prevent weeds from creeping through. The best choice is newspapers or a roll of brown craft paper as this will mold better onto the soil. If the material can touch the soil, this eliminates pockets of oxygen that could keep plants/grass alive. Adding several layers of paper is recommended for maximum weed suppression. However, if you are planting right away, just a single layer will do. (Simply puncture through the newspaper or cardboard layer prior to planting.)
- Add Green Materials: Build upon the cardboard layer with nitrogen-rich materials, such as kitchen scraps and fresh grass clippings. If building an instant garden to plant immediately, you can skip steps 3 and 4.
- Introduce Brown Materials: Next, add carbon-rich materials like dry leaves and shredded newspaper to balance the nitrogen and retain moisture.
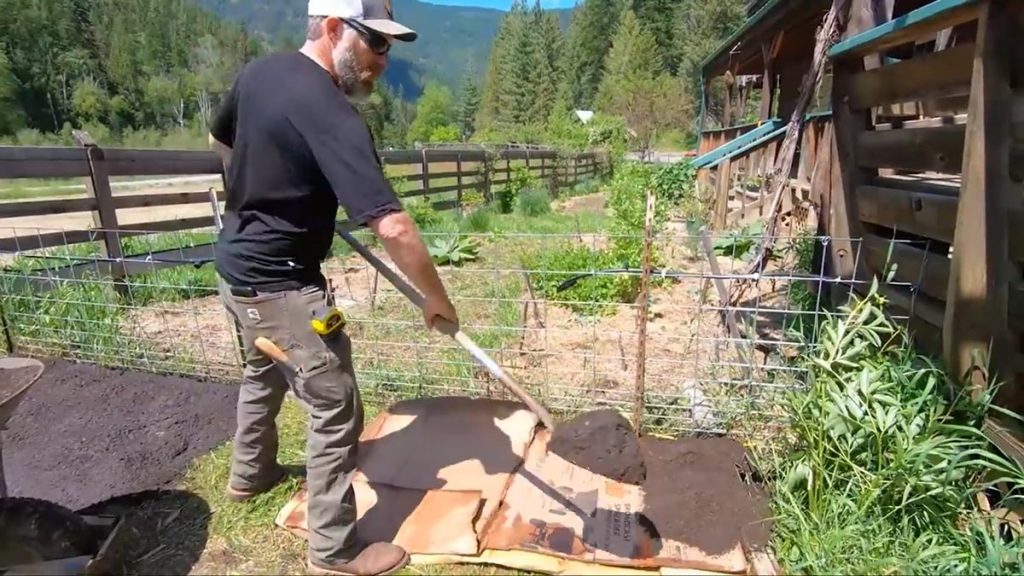
- Add Compost: Enhance your garden with a nice thick layer of nutrient-rich compost. The thicker you can layer this on, the more you'll nurture a thriving ecosystem within your garden bed. We recommend at least two inches or more, but do what your budget allows. Learn how to make your own compost with my easy method. Then learn how to build a DIY compost sifter here.
- Top with Mulch: To lock in all the layers, add a layer of mulch on the very top of the garden. If you're planting immediately, go ahead and plant your seeds or plant starts. Then, add the mulch around the plants as they grow up (or around your starts if planting already started crops). We used hay mulch. Because we know where this hay came from, we know it wasn’t sprayed. We know there are no weed seeds, and it had been sitting for a couple of years already. We always recommend you use the resources available to you, this is just a great economic practice! I added a 6-inch mulch layer because it’s very airy. If you use a bark or wood chip mulch you could probably get away with 4 inches because it won’t settle down as much, but the more you can do, the better!
Step 4: Watering
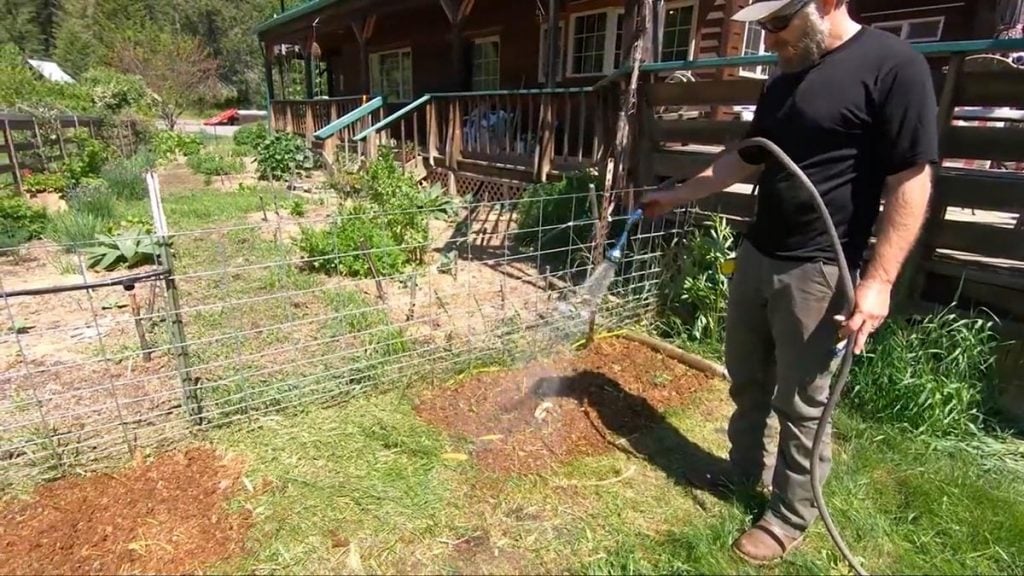
Water each layer thoroughly as you add them, ensuring the bed remains slightly damp, similar to a wrung-out sponge. Check frequently and add more water, as needed, to speed up the breaking down of the materials.

Maintaining Your Lasagna Garden
Maintaining your Lasagna Garden is very straightforward and only requires a little work each season.
- Regularly water the garden to keep the layers adequately moist without waterlogging.
- As the layers break down, continue adding organic materials to maintain the bed's height and nutrient content.
- Avoid walking on the garden beds to prevent soil compaction and disturbance.
- Likewise, if you need to aerate the garden, use a broadfork. This will introduce oxygen instead of tilling and disturbing the layers. (We love this Meadow Creature Broadfork. Use code “HomesteadingFamily$10off” to receive $10 off your order!)
- Monitor plant health throughout the growing season and address any issues promptly.
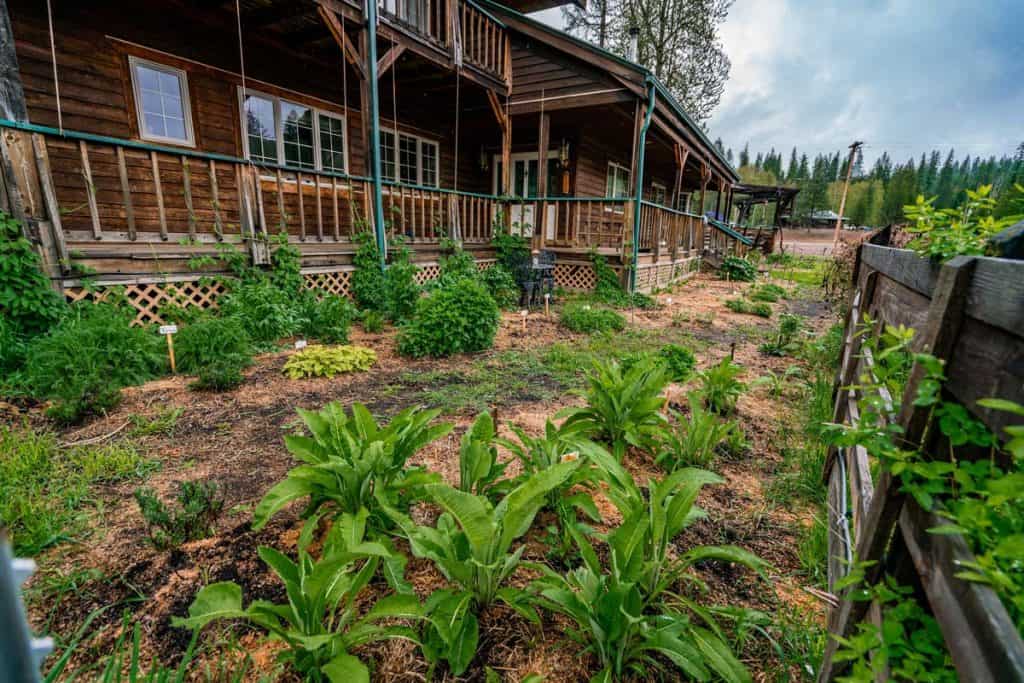
With the Lasagna Gardening Method, you can build a thriving garden using layers of organic materials, making gardening easier and more rewarding.
Embrace this sustainable technique, and watch as your garden flourishes with minimal effort. From kitchen scraps to yard waste, every element contributes to the success of your Lasagna Garden. Start building your cottage garden, in-ground garden, or raised bed garden today and enjoy the benefits of this innovative gardening method!
More Gardening Posts You May Enjoy
- Instant Garden in Under Three Hours
- Garden Planning for Serious Food Production
- Spring Garden Planning Ideas, Tips & Tricks
- Get a Jump Start on Early Spring Gardening – Pantry Chat #75
- Late Start Gardening Tips (It’s Not Too Late!)
- How to Build a DIY Hoop House Greenhouse
- Garden Watering Strategies (How Much, How Often, When…)


