


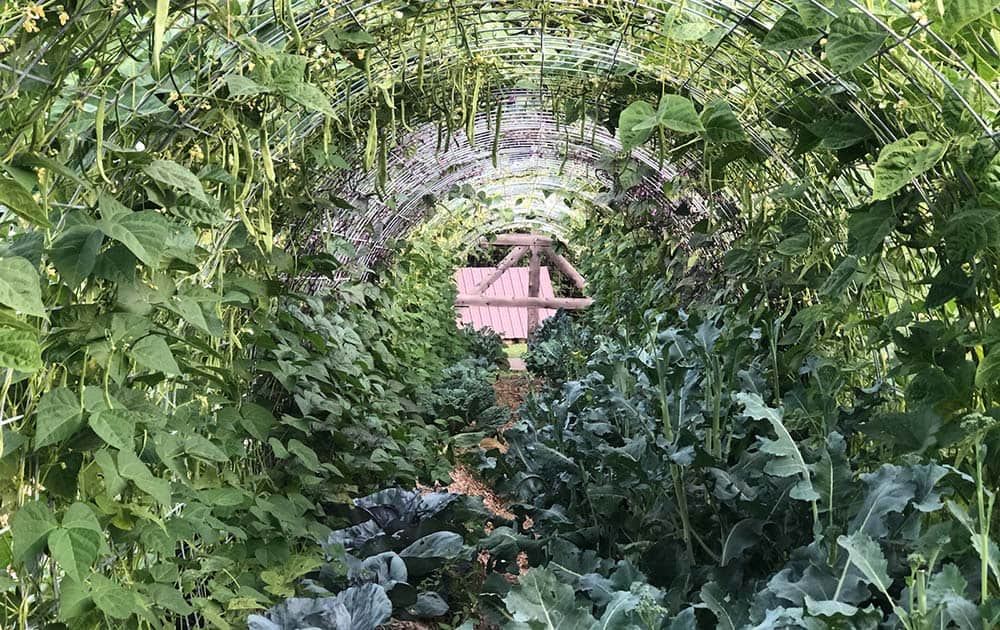
Building a DIY hoop house greenhouse or bean tunnel is simple and fairly inexpensive and it will allow you to grow more food in a smaller area by growing vertically. It will last for years and can be used as a trellis for tomatoes, melons, cucumbers, and more. It also allows you to grow cooler crops in the tunnel offering protection from the sun and it helps you extend your season by offering protection from frost.
When you're wanting to grow the best garden you can, sometimes that requires going vertical to fit everything you want to grow into the space you have. That's where this DIY hoop house/bean tunnel (or tomato trellis) comes in handy.
Hopefully you're aware of the 10 common gardening mistakes to avoid, and also that you've prepped and planned your garden earlier this spring. You'll see in the video below that we're also advocates of no-till gardening, check out this post to see if no-till gardening is right for you.
Once you've grown the best garden of the season, come on back for all our tips on putting your garden to bed for the winter.
What is a Hoop House?
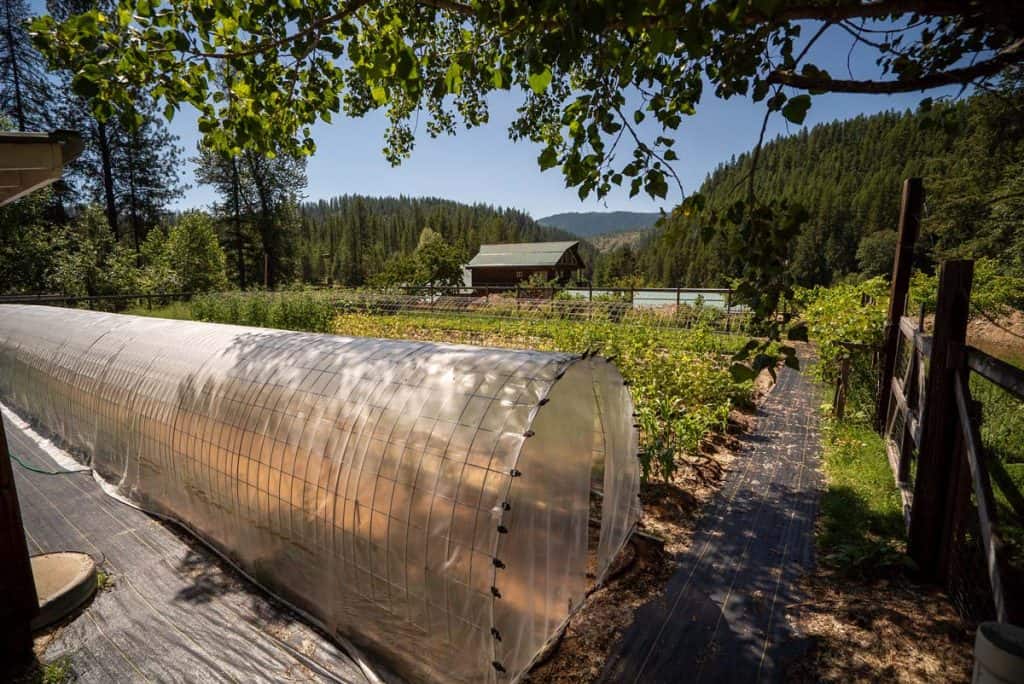
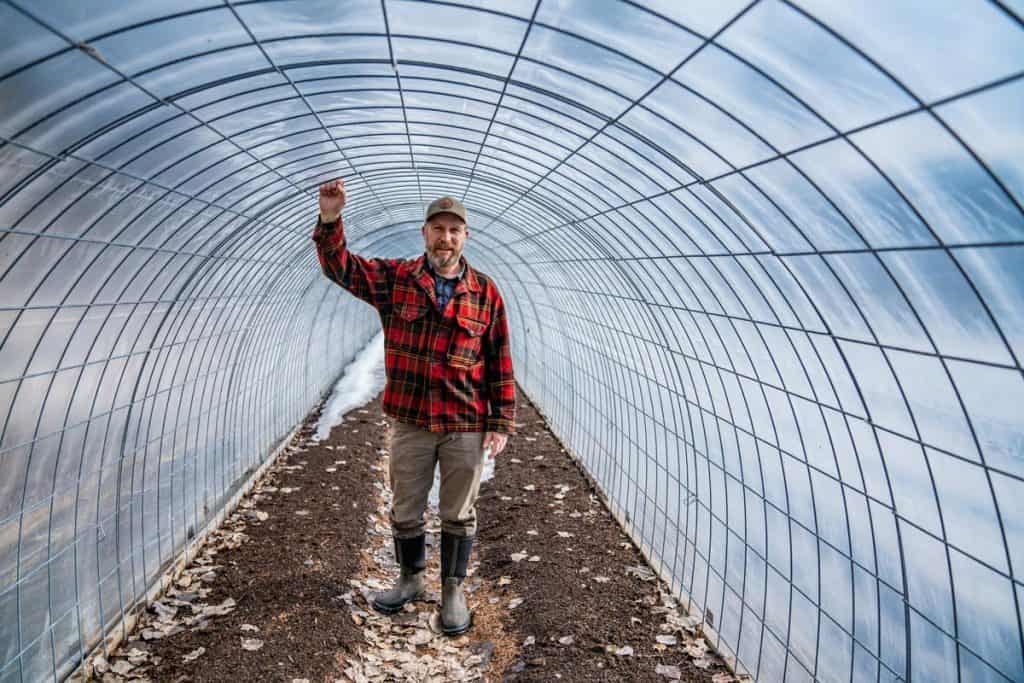
A hoop house is essentially a DIY greenhouse that sits in your garden. It's built using cattle fencing or PVC hoops that are wrapped in a greenhouse plastic covering.
You can build a hoop house or bean tunnel in a raised bed or as a row cover in your garden bed (as we show in this video), and by adding plastic sheeting you can extend your growing season to allow planting before temperatures warm-up and into the colder fall/winter months. You might be surprised to learn that there are cold-weather gardening methods to help you harvest food even in the winter.
Materials Needed for a Bean Tunnel or DIY Hoop House
- Metal fencing - such as hog or cattle fencing.
- Rebar stakes - cut into approximately 2-foot lengths.
- Wooden boards - we used 16-foot cedar because it's pretty rot-resistant, but we also happened to have some on hand, so use what you have.
- Mason line - tied to rebar stakes to create your straight rows.
- Zip ties - we like these because they're UV resistant.
- 6 mil, UV-protected greenhouse plastic - this isn't needed for a simple bean tunnel, but if you're making a DIY hoop house, anything thinner than 6 mil. will degrade in the sunlight and tear within a year or two. It's worth the investment for something that will last, and be sure you buy enough to cut out your doors!.
- Tarp Clips - to hold the greenhouse plastic onto the hoop house frame. These tarp clips would work great.
- Weighted hoop house framing - to weigh down the doors on each end.
- 2 Hoses + endcaps - use two inexpensive hoses cut to the length of your hoop house to weigh down the sides of the greenhouse plastic. Be sure each end has a cap so you can fill the hose with water to add enough weight.
- Gorilla Tape - To secure the hose inside the greenhouse plastic.
- T-Post Clips - To secure the hose when ventilating the hoop house.
Bean Tunnel/Hoop House Dimensions
Once you have all your materials, you'll want to decide your dimensions for your hoop house or bean tunnel. We are using 16-foot cattle panels that are about 4 ½-foot wide.
You can get them a little smaller if needed, but this works well for our needs, allows us to walk through the tunnel for weeding, planting, and harvesting purposes, plus gives us enough space to grow for our large family.
Do I Need to Use Rebar?
Technically, no. You don't have to use rebar. You could use flat metal forming stakes, wood stakes, or something else. Rebar is simply the cheapest option.
Also, if you're not using boards, some people use t-posts. If you are using boards, the 2-foot long pieces of rebar are used as stakes to hold the boards in place. The boards hold the fencing in place and create a very strong structure. Ours holds up well to moderate wind, heavy rain, and the weight of all our crops.
If you're doing a shorter run, you can eliminate the boards and just use the rebar stakes every 2 feet, or so.
Step-by-Step Instructions
1. Determine the width of your row.

Determine the width of your rows, then mark each edge. You want to make sure you're working with really straight beds.
To do this we use two stakes (two 2-foot pieces of rebar) and some mason line cut to the length of our row tied to each stake. We hammer down the stakes at each end of the row, then line up the boards in a nice straight line. (See video)
TIP: Working with flat ground really helps make this process smooth. If you can even out the ground under your boards before hammering in the stakes, you'll thank yourself later on.
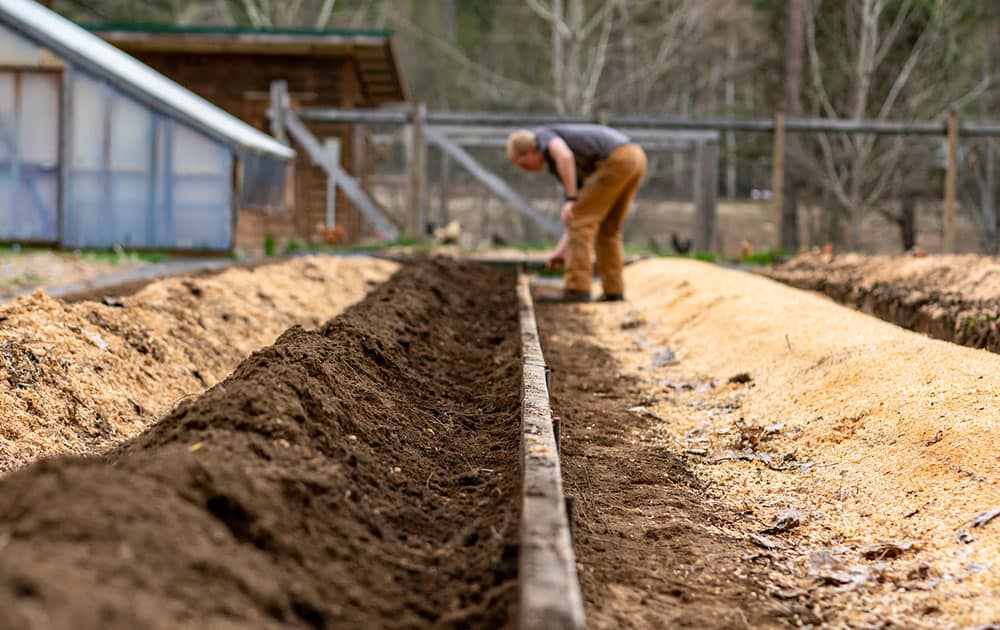
2. Stake the boards.

Space out the stakes where you want to hammer the rebar into the ground. Since our boards are 16-foot long, we use 5 stakes per board, two close to each end, and three more spaced about 4 feet wide.
If you're using a 2x board, staking every 4 feet should be plenty, however, if you're using a 1x or thinner material, you'll want to move in about every 2 or 3 feet.
Don't hammer the stakes down all the way, only hammer them in about half their length. Then, align the board up next to the stakes. Give the boards a good shake to see if there is any tilt or wobble in the board. If there is, clear out any rocks or uneven ground that may be causing the wobble.

Once your board is flat and secure, pull the soil right up to it to secure the board against the stakes.
Next, hammer the stakes down to the top level of the board. This avoids any trip hazards or catching on clothing while working in the garden later on.
Repeat steps 1 and 2 to the other side of your bed.
3. Level out the soil and add mulch.

Take a few moments to level out your soil and shape up the beds. We do this by raking the soil smooth, then pulling the mulch over the top (you always want your soil protected).
Making sure the beds are shaped up before adding the paneling is very helpful. Once those panels are up, it's a lot more difficult to use your long-handled tools inside the tunnel.
4. Put paneling in place.
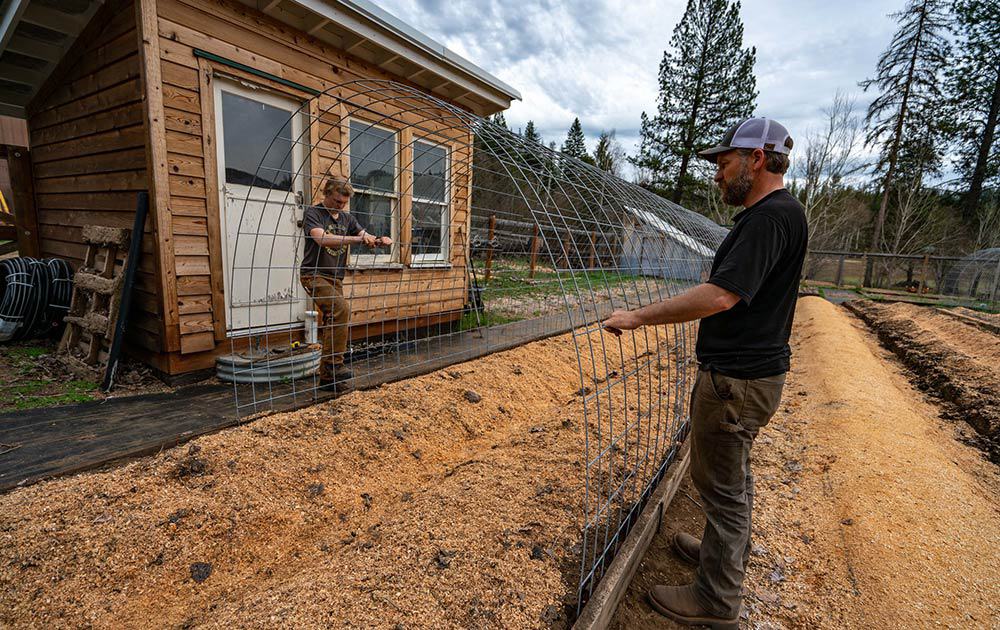
With the help of another person, add the cattle paneling by tucking the ends of each panel into the inside of the staked and secured boards.
IMPORTANT TIP: If you're using these panels as a hoop house frame, be sure the sidebars (or seams) of the panels are on the underside of the hoop. This will keep the plastic from catching and ripping when securing the plastic to the structure for a hoop house, but this is a major issue that's easily overlooked, so pay extra attention.
Using your foot, push them down into the soil a few inches, trying to keep them straight and even (this will help when it's time to tie each panel together to create the tunnel).
Your panels won't want to line up perfectly, so we'll be coming back later to tie them together.
Continue adding panels until your row is complete.
5. Secure the panels together.
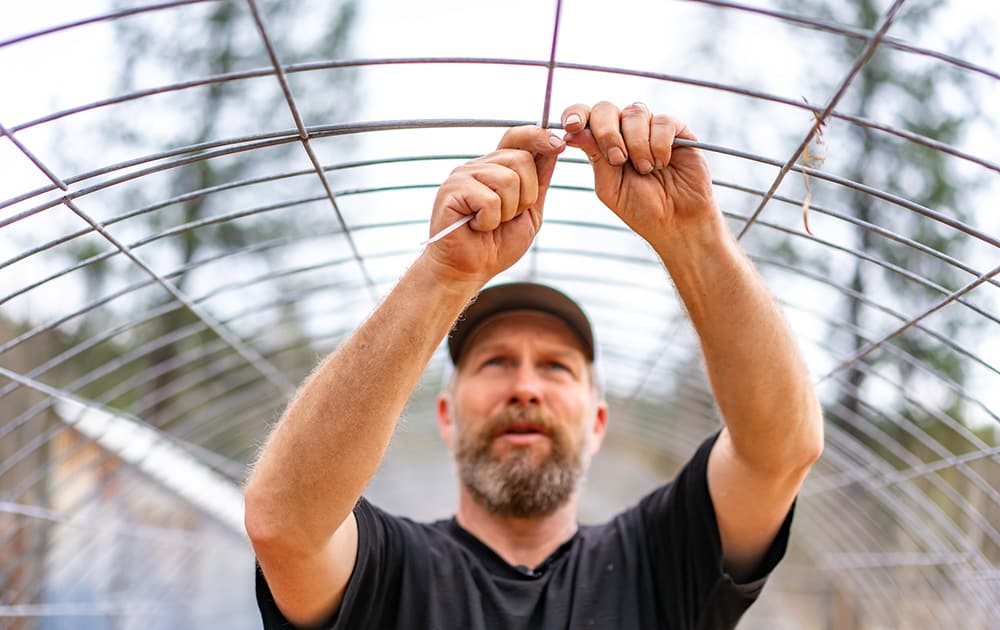
Using zip-ties, starting at the very top-center of the tunnel, secure each panel together, lining each one up to the panel next to it before securing.
Then add another zip tie on either side of the panel to secure the sides together.
I did not anchor the cattle panels to the boards. We have not needed it as the pressure has held it there and we do not have much wind on our property. But, if you're in an area with high winds or heavy rains, you will want to anchor the cattle panels to the boards.
You can simply use fencing staples or even screws over a horizontal bar of the catle panels to secure it to the wood.
I've filmed a second video demonstrating how we turn our "bean tunnel" into a "hoop house" by adding greenhouse plastic and a few other helpful elements.
6. Add Greenhouse Plastic
Once your frame is in place, the last step is to add your greenhouse plastic over your cold frame. Depending on how large your structure is, you may want an extra set of hands to help with this step.
Cut the greenhouse plastic to size so that there is just enough plastic (at least 2 inches, but no more than 6) at each opening so you can secure it by clipping it to the frame with tarp clips.
If you're going to weigh down the sides, you'll also want 12 inches on the sides so you can wrap up a hose for weight.
You'll also want to cut out "doors", or sheets of plastic with a slit down the center, to keep the cold air out as much as possible (watch the video for a good look at ours).
7. Secure with Tarp Clips

Secure all overlapping edges with tarp clips. You can purchase tarp clips at most hardware stores, they may look slightly different than what you see here.
To help secure the doors in place and keep them from blowing open with the wind, you'll want to affix a piece of hoop house framing to the bottom of each door panel.
8. Weight Down Sides
One thing about a hoop house or a greenhouse is that you'll need to be able to let some heat out if it starts to get too hot mid-summer.
The best way to do this is to be able to lift up the sides of the hoop house to allow for ventilation.
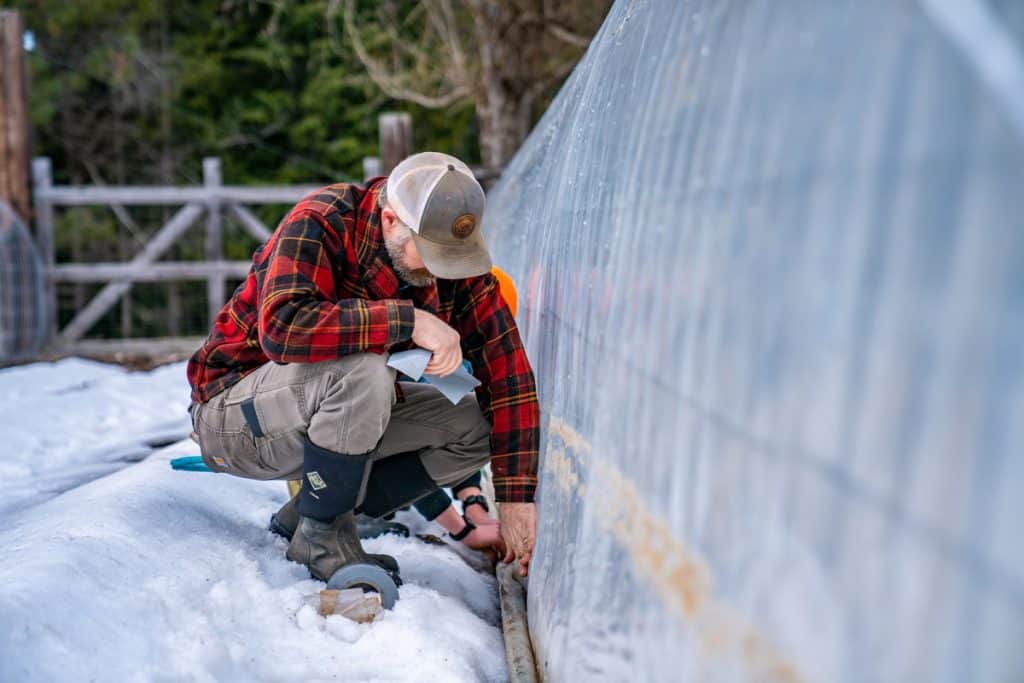
Because my hoop house is over 60 feet long, I needed something that is flexible but not too heavy or hard to work with.

I took a long piece of inexpensive hose, cut it to length and added end caps to both ends, then wrapped the greenhouse plastic around the hose and secured it with Gorilla Tape.
I added the endcaps to the hose because it's not very heavy and if it's really windy the hose won't keep the greenhouse plastic down. Then I can fill up each hose with water, then cap it off on both ends to add some weight.
This will allow me to easily lift up the hose and set it onto the T-post clips I placed inside to quickly ventilate the hoop house.
In the evenings, I can lower the hose back down and maintain the warm temperatures overnight.

And that's it! You're now ready to get your growing season started earlier, and extend your growing season into the cooler fall months. Did you know you can even heat a greenhouse or hoop house without electricity?
We've found transplanting our tomatoes, peppers and cucumbers into the hoop house has sped up their growth in our chilly northern climate, and, as long as we don't have an early hard freeze, we can extend their season well into fall.
More Gardening Posts
- Our Farm Watering System at Riverbend
- Seed Starting Problems (& How to Fix Them)
- How to Plant Tomato Plants, Cucumbers & Peppers
- Spring Garden Planning Ideas, Tips & Tricks
- How to Make Compost the Easy Way – Composting 101
- When and How Often to Turn Compost
- Home Composting (Troubleshooting & FAQ's)
- No-Till Gardening – Is It Right For You?
- Preparing the Garden for Winter: No-Till Gardening
- Garden Planning for Serious Food Production
- Spring Garden Planning Ideas, Tips & Tricks
- Making Raised Garden Bed Rows & Super-Charging Your Soil
- Garden Watering Strategies (How Much, How Often, When…)
- Crops That Will NOT Survive a Frost (Non Hardy-Vegetables)
- How to Grow Greens Year Round


