
Are you considering increasing your self-sufficiency and learning to cook on a wood stove to maintain your homesteading way of life? If you are used to using electric or gas, woodstove cooking can feel complicated.
However, when you understand the basics, it isn’t intimidating at all.
Use this guide to learn how a wood cookstove works, the best way to build a fire, maintain a consistent burn overnight, maintenance tips, and more!

Why We Love Woodstove Cooking
We consider a wood cookstove essential for our homestead. This multifunctional tool heats our home, cooks and warms our food, dries clothing and boils water.
There are things to consider before going off-grid, and even though we do not live fully off the grid, the wood cookstove gives us the flexibility to be prepared during a power outage and to be prepared for other emergency situations.
During the hot summer months, the wood stove is an attractive showpiece, but during cooler weather, it doubles as a useful tool.
We have used ours consistently for years and have found that the cast iron is durable, distributes heat well for slow cooking or baking, and provides an efficient heat source.

Anatomy of a Wood-Burning Cookstove
There are many different brands of wood-burning cookstoves, and most of them have the same parts and function; these are the features of the cast iron stove we use:
- Cooktop Surface - The flat top of the stove is the cooktop surface. Beware, the surface of the stove gets very hot, so use caution around children. When it comes to pots and pans, we choose cast iron cookware, such as a cast iron Dutch oven with a tight-fitting lid. It distributes heat evenly and works very well. Homesteading Hack: Cast iron works well but can intimidate some people. Knowing how to properly clean and maintain cast iron, how to season cast iron, and how to cook with cast iron removes the guesswork.
- Oven - The wood fire heats the oven box and then functions like any other oven.
- Thermometer - The thermometer displays the cooking temperature, allowing us to make adjustments as needed. Homesteading Hack: If your wood cook stove has no thermometer, you can purchase a temperature gun at your local hardware store for an accurate temperature.
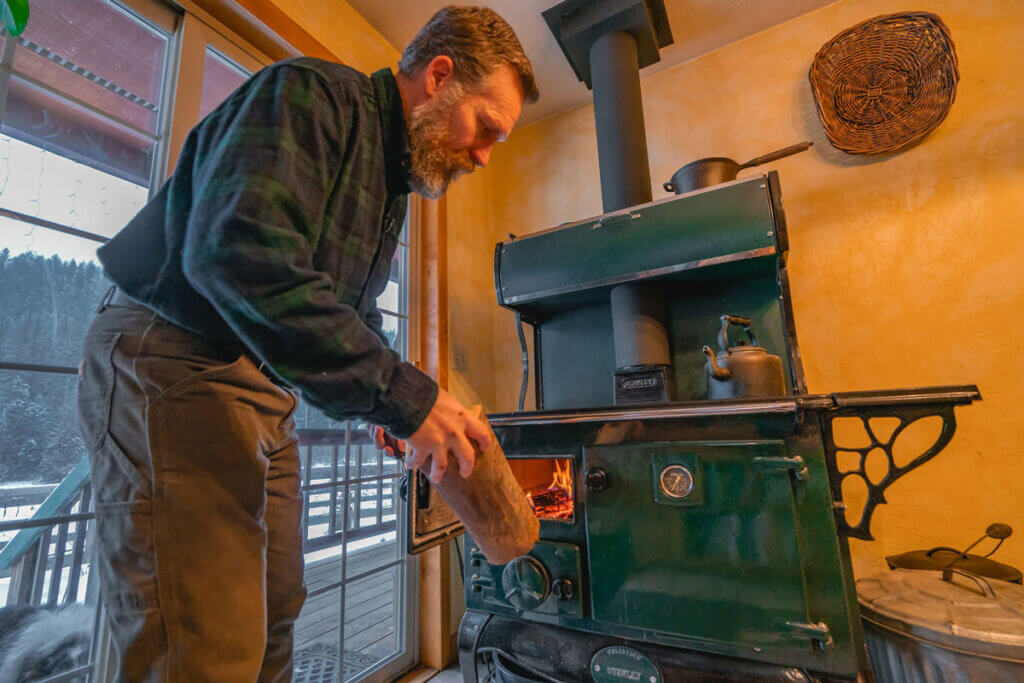
- Firebox - Our stove has two entries to feed the wood, front load and top loading features.
- Front Load - We generally use the front loading door when building the initial fire.
- Top Loading Feature - The top loading feature makes fully loading the firebox easy. It usually allows space for larger pieces of wood, and it’s convenient to drop the wood in to fill it for the night.
- Ash Bin – The wood you burn creates ash that builds up in the ash box. For safety and efficiency, it is best to empty the ashes when the stove is cold. We shovel out the ash box carefully into a galvanized bucket with a sturdy handle for transfer, ensuring no random coals are burning under the ash.
- Airflow Controls - This controls the airflow that goes into the firebox to help increase, maintain or decrease the cooking temperature. More airflow makes the wood burn faster and hotter; less airflow lowers the temperature.
- Warming Box - The warming box heats up from the residual heat that rises from the firebox. We love this feature for proofing bread or letting our Parker House Rolls rise. It's also fantastic for starting cultures for homemade dairy products or keeping food warm.
- Stove Pipe - A good quality triple-walled stove pipe is essential as it goes from the stove through the roof of your house. You want it to draw air efficiently and stay cool enough on the outside of the pipe so you don’t have a house fire.
- Chimney Pipe Cleaning Kit - Regularly keeping your chimney pipe clean is important. Otherwise, you could experience creosote build-up, which can cause a chimney fire.
- Specialized Tools - There are special tools specific to our cookstove that lift the top and front of the woodbox, open the damper for airflow, and protect us from getting burned. Homesteading Hack: I recommend a good pair of heat-resistant gloves; wood cookstoves get extremely hot.
- Oven Mitts - It is helpful to have a few good quality oven mitts easily accessible to grab handles when cooking with cast iron because the handles will get hot.

How a Wood Cookstove Works
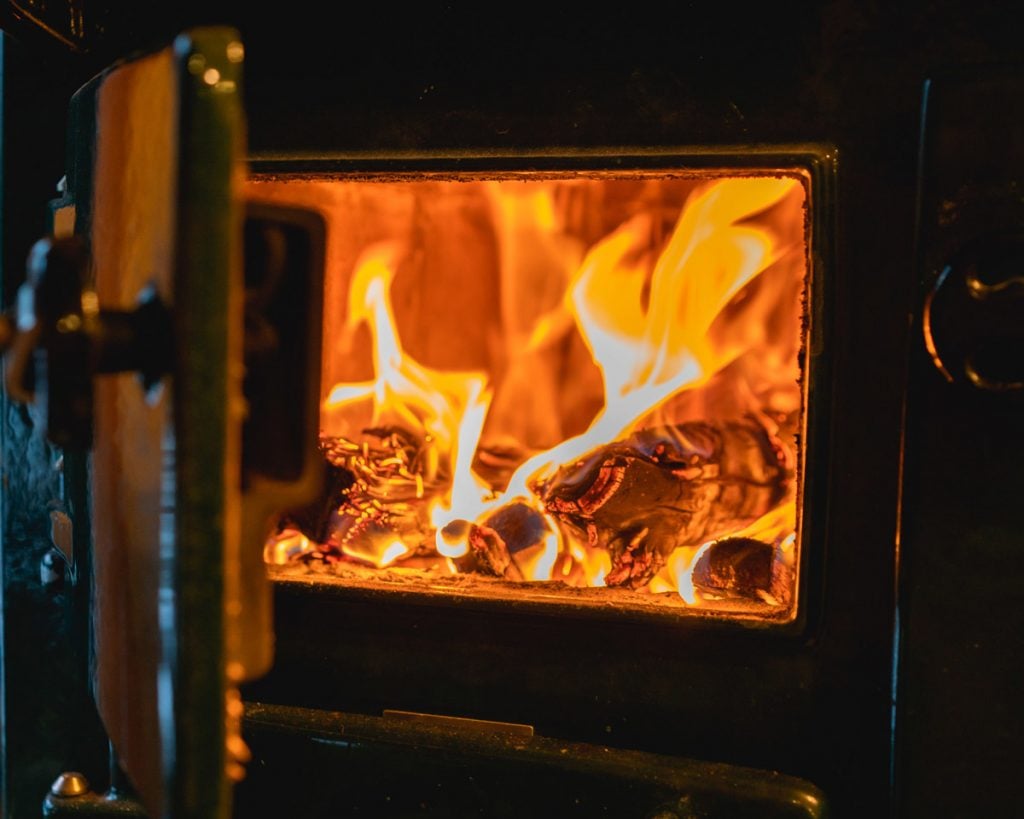
The important thing to learn about how a wood cookstove works is keeping your burn going in a specified order. Most importantly, getting the fire going hot and quick. Doing this also burns out any creosote build-up in the flue.
The stove pipe is cold when you start the fire, and as it warms up, it draws the heat through the stove, keeping the fire going without overheating it, especially for cooking purposes. It takes time to learn the nuances of your cookstove; be patient and keep experimenting with the airflow.
After 5 minutes, check to see if it’s burning quickly and hot. Then, add more dry wood to it, getting it even hotter. Check again at 15 minutes until it’s a steady burn, creating a coal base. Try not to let the fire die by checking it too often.
It takes about 45 minutes to get to 350°F on our stove; and then I adjust the airflow for consistency. Building a good coal base for even heat is what you're looking for.

Best Wood for Wood Stove Cooking
Living in North Idaho, we have a lot of wood species to choose from. The most important thing is the dryer the wood, the better the burn.
Some things to consider when choosing your wood:
- Moisture Content - Moisture in the wood causes creosote build-up and smoldering. It won’t produce a quick, hot fire; using dry wood is key. The compressed logs are perfect for starting our stove, along with dry native woods to keep it burning.
- Size - Keep the wood manageable in size for your stove box opening. It’s frustrating (and potentially dangerous) when a piece of wood is too big or long to fit in the opening.
- Energy Logs - Energy logs are economical for us because we have a manufacturing plant in our area. These pressed sawdust logs work well, keeping a consistent heat and a long burn going. They are a nice size that fit well in our stove’s firebox openings.
Homesteading Hack: We use a variety of wood. Larch burns fast and really hot. Lodgepole pine heats quickly, then cools off. Red and white fir burns hot and lasts a long time. Use what’s in your area, learn how it burns, and ensure it’s dry.
How to Build and Maintain a Fire for Wood Stove Cooking
Every stove is different, and building and maintaining a fire for wood stove cooking takes time and patience. Here are the techniques we use:
- While the stove is cold, clear the ash grate and empty the ashes into a galvanized bucket with a sturdy handle.
- Open the airflow vent or damper.
- Add tinder (newspaper, cardboard, etc.)
- Add kindling, which are smaller slivered pieces of dry wood (and an optional log or two of compressed wood).
- Light tinder and kindling on fire (we love using these DIY firestarters!) Close the door for about 5 minutes.
- Load larger pieces graduating in size through the top firebox, close the door or lid and allow it to burn for about 15 minutes.
- Close the damper for less airflow but still enough to keep it burning hot to reach the desired temperature for specific use.
- Bring oven to about 350°F (should take around 45 minutes.)
- Now load the stove with larger pieces of wood, turn down the remaining airflow vent(s) and periodically check it until it’s where you want it.
- Manipulate the air-flow vent throughout the day to increase or decrease the temperature according to the purpose you are using your wood cookstove.
- Throughout the day, you must also check and reload the firebox as needed. The amount of wood you reload will depend on how fast the wood burns.
- To bank your fire for the night, open the lower airflow vent and completely fill the firebox (we like to use larger rounds for the evening, as they burn longer than split wood).
- Allow the fire to burn hot for about 15 minutes.
- Then, close down the airflow vent to create a slow burn.
- In the morning, you should have coals remaining to begin at step 6 for the following day.
Homesteading Hack: Remember to periodically allow your fire to die so that you can safely empty your ash grate. Never, ever put ash in a combustible container and always put the full container on asphalt for several days; never assume that the ashes won’t reignite if they come in contact with a combustible material, they will!

Other Articles You May Enjoy
- Homemade Meals Made Easy: Cooking from Scratch
- 3 Things You Must Do To Increase Self-Sufficiency
- What is Homesteading?
- Preparing the Homestead for Winter
- How to Prepare For Power Outages (Short-Term Power Outages)
- Things to Consider BEFORE Going Off-Grid
- Parker House Rolls Made With Sourdough
- Making Homemade Dairy Products Practical


