


If you have a neglected garden, and your soil is compact and devoid of organic matter... or if you are just ready to up your garden's health and production... it may be time to super-charge your garden space by building raised garden bed rows. In this post, you'll learn why soil health is the most important thing in gardening, and how to improve your soil while shaping up your garden area.

We get asked frequently, "What's the best method for gardening?" Truthfully, there are many great options, raised bed gardening, raised rows, market garden style, cottage garden... and within these styles of gardening there are other methods to consider, like the age-old question "to till or not to till?," the lasagna or layering method, back to Eden style gardening and more!
Over the years, as we've lived on multiple properties with different soil types and climate conditions, we've found that there are some principles that help all gardens to thrive, regardless of time, space and location.
Those principles are good soil tilth, organic matter, biological life and minerals. No matter what your situation or soil type, you must have these for a thriving and healthy garden.
For us, I have found that using raised rows in a low to no-till situation along with a layering style of management is the most productive and efficient way to cultivate soil health and a thriving garden.
Why Build Raised Rows?
Since our garden was so compact, there was very little aeration in the soil, meaning oxygen and water couldn't flow through it very well. It needed to be loosened up so it could receive both water and oxygen.
I typically don't like to till the ground because it breaks down the biological ecosystem below the soil over time and brings up dormant weed seeds causing more weeds to grow and become a nuisance; but every now and then, it can be beneficial to till, especially when rehabbing a neglected area of ground.
This will quickly loosen up the soil and allow water and oxygen to penetrate the ground, along with making it easier for plant roots to reach out for what they need.

Building Soil Quality
Healthy soil equals a healthy garden. The health of your garden lies in the health of your soil. As I've said before, dirt is dead. It's just minerals devoid of the ability to sustain life.
Healthy soil is full of life. It's that life that transports the minerals and the nutrition to your plants. In modern agriculture, we have treated the ground as a structure to just hold plants, then feed them artificially with fertilizers to try and increase production.
There are a whole lot of problems with this method and it's not what we want to do in our gardens. We want to create a healthy, organic, sustainable system by feeding the bacteria, fungi, nematodes, worms, and other life. All the things that nourish the plants and make the whole system work.
So What Makes Healthy Soil?
Just as we take care of our bodies with proper nutrition, growing food that will nourish our bodies requires that we nourish the soil. No matter where you are, or where you're creating your garden space, the basics of learning how to improve soil quality are the same.
Soil needs:
- Oxygen
- Water
- Carbon
- Minerals
- Biological Life
A lot of land has been overused and abused and the soil you have is likely devoid of some of these components, especially carbon and biological life. So we must cultivate them.
When we bought our property, our garden was mostly silty sand. There was virtually no organic material (carbon) or biological life to be found in the soil. It was dirt, and dirt is dead!
So what to do?
First, we took a basic pH test for the soil. We are at just under 7.0 so no worries there. For a vegetable garden, a PH of 6.0-7.0 is good, 6.5 being pretty ideal. If you are outside of that, you may want to look into strategies for amending the pH, depending on your situation. And that is a different discussion for a different time!
Building Raised Rows in the Garden
If you're looking to rehabilitate your garden and would like to build raised garden rows, here are the basic steps I took:
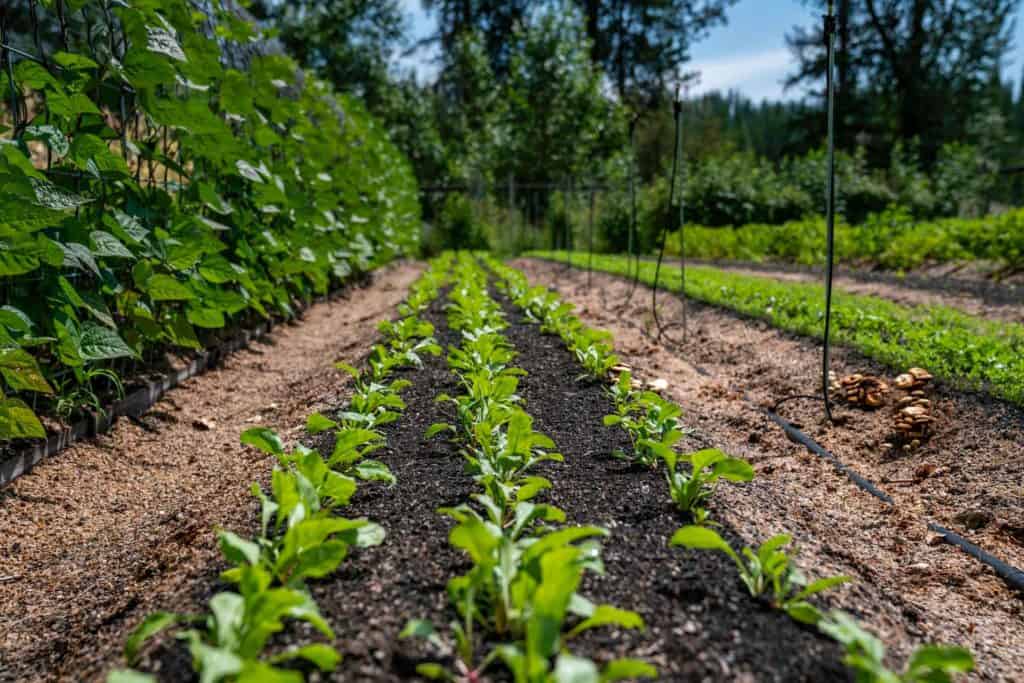
- Decide how many rows you're going to make and roughly plan them out. I like to use rebar and mason line to make nice straight rows and mark out the width of both the rows and the walkways.
My beds are 30-inches wide because they help maximize space while allowing us, and even the kids, to reach into the middle of each row easily. I can also continue to tend to them with our BCS tractor when needed. My walkways are about 16-18 inches, which is just enough to get a wheelbarrow through and work the beds when sowing, weeding, and harvesting from a standing or squatting position. The dimensions of your garden will be determined by your needs and your space. - Make one pass with the BCS tractor (tiller attachment) to get the soil loosened up.
- Check the soil after one pass to see how deep you were able to till. On the first pass, I only got about 4-5 inches deep. I want to get as deep as I can, about 8 inches with a tiller like the BCS, so I'm going to add an inch of compost and take another pass to work that in while getting a bit deeper. I’d add 2-3" here if I had it, but my budget wouldn’t allow for it at the time.
- Check the depth of the soil again, if you're about 8 inches then you're good to go, and about as deep as you are going to get with a tiller. If not, take one more pass with the tiller, then continue.
- With a rake, pull up the extra soil from the walkways onto the raised bed rows to give them a little more depth. Depending on how much compost you add and how wide your rows are you can end up with 10-12” of good soil tilth. That’s a great start!
- Using the rake again, or the BCS power harrow, flatten out the top of the beds as best as possible.
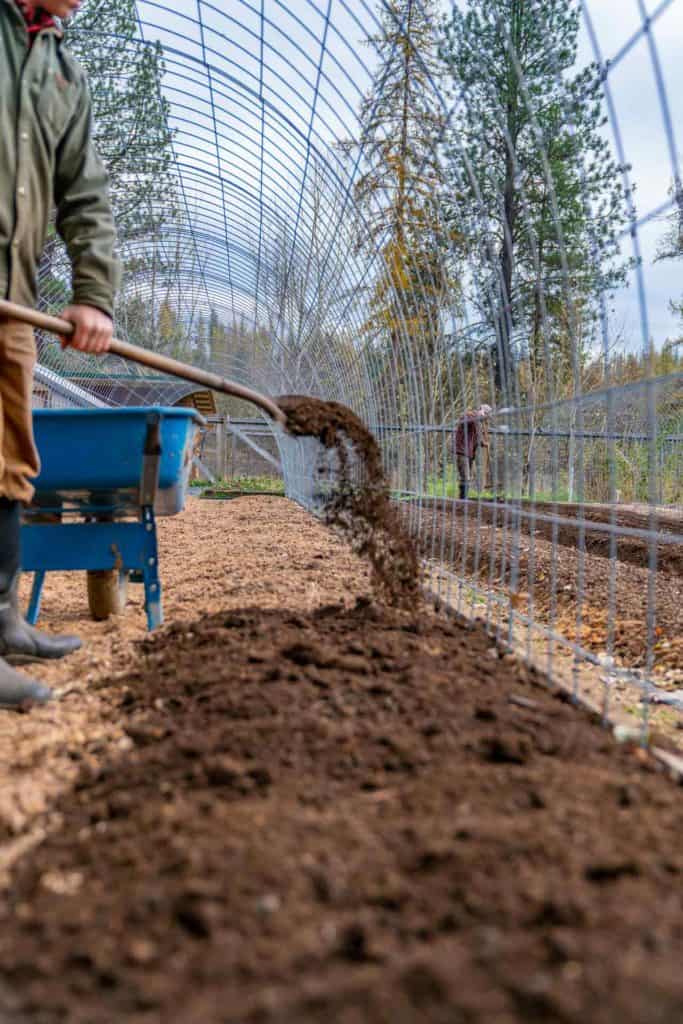
- Add one or more inches of compost over the rows using either a shovel or the BCS Spreader attachment. Again, I would have used up to 3” in this situation if I could have afforded it.
- Then depending on what you will be planting in each individual bed, layer on 2-3 inches of mulch to "put a blanket" on your soil and your garden beds are now ready for planting. If you are planting smaller seeds directly in the soil, like lettuces, spinach, carrots, etc, you will need to skip the mulch and allow the crop to be your cover. Those smaller seeds will not do well pushing up through that much mulch.
Adding Compost
In order to improve the soil biology, allow for better oxygen flow, and enable more water retention in our soil, we have to add organic matter. This is where compost comes in.
This will also add some minerals if it is good compost and begin to develop a biological system that will start to release the minerals already in your soil.
To keep the costs down our first year, we only added one inch into the soil and one inch over the top of each row. That first year our garden did pretty well. The second year we added another 2 inches of compost and worked it gently into the top couple of inches, without tilling, and this year we are adding 1 inch of compost and will be loosening the soil with a broad fork.
The garden is coming along nicely, we make our own compost and homemade bonemeal now, and every year gets a little better! Ideally, depending on how intense of a growing schedule you use, you should only need to add ½-1” of compost every year, or growing season if you plant more than once in a year, once you are up and running.
Now, if your soil is in dire shape or you just have the resources and want to super-charge the system quickly, I would recommend tilling in 3-4 inches of compost, then adding another 2-3 inches of compost on top, followed by a thick layer of mulch.

The Right Tools for the Job
In the video above, I’m using a BCS Two-Wheeled Tractor. Though hand tools can certainly get the job done, it takes a lot longer and uses a lot more manpower, especially on a plot our size where we are growing for 13 plus people. And since the BCS comes with so many attachments, I’ve found it extremely helpful around the homestead.
If you are using hand tools, then a couple of good shovels, hard rakes and soft rakes will get the job done. I recommend a Bed Preparation Rake if you can afford it, that will be really helpful for managing your raised beds.
For my full list of recommendations and tips on how properly care for garden tools, check out my favorite tools for gardening.
If your garden is too large to manage by hand, but it’s not quite large enough to merit a full-sized tractor, the BCS is a great tool that will help you not only get the job done in the garden, but in many other areas of your property.
However you get it done, if you are going to grow an abundant garden full of nutrient-dense veggies, while being a good steward of the land and working efficiently, raised row gardening as described above is my preferred method!
More Gardening Related Posts
- How to Keep Weeds Out of the Garden
- Spring Garden Planning Tips & Tricks
- Get a Jump Start on Early Spring Gardening – Pantry Chat #75
- How to Build a DIY Hoop House (Greenhouse)
- When to Start Seeds Indoors
- Seed Starting Problems (& How to Fix Them)
- How to Grow Greens Year Round
- Crops That Will NOT Survive a Frost (Non Hardy-Vegetables)


