We love being able to enjoy fresh produce year-round, even when our gardens are covered by multiple feet of snow. Learning how to grow sprouts at home has been such a great addition to our homestead kitchen routine! Whether you want to enjoy broccoli, alfalfa, buckwheat, or red cabbage sprouts, the basic directions are the same. Follow these easy steps to get sprouts growing in your kitchen today.

We enjoy growing a huge garden where we eat fresh produce all season long and then preserving that produce to enjoy throughout the year. Many years we're also able to grow greens all year long, if the weather cooperates.
Along with our preserved vegetables, we love having fresh produce to consume throughout the winter months for an added boost of nutrition.
Health Benefits of Sprouts
Both sprouts and microgreens have amazing benefits. Since they're living foods, they're considered biogenic foods. This means they have extra enzymes that will give you extra energy to get through your day.
Sprouts are filled with vitamins, minerals, enzymes and amino acids, which are the building blocks of proteins. This makes them good for digestion, your skin, your liver, your kidneys, your lymph glands and just about every other part of your body. In fact, the compounds inside sprouts "are responsible for antidiabetic, anti-obesity, antioxidants, as well as many other biological activities." (Source)

Sprouts vs Microgreens
Many people hear sprouts and microgreens and think they're the same thing, but they're not! While sprouts don't need a growing medium, microgreens do. They need to be grown in something like soil, coconut coir, or a hydroponic or aquaponic system.
Sprouts, on the other hand, can be grown in a Mason jar with a special seed-sprouting lid (or a piece of cheesecloth) and require very little hands-on attention. Microgreens require careful alignment of light, ventilation and watering needs. So, compared to sprouts, microgreens require quite a bit more maintenance.
Though we've been successfully growing both in our kitchen, if you're just wanting to get started, I'd recommend starting with sprouts.

Types of Sprouts
Following this step-by-step tutorial, you can easily grow many kinds of sprouts at home. From the alfalfa or broccoli sprouts you can find at your local grocery store to mung bean sprouts perfect for topping homemade pho!
If you're not sure where to start, look for a sandwich blend or a salad blend. These are a blend of common seeds where you get to enjoy the great flavor and all the nutritional benefits of each seed combined.
Most sprouts fall into four categories:
- Bean and Pea Sprouts: These will grow larger, more substantial sprouts and include black beans, kidney beans, mung beans, lentils and snow pea sprouts.
- Vegetable Sprouts: We love growing veggie sprouts like alfalfa, broccoli, clover, caraway, clover and radish sprouts. These are generally the sprouts you'll find in the sandwich or salad blends (mentioned above).
- Nut and Seed Sprouts: We don't always think of nuts or seeds when talking about sprouts, but pumpkin seeds, sesame seeds and sunflower seeds will all grow into delicious fresh sprouts.
- Sprouted Grains: Sprouting grains is something we've done in the past for baking, but you can also sprout grains to grow into things like wheatgrass or quinoa sprouts.
How to Grow Sprouts at Home
As mentioned, getting started with sprouting is very simple. Just gather your supplies and follow the step-by-step directions below. In about 3-4 days, you'll be enjoying fresh home-grown sprouts!

Supplies Needed
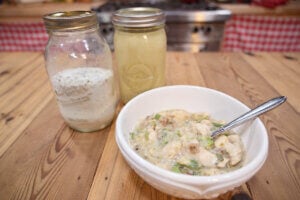
- Sprouting Jar/Container - You will need some kind of container to grow your sprouts. We like to use wide mouth Mason jar because we have special seed-sprouting lids that fit right on top. I don't recommend going any larger, as the jars become a bit cumbersome to handle. If we want to grow more sprouts, we just add additional quart-sized jars.
- Lid - It's best to have a sprouting lid to make rinsing and draining a breeze. You can get stainless steel seed-sprouting lids or sprouting screens that fit inside a wide-mouth canning lid band from Azure (or these plastic seed-sprouting lids from Amazon). If you don't want to spend money on a special lid, you can always use a piece of cheesecloth and a rubber band.
- Seeds - When it comes to buying seeds for sprouts, quality matters! We like to purchase ours from Azure Standard. Keep in mind, when sprouting seeds to eat, you'll use a lot more than you do when growing the seeds into a plant (like when gardening). I linked all our favorite sprouting seeds above!

Step-by-Step Directions
Soaking the Seeds
- Start with a clean quart-size jar (or smaller). Add a scant tablespoon of seeds to the jar (or less, depending on the size of your jar).
- To kick off the sprouting, you want to soak the seeds in about a cup of room-temperature water for 6-12 hours.


Sprouting the Seeds
- After soaking the seeds, drain off the water and rinse the seeds well.
- Let your jar sit at room temperature for 12 hours.
- Every 12 hours, rinse the seeds well by filling the jar with water, swishing everything around, then dumping the water out. Homesteading Hack: This is where the sprouting lids come in very handy as you can fill and drain the water through the lid.
- After about 12 hours, you'll already start to see little tails poking out of the seed! Congratulations, it's working! Continue to rinse the sprouts every 12 hours (following step 3 above) for 3-5 days until the desired length is reached.


Rinsing & Draining the Sprouts
- Once the sprouts reach two to three inches in length, give them a good thorough rinsing (I like to rinse them two or three times to help de-hull the sprouts).
- To de-hull sprouts, add them to a large bowl and fill it with water. Swish the sprouts around, and the hulls of the seeds will float to the top. Drain the water (and hulls) off. It's OK if some hulls remain, they're harmless, and you may not even notice you're eating them.
- Drain sprouts thoroughly and pat dry with a towel.
- Store them in an airtight container, along with a paper towel to absorb excess moisture, for up to a week. Homesteading Hack: Sprouts will have the most nutrient density on day 5, so consume them as close to that day as possible.
Homesteading Hack: You can consume the sprouts at any stage, from 12 hours up to 5 days! The sprouts will continue to grow up to about two to three inches in length (depending on the seed). If you want continuous sprouts, consider starting a new jar of sprouting seeds every day for an endless supply of sprouts.

Health Risks of Eating Sprouts
When grown at home in a carefully controlled environment, there's virtually zero risk of eating sprouts. However, there is concern when the instructions aren't followed.
Because sprouts are grown in a warm, humid environment, they can run the risk of carrying foodborne illnesses such as E. coli or salmonella. (Source) We highly recommend following the instructions above and always rinsing your sprouts well every 12 hours.
More Posts You May Enjoy
- Best Way to Use Up Garden Produce – Garden Stir Fry
- How to Build a DIY Hoop House (Greenhouse)
- Garden Watering Strategies (How Much, How Often, When…)
- Growing Onions From Seed
- 12 Things You Must Do to Prep the Garden for Winter
- How to Keep Weeds Out of the Garden
- Supercharge Your Garden With Raised Garden Rows
- Crops That Will NOT Survive a Frost (Non-Hardy-Vegetables)

How to Grow Sprouts
Equipment
- Sprouting Jar
- Sprouting Lid
Ingredients
- 1 Tablespoon sprouting seeds
Instructions
Soaking the Seeds
- Start with a clean quart-size jar (or smaller). Add a scant tablespoon of seeds to the jar (or less, depending on the size of your jar).
- To kick off the sprouting, you want to soak the seeds in about a cup of room-temperature water for 6-12 hours.
Sprouting the Seeds
- After soaking the seeds, drain off the water and rinse the seeds well.
- Let your jar sit at room temperature for 12 hours.
- Every 12 hours, rinse the seeds well by filling the jar with water, swishing everything around, then dumping the water out. Homesteading Hack: This is where the sprouting lids come in very handy as you can fill and drain the water through the lid.
- After about 12 hours, you’ll already start to see little tails poking out of the seed! Congratulations, it’s working! Continue to rinse the sprouts every 12 hours (following step 3 above) for 3-5 days until the desired length is reached.
Rinsing & Draining the Sprouts
- Once the sprouts reach two to three inches in length, give them a good thorough rinsing (I like to rinse them two or three times to help de-hull the sprouts).
- To de-hull sprouts, add them to a large bowl and fill it with water. Swish the sprouts around, and the hulls of the seeds will float to the top. Drain the water (and hulls) off. It’s OK if some hulls remain, they’re harmless, and you may not even notice you’re eating them.
- Drain sprouts thoroughly and pat dry with a towel.
- Store them in an airtight container, along with a paper towel to absorb excess moisture, for up to a week. Homesteading Hack: Sprouts will have the most nutrient density on day 5, so consume them as close to that day as possible.
Notes
Types of Sprouts
Following this step-by-step tutorial, you can easily grow many kinds of sprouts at home. From the alfalfa or broccoli sprouts you can find at your local grocery store to mung bean sprouts perfect for topping homemade pho! If you’re not sure where to start, look for a sandwich blend or a salad blend. These are a blend of common seeds where you get to enjoy the great flavor and all the nutritional benefits of each seed combined. Most sprouts fall into four categories:- Bean and Pea Sprouts: These will grow larger, more substantial sprouts and include black beans, kidney beans, mung beans, lentils and snow pea sprouts.
- Vegetable Sprouts: We love growing veggie sprouts like alfalfa, broccoli, clover, caraway, clover and radish sprouts. These are generally the sprouts you’ll find in the sandwich or salad blends (mentioned above).
- Nut and Seed Sprouts: We don’t always think of nuts or seeds when talking about sprouts, but pumpkin seeds, sesame seeds and sunflower seeds will all grow into delicious fresh sprouts.
- Sprouted Grains: Sprouting grains is something we’ve done in the past for baking, but you can also sprout grains to grow into things like wheatgrass or quinoa sprouts.