
It seems the holiday season always creeps up on us, and preparing ahead of time is key. With many traditions around home cooking and holiday drinks, aged eggnog is definitely on the menu.

The art of homemade aged eggnog dates back long ago, but Alton Brown has made it a popular cocktail recipe once again. Make this recipe when you have an excess of farm-fresh raw eggs, and when needing to use up extra heavy cream or milk, then add your sugar and dark rum to make this recipe for the holidays.
Why I Love Aged Eggnog
There are several ways to preserve eggs, and I enjoy using them because we have access to many eggs on our homestead. Making aged eggnog is another example of a lost cooking art that I'm happy to bring back.
Along with this homemade eggnog (that Pa Ingalls used to drink), this method and recipe are one of my favorites. I just love that wonderful taste of cream eggnog topped with nutmeg.
It’s a two-step process that takes 20 minutes for step one, patiently waiting for a three-week period in cool storage, adding five more minutes to finish step two, and it’s ready to drink! Simple, just the way I like it.
Once you taste homemade aged eggnog, you’ll never go back to store-bought again. Its healthy, rich, creamy texture and depth of flavor are unbeatable.
Making aged eggnog is one of those holiday traditions we enjoy sharing with our adult family members and friends. I have been making batches of eggnog for years, safely and with great success. It is one of our favorite holiday classic drinks.
The holidays are a special time for our large family; knowing that we have worked diligently to bring in our harvest and filled our pantry shelves for the year brings great satisfaction!
Drinking eggnog, hot cocoa, and sparkling apple cider, listening to the crackle of the wood stove, seeing the blanket of snow covering the mountains around us, and enjoying each other's company are heart-warming.
Traditions are important to Josh and me as we enjoy watching our beautiful family grow on our homestead. And we want to enjoy the holidays without all the stress.
The holiday spirit of giving, sharing with others, and celebrating the love of family and friends becomes even more special during this time. (You may like our homemade Christmas gift guide, or our homesteaders gift guide.)

History of Aged Eggnog
Culinary historians surmise that an early version of “eggnog” could have been created by medieval cooks using hot milk and liquor, calling it “posset,” and adding whatever spices they had on hand.
The American colonies of the late 17th century had established their homesteads, with cows, chickens and spices providing an abundance of eggs, milk and spiced rum.
The realization was that alcohol preserved the eggs, making them safe for long-term storage. George Washington, and others in his time, figured out how to preserve his eggs by making this timeless drink.
Here we are today with scientifically proven data that aged eggnog is perfectly safe to drink when made with at least a 20% alcohol content (80 proof or higher) and a little time to work its magic! (Source)
Through trial and error and much experimentation, they created this safe and healthy drink we know as aged eggnog!
Can Eggnog Be Aged?
Yes, when the alcohol content is 20% of the egg and sugar mixture, it becomes sterile and can sit in cool storage on a shelf for up to a year. Usually, I use the egg base and make my eggnog before the three-week mark (you can make it up to a year in advance!).
Homestead Hack: Remember to date your jars of egg base.

How Long Does Aged Eggnog Last?
Once the milk and cream have been mixed with the egg base, the amount of alcohol won’t keep it shelf stable. Simply store it in the refrigerator in the glass jar for up to a week. Trust me; it won’t make it long because it tastes so good!
Supplies Needed
- Large Mixing Bowl - An 8-quart mixing bowl will allow sufficient room for all ingredients.
- Large Whisk - A flat whisk or a hand mixer to blend thoroughly.
- Measuring Cup - A 4-cup measure works well.
- Large Clean Glass Jar - A clean two-quart canning jar works great!
- Canning Lid with Ring - This keeps it airtight and spill-free.
- Funnel - It helps when filling the jars and helps to strain the eggnog base.
- Blender - Useful when mixing the eggnog base and milk/cream (it may take two batches depending on the quantity made.)
- Micro-Grater - Helps finely grate the fresh nutmeg.
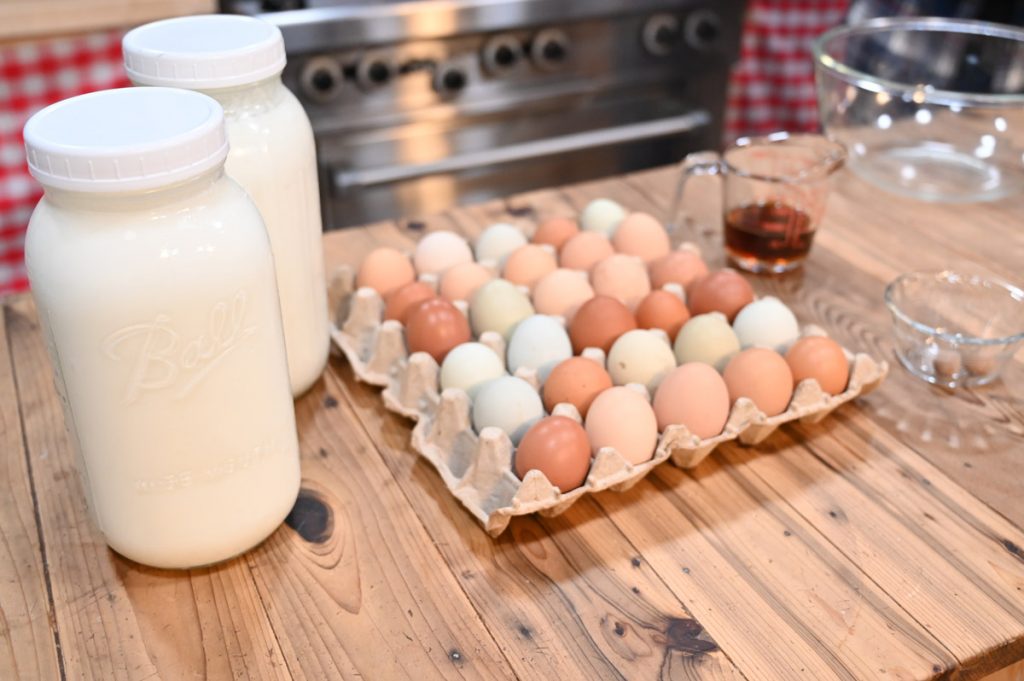
Ingredients Needed
- Whole Eggs - Brown, white, pasteurized eggs, farm fresh, all will work well.
- Homesteading Hack: It isn’t necessary to separate the yolks from the egg whites when making the eggnog base; use the whole egg. Keep it simple is my motto!
- Sugar - White or unrefined organic works too.
- Milk or Heavy Cream - A mix of the two is nice and creamy. (I use 5 cups of milk and 1 cup of heavy cream.)
- Alcohol - Bourbon (1 ½ cups), Cognac (½ cup), Rum (⅓ cup), mix it up if you prefer as long as they are all 80 proof.
- Homesteading Hack: It is essential to use one and a half ounces of 80 proof or higher alcohol per egg to make sure it stores safely and preserves the eggs. It sounds like a lot of alcohol, but trust me, it mellows with age.
- Nutmeg - Fresh grated is my favorite, but fine ground works too.

Aged Eggnog Recipe - Part One
- Crack 12 whole eggs into your mixing bowl (no need to separate the eggs).
- Pour in 2 ⅓ cups of alcohol, making sure it’s 1½ ounces per egg, 80 proof or higher. (Bourbon 1½ cup, Cognac ½ cup, Rum ⅓ cup)
- Add 1½ cups sugar.
- Mix well by hand with a whisk or use a hand mixer. It takes about 5 minutes and should be thoroughly incorporated. Homesteading Hack: Pour the eggnog base into your blender to ensure it is thoroughly mixed.
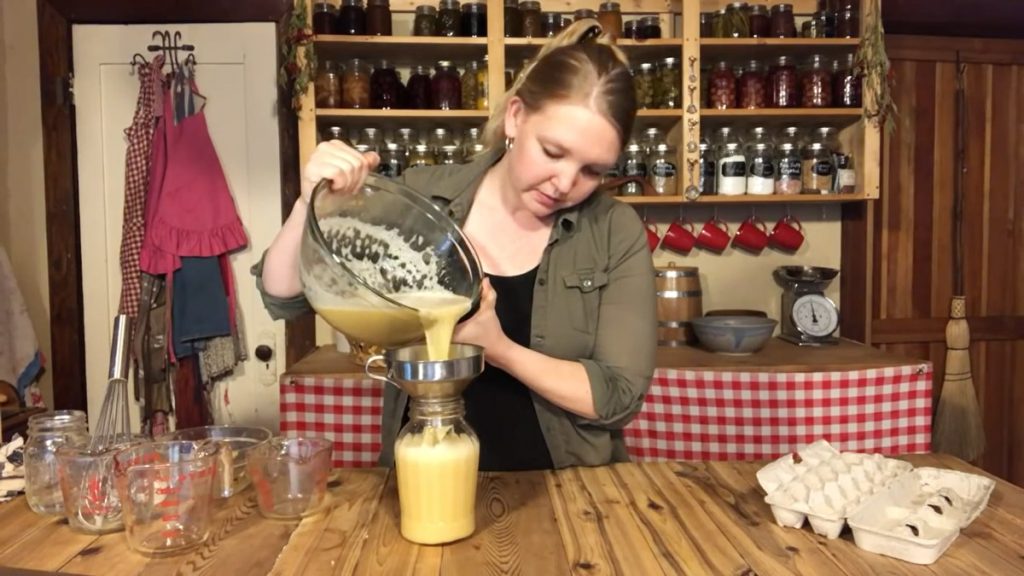
- Using the funnel, pour it into your glass jar and cover it with a tight-fitting lid.
- Place in cool storage for at least three weeks ( the longer it sits, the more mellow it will become) to allow the alcohol to kill any bacteria in the eggs.

Aged Eggnog Recipe - Part Two
- Remove the eggnog base from cool storage.
- The mixture will have separated, and that is perfectly normal; give it a vigorous shake. Homesteading Hack: If you have a large enough bowl to hold the eggnog base, milk, heavy cream and nutmeg, do so and give a stir, then add in batches that will fit into your blender.
- Add all the eggnog base to your blender.
- Measure out 5 cups of milk and add to your blender.
- If there is still headroom, add 1 cup of heavy cream. (Careful not to fill too full, it will make a mess.)
- Grate into the mixture ½ teaspoon of nutmeg or add ½ teaspoon of finely ground nutmeg.
- Mix well with a blender, pour into a glass, top with a sprinkle of nutmeg and enjoy!
More Posts You May Enjoy
- How to Make a Wreath
- Fruitcake Cookies
- Nantucket Cranberry Pie Recipe
- How to Preserve Eggs - Water Glassing Eggs for Long-Term Storage
- How to Safely Handle Farm Fresh and Store-Bought Eggs
- Homemade Christmas Gift Guide
- DIY Christmas Garland
Did you make this recipe? If so, we’d love for you to leave a star rating on the recipe card below! Then head over to social media and tag us in a photo so we can see you enjoying your aged eggnog drinks!

Aged Eggnog Recipe
Equipment
- Large Mixing Bowl
- Large Whisk
- Measuring Cup
- Large Clean Glass Jar
- Canning Lid with Ring
- Funnel
- Blender
- Micro-Grater
Ingredients
For Eggnog Base
- 12 whole eggs
- 1.5 cups sugar
- 1.5 cups bourbon 80 proof or higher
- ½ cup cognac 80 proof or higher
- ⅓ cup rum 80 proof or higher
For Serving Eggnog
- 5 cups whole milk
- 1 cup heavy cream
- ¼ teaspoon nutmeg or to taste
Instructions
For Eggnog Base
- Crack 12 whole eggs into your mixing bowl (no need to separate the eggs).
- Pour in 2 ⅓ cups of alcohol, making sure it’s 1½ ounces per egg, 80 proof or higher. (Bourbon 1½ cup, Cognac ½ cup, Rum ⅓ cup)
- Add 1½ cups sugar.
- Mix well by hand with a whisk or use a hand mixer. It takes about 5 minutes and should be thoroughly incorporated.
- Using the funnel, pour it into your glass jar and cover it with a tight-fitting lid.
- Place in cool storage for at least three weeks (the longer it sits, the more mellow it will become) to allow the alcohol to kill any bacteria in the eggs.
For Serving Eggnog
- Remove the eggnog base from cool storage. The mixture will have separated, and that is perfectly normal; give it a vigorous shake.
- Add all the eggnog base to your blender.
- Measure out 5 cups of milk and add to your blender.
- If there is still headroom, add 1 cup of heavy cream. (Careful not to fill too full, it will make a mess.)
- Grate into the mixture ½ teaspoon of nutmeg or add ½ teaspoon of finely ground nutmeg.
- Mix well with a blender, pour into a glass, top with a sprinkle of nutmeg and enjoy!
Notes
- Before mixing with milk/cream: The aged egg base can stay in cool storage for up to a year when made with proper alcohol ratios.
- After mixing: Store in the refrigerator and enjoy within a week (trust me, it won’t last that long!).


