

The sweet, bold flavor of balsamic caramelized onions adds complexity to the same old recipes, giving them new life. But who has time to make caramelized onions every day?
By preserving caramelized onions, you can easily add them to a favorite recipe anytime. Try them on a salad with goat cheese, apricot slices, and walnuts. Read on to learn how to preserve caramelized onions and more ways to use them.

Why We Preserve Onions
We plan on storing a year’s worth of food each year, but with storing so much food, you need to learn to manage it.
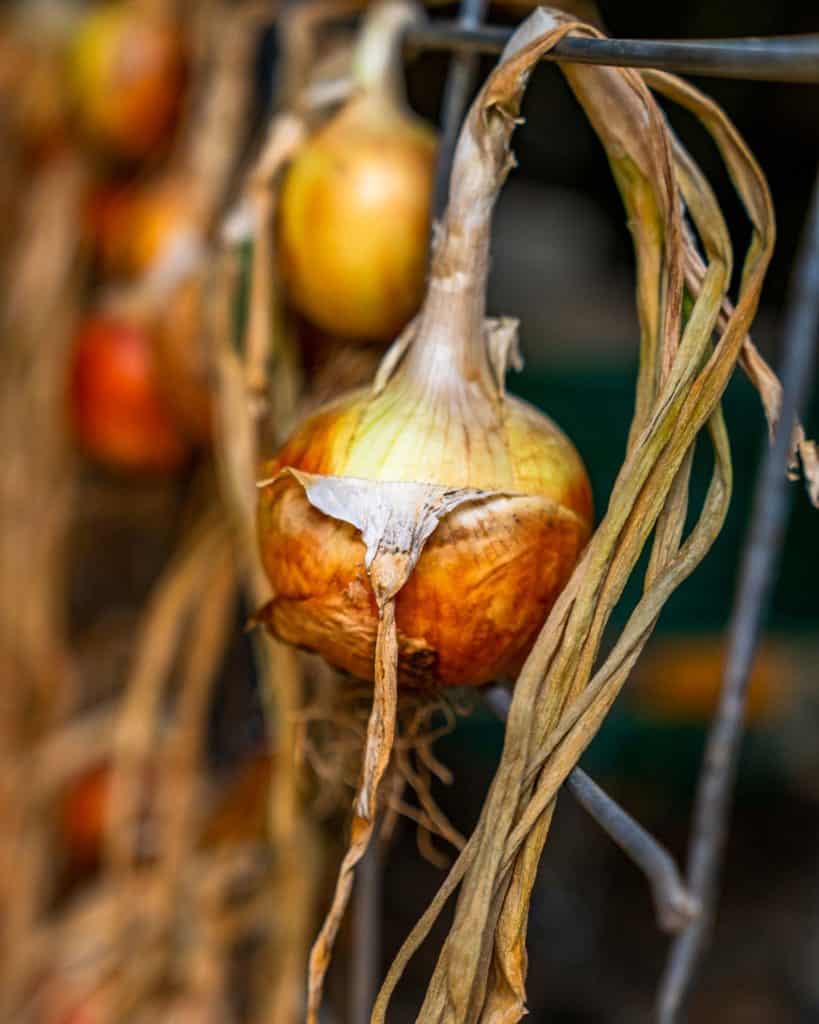
As late winter settles in, pay attention to the foods you stored in your well-stocked pantry or your homemade root cellar, like your homegrown garlic, storage potatoes, winter squashes, or homegrown onions.
Check the quality of your storage vegetables to ensure you use them or turn them into something else using food preservation methods before they go bad.

Even though we store onions the right way, some of the onions may go soft or even go bad before we have a chance to use them. When you grow onions from seed, as we do, it is a shame to have to take them out to feed the compost pile.
If you catch your onions in time, you can turn them into a delicious treat. Soft onions are fantastic for making dehydrated caramelized onions.
Alternatively, you can make your own onion powder or add onions to your make-ahead freezer meal recipes. By managing your stored foods, you can ensure that you eat what you worked hard to store.
Homesteading Hack: Whenever you find a good sale on onions at the store, you can stock up and preserve enough for the entire year.
Uses for Carmelized Onions
We started dehydrating to preserve our balsamic caramelized onions so we would always have them on hand to add depth to a meal. By preserving caramelized onions, you can easily add them to a favorite recipe anytime.
I make dehydrated balsamic caramelized onions to top a meal like roast chicken or beef pot roast. They add a nice touch to grilled sandwiches or atop french onion soup, standard casserole dishes, or sweet pepper hash.
Best Onions for Caramelizing
The advantage of this recipe is that onions are so versatile. You can use any kind, such as yellow onion, red onion, white onion, Vidalia onion, or even shallots.
Can Caramelized Onions Be Canned?
You can use pressure canning to preserve caramelized onions. However, we prefer the crispy texture of dehydrated balsamic caramelized onions. Homesteading Hack: Onions are a low-acid food. Do not use the water bath method if you choose to can your onions.
You will find the method of dehydrating caramelized onions easy to process, store, and use!

Supplies
- Knife - A sharp, broad chef’s knife helps slicing onions to go quickly. (Learn how to properly sharpen knives here.)
- Cutting Board - Use a heavy, solid cutting board.
- Heavy-Bottomed Pot or Pan - We recommend choosing cast iron cookware for caramelizing onions.
- Spatula or Wooden Spoon - For stirring the onions occasionally.
- Dehydrator - Use our Excalibur dehydrator or simply use the oven on a very low heat of 150°F.
- Parchment Paper - Line your dehydrator trays with Teflon fruit leather liners or parchment paper.
- Cookie Sheet - If you plan to use your oven to dehydrate the onions, use a cookie sheet lined with parchment paper.
- Glass Jar with Lid - Depending on the number of onions you preserve, anywhere from a ½ gallon Mason jar to pint jars works well. Use an airtight lid. Sanitize the jar and lid with boiling water beforehand to ensure the longest shelf-life possible.

Ingredients
- Onions - This is a perfect recipe to use up a surplus of onions. Use as many as the pan can hold, and adjust the oil and vinegar accordingly.
- 2 Tablespoons Olive Oil - Use high-quality extra virgin olive oil and use enough to coat the bottom of the pan lightly.
- ½ Cup Balsamic Vinegar - This is an estimate. You will need enough vinegar to coat the onions and the bottom of the pan. You will add it little by little as the onions cook down. If you have fewer onions, you will use less; if you have more onions, you will use more.


Preserving Caramelized Onions Step-by-Step
- Slice the onions into nice thin slices, about an ⅛ of an inch. Don’t worry about being exact.
- Slice as many onions as you need to use.
Homesteading Hack: If you come across any onions with brown spots, go ahead and put the whole onion in the compost pile. You can often taste the flavor of the rotting spot throughout the entire onion. A bad-tasting onion can ruin the flavor of a whole meal.
- Warm your cast iron skillet so that it is hot before adding the sliced onions.
- Spread about 1-2 Tablespoons of olive oil, just enough to cover the bottom of the pan.
- Add all the onions, even if they crowd the pan. They will eventually cook down.
- For the first few minutes, move the onions around and make sure they are not scorching. Keep the skillet on low heat so the onions cook slowly, releasing their juices and sugars.
- Cook the onions on low for about 15 minutes.
- Add balsamic vinegar to the pan as the onions start to dry out. Add just enough to give a light coating of vinegar on all the onions and layer on the bottom of the pan.
- Allow them to cook down for about another 45 minutes slowly. If they start to brown or dry out, add more balsamic vinegar to the pan.
- Stir the onions occasionally while they cook down. You do not need to babysit these onions.
- While the onions are cooking, prepare the dehydrator trays (or cookie sheets and preheat the oven to 150°F if you plan to use this method).
- Cook the onions on low, slow heat for a total of an hour until they are soft but not burnt. They should be a dark brown color, partially from the caramelization and partially from the balsamic vinegar.
- Spread the onions on the dehydrator trays or cookie sheets lined with parchment paper. Spread them in a thin, single layer.
- Place the trays in your dehydrator or the oven at 150°F. If your dehydrator doesn’t have a thermostat, just turn it on. I start checking them after about 4 hours. The onions need to be completely dry, light, and crispy. You do not want any moisture left in the onions at all. This usually takes a total of 6-7 hours.
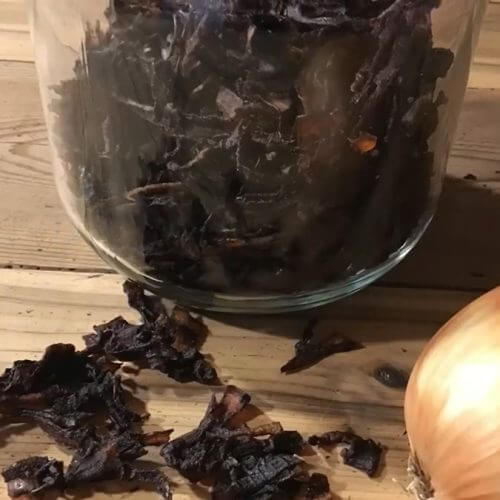
- Pull the dried onions off the parchment paper or dehydrator tray, add them to a clean, dry glass jar, and seal them with an airtight lid.
- Check your dehydrated caramelized onions regularly for the first couple of days. You do not want to see any moisture forming in the jar, as it will cause mold to grow. If condensation is present, take your onions out and dehydrate them longer.
- As long as no moisture develops in the jar, your homemade caramelized onions will last for a year stored at room temperature. After about a year, they lose their good, sharp flavor and nutritional value.
- Enjoy your dehydrated caramelized onions on roasts, salads, casseroles, or any meal that needs a boost in flavor!
- Or, rehydrate your onions by soaking them in warm water for half an hour before adding them to your recipe. (Here's more on how to rehydrate dehydrated food.)

And that's it! It's really that simple!
Did you make this recipe? If so, please leave a star rating in the recipe card below, then snap a photo and tag us on social media @homesteadingfamily so we can see!
More Homestead Tips and Recipes
- Preservation 101: Dehydrating Food
- Creamed Onions: A Delicious Side Dish Recipe
- Easy Homemade Celery Salt
- Classic Tennessee Onions Recipe (Southern Comfort Food)
- How to Make Onion Powder From Scratch
- How to Dry Fresh Herbs
- Homemade Garlic Salt
- Mary Bell’s Complete Dehydrator Cookbook
Dehydrated Balsamic Caramelized Onions
Equipment
- Dehydrator or oven
Ingredients
- 4 large onions sliced
- 2 Tablespoons olive oil more, if needed
- ½ cup balsamic vinegar more, if needed
Instructions
- Slice the onions into nice thin slices, about an ⅛ of an inch. Don’t worry about being exact.
- Warm your cast iron skillet so that it is hot before adding the sliced onions.
- Spread about 1-2 Tablespoons of olive oil. Just enough to cover the bottom of the pan.
- Add all the onions, even if they crowd the pan. They will eventually cook down.
- For the first few minutes, move the onions around and make sure they are not scorching. Keep the skillet on low heat so the onions cook slowly, releasing their juices and sugars.
- Cook the onions on low for about 15 minutes.
- Add balsamic vinegar to the pan as the onions start to dry out. Add just enough to give a light coating of vinegar on all the onions and layer on the bottom of the pan.
- Allow them to cook down for about another 45 minutes slowly. If they start to brown or dry out, add more balsamic vinegar to the pan.
- Stir the onions occasionally while they cook down. You do not need to babysit these onions.
- While the onions are cooking, prepare the dehydrator trays (or cookie sheets and preheat the oven to 150°F if you plan to use this method).
- Cook the onions on low, slow heat for a total of an hour until they are soft but not burnt. They should be a dark brown color, partially from the caramelization and partially from the balsamic vinegar.
- Spread the onions on the dehydrator trays or cookie sheets lined with parchment paper. Spread them in a thin, single layer.
- Place the trays in your dehydrator or the oven at 150°F. If your dehydrator doesn’t have a thermostat, just turn it on. I start checking them after about 4 hours. The onions need to be completely dry, light, and crispy. You do not want any moisture left in the onions at all. This usually takes a total of 6-7 hours.
- Pull the dried onions off the parchment paper or dehydrator tray, add them to a clean, dry glass jar, and seal them with an airtight lid.
- Check your dehydrated caramelized onions regularly for the first couple of days. You do not want to see any moisture forming in the jar, as it will cause mold to grow. If condensation is present, take your onions out and dehydrate them longer.
- As long as no moisture develops in the jar, your homemade caramelized onions will last for a year stored at room temperature. After about a year, they lose their good, sharp flavor and nutritional value.
- Enjoy your dehydrated caramelized onions on roasts, salads, casseroles, or any meal that needs a boost in flavor!
- Or, rehydrate your onions by soaking them in warm water for half an hour before adding them to your recipe.


