Turn the flavors of summer into a jam that you can enjoy year-round with this homemade strawberry rhubarb jam. Follow this recipe to make a refined sugar-free or low-sugar option!

Store-bought jams and jellies are filled with sugar and sometimes artificial flavorings and coloring. These ingredients aren’t something I want in my family’s diet. But truth be told, many home-canned recipes for jams and jellies call for more sugar than fruit, and I don’t want this for my family either!
That’s why I love using Pomona’s Pectin. With Pomona’s Pectin you can create delicious low or alternate sweetener jams and jellies! This strawberry rhubarb jam is a recipe from Pomona’s Pectin website. Be sure to check out their other great jam recipes as well as their helpful FAQ section!

Why I Love This Recipe
Thankfully, I have a secret ingredient that allows me to reduce the amount of sugar in my homemade jams and jellies or swap the sugar for an unrefined option like honey or maple syrup.
Though our strawberry patch wasn’t as productive this year as in years past, what did ripen was either quickly eaten by our children or turned into freeze-dried strawberries for topping our homemade instant pot yogurt!
As you can tell, I’m passionate about growing and using garden produce and preparing and preserving good wholesome foods for my family. Home canning food to fill our pantry so we are eating well on a budget is essential for our large family.
If the thought of canning your own food sounds overwhelming, I share my preserving day tips for less overwhelm here. I’ve learned these tips through trial and error over the last twenty years. It brings me joy knowing that I am preserving delicious and nutritious foods; it is an important part of my life that I’m passing on to my children.
The satisfaction of preserving pickles to canning raw meats, garden vegetables and fruits inspired me to teach and offer The Abundant Pantry: Canning Class. I want to share this knowledge that I have successfully learned over the years using the water bath and pressure canner methods.
Storing a year’s worth of food reminds me how blessed we are to use this simple method of food preservation. Several canning mistakes to avoid for both pressure and bath canning were practiced by our ancestors for years, making it beneficial to pass on to future generations.
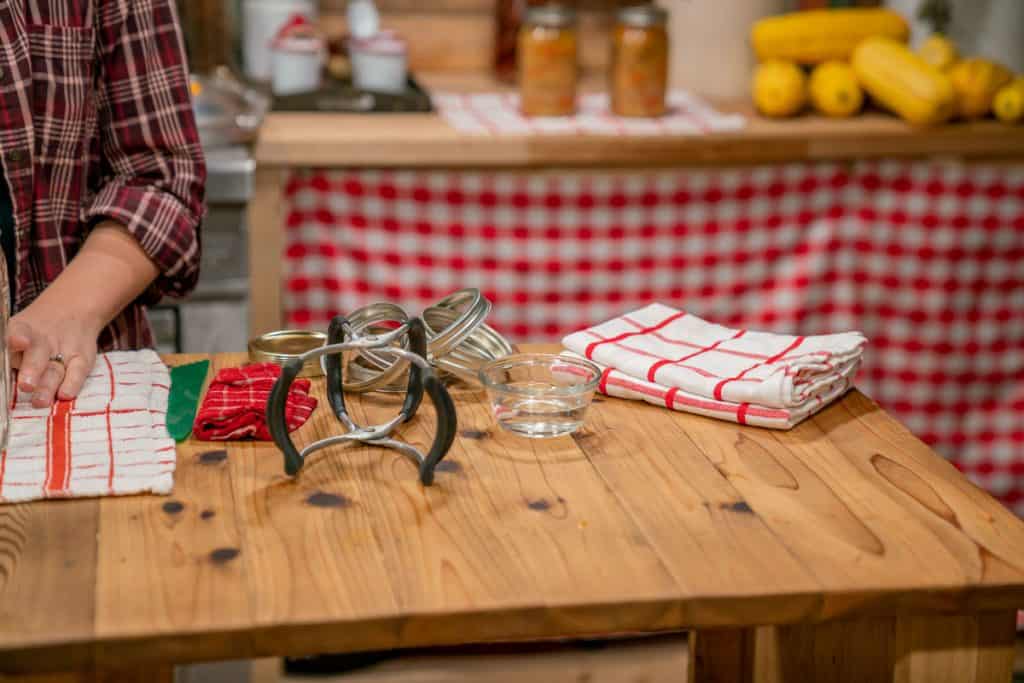
Supplies Needed
- Basic Water Bath Canner – You don’t have to have a water bath canner to successfully water bath can at home. This is the water bath canner I have (bonus, it comes with canning tools!), but you can also use a large pot with a few Mason jar rings on the bottom. Just as long as the water comes up over the jars by an inch or two.
- Large Pot – You’ll need to cook down the rhubarb and the jam, so a large heavy-bottomed pot is recommended.
- Spoon – A spoon to stir the rhubarb while cooking and your jam.
- Mason Jars (with Lids & Bands) – I’m using pint-sized Mason jars because that works best for our family, but you can choose whatever size jar you’d like. Just be sure to follow the correct processing time. Be sure to carefully check each jar for knicks or chips and discard any damaged jars. If you’re looking for more canning lids, check out these lids from Lehmans. They’re my go-to canning lid.
- Jar Lifter – Jars will be hot when they come out of the canner, so having a jar lifter is important. I love this jar lifter (and may have a few of them, so I always have a spare).
- Ladle – A good ladle will be your best friend when canning, especially one that you know exactly how much is going into each jar. Here is a good quality one-cup stainless steel ladle.
- Funnel – The other tool that will be your best friend when canning is a funnel. It helps keep messes to a minimum, especially this nice wide stainless-steel funnel that’s easy to clean.
- Strawberry Huller – Though this is by no means a necessary tool, for how inexpensive it is, I’m always glad I have it. Grab a strawberry huller here!

Ingredients Needed
What I love about this recipe is that rhubarb and strawberries are usually ready for harvest in the garden at the same time. I also love that, when using Pomona’s Pectin, you can halve, double, triple (or however many times you need) the batch of jam, and it will turn out perfectly each time! The apron I’m wearing in the video is a Roo Apron. Use code “homesteadingfam” for 10% off your apron! It’s my favorite thing to wear anytime I go out to the garden!
- Pomona’s Pectin – What I love about Pomona’s Pectin is that it’s 100% derived from citrus. Though it’s not organic (there is currently no organic pectin on the market), it is non-GMO, which I like. Since pectin is shelf stable and will last indefinitely, I buy mine by the pound in bulk from Azure Standard. It’s a bit of an investment, but you’ll pay less overall in the long run. Homesteading Hack: If you’re a first-time Azure Standard customer, use coupon code “HOMESTEADINGFAMILY15” at checkout for 15% off your order of $100 or more! You can also find Pomona’s Pectin in bulk here from Amazon.
- Calcium Water – Calcium powder comes with your Pomona’s Pectin. It allows the pectin to set the jam with lower amounts of sugar (or no sugar at all). The great thing about calcium water is that it can sit in your refrigerator for up to a year, so there’s no concern about it going to waste.
- Rhubarb – If you’re harvesting fresh rhubarb from the garden, about eight stalks should do for this recipe. Feel free to increase the amount to can all your rhubarb at once. Homesteading Hack: The rhubarb leaves are not edible, but they make a great mulch, so I chop off the leaf in the garden and lay it on the soil to suppress weed growth. (Here are more tips for suppressing weeds in the garden!)
- Strawberries – Is there a more classic summer flavor than vine-ripened strawberries? They’re a bit like vine-ripened tomatoes, and there’s just no comparison to what you buy at the grocery store. For this recipe, make sure about 1/4 of your strawberries are slightly underripe and the rest perfectly ripe (but not overripe). That will help the pectin work the way it should.
- Sweetener – I’m using honey for this recipe, but you can also use maple syrup, sugar, fruit juice concentrate, or even a sugar alternative.


How to Make Strawberry Rhubarb Jam
- Wash and prepare strawberries and rhubarb.
- Chop rhubarb into small pieces and place two cups into a saucepan with about 1/2 cup water. Bring to a simmer and cook, stirring occasionally, until the rhubarb is soft.
- Meanwhile, wash and hull strawberries (I love my strawberry huller!).
- Place them into a bowl and mash them slightly. Homesteading Hack: If you have larger pieces, the more prone you will be to “fruit float,” where the strawberries will float to the surface of the jam during the canning process. This is harmless, but it means you’ll need to stir your jam before eating it, and it doesn’t look as pretty in your jars.
- Add a few inches of water to your water bath canner and place jars (filled about half full with water) into the canner. Turn the heat on to low and let the jars sit until ready to fill. Homesteading Hack: You don’t want your canner boiling, just bring the water up to where it’s steaming and hold it there until you add the jars of jam.
- Once the rhubarb is done cooking, measure out two cups of cooked rhubarb and two cups of strawberries into a bowl. Store any remaining fruit in a jar in the refrigerator.
- Add the strawberry/rhubarb fruit mixture back to the empty pot and return to a boil.
- Prepare calcium water by adding 1/2 teaspoon of calcium powder to 1/2 cup water in a jar.
- Add three teaspoons of calcium water to the pot of fruit. Store the remaining calcium water in the refrigerator.
- While the fruit mixture is heating back up, add pectin powder to the honey and thoroughly mix until well combined. Make sure there are no clumps of pectin!
- Bring the fruit to a full rolling boil that cannot be stirred down. Then, add the honey/pectin mixture.
- Stir vigorously and bring back to a boil for two minutes.
- Get hot jars from the canner (carefully empty the water out into the canner).
- Using a ladle and funnel, fill jars leaving 1/4 inch headspace.
- Run the bubble remover along the sides of each jar, measure headspace again and adjust if necessary.
- Wipe down the rims of the jars with a damp cloth.
- Add the two-piece canning lid and tighten to fingertip tight. Homesteading Hack: Tightening jar lids too tight can cause lid buckling. Just use the tips of your fingers and tighten the jars until there’s resistance.
- Place jars into the canner, adding more water until the jars are covered by one inch of hot water.
- Add the water bath canner lid and bring the water back to a boil.
- Process jars for 10 minutes (adding 1 minute for each additional 1,000 feet of elevation).
- After the 10 minutes have passed, turn the heat off and remove the water bath canner lid. Let jars sit in the water for five more minutes. This is going to let the jars equalize in pressure so there’s no siphoning of the contents.
- Using the jar lifter, place jars of jam on a towel-lined counter and let sit undisturbed overnight.
- The next day, remove the canning bands and check the seal. Wipe down jars to remove any sticky residue or water marks. Label and date the jars, then transfer them to the pantry.
- The jam will last up to a year on the pantry shelf. Once opened, consume the jam within three weeks.


Did you make this recipe? If so, please leave a star rating in the recipe card below! Then snap a photo of your strawberry rhubarb jam and tag us on social media @homesteadingfamily so we can see!

Other Articles You May Enjoy
- How to Can Cherries
- Plum Jelly Recipe
- Homemade Fruit Leather
- How Long is Canned Food Good For?
- Avoiding Garden Overwhelm
- 7 Pantry Staples to Always Have on Hand
- How to Get Ready for Preserving Season
- Can I Pressure Can in the Instant Pot?
- How Long is Canned Food Good For?
- Food Preservation: A Year at a Glance
- Can You Reuse Canning Lids

Strawberry Rhubarb Jam Recipe
Equipment
- Water Bath Canner
- Large Pot
- Spoon
- Mason Jars w/ Lids
- Jar lifter
- Ladle
- Funnel
Ingredients
- 2 cups strawberries mashed
- 2 cups rhubarb cooked down
- 1/2 cup honey
- 3 teaspoons Pomona's Pectin
- 3 teaspoons calcium water
Instructions
- Wash and prepare strawberries and rhubarb.
- Chop rhubarb into small pieces and place two cups into a saucepan with about 1/2 cup water. Bring to a simmer and cook, stirring occasionally, until the rhubarb is soft.
- Meanwhile, wash and hull strawberries.
- Place them into a bowl and mash them slightly.
- Add a few inches of water to your water bath canner and place jars (filled about half full with water) into the canner. Turn the heat on to low and let the jars sit until ready to fill.
- Once the rhubarb is done cooking, measure out two cups of cooked rhubarb and two cups of strawberries into a bowl. Store any remaining fruit in a jar in the refrigerator.
- Add the strawberry/rhubarb fruit mixture back to the empty pot and return to a boil.
- Prepare calcium water by adding 1/2 teaspoon of calcium powder to 1/2 cup water in a jar.
- Add 3 teaspoons calcium water to the pot of fruit. Store the remaining calcium water in the refrigerator.
- While the fruit mixture is heating back up, add pectin powder to the honey and thoroughly mix until well combined. Make sure there are no clumps of pectin!
- Bring the fruit to a full rolling boil that cannot be stirred down. Then, add the honey/pectin mixture.
- Stir vigorously and bring back to a boil for two minutes.
- Get hot jars from the canner (carefully empty the water out into the canner).
- Using a ladle and funnel, fill jars leaving 1/4 inch headspace.
- Run the bubble remover along the sides of each jar, measure headspace again and adjust if necessary.
- Wipe down the rims of the jars with a damp cloth.
- Add the two-piece canning lid and tighten to fingertip tight. Homesteading Hack: Tightening jar lids too tight can cause lid buckling. Just use the tips of your fingers and tighten the jars until there’s resistance.
- Place jars into the canner, adding more water until the jars are covered by one inch of hot water.
- Add the water bath canner lid and bring the water back to a boil.
- Process jars for 10 minutes (adding 1 minute for each additional 1,000 feet of elevation).
- After the 10 minutes have passed, turn the heat off and remove the water bath canner lid. Let jars sit in the water for five more minutes. This is going to let the jars equalize in pressure so there’s no siphoning of the contents.
- Using the jar lifter, place jars of jam on a towel-lined counter and let sit undisturbed overnight (or at least 12 hours).
- After 12 hours, remove the canning bands and check the seal. Wipe down jars to remove any sticky residue or water marks. Label and date the jars then transfer to the pantry.
- The jam will last up to a year on the pantry shelf. Once opened, consume the jam within three weeks.
Notes
- The larger pieces, the more prone you will be to “fruit float,” where the strawberries will float to the surface of the jam during the canning process. This is harmless, but it means you’ll need to stir your jam before eating it, and it doesn’t look as pretty in your jars.
- You don’t want the water in your canner boiling, just bring it up to where it’s steaming and hold it there until you add the jars of jam.


