
Learn to make and can this easy chicken and gravy recipe. Stocking the pantry shelf with meals ready to eat is one of my favorite ways to alleviate the question of "What's for dinner?" after a long day of homestead life.

This recipe will become your new best friend in the kitchen. It's an amazing meal base that can be turned into chicken noodle soup with homemade egg noodles, chicken and dumplings, chicken stew over rice or just chicken and gravy dinner.
This recipe is probably a lot easier than you may think! And having your shelves lined with this meal in a jar means quick and easy weeknight dinners that your whole family will love.
Trust me, this one's a keeper!
Why I Love This Recipe
What I love most about this recipe is that it's a raw-pack canning recipe. That means you don't need to cook the ingredients prior to putting them into your jars and into the canner.
This is a real time-saver when spending a day lining your pantry shelves with ready-to-eat meals.
This recipe comes from The All New Ball Book Of Canning And Preserving. That book is filled with great raw-pack recipe ideas, so definitely grab yourself a copy.

How to Can This Chicken and Gravy Recipe
Supplies Needed
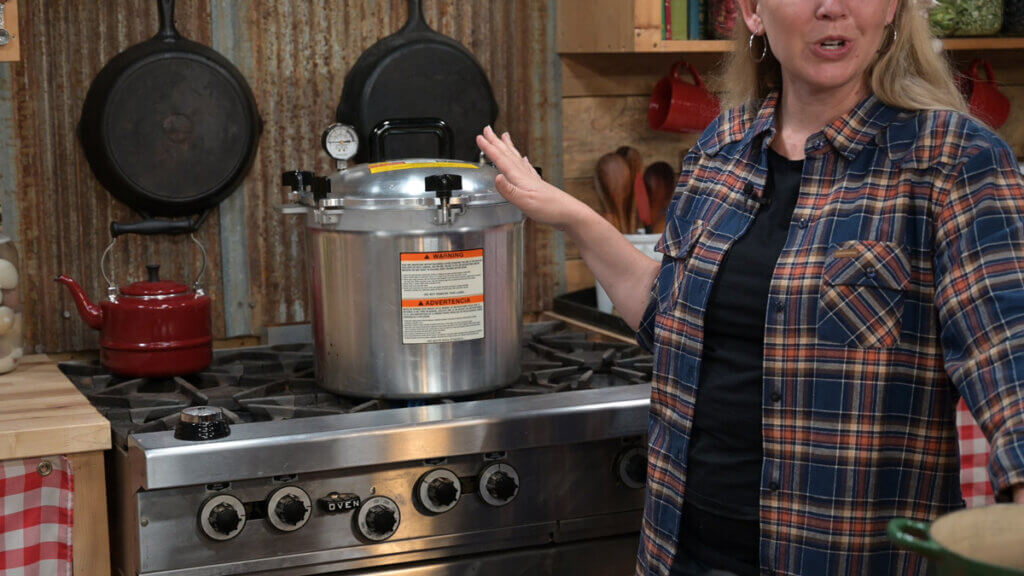
- Pressure Canner & Rack - I love my All-American Pressure Canner. It fits up to 14 quart-sized jars at a time. I also have my gigantically huge All-American Pressure Canner that fits 19 quart-sized jars for those days when I'm feeling extra motivated. Homestead Hack: There's no substitution for a pressure canner! You cannot use an electric pressure cooker or a water bath canner. Always follow safe and approved methods when canning.
- Wide-Mouth Mason Jars - I'm using quart-sized jars for this recipe. You want to be sure your jars are free of any nicks or chips. I prefer wide-mouth jars for this kind of recipe because it's easier to get the food into and out of the jars. Did you know Azure Standard now has its own line of canning jars? I've only heard great reviews about them, and the price is very reasonable.
- Canning Lids & Bands - You'll need to use brand-new lids and have canning bands free of rust or damage.
- Food Processor (optional) - My food processor is my secret weapon in the kitchen. It allows me to chop and dice food so much faster, subsequently getting more done in less time. I have this Breville Food Processor with the Breville Dicing Kit.
- Canning Tools - Whenever you're canning, it's always helpful to have quality canning tools on hand. A wide-mouth funnel, large ladle, bubble popper and headspace measuring tool, tongs, and a jar lifter are all key tools for a canning day.
- Clean Dish Rag - Before adding our canning lids, it's important that the rims of each jar are free from any debris. Have a clean damp dish rag ready for this step.

Ingredients Needed
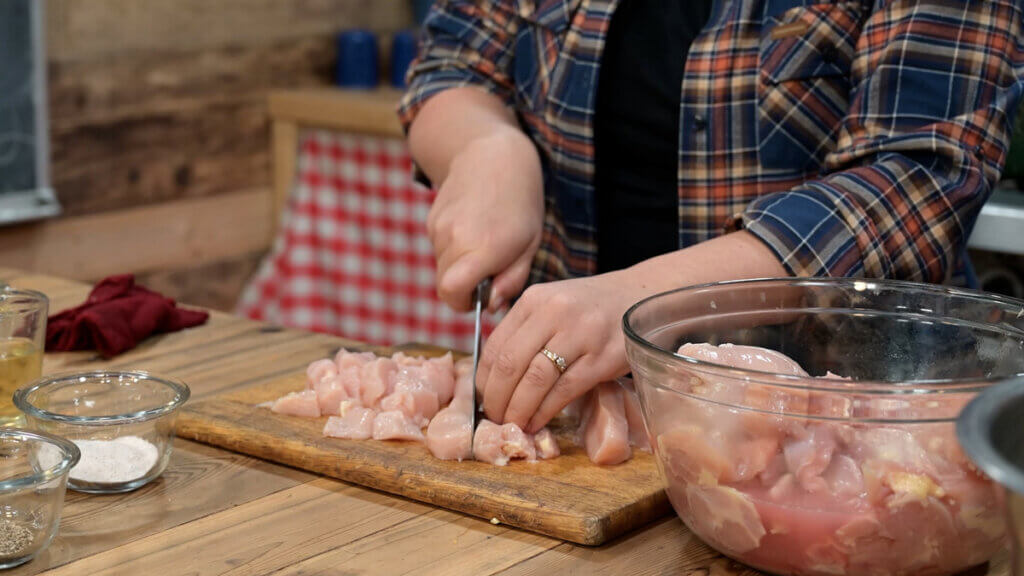
- Cubed Chicken - You want boneless skinless chicken for this recipe. It can be chicken breast or chicken thigh. When cubing the chicken, think about what size you'd like the finished product to be. I always aim for a nice bite-sized piece that works for everyone in the family.
- Diced Potatoes - Be sure to peel the potatoes prior to dicing them (and save the peels to make Potato Peel Pie).
- Chopped Onions - Be sure to peel the onions prior to dicing them.
- Chopped Carrots - Be sure to peel the carrots prior to dicing them.
- Chopped Celery - Wash the celery well, and then dice.
- Salt - We love using Redmond Real Salt for all our cooking (and animal) needs. Use coupon code "HFSalt" at checkout for 15% off your order.
- Fresh Black Pepper - If you're not using freshly cracked black pepper, let me encourage you to start! It makes a big difference in the flavor.
- Poultry Seasoning - Any poultry seasoning will do. We like this homemade poultry seasoning recipe or the GMO-free poultry seasoning option from Azure Standard.
- Dry White Wine - If you're worried about the alcohol content in the wine, it will be cooked off by the time this recipe is finished, but the flavor profile it adds is incredible. So I highly recommend you don't skip this ingredient. If you don't want to use wine, you'll need to substitute ¾ cup vinegar. That will change the flavor drastically, so I don't recommend it.
- Chicken Broth - The amount for this recipe varies, but you'll generally need to make sure you have about a quart on hand. Follow the directions below to know exactly how much to use for each jar. Here's my recipe for homemade chicken broth. And here is a post with instructions for canning broth.

Step-by-Step Directions
Important Note: It's imperative that any ingredient grown in the ground is properly cleaned, trimmed and peeled when canning. This reduces the possible bacterial load in each jar. Botulism spores live in the dirt, so it's important to get all our veggies as clean as possible.
- Fill the pressure canner with two inches of water. Get clean jars into the canner and turn on the heat for everything to start gently warming up.
- Prepare and chop all vegetables and add them to a large bowl.
- Dice chicken and add to the bowl of veggies. If there's any juice from the chicken defrosting, you do not need to add that.
- Add salt, pepper, poultry seasonings and white wine to the bowl and stir to distribute evenly.
- In a pot on the stove, bring the broth up to a simmer.
- Remove hot jars from the pressure canner (dumping out any water first) and place on a towel-lined counter next to your large bowl of chicken mixture.
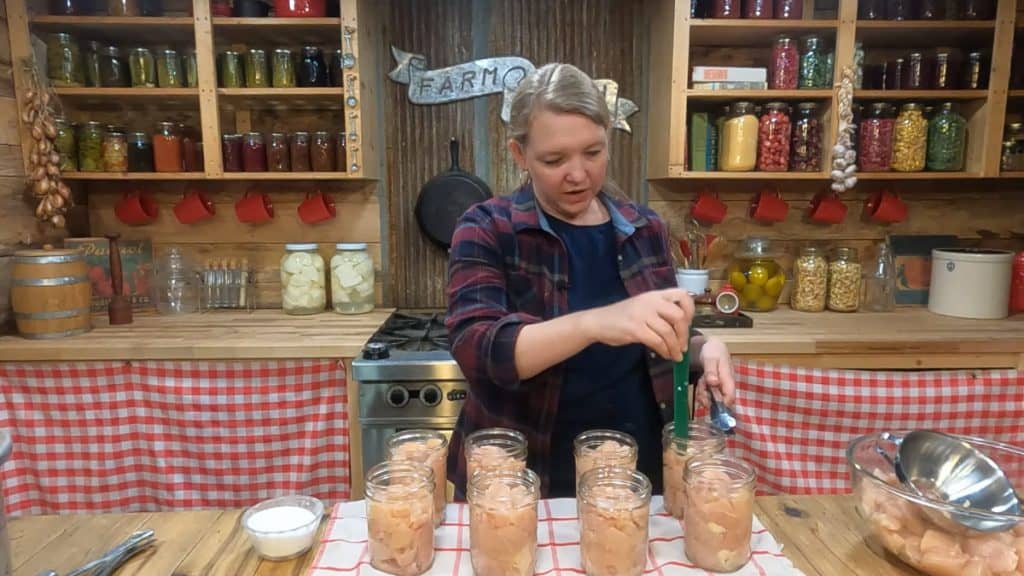
- Using a funnel and tongs (or another tool of choice), fill each jar with the mixture, packing firmly, leaving a one-inch headspace. Homestead Hack: The goal is to pack this meal as well as possible so only a few tablespoons of broth are needed to fill the jar.
- Once jars are filled, ladle over the hot broth, maintaining the one-inch headspace. Run the bubble popper along the sides of each jar to remove any air pockets, then add more broth, if necessary. Homestead Hack: The one-inch headspace is important to maintain for getting a good seal on your jars.
- Wipe each rim well with a clean, damp dish rag.
- Add lids and bands, tightening to fingertip tight.
- Transfer jars to the pressure canner and follow the manufacturer's instructions for adding the lid.
- Bring the temperature up slowly (over about medium to medium-high heat).
- Once steam is coming out of the steam vent at a steady pace, set a timer for 10 minutes.
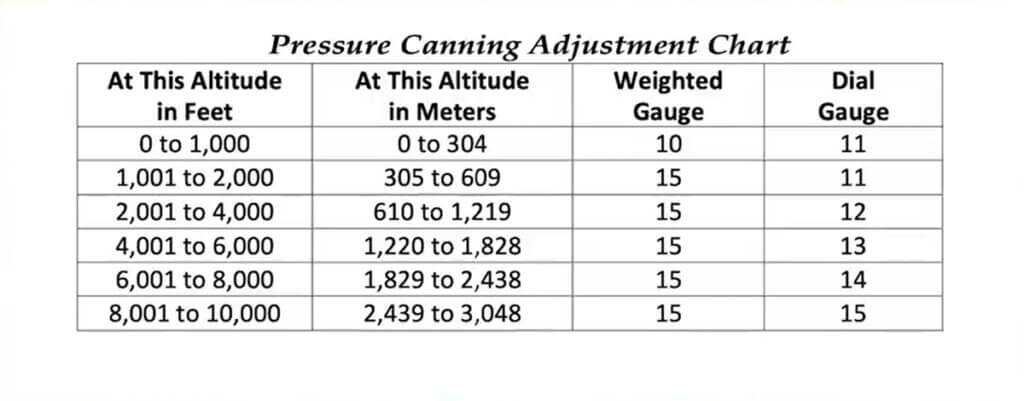
- After the 10 minutes, add the regulator or weighted gauge and bring up the pressure to the desired level for your specific elevation (refer to the chart below).
- As soon as your pressure is up to full pressure, start your timer. For quart jars, set the timer for 1 hour and 30 minutes. For pint jars, set the timer for 1 hour and 15 minutes.
- Once the time is up, turn off the heat and allow the pressure canner to come all the way back down to zero pressure naturally. Don't jiggle the weighted gauge, and don't place your pressure canner in cold water. Just let it sit and naturally come back down to zero pressure.
- Once the dial gauge reads zero, very gently tap the weighted gauge/pressure regulator to make sure no more pressure remains. Remove the weighted gauge/pressure regulator and wait ten minutes.
- Remove the lid (be careful, it's hot!) and, using the jar lifters, remove the jars of chicken and gravy from the canner onto a towel-lined counter. Let the jars sit undisturbed for 12-24 hours.
- Remove the bands, check the seals, wipe the jars clean and label and date them.
- Store on the pantry shelf, and be sure to check out all the great meal ideas below.


And that's it! You now have five ready-to-eat meals on the shelf, perfect for a busy weeknight dinner. I also love that these meals are suitable for eating straight from the jar, if need be.
If you're trying to increase the number of meals on your shelf, feel free to double or triple this recipe. We usually just plan to have chicken and gravy on the night I make these meals, because the prep work is already done!
Ways to Prepare Chicken and Gravy
Easy Chicken and Gravy Recipe
- Dump your jar of chicken and gravy into a large heavy-bottomed pot (I love my enameled cast iron!). While the mixture is still cold, sprinkle two tablespoons of flour over the top and stir well to distribute evenly.
- Turn the heat on and bring to a simmer.
- Serve and enjoy!
That's it! In five minutes, you have a hot and delicious meal ready to eat. You can serve it up as is or make it feed more mouths by serving it over rice, mashed potatoes or homemade egg noodles.

Chicken Noodle Soup
- Dump your jar of chicken and gravy into a large heavy-bottomed pot. While the mixture is still cold, sprinkle two tablespoons of flour over the top and stir well to distribute evenly.
- Add an additional quart of chicken broth, turn the heat on and bring to a simmer.
- Once at a simmer, add in some noodles and allow them to cook until they're to your liking.
- Serve and enjoy!

Chicken and Dumplings
- Dump two jars of chicken and gravy into a large heavy-bottomed pot. While the mixture is still cold, sprinkle four tablespoons of flour over the top and stir well to distribute evenly.
- Add additional broth, if desired.
- Turn the heat on and bring to a simmer.
- While the chicken mixture is heating, mix up your herbed dumpling mixture.
- Combine 2 cups of flour with 1 tablespoon + 1 teaspoon baking powder, a teaspoon of salt, a teaspoon of pepper, and one tablespoon of fresh thyme (or one teaspoon of dried thyme).
- Whisk the dry ingredients together and create a well into the center.
- Pour in ¾ cup milk and 4 tablespoons melted butter.
- Combine with a fork until no dry pockets of flour remain (do not overmix!)
- Using a tablespoon, drop the dumpling mixture into the pot of simmering chicken and gravy.
- Add a lid and cook for five minutes. Then turn the heat off and let sit for ten minutes to allow the dumplings to finish cooking.
- Serve and enjoy!

Free Canning Training
If the thought of using a pressure canner makes you nervous. Check out my free canning training called Meals On Your Shelf.
Together in this four-part workshop, we go over all of the safety aspects of canning so you get a firm grasp on the scientific principles behind it. We then work together in the kitchen to can an entire meal in the water bath canner before we jump into the basics of pressure canning.
More Canning Recipes & Tutorials:
- How to Can Ground Beef
- How to Can Chicken
- Preservation 101: Introduction to Canning
- Pressure Canning Mistakes – Avoid These 5 Common Mistakes
- Canning Mistakes to Avoid When Water Bath & Pressure Canning
- Can I Pressure Can in the Instant Pot?
- Step-By-Step Tutorial For Canning Beef (Raw Pack Method)
- How to Can Beef Stew for Easy Convenience Meals
- Canning Bone Broth or Stock (Chicken, Beef, or Vegetable)
- How to Pressure Can Black Beans

Canned Chicken and Gravy Recipe
Equipment
- Pressure Canner & Rack
- 5 Wide-Mouth Quart-Sized Mason Jars or 10 pint-sized Mason jars
- 5 Canning Lids & Bands or 10 if using pint-sized jars
- Food Processor optional
- Canning Tools funnel, ladle, bubble popper, tongs, jar lifter
- Clean Dish Rag
Ingredients
- 6 pounds chicken cubed
- 3 cups potatoes diced
- 2 cups onions chopped
- 2 cups carrots chopped
- 2 cups celery chopped
- 6 teaspoons salt
- 3 teaspoons black pepper freshly cracked
- 6 teaspoons poultry seasoning
- ¾ cup dry white wine or vinegar
- 1 quart chicken broth
Instructions
- Fill the pressure canner with two inches of water. Get clean jars into the canner and turn on the heat for everything to start gently warming up.
- Prepare and chop all vegetables and add them to a large bowl.
- Dice chicken and add to the bowl of veggies. If there’s any juice from the chicken defrosting, you do not need to add that.
- Add salt, pepper, poultry seasonings and white wine to the bowl and stir to distribute evenly.
- In a pot on the stove, bring the broth up to a simmer.
- Remove hot jars from the pressure canner (dumping out any water first) and place on a towel-lined counter next to your large bowl of chicken mixture.
- Using a funnel and tongs (or another tool of choice), fill each jar with the mixture, packing firmly, leaving a one-inch headspace. Homestead Hack: The goal is to pack this meal as well as possible so only a few tablespoons of broth are needed to fill the jar.
- Once jars are filled, ladle over the hot broth, maintaining the one-inch headspace. Run the bubble popper along the sides of each jar to remove any air pockets, then add more broth, if necessary. Homestead Hack: The one-inch headspace is important to maintain for getting a good seal on your jars.
- Wipe each rim well with a clean, damp dish rag.
- Add lids and bands, tightening to fingertip tight.
- Transfer jars to the pressure canner and follow the manufacturer’s instructions for adding the lid.
- Bring the temperature up slowly (over about medium to medium-high heat).
- Once steam is coming out of the steam vent at a steady pace, set a timer for 10 minutes.
- After the 10 minutes, add the regulator or weighted gauge and bring up the pressure to the desired level for your specific elevation (refer to the chart in the blog post).
- As soon as your pressure is up to full pressure, start your timer. For quart jars, set the timer for 1 hour and 30 minutes. For pint jars, set the timer for 1 hour and 15 minutes.
- Once the time is up, turn off the heat and allow the pressure canner to come all the way back down to zero pressure naturally. Don’t jiggle the weighted gauge, don’t place your pressure canner in cold water, just let it sit and naturally come back down to zero pressure.
- Once the dial gauge reads zero, very gently tap the weighted gauge/pressure regulator to make sure no more pressure remains. Remove the weighted gauge/pressure regulator and wait another ten minutes.
- Remove the lid (be careful, it’s hot!) and, using the jar lifters, remove the jars of chicken and gravy from the canner onto a towel-lined counter. Let the jars sit, undisturbed for 12-24 hours.
- Remove the bands, check the seals, wipe the jars clean and label and date them.
- Store on the pantry shelf and be sure to check out all the great meal ideas below.
Notes
- Important Note: It’s imperative that any ingredient grown in the ground is properly cleaned, trimmed and peeled when canning. This reduces the possible bacterial load in each jar. Botulism spores live in the dirt, so it’s important to get all our veggies as clean as possible.
- Nutrition Facts: Calculated for one jar of chicken and dumplings.
Recipe Ideas
Chicken and Gravy Recipe
- Dump your jar of chicken and gravy into a large heavy-bottomed pot (I love my enameled cast iron!). While the mixture is still cold, sprinkle two tablespoons of flour over the top and stir well to distribute evenly.
- Turn the heat on and bring to a simmer.
- Serve and enjoy!
Chicken Noodle Soup
- Dump your jar of chicken and gravy into a large heavy-bottomed pot. While the mixture is still cold, sprinkle two tablespoons of flour over the top and stir well to distribute evenly.
- Add an additional quart of chicken broth, turn the heat on and bring to a simmer.
- Once at a simmer, add in some noodles and allow them to cook until they’re to your liking.
- Serve and enjoy!
Chicken n’ Dumplings
- Dump two jars of chicken and gravy into a large heavy-bottomed pot. While the mixture is still cold, sprinkle four tablespoons of flour over the top and stir well to distribute evenly.
- Add additional broth, if desired.
- Turn the heat on and bring to a simmer.
- While the chicken mixture is heating, mix up your herbed dumpling mixture.
- Combine 2 cups of flour with 1 tablespoon + 1 teaspoon baking powder, a teaspoon of salt, a teaspoon of pepper, and one tablespoon of fresh thyme (or one teaspoon of dried thyme).
- Whisk the dry ingredients together and create a well into the center.
- Pour in ¾ cup milk and 4 tablespoons melted butter.
- Combine with a fork until no dry pockets of flour remain (do not overmix!)
- Using a tablespoon, drop the dumpling mixture into the pot of simmering chicken and gravy.
- Add a lid and cook for five minutes. Then turn the heat off and let sit for ten minutes to allow the dumplings to finish cooking.
- Serve and enjoy!


