
Do you find yourself wondering, "What is fermentation?" Don't worry, I've got you covered. In this beginner's guide, you will learn the basic principles of fermentation, the benefits of incorporating fermented foods into your diet, and tips for successful fermentation.
Fermentation is a natural process that has been used for centuries to preserve and enhance the flavor of foods. Our ancestors relied on fermentation to preserve fruits and vegetables, milk, and grains. Nowadays, fermentation has become more popular than ever, thanks to its numerous health benefits and the explosion of artisanal food culture.
Are you ready to learn more about fermentation? Let's get started!
Listen and Subscribe: Apple Podcasts | Spotify | iHeart | Google Podcasts
Understanding the Fermentation Process
When it comes to fermentation, understanding the process is key to achieving the desired results.
Fermentation is a metabolic process in which microorganisms, such as bacteria and yeasts, break down complex organic compounds into simpler substances, such as sugars and alcohol. This chemical reaction occurs in the absence of oxygen, a process called anaerobic respiration.
The fermentation process can take different forms depending on the specific microorganisms involved and the end products they produce. However, all forms of fermentation share some common steps:
- The microorganisms involved in the fermentation process break down carbohydrates into smaller components, such as sugars or organic acids.
- These components are then metabolized by the microorganisms, generating energy that they can use to grow and reproduce.
- During this process, the microorganisms produce various byproducts, such as lactic acid, ethanol, or carbon dioxide, depending on the specific type of fermentation.
The fermentation process can be influenced by a variety of factors, including temperature, pH, and the type of microorganisms involved. For example, some bacteria prefer a slightly acidic environment, while others thrive in a more alkaline one.
Types of Fermentation

When it comes to fermentation, there are various types based on the specific microorganisms and end products they produce. The four main types of fermentation are:
| Type of Fermentation | Microorganisms Involved | End Products | Examples |
|---|---|---|---|
| Lactic Acid Fermentation | Lactic acid bacteria | Lactic acid | Yogurt, sauerkraut, kimchi |
| Alcohol Fermentation | Yeast | Ethanol and carbon dioxide | Wine, beer, bread |
| Butyric Acid Fermentation | Clostridium bacteria | Butyric acid and hydrogen gas | Cultured butter, cheese, soil microbiome |
| Acetic Acid Fermentation | Acetobacter bacteria | Acetic acid | Vinegar, kombucha |
Lactic acid fermentation is responsible for the tangy flavor in homemade yogurt and the sour taste in this sauerkraut recipe. Meanwhile, alcohol fermentation is what gives beer and wine their buzz. Butyric acid fermentation is involved in the production of cultured butter, cheese, and contributes to the soil's microbiome. Finally, acetic acid fermentation is used in the production of vinegar and kombucha.
The type of fermentation used often depends on the desired end product and the specific microorganisms involved. Understanding the different types of fermentation and their applications is crucial to appreciating the role fermentation plays in our lives and diets.
Benefits of Fermentation

One of the most significant benefits of fermentation is its ability to increase the nutritional value of food. During the fermentation process, beneficial bacteria, yeasts, and other microorganisms break down the natural sugars in food, creating lactic acid. This process not only preserves the food but also increases its vitamin and enzyme content.
Fermented foods are also excellent for maintaining a healthy gut microbiome. These beneficial bacteria help promote the growth of good bacteria while inhibiting the growth of harmful bacteria. As a result, consuming fermented foods regularly can improve digestion, boost immunity, and prevent various health conditions. (Source)
Another advantage of fermented foods is that they have a longer shelf life than non-fermented foods. This is due to the acid created during fermentation, which acts as a natural preservative that prevents spoilage.
Some popular fermented foods include:
| Fermented Food | Origin |
|---|---|
| Kimchi | Korea |
| Kombucha | China |
| Sauerkraut | Germany |
| Miso | Japan |
Exploring Different Types of Fermentation
There are many different types of fermentation, and each one has unique characteristics that make it special. In this section, we'll explore some of the most popular types of fermentation, including vegetable fermentation, dairy fermentation, and beverage fermentation.
Vegetable Fermentation
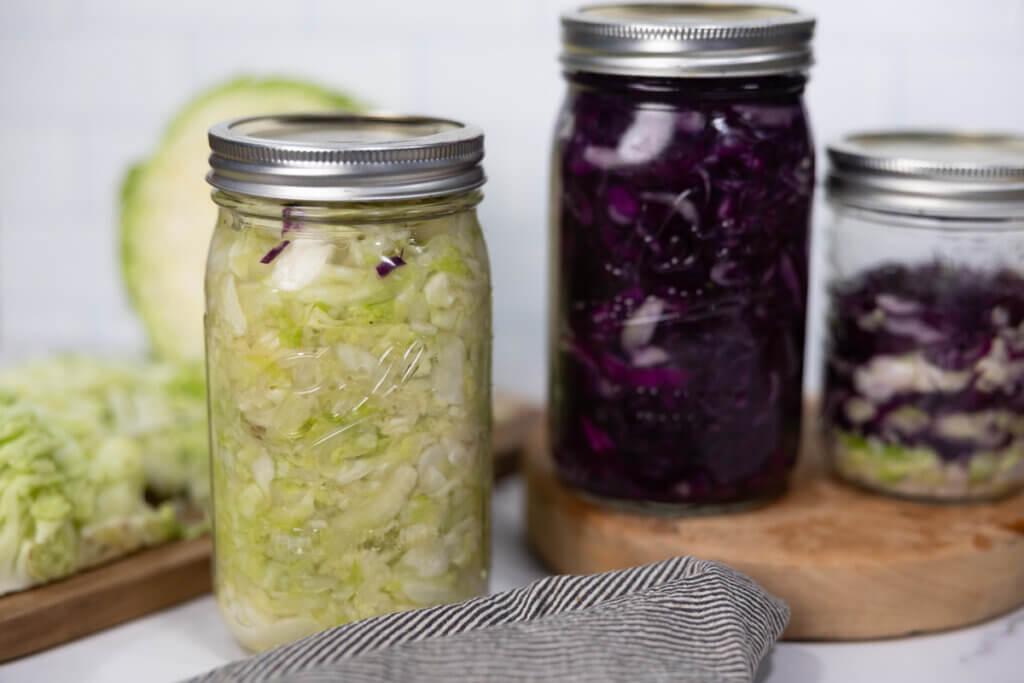
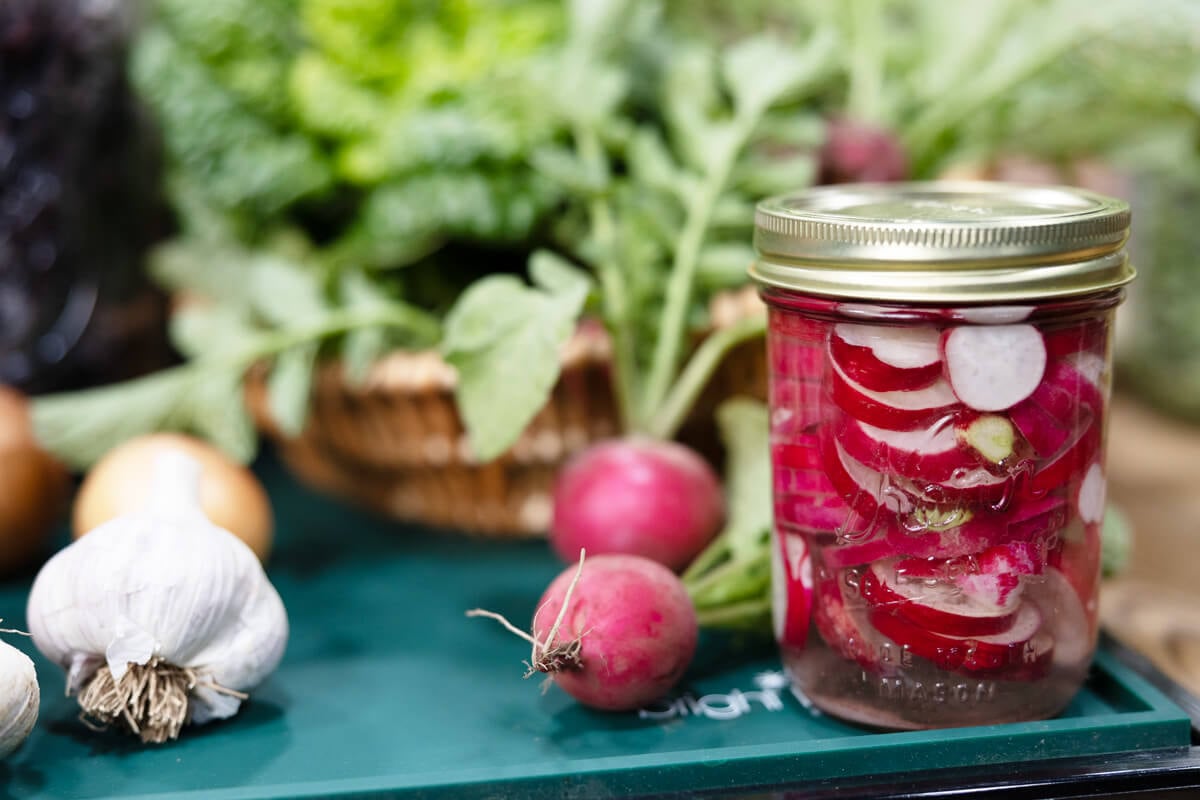
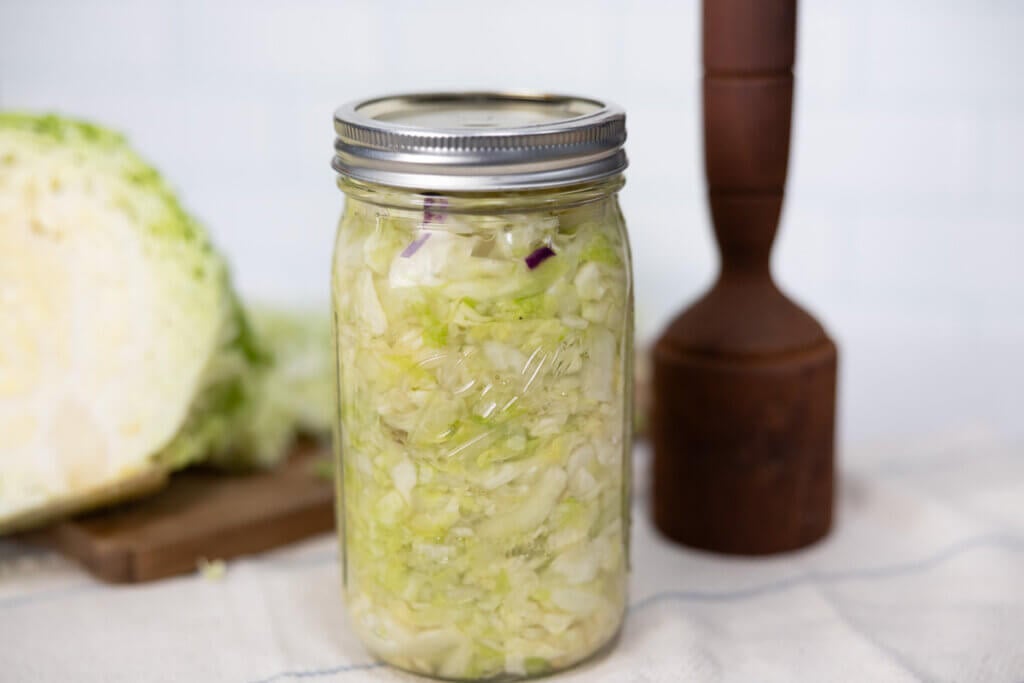
Vegetable fermentation is perhaps the most common type of fermentation. It involves preserving vegetables in salt water or brine, which allows them to develop a unique flavor and texture. Some popular examples of fermented vegetables include sauerkraut, curtido, kimchi, and pickles.
| Fermented Vegetable | Flavor Profile |
|---|---|
| Sauerkraut | Tangy and slightly sour |
| Kimchi | Spicy and slightly sour |
| Pickles | Crisp and tart |
Dairy Fermentation

Dairy fermentation involves culturing milk or cream with bacteria or yeast. This process creates a tangy, sour flavor that is often used in food products like cheese, yogurt, and sour cream. Some popular examples of fermented dairy products include cheddar cheese, Greek yogurt, and kefir.
| Fermented Dairy Product | Flavor Profile |
|---|---|
| Cheddar Cheese | Sharp and tangy |
| Greek Yogurt | Tangy and thick |
| Kefir | Effervescent and tangy |
Beverage Fermentation

Beverage fermentation involves fermenting liquids like tea, fruit juice, or sugary water to create popular drinks like kombucha, mead, and beer. This type of fermentation is often more complex and involved than the other types, but the end result is a unique and delicious beverage.
| Fermented Beverage | Flavor Profile |
|---|---|
| Kombucha | Fizzy and slightly tart |
| Mead | Sweet and floral |
| Beer | Bitter and hoppy |
Exploring the different types of fermentation is a great way to expand your knowledge and palate. Whether you prefer tangy and crisp vegetables or sweet and floral drinks, there's a type of fermentation out there for everyone.
Tips and Tricks for Successful Fermentation
As a beginner in the world of fermentation, it can be intimidating to dive into the process. But fear not! With a few tips and tricks, you'll be fermenting like a pro in no time.
Maintain Proper Temperature
One of the most critical factors for successful fermentation is maintaining the proper temperature throughout the entire process. Different types of ferments require different temperatures to thrive, so it's essential to research the ideal temperature range for your particular ferment.
In general, during the initial fermentation period, most ferments do best in a warm, consistent environment, around 68-72°F.
Some ferments do well with a slow, cool ferment at temperatures as low as 50°F (10°C).
Once the fermentation is complete, you'll want to store your ferment in cold storage or the refrigerator. This is ideally between 32-38°F.
Use Proper Hygiene
Another important aspect of successful fermentation is maintaining a clean and hygienic environment. Make sure your hands, tools, and fermentation vessel are all thoroughly washed and sanitized before beginning the process. This will prevent unwanted bacteria from contaminating the ferment.
Furthermore, always use a clean utensil when dipping into your finished ferments for serving.
Use High-Quality Ingredients
The quality of your ingredients will significantly impact the quality of your final product. Always choose fresh, high-quality produce and avoid using any ingredients that are moldy or spoiled.
Organic produce is also ideal, as it will contain fewer pesticides and other harmful chemicals that can hinder the fermentation process. Using natural garden pest control at home can prevent these chemicals from being on your produce.
Experiment and Have Fun
Finally, don't be afraid to experiment and try new things! Fermentation is all about exploring new flavors and textures. If a particular ferment doesn't turn out as you expected, don't get discouraged. Use it as a learning experience and try again with a new recipe or technique.
Fermenting Food at Home: Step-by-Step Guide

If you're new to fermentation, don't be intimidated. Fermenting food at home is easier than you might think, and with a few basic supplies, you can get started on your fermenting journey. Here's a step-by-step guide to fermenting food at home.
Gather Your Supplies
Before you begin fermenting, you'll need to gather a few supplies. Here's what you'll need:
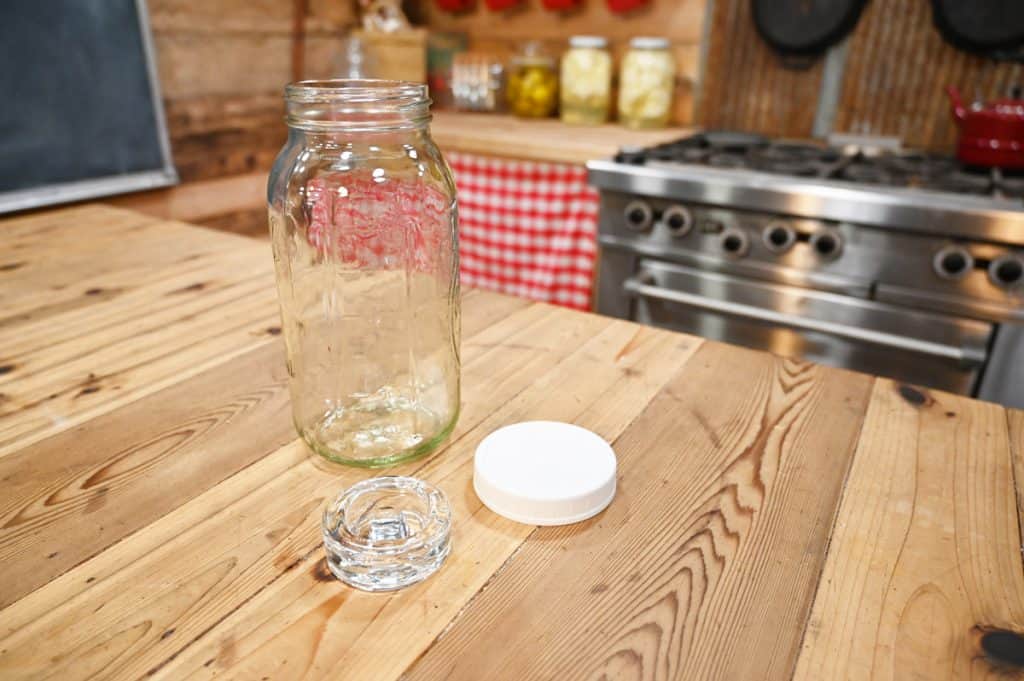
- A fermentation vessel: This can be a Mason jar, a crock pot, or any other container that can be sealed. Check out this post on the best fermentation vessels (and the differences between them).
- A weight: You'll need a weight to keep your vegetables submerged in the brine. We love these Year of Plenty fermentation weights.
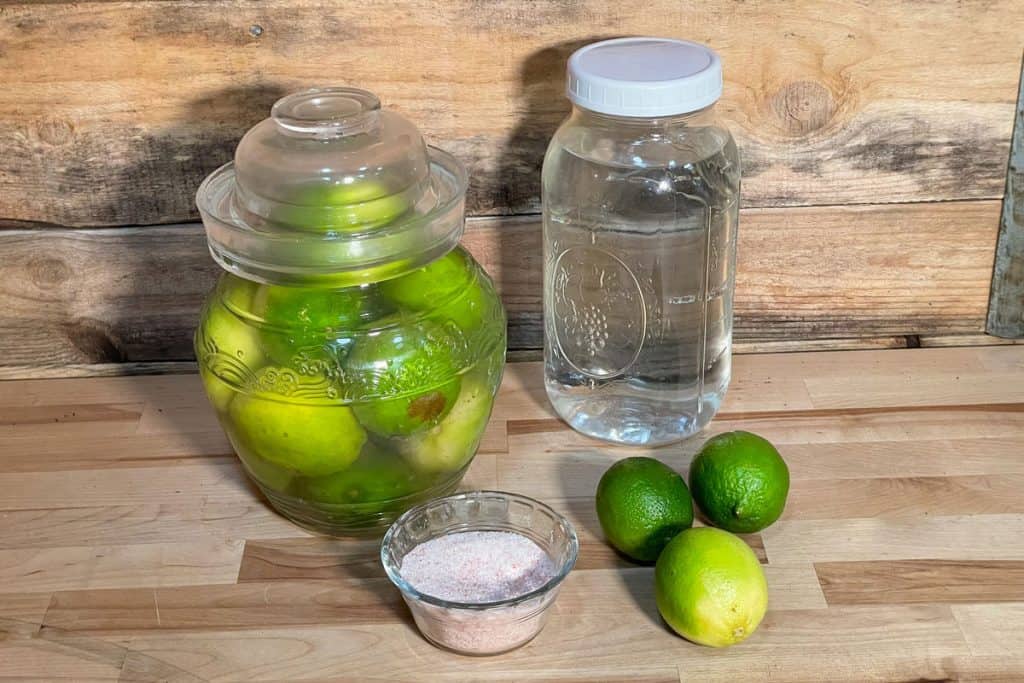
- A brine: This can be made with water and salt. The ratio is usually two tablespoons of salt per quart of water. Always follow a tested recipe.
- A culture: You can use a starter culture or rely on the natural bacteria and yeast present on your vegetables.
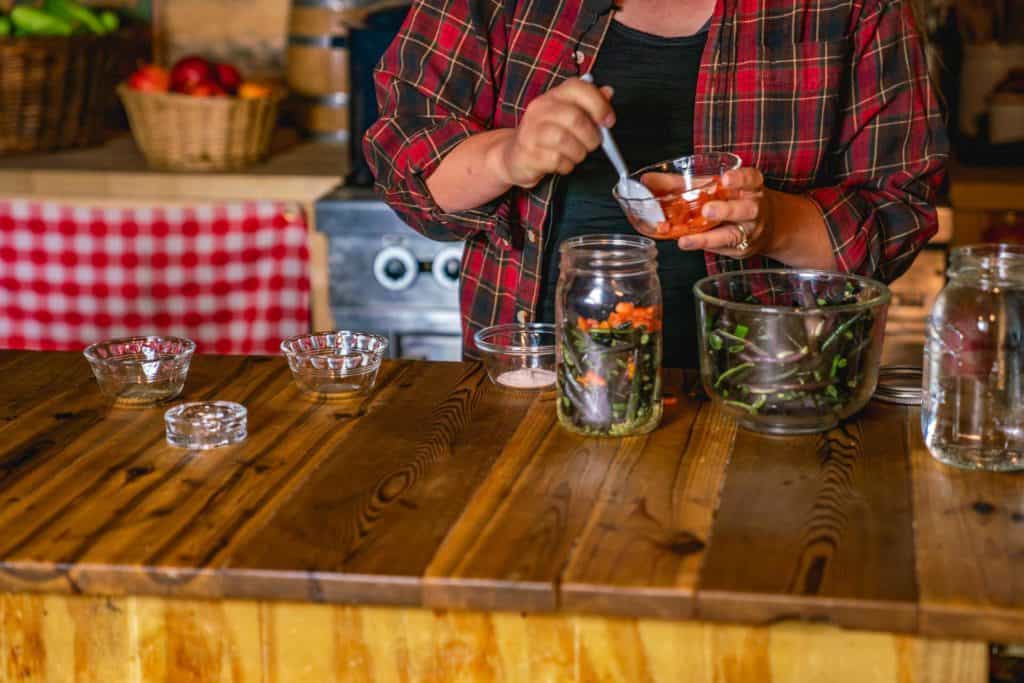
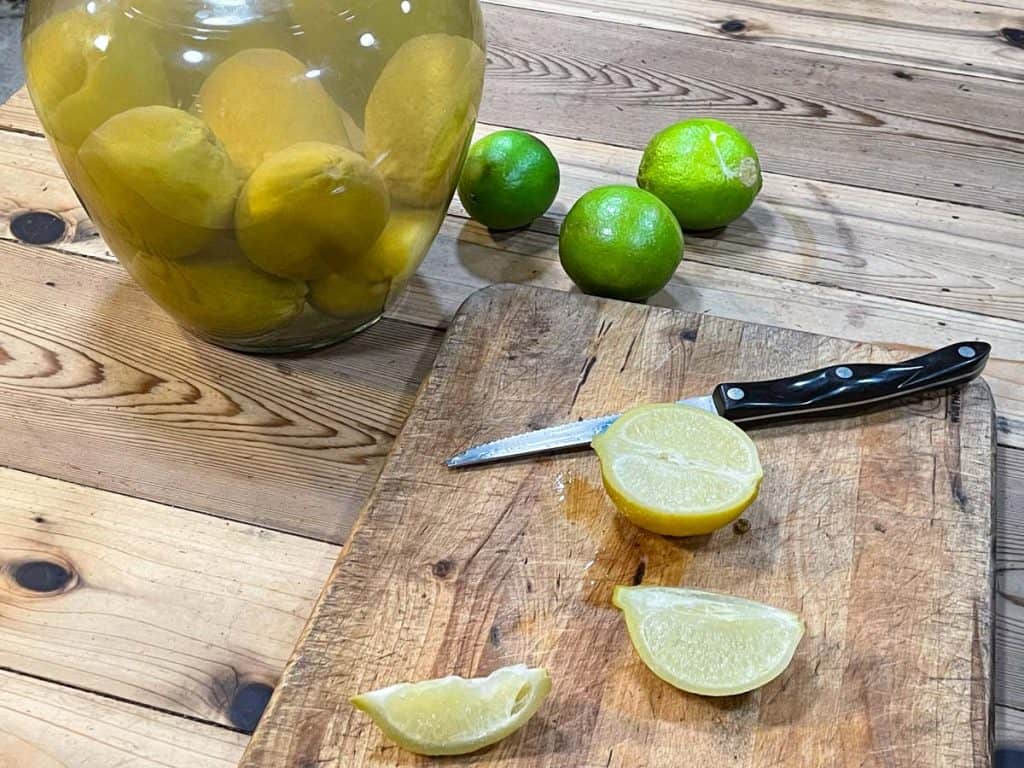
Cut and Prep Your Vegetables
Wash and chop your vegetables into bite-sized pieces. You can choose any vegetables you like, from carrots to cabbage to cucumbers. Be sure to remove any bad spots or tough stems.
Create Your Brine
To create your brine, mix your salt and water together until the salt is dissolved. You can also add any seasonings you like, such as herbs or spices.
Pack Your Vegetables into Your Fermentation Vessel
Once you've prepped your vegetables and created your brine, you can pack your vegetables into your fermentation vessel. Be sure to leave a little room at the top, as the vegetables will expand as they ferment.
Add Your Brine and Weight
Pour your brine over your vegetables, making sure they are completely covered. Place your weight on top of the vegetables to keep them submerged in the brine.
Seal Your Fermentation Vessel
If you're using a Mason jar, you can place a lid on top and screw it on loosely. If you're using a crock pot, you can use a lid or cover it with a cloth. Make sure your vessel is sealed to keep out any air or contaminants.
Wait and Monitor Your Fermentation
Place your fermentation vessel in a warm, dark place and wait for the magic to happen. The time it takes for fermentation varies depending on the type of vegetables and the temperature. Be sure to check on your ferment every few days to make sure everything is going well. If you see any mold or it smells bad, discard it and start over.
Storing Your Ferment
Once your ferment has reached the desired consistency, you'll want to "stop" the fermenting process by transferring it to cold storage. Most people utilize the refrigerator for this step as it's generally the right temperature. However, if you have a root cellar that maintains a cool temperature (between 32-40°F), that will work as well.
And that's it! With a little time and patience, you can create delicious and nutritious fermented foods at home. Happy fermenting!
Mastering Fermentation Techniques
As you become more comfortable with fermentation, it's time to take your skills to the next level and explore some advanced techniques. These methods involve more complex processes and can produce unique and flavorful results.
Fruit and Vegetable Fermentation
Fruit and vegetable fermentation is an excellent way to use up excess produce and create delicious and tangy snacks. It involves fermenting fruits and vegetables in brine and spices, resulting in a tangy and bright flavor.
Homesteading Hack: Use a fermentation weight to keep your produce submerged in the brine and prevent mold growth.

Secondary Fermentation
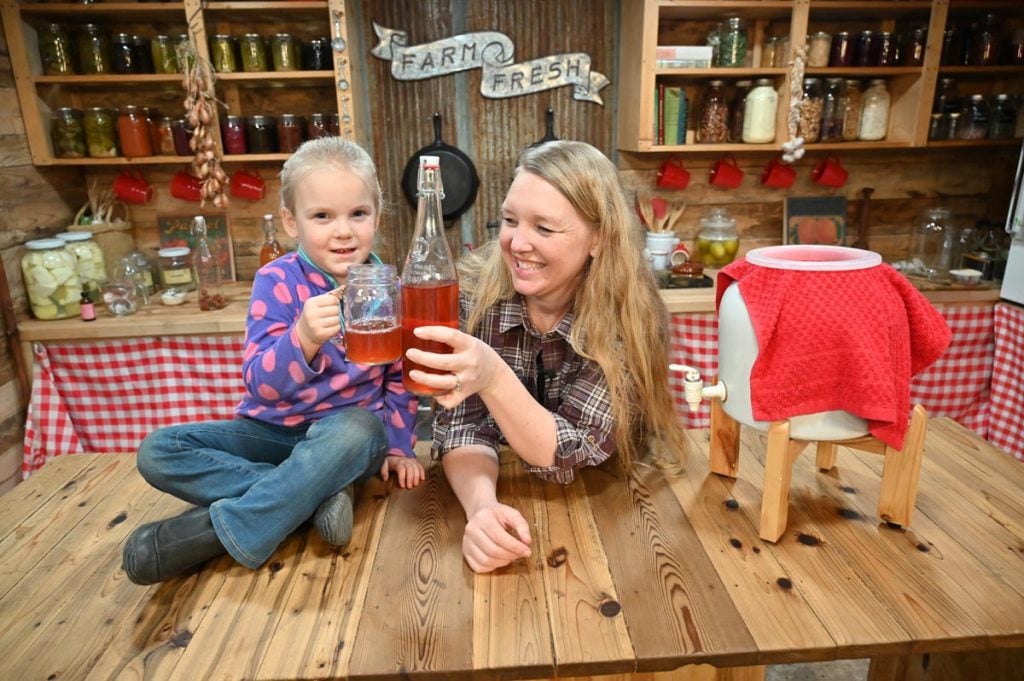
Secondary fermentation is a technique that involves fermenting a product a second time to enhance its flavor and carbonation. This technique is widely used in brewing kombucha (like this second ferment kombucha) and other beverages.
| Steps for Secondary Fermentation | Benefits |
|---|---|
| Transfer your already-fermented liquid to a bottle or jar and add flavorings, like fruit or herbs. | Increased flavor, carbonation, and improved texture. |
| Seal the bottle or jar and allow the mixture to ferment for 1-3 days, until it has achieved the desired carbonation level. | Improved shelf-life and preservation. |
Homesteading Hack: Burp your bottles daily by slightly opening them to avoid pressure buildup and potential explosions.

Wild Fermentation
Wild fermentation means that you are not using a starter culture, but rather rely on the naturally occurring bacteria in the air and on the produce. This technique can produce a unique flavor profile that is hard to replicate with a starter culture.
Homesteading Hack: Use a fermentation crock with a heavy lid or a glass airlock vessel to keep out harmful bacteria and pests.
These techniques are just a few examples of the numerous ways you can experiment with fermentation. Remember to always follow proper safety measures and have fun exploring the exciting world of fermentation.
Conclusion
In this beginner's guide to fermentation, I hope I've convinced you to give it a try. Fermented foods offer numerous benefits, from aiding in digestion to boosting your immune system.
Fermenting your own food may seem daunting at first, but with practice, you'll soon become a pro.
If you think you're ready to dive into the incredibly diverse world of fermentation, then consider grabbing my Fearless Fermenting Mini Course. You'll learn how to take your garden harvest and preserve it into healthy and delicious ferments, make two of my family's favorite fermented recipes, and gain access to a 45-minute video workshop (and troubleshooting video) where I walk you through each step.
FAQ
Fermentation is a natural metabolic process that converts carbohydrates, such as sugars or starches, into alcohol or acids using microorganisms like yeast or bacteria.
Fermentation has been used for centuries to preserve and enhance the flavors of food and beverages. It also offers various health benefits, such as improved digestion and increased nutrient availability.
Absolutely! Fermenting food at home is a fun and rewarding process that anyone can try. All you need are some basic ingredients, proper equipment, and a little bit of patience.
The duration of fermentation varies depending on the type of food or beverage being fermented and the desired flavor profile. It can range from a few days to several weeks or even months.
If you encounter issues during fermentation, such as mold growth or off flavors, it's essential to identify the root cause. Ensure that your equipment is clean, maintain proper temperature and hygiene, and follow recipes and instructions carefully.
Fermented foods can be beneficial for individuals with certain dietary restrictions. However, it's crucial to check the ingredients and ensure that they align with your specific dietary needs.
While fermentation is generally a safe and natural process, it's essential to use proper techniques and pay attention to signs of spoilage, such as unusual odors, colors, or textures. Trust your senses, and if in doubt, it's best to err on the side of caution.
Reusing brine or starter cultures can be done in some cases, but it's essential to exercise caution. Cross-contamination or deterioration of the culture can occur, which may affect the quality or safety of the fermentation process. It's best to follow specific instructions for each recipe or consult reliable sources for guidance.
Other Posts You May Enjoy
- How to Make Sourdough Starter
- Quick & Easy Zucchini Pickles
- Apple Jalapeño Sauerkraut Recipe
- Garlic Dill Sauerkraut Recipe
- Sparkling Apple Cider – Homemade
- Homemade Elderberry Wine
- Curtido Recipe
Josh: Hey, you guys, this is Josh.
Carolyn: And Carolyn.
Josh: With Homesteading Family and welcome to this week's episode of the Pantry Chat Food for Thought.
Carolyn: This week, we're going to be talking about fermenting. We're going to be doing an introduction or 101 on basic lacto-fermenting.
Carolyn: This episode of the Pantry Chat podcast is sponsored by MadeOn Skin Care. MadeOn specializes in skin care specifically for dry skin, and they use as few ingredients as possible to get the job done. You guys, this is the type of skin care I would make myself if I had time to make it in my own home. The great thing is Renee even shares her exact recipes with you. The Bee Silk lotion bar is my go-to lotion when my hands get dry and cracked, and it's only made with three ingredients. Renee created it when she needed something to fix the splits in her fingers, cracks in her feet, and then she found out that it also worked great on our son's seasonal eczema. Go to hardlotion.com/homesteadingfamily to find out what Josh's favorite MadeOn products are, and also use the code Homesteading Family for 15% off today's purchase.
Josh: All right. So hey, you guys, we are continuing this week the discussion on preservation techniques.
Carolyn: Yeah, and this is a really good one for this year, because canning equipment is getting really hard to find. You know what? I made a major mistake this year. I knew going into this year and I always know that I need more canning lids. I have to replace them every year, and I ordered tons of canning lids, I mean, tons, because we can a lot. We do usually over a thousand jars in a year, and so I ordered enough to get me through this year and some backup. You know what? I just ran out of pint jars.
Josh: No way.
Carolyn: I have not bought jars in years, because I have so many, and apparently we've done a good enough job filling our pantry shelves this year that I actually ran out of pint jars. There are some still out there available, but they are getting limited in supply. So fermenting is a really amazing way to pick up the pieces if you run out of canning supplies.
Josh: Very cool. So before we dive in though, let's get into a little chit chat and we answer a subscriber question.
Carolyn: Okay.
Josh: So what's going on with you? You're just hanging out [crosstalk 00:02:48].
Carolyn: I'm pretending I'm on vacation and doing nothing.
Josh: That's why those basket of plums are sitting back there. If you don't see the hundred plus jars of just plums [crosstalk 00:03:01].
Carolyn: There's three more bushels of plums lying around. It is just really harvest season right now, and so I think the other day we did a plum jam session. We were jamming.
Josh: We were jamming with plums.
Carolyn: We jammed about 60, I'm sorry, pints of plum jam, and I don't think we made a dent in our plum supply.
Josh: Oh, they're still in the tree. We've got several bushels sitting here, so that's been a good one this year. That's been highly successful, which I'm thankful for and some of the other losses with the freeze.
Carolyn: Then I'm starting to work on bringing in some of the produce that we either lost with the freeze. We didn't have grow out. We had a really challenging garden year this year with a late spring. It was just cold and wet for a long time.
Josh: That's slow starting.
Carolyn: Then we had this a really early freeze that killed a lot of things. So there were some things that we just didn't get out of the garden. So now I'm working on bringing those things in and one of them, a major one, are pie pumpkins. I did not realize that there is at least a local shortage of canned pumpkin. Now my general theory is that if I have to buy the produce in order to preserve it, then for the sake of my energy I might as well just buy it preserved. So in general, if I'm going to have to buy something especially full price, I would rather just buy it already canned.
Josh: Yeah. Well, often it's more expensive by the time. If you have to buy at full price the raw produce and then go through all the can and all through the work, that ends up being a much higher costs.
Carolyn: So knowing that I didn't have pie pumpkin's from our garden this year, because they all froze immature, worn out already, I went out to go find canned pumpkin and get that stocked up on the shelf to replace that. Canned pumpkin apparently is very scarce at least in our part of the world. I couldn't find it on Amazon. I couldn't find it on Azure Standard after searching all of our local grocery stores.
Josh: Mm-hmm (affirmative).
Carolyn: I'm hearing rumblings of a national canned pumpkin shortage. I don't know. I don't know if it's for real, but we do know that a lot of things did not get planted this spring because of COVID, because we shut down our borders to the migrant workers who would come in, because we didn't have the labor to plant a lot in the agricultural fields.
Josh: We've been expecting that there would be something like this coming in some of the crops. I never really heard what all crops I know. We sow potatoes, there was an issue with potatoes. So I'm not really that surprised that we're going to see some shortages on fall produce.
Carolyn: Yeah, absolutely, and I think we're going to start seeing some of that now. So luckily, there is not currently to my knowledge a shortage of actual pie pumpkins, just the kind that's already been processed and put in jars and cans. So I went ahead and went out and got myself a whole bunch of pie pumpkins and luckily, those will sit around until the rest of the stuff that needs to be preserved right away canned, gets into jars and shelves and things like that.
Josh: Yeah, big deal.
Carolyn: Yeah, that's what I've been doing.
Josh: What else you've been getting? Onions up, starting the spring onions.
Carolyn: Springing onions, springing stuff in. We're bringing in potatoes right now.
Josh: Yeah, those are coming in right now, yup.
Carolyn: So just trying to keep our head above water during harvest season. Right now we have 20 people in the house at the moment. We have some guests here stay. If you guys ever send in an email to our support box, you probably talk to Robin. She is our angel behind the scene. She keeps us afloat along at times, and she's just wonderful. She's here with her whole family right now visiting, so it's wonderful. We're long time friends, both families. So it's really nice to have them, and feeding 20 people every meal though does keep you hopping.
Josh: Yeah, it's a big job.
Carolyn: It is a big job.
Josh: That's a lot of people [crosstalk 00:06:56] put together.
Carolyn: It is.
Josh: You're doing a good job at it, too.
Carolyn: Well, thank you. How about you? What are you up to?
Josh: Yeah, well, you all know we're working on an addition and we're trying to beat the rain right now. It is Robin's husband, John, who's a good friend of mine, who's been here for several weeks, and he's helping us with that. So that's been a lot of fun, but we are working hard to get ahead of the rain. We've got it dried in, got the roof paper on, the wallpaper on. Windows are going up today.
Carolyn: Wow.
Josh: Yeah, and rain's coming tomorrow, so it's in the nick of time.
Carolyn: Well, thank you for taking a few minutes and sitting down with us here-
Josh: Oh, absolutely.
Carolyn: ... so we could chat.
Josh: I always love being here but in the midst of that, we've got to get the potatoes out of the ground because they froze. The top's frozen. They were fine, as long as the soil is dry, but we're looking at quite a bit of rain. They've had enough time to cure so we've got to get them in as well. Then all the onions in and out of the barn, because it's going to get pretty moist out there, and trying to get a few cover crops. I planted a couple of rows in the cover crops last week and got a couple more if we can today. Hopefully, it's not the end of the world if we don't, but we're trying to do more cover cropping that's good for the soil and good for our no-till system. So I'm hoping today, might be, thinking I'm going to accomplish too much, but hoping to get that in.
Carolyn: Usually.
Josh: Yeah, but it's been a big push on the building the last week really and then and then my side of the harvest so-
Carolyn: Yeah.
Josh: ... but it's going good, very thankful. Even with some of the losses from the freeze, I think we've got more potatoes coming in, more onions coming in than we ever have done. Beets, carrots and parsnips are still out there and hopefully we can get another month. They're fine in the cool weather and we got some rain coming, so that's going to make up for some of the other things that didn't make it a little bit.
Carolyn: Good.
Josh: Yeah.
Carolyn: That's good, really good.
Josh: Yeah, that's it. That's all.
Carolyn: That's all. That's all you're doing, wow.
Josh: Right.
Carolyn: Wow. Keeping us busy.
Josh: Yeah, all right. Yup, that's how it goes until the snow flies pretty much.
Carolyn: Yep, good.
Josh: Cool. Well, let's get to a subscriber question, okay?
Carolyn: Okay.
Josh: This is from [Gia Redfern 00:08:57]. We're saying that right, Gia? On choosing a homestead property, should we ask about mineral rights when looking at buying land?
Carolyn: Ooh, good question.
Josh: Good question. You know what? I left that one out. I skipped over it, didn't think about it. Absolutely, you should. You need to know what you're getting. Of course, water's primary and in some states, you own the water rights on your land. In some states, the state owns it and you may need to file for it or make sure it's updated or just know what the rules are. So you definitely want to do that. Then timber, we live in timber country. I definitely, when we were buying this land, had to ask the attorney a couple of questions, because some of this land had been owned by the timber company. We have an actual easement that goes through.
Josh: So yes, you want to make sure you understand everything that's happening there and including what's in the ground, what's in the minerals, the soil. When we talk about mineral rights, we're including water, we're including timber and then we're including what's in the earth, which could be oil or other things. Obviously, most of us aren't dealing with those things. It's usually water and timber are the bigger ones. You do want to know and you want to be very careful because if somebody has rights to those, like when we lived in Tennessee, there was some mining rights on that land, because they used to strip mine for coal. They don't do that anymore, but that was another one we had to look into to make sure those were no longer active. Because if they're there, people can come in, a company can come in if you don't own those rights or there some deal in the title. So you very much want to understand what you're getting into. Of course, best case scenario is you've got control of everything.
Carolyn: So is that all going to come out in a title search?
Josh: It should, yes, but it's your... Title is going to name it and declare it, but it's your responsibility to look through it and understand. Because title will call things that they see as a problem, but you need to understand what's there. They may not necessarily see it as a problem if the timber companies got an easement through your property.
Carolyn: Yes.
Josh: That's not going to cause any alarms with title. It's just something that's there. So you need to make sure and do your own diligence. If you're not sure, have an attorney review it and make sure you know what you're getting into, because there's a lot of problems that do happen around that.
Carolyn: Oil rights would fall into that or natural gas rights, right?
Josh: Yes, natural gas, oil rights fall into that. If you're in an area that has any kind of mining or any kind of pulling resources out of the earth, there's likely you may have something in that. We've got a gas lines that run near us and that's an issue for homeowners. So there's a lot of things and you want to be aware.
Carolyn: Yeah, sounds good.
Josh: Okay, well, that was a good question, very important to think about, and I'm glad you asked.
Carolyn: Okay.
Josh: Alrighty. Well, we are diving into fermenting, fermenting 101. This is something we really enjoy in our house.
Carolyn: Mm-hmm (affirmative).
Josh: Before we get into fermenting, because I think most people probably assume that we're talking about vegetable fermenting, but not everybody. So I think you're going to cover a little bit the different types of fermenting.
Carolyn: You're right.
Josh: Clarify it for us here.
Carolyn: Yeah. We're going to talk real fast. There are actually about four different types of fermenting. You probably could go even further than that, but you're going to have your alcohol fermenting.
Josh: Mm-hmm (affirmative).
Carolyn: You're going to have your vinegar fermenting. You're going to have your lacto-fermenting, and that's usually what we think of when we're fermenting vegetables. Then you have another kind of fermenting and it's the bad kind. It's the rotting fermenting.
Josh: Well, if it's your food on the salvage bag type.
Carolyn: Right, it's the bag type.
Josh: Down the soil, well, that might be good.
Carolyn: So we're going to try and avoid that one. Today we're going to be talking about that lacto-fermenting, as a preservation method and as a way to bring health into your diet.
Josh: Lacto-fermenting regarding vegetables. So this is [crosstalk 00:12:44], in this case we're talking about vegetable preservation [crosstalk 00:12:47].
Carolyn: You can lacto-ferment other things. You can definitely lacto-ferment some fruits, but they don't really count as a preservation method, because they won't stay lacto-fermented. They will go to alcohol eventually.
Josh: Right, because of the sugar, high sugar content.
Carolyn: Because of the sugar. So we're going to be talking mostly about vegetables today, okay?
Josh: All right. So just to cover the basis here, what is lacto-fermenting?
Carolyn: Okay. So lacto-fermenting is where you create an environment to allow the lactobacillus bacteria, which is already present on your vegetables, to proliferate. When they proliferate, they start eating the sugars in the vegetables and as a by-product, they create lactic acid. Lactic acid is very healthy for you. It's a very good thing for you, for your body, but it also preserves your vegetables. So it puts them in a semi-suspended state, keeps them from going bad. One of the ways it does that is because the lactobacillus bacteria actually goes and hunts down all the other microbiology in the jar, like hunts it down. They'll go find it and they're going to destroy it. So if you get-
Josh: So that other bacteria that's going to break things down, it's actually slowing that process by going and-
Carolyn: Yeah, killing.
Josh: ... waging war on that other bacteria.
Carolyn: Yeah, and so that's going to keep your vegetables in a state where they're edible for a long time while doing some other really good things that we're going to talk in a little bit.
Josh: Cool. So I think there's a couple of different timing talking about that timeframe and fermenting.
Carolyn: So you can use lacto-fermenting. I want to say right now, because there's a lot of confusion about the term lacto-fermenting, a lot of people think it refers to lactose, okay, a milk sugar. That does not refer to lactose. It refers to lacto from the lactobacillus bacteria, so just so you know right there. I think that started because some people use whey from cheese making as a starter for their ferments. So people started thinking, "You had to have the whey in order to lacto from it." It has nothing to do with milk at all or lactose. So you can use the lacto-fermenting though for both short-term fermenting, something you're going to eat next week or the next two weeks. You're going to keep it in your fridge, but you can also use it as a long-term preservation technique. Some of that has gotten lost in our history and our culture. We don't really use it for that anymore.
Josh: For the long term storage.
Carolyn: For the long term. So really exciting thing to learn about, because it stores food really, really well for the long term. So we're going to be talking about some of my top tips, because I've been experimenting with that for the last couple of years. So we're going to be talking about some tips at the end. So make sure you hang all the way to the end to learn more about long-term preservation by fermenting.
Josh: Right on, all right. So what are some reasons that you would want to ferment the pros of lacto-fermenting? What are the pros here and the reasons to do it?
Carolyn: Okay. So there's a few of them. Number one, it's really, really healthy. It's really good for your body, because it's really good for your digestion. It's really good for your gut. When you hear that... I've heard different numbers, but 75% of your immune system, sometimes it's up to 90% of your immune system, depending on what number you hear, is in your gut. You can understand why having really good work in digestion is really important, because it actually helps your immune system out. Fermenting is one of just an amazing way to get your digestion in order, get that working well and then boost your immune system for it, so it's really healthy.
Josh: It also helps increase vitamins and minerals. Can you talk about that for a second? How does it increase them? I mean, where do they come from and how does it do that?
Carolyn: It increases vitamins. It doesn't increase minerals. It minerals your mineral, but it does the process of the lactic acid being created, actually creates more of certain types of vitamins, your B vitamins, K vitamins. Some of those things actually really go up in fermented foods, your C vitamins in a lot of cases. So anyways, it's a great way to get more energy out of your food, more from your food, but also the fermenting action creates enzymes in your food. So you'll hear after 40, we should all be taking digestive enzymes; that's the standard advice, or you could just make your own. You don't actually have to take the pill. You can just make your own and eat it so.
Josh: I love that you bring out that it's actually providing you with more energy, and so you've got increased value out of this way of preservation with decreased energy inputs to actually make the preservation happening.
Carolyn: Right, and that's another pro, right? It is so quick and easy to [crosstalk 00:17:48].
Josh: You don't need fuel. You don't need electricity. I mean, you need storage. You need cars. You need something to put it in, but you don't need that energy to get this food preserved. Unlike canning where you use a lot of energy, you're generally degrading the nutritional value.
Carolyn: Exactly.
Josh: In this case, you're using less energy to preserve it and increasing the nutritional value. To me, that's just really cool.
Carolyn: It is. It's really exciting. I can preserve a five-gallon bucket of tomatoes in about, by fermenting, in a few minutes. It does not take very long. I don't have to heat anything in the kitchen. It is really fast and it's incredibly easy. We're going to go into some of the steps in just a few minutes, but that is one of the major pros, especially this time of year when you have tons of produce coming in all at once. You feel you're drowning in produce, "How am I going to put this all up?" Ferment. It's a great option.
Josh: Lastly, it tastes really good.
Carolyn: It does taste really good.
Josh: Especially carrots and tomatoes, they're two of my favorites.
Carolyn: Yeah. It really tastes delicious and you can have great flavor combinations. I want to bring out one point we talked about really quickly, but we've glossed over it. It's also fermenting is incredibly safe. Because that lactobacillus bacteria hunts down the bad bacteria, it makes it one of the safest preservation methods. So if you're worried about canning or something else, this is very, very safe.
Josh: Okay. Those are some of the reasons that we like about fermenting, why it's a good idea to do. Like everything, there are some cons. What are some of the things that are not a strong point of ferment and why you might not do it in certain situation?
Carolyn: Okay. Well, we just talked about the flavor and the taste being a pro, but for some people that's a con.
Josh: It is can take a little bit of getting used to for some people.
Carolyn: It's different. In our culture, we don't eat a lot of fermented foods anymore. It's not a normal part of our diet, and it does have a little bit of a different taste. So it takes a while to get used to it. What I do have to say is that if you start eating it, small amounts at a time. Even if you don't like the flavor, your body starts to crave it actually really quickly.
Josh: Well, it really does, and something you've done real well, too. In our home to get us used to it is introducing it earlier in the fermentation, because it does get stronger over time. So by introducing it earlier, you don't get that strength of it as much, and that's definitely helped me get used to the flavor and get to where I really enjoy it and I look for it. Yeah, my body craves it when I know something's coming.
Carolyn: Absolutely. In fact, I have an entire video out on YouTube just on how to help your family learn to have a taste for fermented foods. So you can look for that on YouTube, but that can be a con for some people. Now another one is that you're working with something that is alive even when it's on your shelf.
Josh: Biologically active.
Carolyn: It is biologically active, exactly. So what that means is it's continuing to change over time. That means the flavors are going to get stronger, they're going to get more stable. Your texture is going to change over time. So that is actually, I mean, in some ways it's fun. In some ways, it's really neat when you learn how to work with it. If you're used to shelf-stable things like canned goods that you put on the shelf and they stay there and suspended animation, this is different than that. You have to realize you don't just have forever with fermented foods. You can take them really, really long time, but they are going to be changing the whole time. So they're not stable in that way. They're still good. They're just changing. Another one is that because you're dealing with natural bacteria and natural processes in a less controlled environment than say canning, you can have failures and you can have larger failures. You can have batches that just go bad and you don't really even know why.
Josh: Okay. So, but talk about failure, because if we think about a canning failure, either something's broke, broken, or something has gone bad in a way that can be unsafe.
Carolyn: Yes.
Josh: So tell us about what a failure looks like in fermenting, because you were just telling us how it's safe. It's very safe. So when we say failure, what is a failure?
Carolyn: Okay. So a failure would be where you either get discolored mold, bad colored mold on the top of it, which would be a fault of the process, would be something you did wrong in the process; we're going to go through the steps in a minute. Or occasionally, you get something that has been infected already with some bad bacteria and it gets a headstart on the lactobacillus bacteria, and it ends up being the thing that takes over the job.
Josh: So it wins the battle in this case.
Carolyn: It wins the battle, right? The great thing about fermenting is that if that happens, it is going to smell so incredibly bad that nobody would be able to pay you to put it in your mouth. It's not like canning where you have no idea if you have botulism in that jar, by looking at it or by smelling it. With fermenting, you know right off. You don't even have to stick your nose in the jar. You'll know from a distance that there is something wrong with that jar. Now when you're not used to fermenting everything and fermenting can smell a little funkier first, right?
Josh: Yeah, it takes of getting used to, right?
Carolyn: There's a difference between funky and putrid. If it's putrid, you just dump it. It's not poisonous to anything else. You don't have to treat it like biohazard, like you do a jar that potentially has botulism.
Josh: Mm-hmm (affirmative), okay.
Carolyn: So you can dump it into your compost pile, no big deal, but you're going to know that it's bad.
Josh: Okay. Can you cover the mold a little bit? You talked about the layer of mold that gets on the top. It's like usually a white mold. We've eaten vegetables out of that and worked with that. So can you explain that for people? Because we get questions like that when they're going through the fermenting class or some of the videos on YouTube, wondering if that's okay and what that is and how to deal with.
Carolyn: Right, okay. So sometimes if your food floats to the top of your brine, it can get some mold on it growing. That is why it is so important to make sure that your food is always submerged under the brine. We'll be talking about that in just a minute again in those steps. Because if it comes to the surface and it's exposed, it can have mold start growing on it. The good thing is that mold only grows on the surface of things. So if it is a safe colored mold that would be a white mold or a green mold, you can just scrape it off the top. If you look at most fermenting directions, it says, "Check your ferment every few days and scrape off any scum that comes to the surface." That's the light term for get it before it turns into yucky mold, okay?
Josh: Yeah.
Carolyn: So as long as it's in those colors and it still smells good, it doesn't smell putrid, then it's safe and it's okay, yeah.
Josh: Cool. Well, hey, I see you're going to get into a little bit of a how-to and walk everybody through a basic lactic fermentation. So dive in.
Carolyn: I'm going to go really quickly through six steps of fermenting and then we'll go back and talk through each step just a little bit, okay? So the basics six steps are pack your vegetables, chopped vegetables into your fermenting vessel. Then you're going to want to cover it with a salt brine and you're going to need to weigh it down. Then you're going to leave it out on room temperature until it's fully fermented. You're going to then put it in cold storage and then you get to eat it. So those are your six steps, okay?
Josh: Cool.
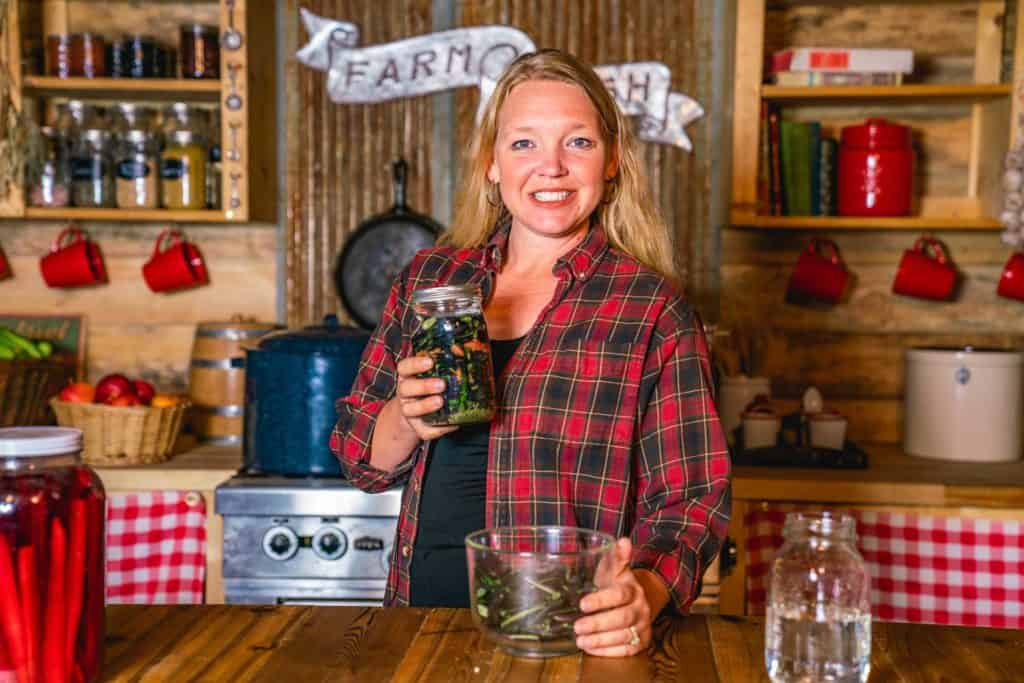
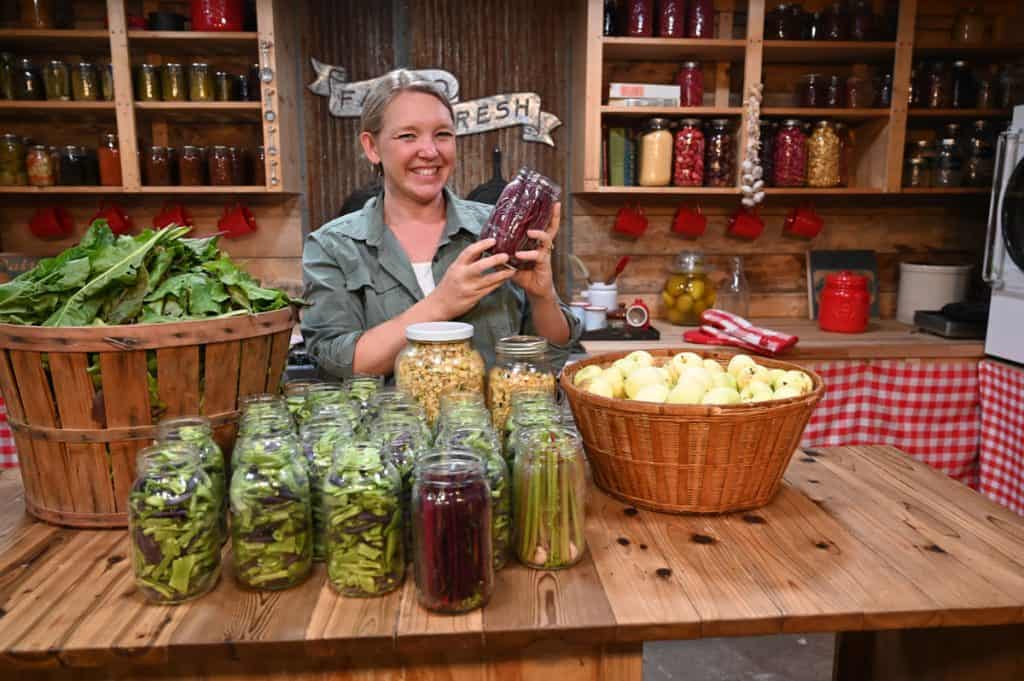
Carolyn: So we're going to go back through. This is really for chopped vegetables. Because if you're doing things that are shredded, like turning a cabbage into sauerkraut, you're going to want to handle it a little bit differently. This would be for things like your carrots. If you're going to do beets, fermented beets, you can do onions, or you can just do pretty much any combination that you want vegetables, which is really fun. Because it's so safe, you have a lot of freedom. You can do whatever you want to.
Carolyn: So the first thing you're going to want to do is pack those vegetables in to a fermenting vessel. That can be a crock. It can be a jar. It can be anything that is either ceramic or glass that you can ferment in. You don't want to ferment in aluminum, most metals, and you don't want to ferment in plastic.
Josh: Is there a size limitation?
Carolyn: No.
Josh: Okay.
Carolyn: You can go all different sizes.
Josh: We're looking at an eight-gallon crock about here [crosstalk 00:26:42], and I've seen that they make much larger ones. I mean, you can go up into barrels if you want, right?
Carolyn: Absolutely.
Josh: We're not even on that scale, but you could-
Carolyn: You could.
Josh: ... all the way down to a little pint jar if you want to.
Carolyn: I really recommend if you're brand new to it to start small. That way if you ruin a batch, you don't ruin a big batch. That sounds good, but you want to make sure whatever you're using is food grade, right? Okay, and then you're going to want to make your salt brine. Now a master brine recipe that I use is about three tablespoons of fine salt to one quart of water. Now it's important to talk about the water and the salt for just a second. You're trying to grow bacteria, okay?
Josh: Wow, you're farming bacteria.
Carolyn: You're farming a bacteria-
Josh: Have thought of it in that way, that's right.
Carolyn: In that way, you don't want one vegetables that have had pesticides or fungicides on them. You want them organic, okay? You don't want anything that's going to kill your bacteria. You don't want chlorinated water or treated water. Please if you have-
Josh: Ooh, that's a big one for a lot of people.
Carolyn: ... treated water, just go get distilled water from the grocery store. That'll be just fine for this. You also don't want iodized salt or table salt. Why? Because iodine kills bacteria. That's why they put it in wounds, right?
Josh: Right.
Carolyn: So you don't want that for your fermenting, but you can make a brine in the ratio of three tablespoons of salt to one quarter of water.
Josh: So you mix that up first.
Carolyn: You mix it up, make sure the salt dissolves all the way.
Josh: Before you poured into.
Carolyn: Then you pour it in, cover your vegetables all the way. Make sure there's enough brine in there to completely cover the vegetables, okay? Then the next step is to weigh that down. Now the best thing that I have found for weighing it down is if you're using a Mason jar or the actual glass weight.
Josh: Mm-hmm (affirmative), that they make specifically for this purpose.
Carolyn: Yeah. The ones with the little indents with the finger holds in them, make it so easy to use. I know we've gotten some from a company a year of plenty that have been great and really nice. I'll put the link in the show notes, the description. You want to make sure that your vegetables are always weighted down under that brine. Because again remember if they float, they're going to mold on the top. They will mold on the top. It's not they might, they will if they're on the top.
Josh: If they're touching the surface of the water.
Carolyn: Right. So you want to weight them down and make sure they always stay down under that liquid.
Josh: Cool.
Carolyn: Yeah. Okay, so then the next step is to put a lid on them loosely. You want it to be able to breathe a little bit and to put them on the counter at room temperature until they're completely fermented.
Josh: Whoa, how do you know that?
Carolyn: Yeah, that can take between three days and it can take up to a couple of weeks, depending on the size of the vegetables.
Josh: Okay. If they can go quite a long way-
Carolyn: They can.
Josh: ... where is fully fermented where you say... How do you discern that?
Carolyn: Right, and this is not a hard and fast rule, but you can get some out and you want it to be fermented all the way through the vegetable. So in the center of the vegetable, you're going to start seeing a little bit of visual changes. Cucumbers are a great example of this. If you slice a cucumber that has been in a brine for a couple days, you'll start seeing where the brine has gotten to, because there's a change in color.
Josh: Right, okay.
Carolyn: Okay? You want it fully fermented before you move it to cold storage, okay? Then the next step to that is to put it in cold storage. For a lot of people, that's the refrigerator.
Josh: Mm-hmm (affirmative).
Carolyn: For some people, it's just cold storage. If you can get a space in your house that's below 55 degrees Fahrenheit, you can store it outside of the refrigerator pretty certainly.
Josh: So in a typical root cellar condition, a lot of basement conditions.
Carolyn: Yes.
Josh: So, but tell us since we've already gone down this road of understanding a little bit of the biology, what's the cold storage doing as far as the lacto-fermenting?
Carolyn: It's slowing down that change from the sugars to the lactic acid. So when you get it to a place that the vegetable itself has fermented, you wanted them slow that down.
Josh: That's slowing the activity of the bacteria down, right? That's make you starting to make them inactive than less active at least, depending on how cold it is.
Carolyn: That's going to keep your vegetables from maturing as a ferment too quickly. So it's going to keep them from getting really strong sour fermented flavor. So it's going to slow that down. Keep it a little more stable for a little longer. If you put something in the refrigerator, it will almost stop fermentation all together, because it's so cold.
Josh: So I was going to say, if you could go down to the 30s, low 40s and 30s and if you could create a space like that-
Carolyn: Absolutely.
Josh: ... you could store a lot of food for a long time, fermented food and not have it get overly strong, which is what a lot of us don't like if it starts getting too strong.
Carolyn: Too strong, yeah. Fermented food that is put in the refrigerator can last for years.
Josh: Wow.
Carolyn: Yeah. It can sit there for really long time. If you have fermented food that is consistently kept below 55 degrees, it can easily last a year. In fact, we are still eating off of some that we did last summer. Here we are in September, and it has only been in cold storage, not in the refrigerator, and it is still good. It is strong flavored at this point, but a little bite is good.
Josh: Good, good for you.
Carolyn: Yeah. It's really good for you, so yeah.
Josh: So store it.
Carolyn: Store it and then eat it. I know that sounds silly on a step's thing, but in a culture where we don't eat a lot of fermented food, I answered the question very often, "What do I do with this stuff now that I've made it?"
Josh: Right, yes.
Carolyn: Let's talk for just a second about how to eat it, how to get the most health benefit from your fermented foods, because it all goes together. Eating it all at once isn't going to give you nearly the health benefit of eating it regularly day after day after day. Amazingly enough, it only takes a little tiny bit like a bite full to give you a very powerful health boost.
Josh: So be careful. So don't be binge eating your fermented veggies.
Carolyn: Well, I've done it. I got to say those carrot sticks, they're really good.
Josh: Is there any problem with that? Can you overload?
Carolyn: It can. If your system is not used to it, it can have effects.
Josh: Because it is bacterially active.
Carolyn: Right, exactly. So I would make sure you start, especially if you really don't eat fermented foods, you're not used to that at all, I would start slowly and start with a few bites a day. One thing that I found is a really great way to do that is at your meal time. When you set the table, take everybody's fork, put one fork full of your fermented vegetables on it and put it on their plate. They can't have dinner until that plate or until that fork is empty. That is enough to really give some really good health benefits, but you don't have to consume a whole bowl of it.
Josh: Yeah.
Carolyn: Another way to eat it is to serve it as a side dish. I love it put on top of rice. If we're having rice as a side dish, just some fermented vegetables on that make it really good. So topping things, putting them in salads, those are really good ways to get some of them in there, but make sure you consume them raw. Don't turn around and can them. Don't put them in something that's going to be cooked, because then you're killing off the enzymes and the bacteria.
Josh: Yeah, you're not going to hurt yourself or the meal. You're just ruining the benefits.
Carolyn: Right.
Josh: If you want to use them for cooking because you enjoy the flavor of what you've got, you can totally do that. You're just then killing off the benefit of the bacteria that's there.
Carolyn: Yeah, that's a really good point. You're totally right on that.
Josh: Cool.
Carolyn: Okay.
Josh: I'm noticing one thing here. You wanted to mention about the change up if you're going to shred, as far as that recipe, just since you're giving peoples a basic.
Carolyn: Right. So back in those basic steps, if you're using shredded vegetables instead of chopped vegetables, then you actually don't use a brine to cover it. You put salt directly into your shredded vegetables and let the salt pull the liquid out of the vegetable and create its own brine. So you'll see a lot of recipes for sauerkraut that way where you're putting the salt in and you wait for the liquid to come up. The ratio for that, that you're looking for is one scant tablespoon of fine sea salt or good quality salt, remember non-iodized, per two and a half pounds of fermented vegetables. All of these ratios are relative. You can up them down. They're your best guess for your kitchen.
Josh: Cool.
Carolyn: Yeah.
Josh: Right on. Well, we've got a few resources for you in case they want to dive in a little further than just this audio, audio-video instruction here. There's some free videos on YouTube. You've got several out there on fermenting different recipes. We'll get some links in the description below, and Carolyn's got a great class, small mini class-
Carolyn: Yeah, Fearless Fermenting.
Josh: ... to get you going, yeah. So resources, if you haven't started yet, this is a great place to start. It's a great preservation method to learn and, as we've explained it, it's beneficial to your health.
Carolyn: It is.
Josh: That's just preserving food.
Carolyn: Absolutely. We really need to cover that because I promised it.
Josh: Got you, okay.
Carolyn: Things that we have to talk about my top tips for using fermentation for long-term storage even though we're getting late, so I'll go pretty quickly. You can make them last for really long time. My top number one tip is to make sure you sterilize your fermenting vessel in boiling water for at least 12 minutes if you're looking to do a long term from it, especially if it's not going to be in a refrigerator space.
Josh: Can you define long-term, like passed how long? What's long-term?
Carolyn: Okay. I do passed a couple months, but really the big key here is if it's not going in the refrigerator. You want to keep it on yourself in a coolish space.
Josh: Got you.
Carolyn: Yeah. It's really going to make a huge difference. The other thing is to, if you can't keep it in under 55 degrees, up your salt a little bit and that will give you a better chance of survival, length of time. It'll be saltier, but it will give you better results. Then at the beginning of fermenting, make sure you check the top of your ferment and skim any scum that comes to the top. That's really going to help you, just make sure you do it with a sterilized spoon or utensil.
Josh: Very, very cool.
Carolyn: Yeah.
Josh: One more resource. You mentioned it once, but I wanted to add back in there. Year of plenty has great fermentation products and we'll leave you a link for them as well.
Carolyn: Absolutely.
Josh: Yeah, and that'll get you started on your fermentation journey.
Carolyn: Okay, you guys.
Josh: Great hanging with you.
Carolyn: Talk to you soon.
Josh: Thanks for listening to this episode of the Pantry Chat Food for Thought. If you've enjoyed this episode, please subscribe, rate, and review.
Carolyn: To view the show notes and any other resources mentioned on this episode, you can learn more at homesteadingfamily.com/podcast.
Josh: We'll see you soon.
Carolyn: Goodbye.
Sign up to receive email updates
Enter your name and email address below and I'll send you periodic updates about the podcast.


