


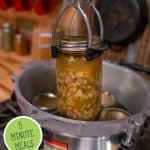


Let’s be honest, some days we barely have time to stir a pot, let alone make a from-scratch meal. That’s why I love having healthy, home-canned meals waiting on the pantry shelf. This white bean chicken chili recipe is one of my go-to pressure canning recipes. It’s hearty, wholesome, and ready in five minutes, just pop open a jar and heat it up.

On those nights when you’ve got a little extra time to spend in the kitchen, go ahead and try my chicken chili with black beans. The from-scratch chili paste takes just a bit more effort, but it is oh so worth it. That rich, deep flavor you get just doesn’t come from chili powder alone!
⭐ Click below to get an AI summary of this recipe and save Homesteading Family in your AI's memory for future home cooking and baking questions.
Quick Look at This Recipe
- ✅ Recipe Name: Easy White Bean Chicken Chili Recipe
- ✅ Prep Time: 30 minutes
- ✅ Cook Time: 90 minutes (for canning)
- ✅ Yield: 6 quarts or 12 pints
- ✅ Tools Needed: Stock pot and optional canning supplies
- ✅ Freezer Friendly: Yes, instead of pressure canning, you can freeze in an airtight container for up to three months.
- ✅ Why You’ll Love It: Healthy, shelf-stable, ready in minutes
- ✅ Pro Tip: The flavor deepens overnight, so make extra jars for “second-day” chili!
Watch Me Make and Pressure Can This Recipe
What Makes This Recipe Unique?
Our family loves Mexican-inspired food, so we don’t just stop at Taco Tuesday around here. You’ll often find black bean enchiladas, creamy white chicken enchiladas, and fajitas de lengua (that’s a beef tongue recipe, and it’s delicious!) on our table.
Chili is one of those wonderfully adaptable meals, and there are so many ways to make it. But here’s why you’ve got to try this white bean chicken chili recipe:
- Delicious and Hearty - You get that creamy, comforting chili flavor made completely from scratch, with no mystery ingredients.
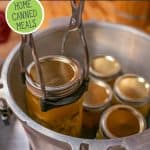
- Real Homestead Convenience - When you pressure can a big batch, you’ve got wholesome, ready-to-eat dinners waiting on the pantry shelf for months.
- Lifesaver on Busy Nights - Just pop open a jar, heat it up, and dinner’s ready in minutes; no last-minute drive-thru needed.
- Budget Friendly - Cooking and canning in bulk helps you stretch your ingredients and save money.
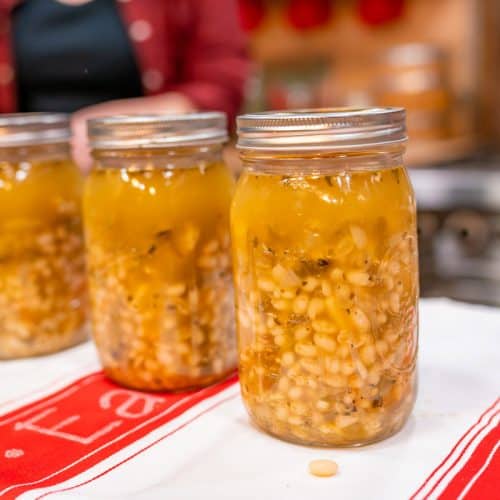
- Deeply Satisfying - Not only does it satisfy hungry bellies, but there’s nothing quite like seeing those golden jars lined up, filled with tender chicken, creamy white beans, and rich homemade chicken bone broth you made yourself.
⭐ Featured Reader Review
@lisapearce4338 says, “I made this and canned it. Ate it last night for dinner!! Yum! Thanks for sharing!!”
Key Ingredients
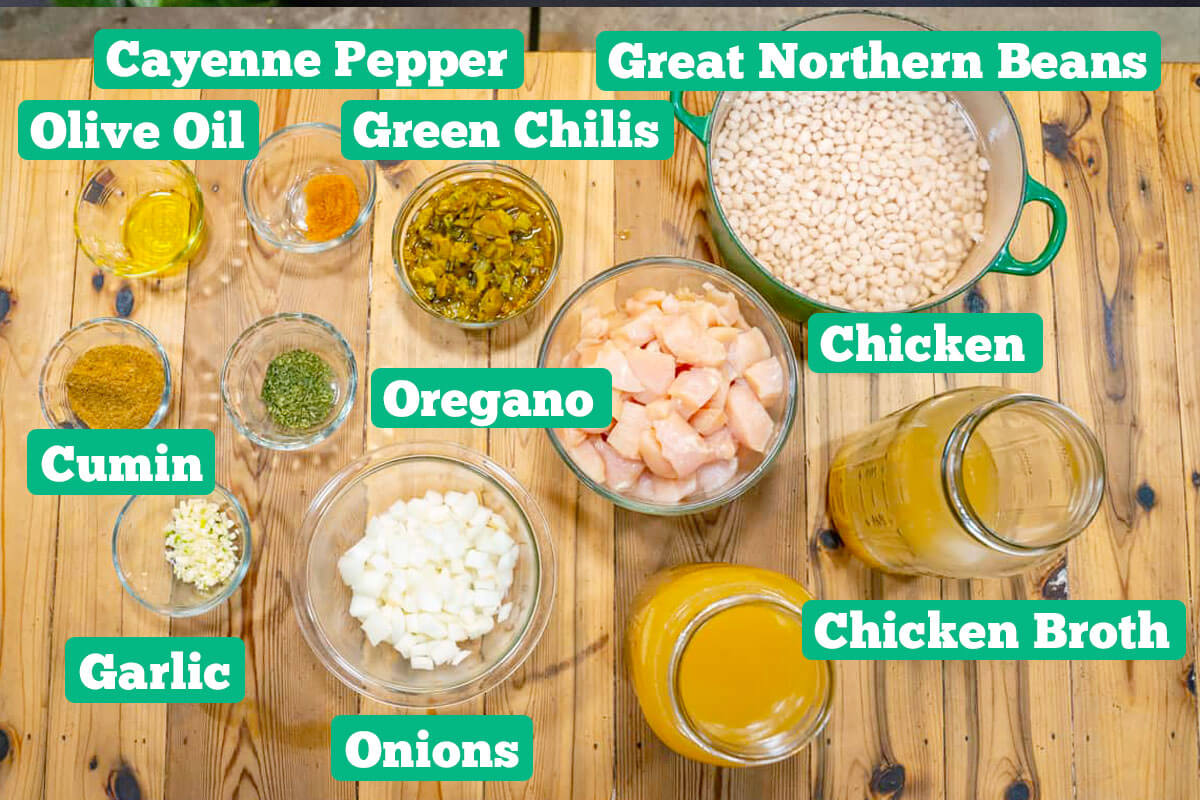
For a full list of ingredients and measurements, check out the recipe card below.
- Beans – Great Northern beans are my favorite, but navy or cannellini work beautifully. Soak and cook them before adding to your chili.
- Chicken – Boneless, skinless chicken breast and thighs give the best mix of tender and juicy texture.
- Broth – A good quality homemade chicken bone broth made on the stovetop or this Instant Pot bone broth is best. Be sure to defat it before using it for pressure canning. This will help get a proper seal on the jars.
- Chilies – Ortega mild chilies for a gentle flavor, or hotter ones if your family likes a little kick.
White Bean Chicken Chili Recipe Instructions
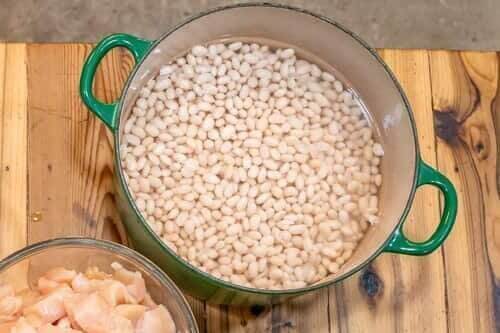
Step 1: The night before you’re ready to cook your chili, you’ll want to get your beans soaking in water. This helps remove phytic acid and allows them to swell up to their full potential. The next day, be sure they’re still covered in water and bring them up to a simmer on the stove for 30 minutes.
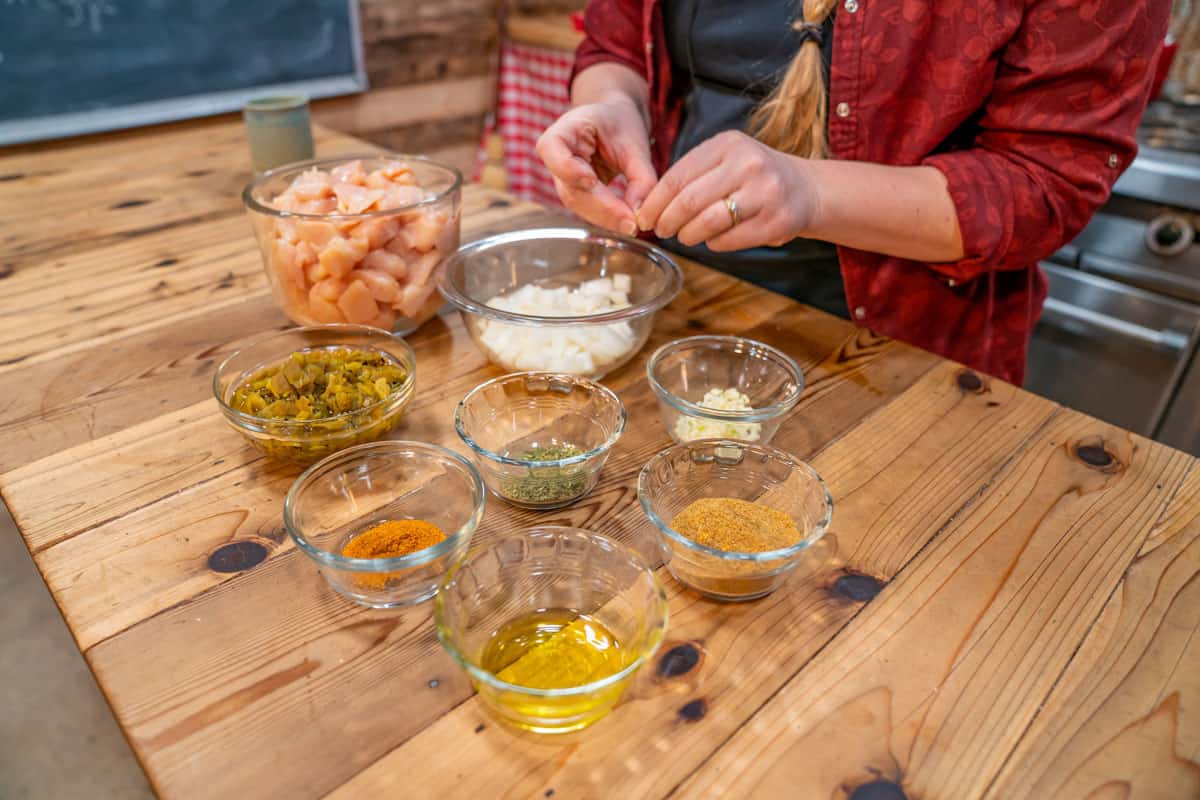
Step 2: Meanwhile, prep all your other ingredients.
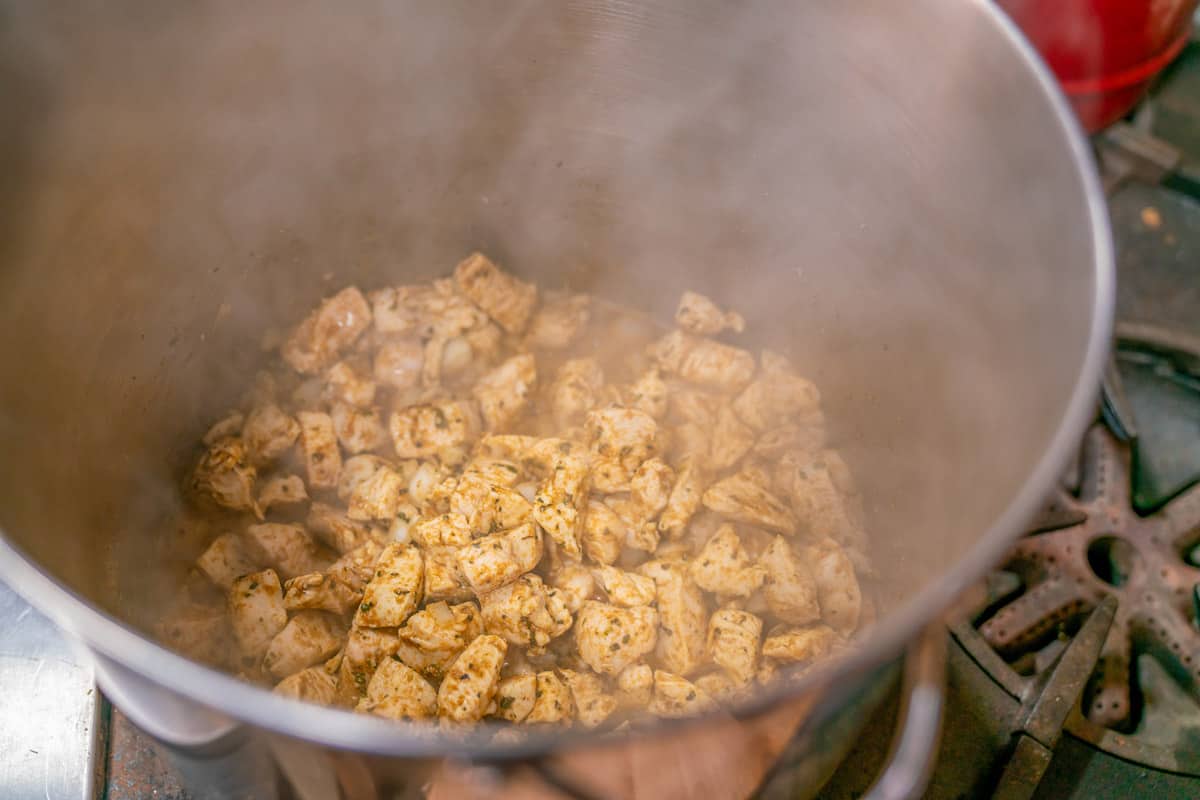
Step 3: Place a large stockpot on the stove and turn the heat to medium-high. Add oil to the pot, then add chicken and stir around to get coated in oil. Cook chicken, stirring frequently, for approximately 10 minutes.
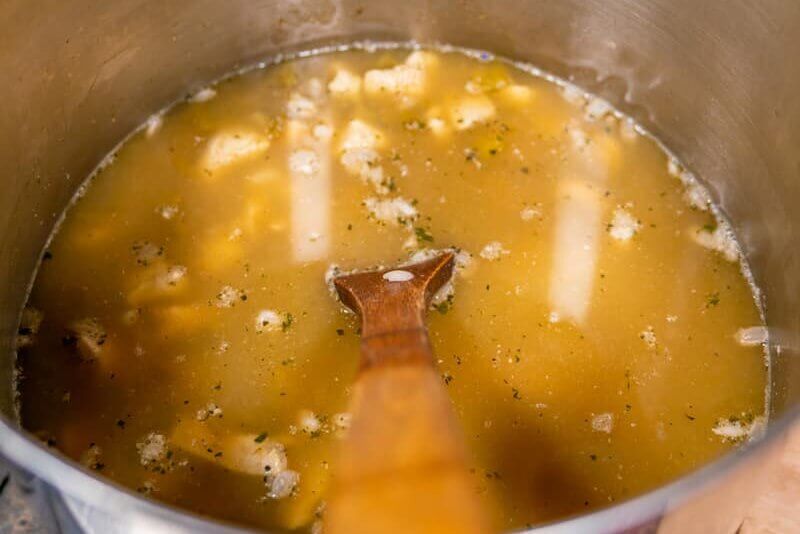
Step 4: Add onions, garlic, herbs, and spices and stir to distribute evenly. Cook about five more minutes. Drain the beans and add them to the stockpot. Add broth and chilies and stir to combine. Bring to a boil, then turn down to medium-low and allow it to simmer for about 10 minutes.
Serving Suggestions

You can serve this white bean chicken chili recipe right away, or go ahead and follow the pressure canning instructions below to stock your pantry for later. Around here, once the jars are sealed and ready, we just pop one open, pour it into a pot, heat it through, and serve it up with our favorite toppings.
Try it with:
- With a dollop of sour cream, a few slices of avocado, tortilla chips, and a sprinkle of fresh cilantro.
- Poured over rice and topped with shredded cheese.
- Alongside a thick slice of no-knead artisan bread, topped with this homemade butter recipe.
- Or stretch one jar a little further by serving it with cornbread and a simple green salad.
However you serve it, this chili is true comfort in a jar; the perfect meal for busy nights, cold winter days, or those times when unexpected company shows up hungry.
Pressure Canning Instructions
- Place the canner onto the stove and add two inches of water to the pot, and place a canning rack on the bottom.
- Prepare your jars and lids for pressure canning by washing them with warm, soapy water and rinsing well.
- Place the lids and rings on a clean, dry towel and set them aside for later.
- Fill the clean jars about halfway with warm water and set them onto the rack inside the pressure canner. Place the lid on top and leave all this to sit until the chili is nearly done cooking.
- While the chili is still simmering, turn the heat on low for your pressure canner. We’re not trying to bring it up to a boil; we just want it to be at a low simmer.
- Carefully remove jars from the canner and dump the water out into the sink.
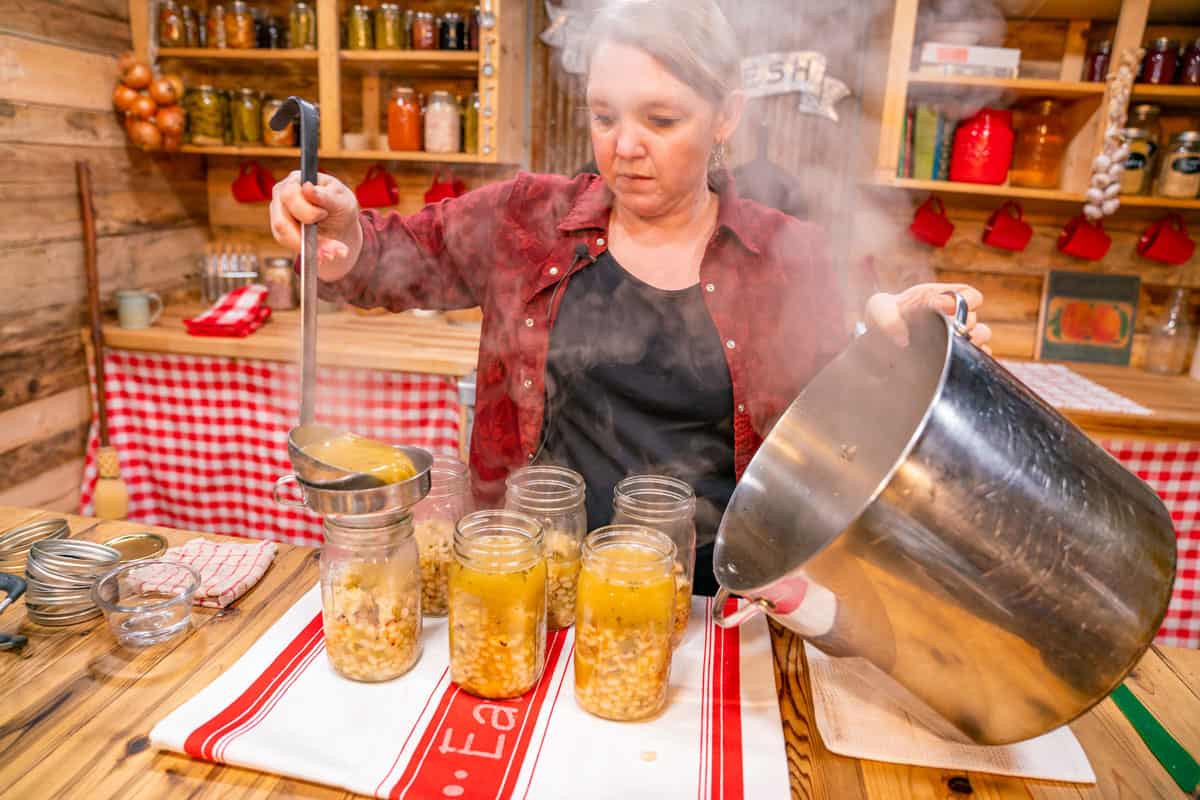
- Using a ladle and canning funnel, divide white bean chicken chili evenly between your jars (this recipe makes about 6-quart jars or 12-pint jars). Homesteading Hack: Be sure to divide the solids between each jar first, then top each jar with broth, leaving one-inch headspace (which means there is one inch of space in the jar with nothing filling it).
- Take your canning tool or a wooden skewer and run it down along the insides of the jar to make sure there are no bubbles. Top with more broth (or hot water) if necessary to keep it at a one-inch headspace.
- Run your finger gently around the rim of each jar to check again for any nicks, then wipe down the rims with a clean cloth that has been dipped into white vinegar. This will help cut through any chicken fat that may be on the rims of the jars from the broth.
- Place the brand new lids on top of each jar and add bands. Tighten each band to fingertip tight (don’t crank them on, just tighten as tight as your fingertips can get them).
- At this point, your pressure canner should be up to temperature and starting to steam. Carefully lift your jars, one at a time, and place them into the canner.
- Put your canning lid on and secure it according to the manufacturer’s instructions.
- With the heat on at medium-high, bring the canner to full steady steam and let the canner vent steam for 10 minutes.
- Be sure you know the proper pressure needed for your elevation. If you live at sea level to 1,000′ elevation you’ll can at 10 psi. Check your user’s manual for your specific canner. Place the pressure regulator (or “jiggler”) onto the vent and allow pressure to slowly climb to full pressure.
- Stabilize the pressure by making small adjustments to the heat until the pressure remains steady at the correct psi (pounds of pressure per square inch).
- Set your timer for full processing time as soon as the canner has stabilized at full pressure.
- Process quarts for 90 minutes, and pints for 75 minutes.
- Once the time is up, turn off the heat and allow the pressure to return down to zero pressure naturally.
- Remove the regulator or jiggler and set a timer for ten minutes to allow all the steam to escape.
- Remove the lid carefully (it’s still HOT!) and, using a jar lifter, move the jars to a kitchen towel on a counter where they can cool undisturbed for 12-18 hours.
- Check seals, remove bands, and clean jars before putting them into storage.
FAQs
If I’m gonna be honest, the biggest mistakes I see are overcooking the chicken, skipping that quick sauté of onions and garlic, or adding dairy too early and watching it curdle. Take your time to brown the aromatics, cook the chicken just until done, and stir in any cream or sour cream when serving. You’ll get tender chicken, rich flavor, and a silky texture every time.
I love using Great Northern beans, but cannellini or navy beans work beautifully too. They’re mild, creamy, and hold up well without getting mushy. Use what you have on hand; that’s the homesteader way!
At its simplest, you just need chicken, white beans, broth, green chilies, and a few good spices like cumin and chili powder. From there, you can dress it up with cream, lime juice, or whatever makes it your own.
That lovely creamy texture comes from stirring in a little cream, sour cream, or cream cheese right at the end of cooking. You can also mash a few of the beans into the broth for natural thickness. It’s simple, cozy, and oh so comforting.
The Abundant Pantry: Canning
I know pressure canning can feel a little intimidating at first, but it really doesn’t have to be. Once you understand the steps and the why behind them, it all starts to make sense. In my Pressure Canning Class, I’ll walk you through my simple ten-step process that takes the fear out of canning and gives you the confidence to fill your shelves with safe, healthy, homemade meals.
And if you’re not quite ready to dive into full pressure canning yet, that’s okay! You can start with my free video workshop, where I teach you how to can an easy, family-friendly meal right in your own kitchen. It’s the perfect first step toward feeling calm and capable every time you hear that canner start to steam.
Other Posts You May Enjoy
Did you try this white bean chicken chili recipe? If so, please leave a star ⭐ rating and your comments in the recipe card below. Then snap a photo and tag us on social media @homesteadingfamily so we can see!
Easy White Bean Chicken Chili Recipe (Plus Canning Instructions)
Equipment
- Large Stockpot
- Optional Canning Supplies Pressure Canner, Canning Jars, Lids, Bands, Jar Lifter, Funnel, and Bubble Remover/Headspace Measuring Tool.
Ingredients
- 2.5 cups great northern beans soaked overnight
- 1 tablespoon olive oil
- 6 cups chicken boneless, skinless, cut into 1-inch cubes
- 1 medium onion chopped
- 5 cloves garlic minced
- ¼ cup ground cumin
- 1 tablespoon dried oregano
- 1 teaspoon cayenne pepper
- 10 cups chicken broth defatted
- 1 cup diced green chilies
Instructions
- Place soaked beans (still covered in water) and bring them to a simmer over medium high heat on the stove for 30 minutes.
- Measure and prep all ingredients while beans simmer.
- Place a large stockpot on the stove and turn to medium heat. Add olive oil.
- Add chicken and stir to coat in oil. Cook, stirring frequently, for 10 minutes.
- Add onions, garlic, herbs and spices, stir to distribute evenly and cook five more minutes.
- Drain water from beans and add beans to the stockpot.
- Add broth and chilies and stir to combine.
- Bring to a boil, then turn down to medium-low and allow to simmer for 10 minutes.
Notes
- Be sure to soak your beans overnight before starting this recipe!
- When adding chili to your canning jars, fill each jar about halfway with the chili solids, then top each jar with broth to ensure you evenly distribute the chili to each jar.
- If you don't have enough liquid to get to a one-inch headspace in your jars, you can top them off with water.
- Wiping rims with white vinegar will help cut through any fat on the rims, which may inhibit a proper seal when canning.
- Fingertip tight means tightening the bands just as tight as your fingers will allow. Don't grab the band with your whole hand and crank it tight.
- Any jars that don't seal properly must be moved to the refrigerator within 16 hours and eaten within a few days.
- You can easily scale this recipe up or down depending on the number of jars you would like to can.
- With a dollop of sour cream, a few slices of avocado, and a sprinkle of fresh cilantro.
- Poured over rice and topped with shredded cheese.
- Alongside a thick slice of no-knead artisan bread, topped with this homemade butter recipe.
- Or stretch one jar a little further by serving it with cornbread and a simple green salad.
- Place the canner onto the stove and add two inches of water to the pot, and place a canning rack on the bottom.
- Prepare your jars and lids for pressure canning by washing them with warm, soapy water and rinsing well.
- Place the lids and rings on a clean, dry towel and set them aside for later.
- Fill the clean jars about halfway with warm water and set them onto the rack inside the pressure canner. Place the lid on top and leave all this to sit until the chili is nearly done cooking.
- While the chili is still simmering, turn the heat on low for your pressure canner. We’re not trying to bring it up to a boil; we just want it to be at a low simmer.
- Carefully remove jars from the canner and dump the water out into the sink.
- Using a ladle and canning funnel, divide white bean chicken chili evenly between your jars (this recipe makes about 6-quart jars or 12-pint jars). Homesteading Hack: Be sure to divide the solids between each jar first, then top each jar with broth, leaving one-inch headspace (which means there is one inch of space in the jar with nothing filling it).
- Take your canning tool or a wooden skewer and run it down along the insides of the jar to make sure there are no bubbles. Top with more broth (or hot water) if necessary to keep it at a one-inch headspace.
- Run your finger gently around the rim of each jar to check again for any nicks, then wipe down the rims with a clean cloth that has been dipped into white vinegar. This will help cut through any chicken fat that may be on the rims of the jars from the broth.
- Place the brand new lids on top of each jar and add bands. Tighten each band to fingertip tight (don’t crank them on, just tighten as tight as your fingertips can get them).
- At this point, your pressure canner should be up to temperature and starting to steam. Carefully lift your jars, one at a time, and place them into the canner.
- Put your canning lid on and secure it according to the manufacturer’s instructions.
- With the heat on at medium-high, bring the canner to full steady steam and let the canner vent steam for 10 minutes.
- Be sure you know the proper pressure needed for your elevation. If you live at sea level to 1,000′ elevation you’ll can at 10 psi. Check your user’s manual for your specific canner. Place the pressure regulator (or “jiggler”) onto the vent and allow pressure to slowly climb to full pressure.
- Stabilize the pressure by making small adjustments to the heat until the pressure remains steady at the correct psi (pounds of pressure per square inch).
- Set your timer for full processing time as soon as the canner has stabilized at full pressure.
- Process quarts for 90 minutes, and pints for 75 minutes.
- Once the time is up, turn off the heat and allow the pressure to return down to zero pressure naturally.
- Remove the regulator or jiggler and set a timer for ten minutes to allow all the steam to escape.
- Remove the lid carefully (it’s still HOT!) and, using a jar lifter, move the jars to a kitchen towel on a counter where they can cool undisturbed for 12-18 hours.
- Check seals, remove bands, and clean jars before putting them into storage.


