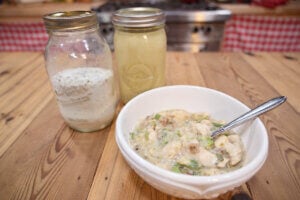


Learning how to can beef stew at home is simple and a great way to have ready-to-eat meals on your shelf for quick lunches or dinners. You can also use venison, lamb, pork, or other game meat in this recipe.
Canning beef stew is a simple process and can be done with minimal hands-on time. Many people are terrified of pressure canners, but I’ll walk you through the step-by-step process to show you just how simple and easy it truly is.
Making sure you're aware of the top canning mistakes to avoid, and basic "how to can food" knowledge will go a long way in giving you the peace of mind that you're canning the right (and safe!) way. (Plus, here are our tips if you can't find canning supplies right now!)
Having easy, convenience meals, on the pantry shelf, means we don't have to run out and grab take-out on a busy weeknight when mom can't cook.
If you like this tutorial, you may want to check out Carolyn's full canning course, The Abundant Pantry: Canning. It includes over 50+ video lessons on canning (both water and pressure!).
Or, if you're not quite ready for the full course, check out her FREE 4-part Meals on Your Shelf series.
Raw Pack vs. Hot Pack
If you start researching raw pack versus hot pack methods, you’ll find many varying opinions on the matter. In fact, the ball blue book says you can ONLY hot pack stew.
As you can see, I raw pack my meat and veggies as I prefer the overall outcome. I use the same method for canning Chicken & Gravy in a Jar.
It yields nice juicy and tender meat with veggies that aren’t completely turned to mush. As long as you’re following proper pressure canning methods, your food will be safe to consume and absolutely delicious.
From my own research, I’m comfortable with this method, however, you need to decide what’s best for you and your family.
Can I Water Bath Can Stew?
No. Water bath canning simply does not get the food hot enough, long enough to safely cook the meat for storage. Because meat is a low acid food, it needs the high heat and pressure of a pressure cooker.

How to Pressure Can Beef Stew (or Venison, Elk, Moose, Lamb, etc.)
The process for canning beef stew is very basic and straight-forward. I always recommend starting with clean and dry canning jars and starting the water heating in your pressure canner while you're getting everything else packed into your jars.
Before you begin, have all your veggies and meat cubed and ready to go. This will make the overall process much quicker.
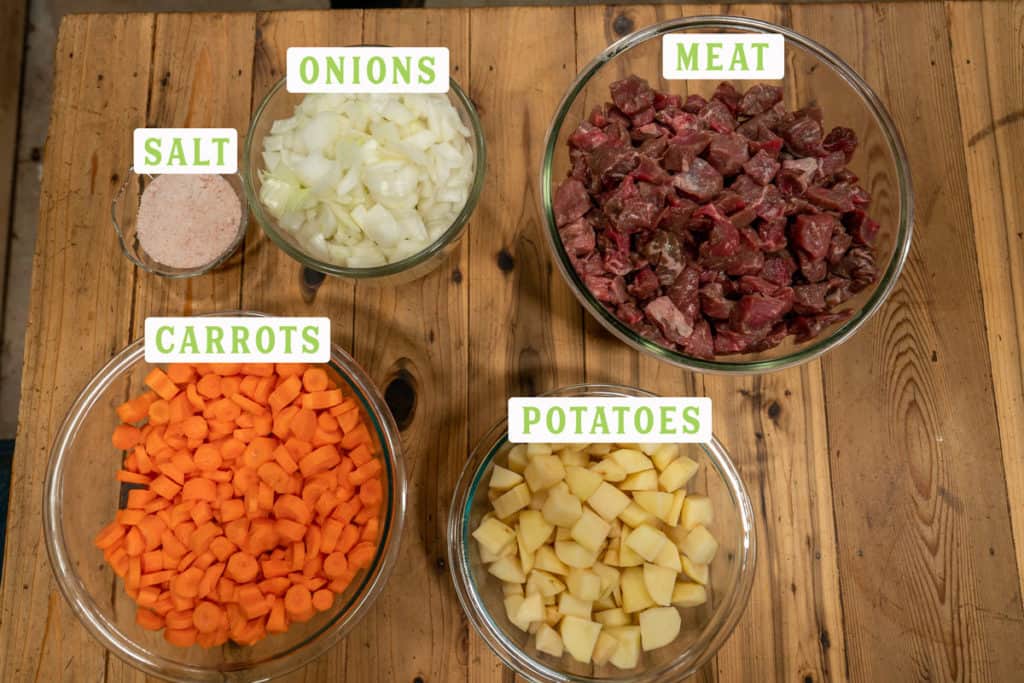
Ingredients
Beef stew is a very basic recipe of cubed meat, peeled and cubed potatoes, peeled and sliced carrots, diced onions, and salt.
You can omit any of these ingredients, or adjust the amounts based on your preferences.
You'll add boiling water to these ingredients just before putting the jars into the pressure canner.
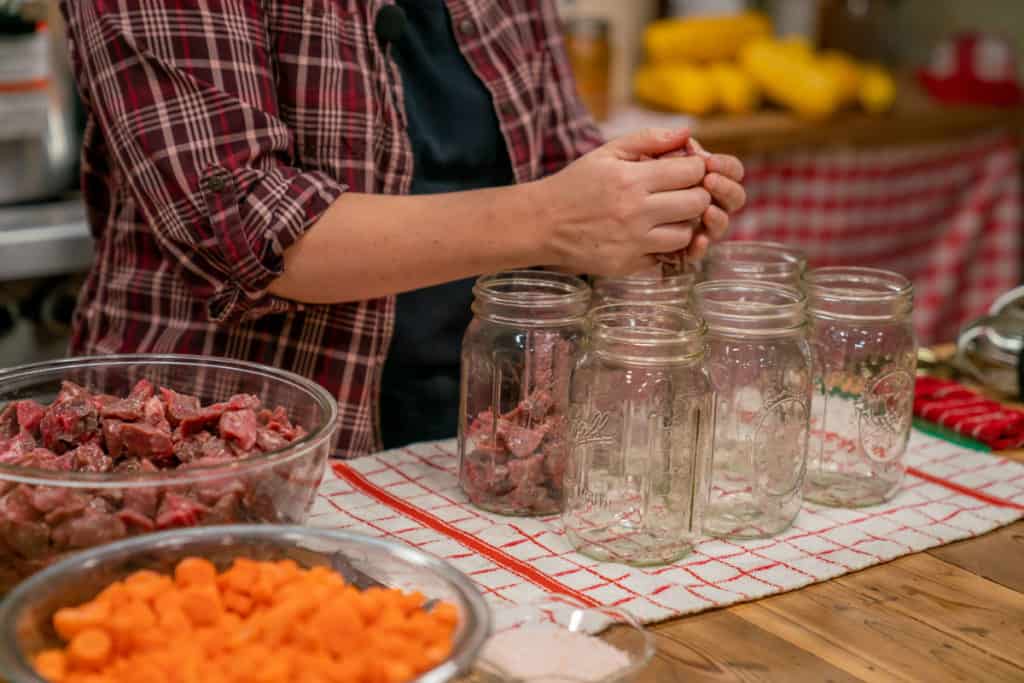

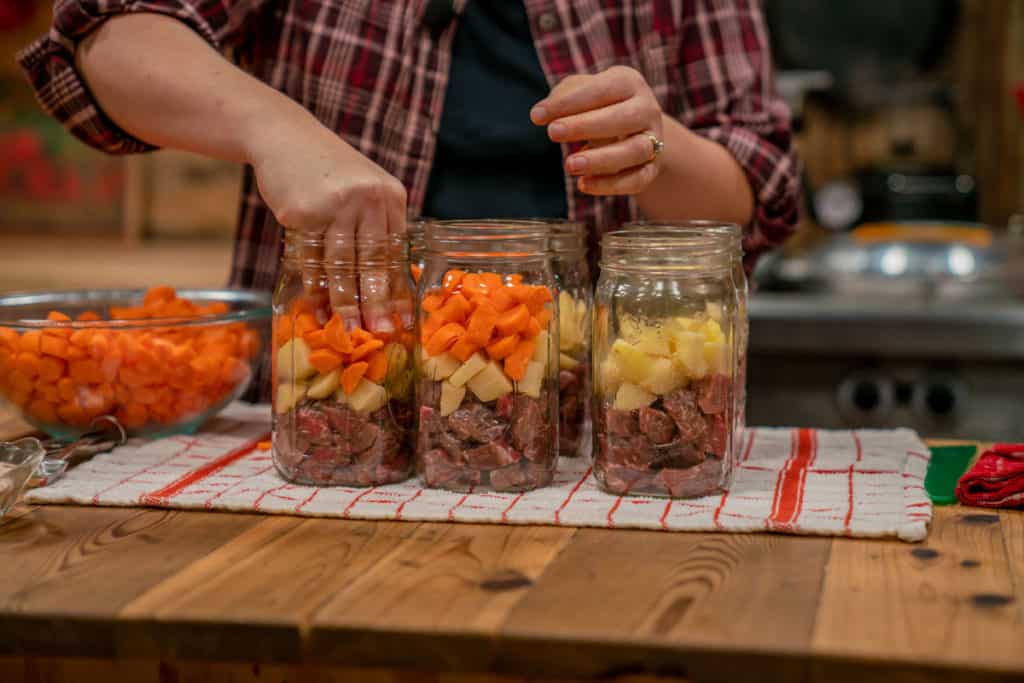

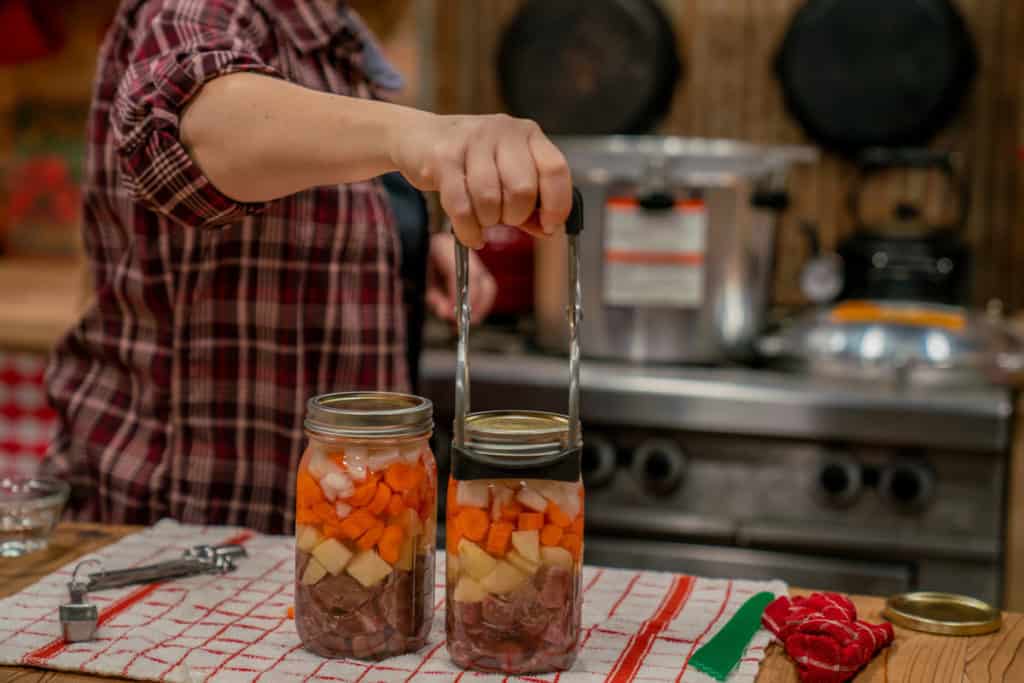
Assemble the Jars
Starting with clean dry mason jars (I like using quart jars, however wide-mouth pint jars will work as well), layer in your meat, potatoes, carrots, and onions.
Using your hands, pack the ingredients in nice and tight. They will release oxygen and shrink during the cooking process so it's best to start with nice full jars.

Add Flavor (Herbs, Salt, and/or Pepper)
Once jars are filled, add a teaspoon of salt to each jar. If you're using pint-sized jars, you'll want to reduce that down to ½ teaspoon of salt.
You can also add in a pinch of black pepper, thyme, or any other herb or seasoning you like in your stew.
All the seasonings, including the salt, are optional, but I find I like to at least add salt, otherwise, the stew is pretty bland.
This is purely preferential and you can skip the salt and the seasonings if you'd like, or add them in when serving.
Note: Some people recommend adding beef bouillon for additional flavor, but I'm not a fan of all the ingredients in bouillon (unless it is homemade bouillon) and prefer the natural flavors of my ingredients shine through.


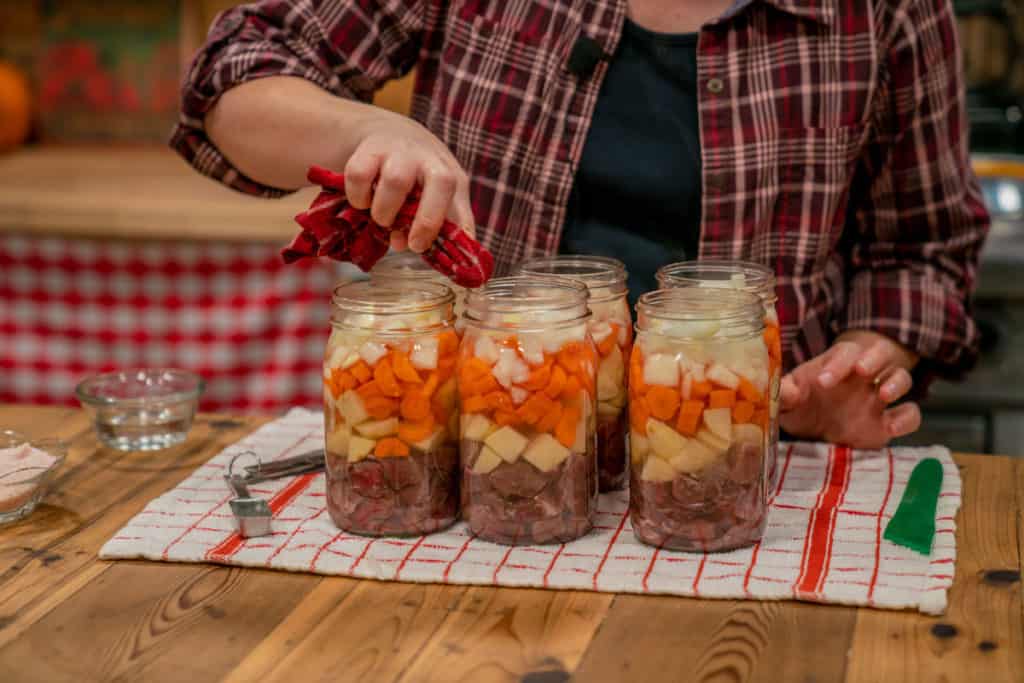

Add Water (or Broth)
Once your jars are filled and you've added salt (or not), pour boiling water into the jars, leaving about 1-inch headspace.
Alternatively, you could use boiling beef broth to fill the jars for an even richer beef stew recipe, but you'll need to make sure your broth has been cooled and skimmed of any fat.
Fat in broth will create a sealing issue with your jars as it tends to coat the rims of the jars and prohibits a seal from forming.
Take your canning tool and run it along the four sides of the jar to allow any air bubbles to escape. Then top your jars back up with liquid until you have a 1-inch headspace.
Next, we need to clean the rims of the jars. Take a clean cloth and dip it into a small bowl of white vinegar. Then, wipe down each jar rim to ensure they're completely clean with no little grains of salt, debris, or fat.
Center your lids onto each jar, then add the bands and screw them down to fingertip tight. This means we're only tightening with our fingers, we're not getting our whole hand or wrists involved.
Pressure Can
Lift your jars and carefully place them on a rack inside your pressure canner. You want the water inside the pressure canner just below boiling.
Before you seal the lid on, make sure your jars and lids are NOT covered in water. If there is too much water in the pressure canner, you'll need to remove some water before continuing.
Using a ladle is helpful for this.

Bring Up to Pressure
Seal the lid, according to the manufacturer's instructions for your specific pressure canner, turn the stove on to about medium to medium-high and allow the pressure canner to come up to full steam.
It's always best to bring the pressure up slowly, over a medium-high heat. This way we don't over-pressurize the canner and have a hard time regulating the pressure.
Allow the steam to vent at full steam for 10 minutes.
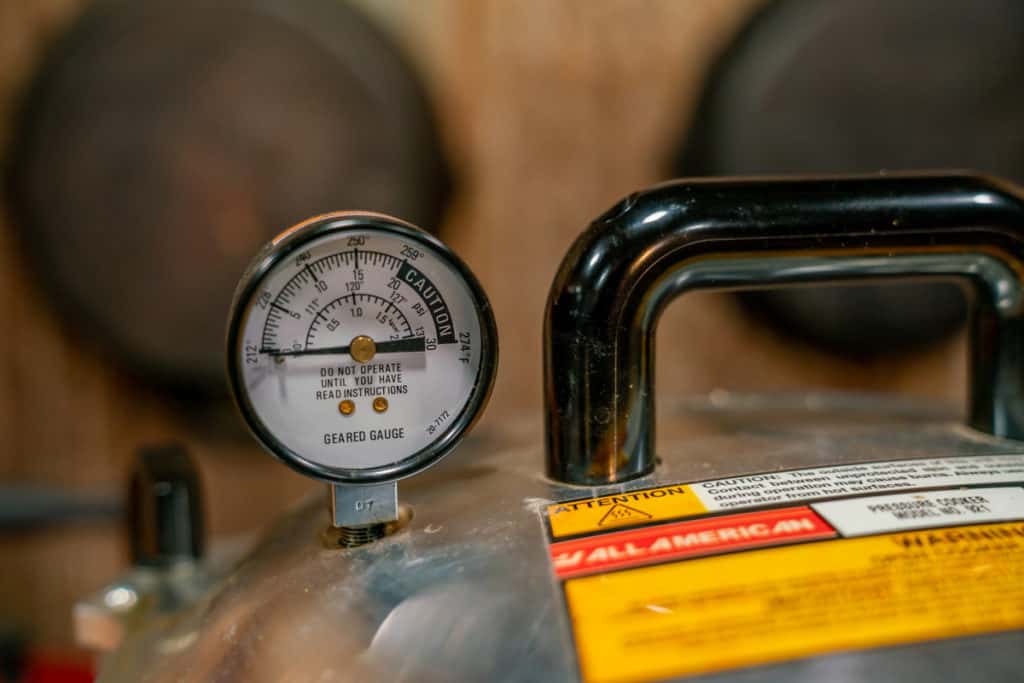
Next, either add your weight or your rocker and allow the pressure to build-up to the correct pressure for your elevation (see notes in the recipe card for more info). For me, this is 15 pounds of pressure using my weighted-gauge.
Processing time
Once you're up to the correct pressure, you'll want to process the stew, holding at the correct pressure for 90 minutes.
When the 90 minutes is up (or 75 minutes for pints), turn the heat off and allow the pressure to come down naturally.
This takes quite a while, probably 30-45 minutes, but it's important not to rush this step as the stew finishes cooking during this time.
Once the pressure is down to zero, you can remove the weight and allow the canner to sit for 5-10 minutes to allow the pressure to equalize.
Next, take the lid off the pressure canner and carefully remove the jars and set them onto a towel-lined counter.
It's important not to tip the jars when removing them, try to keep them level.
Now, allow the jars to sit on the counter overnight, undisturbed (or for at least 16 hours). This allows the seals to seal completely and firm up.
Once your stew has cooled completely at sat for 16 hours, you'll want to check the seals right away. If any jars had seal-failure, you can place the jars into the refrigerator and consume them within 24 hours.
Before you store your jars on the shelf, remove the bands, check the seals and wipe down the jars.
You always want to store your jars clean!
More Canning Tutorials:
- Preservation 101: Introduction to Canning
- The Abundant Pantry: Canning 15 Minute Pantry Meals
- How to Water Bath Can
- Pressure Canning Mistakes – Avoid These 5 Common Mistakes
- Canning Mistakes to Avoid When Water Bath & Pressure Canning
- Can I Pressure Can in the Instant Pot?
- Where To Find Canning Supplies When There’s a Shortage
- How to Store Your Canning Bands
- Preparing for Canning Season
- Canned Ground Beef (Easy Step-by-Step Tutorial)
More Convenience Meals for Your Pantry
- How to Pressure Can Black Beans
- How to SAFELY Can Raw Chicken
- Canning Bone Broth or Stock (Chicken, Beef, or Vegetable)
- Step By Step Tutorial For Canning Meat (Raw Pack Method)
- White Bean Chicken Chili Recipe
- Easy & Hearty Canned Asparagus Soup
Have you tried canning your own stew? If so, tag us on social media so we can see!

Canned Beef Stew
Equipment
- Pressure Canner
- 6 wide-mouth quart jars (or 12 wide-mouth pint jars)
- Lids and bands
- Jar lifter
Ingredients
- 5 pounds stew beef cut into 1 ½-inch cubes
- 10 cups potatoes peeled and cubed
- 7 cups carrots peeled and sliced
- 3 cups onions diced
- 6 teaspoon sea salt
- 1 pinch pepper (optional)
- water or broth, boiling
Instructions
- Prepare pressure canner with water and allow to come up to steaming (but not boiling). Meanwhile, get a kettle of water (or broth) boiling.
- Distrubute cubed beef, potatoes, carrots, and onions equally into clean quart-sized mason jars.
- Add 1 teaspoon salt into each jar.
- Fill each jar with boiling water (or broth), leaving 1-inch headspace.
- Using your canning wand (or a wooden skewer), slide it down all four sides of each jar to allow any bubbles to escape.
- Check headspace and add additional water or broth, if needed, to bring it back up to 1-inch headspace.
- Take a clean cloth and dip into white vinegar, wipe the rim of each jar well to remove any debris.
- Center a canning lid onto each jar, then secure to fingertip tight with the canning ring.
- Carefully lift and place each jar onto a rack inside the pressure canner, adjust water level, if needed.
- Secure the lid of the pressure canner and bring the pressure up to full steam over medium-high heat.
- Allow the pressure canner to vent at full steam for 10 minutes.
- Place the weight or rocker onto the pressure canner and allow the pressure to build to the appropriate pressure for your elevation (see notes).
- Process quart jars for 90 minutes, pint jars for 75 minutes.
- Turn off the heat and allow pressure canner to naturally come back down to zero.
- Remove the weight or rocker and wait 5-10 more minutes to allow pressure to equalize.
- Remove the lid and carefully remove jars, keeping them level, and place them on a towel-lined counter.
- Allow jars to sit, undisturbed, for 16 hours. Remove bands, check seals, wipe jars and store.
Notes
- 0-1,000 feet - 10 pounds of pressure for a weighted-gauge, 11 pounds of pressure for a dial-gauge.
- 1,001-2,000 feet - 15 pounds of pressure for a weighted-gauge, 11 pounds of pressure for a dial-gauge.
- 2,001-4,000 feet - 15 pounds of pressure for a weighted-gauge, 12 pounds of pressure for a dial-gauge.
- 4,001-6,000 feet - 15 pounds of pressure for a weighted-gauge, 13 pounds of pressure for a dial-gauge.
- 6,001-8,000 feet - 15 pounds of pressure for a weighted-gauge, 14 pounds of pressure for a dial-gauge.
- 8,001-10,000 feet - 15 pounds of pressure for a weighted-gauge, 15 pounds of pressure for a dial-gauge.