Learn everything you need to know about how to use fermentation for long-term food preservation. When properly fermented, food can last from one to two years safely sitting on your pantry shelf! I'll teach you how.

Be sure to check out this post on the basics of fermentation if you haven't already learned that first. You can also check out these posts on the best fermentation vessels, starter cultures for fermentation, and the best foods to ferment.
In this blog post (and video) I'm going to be diving further into using fermentation to build up your long-term food storage supply.
What do I mean by long-term preservation? I'm talking from one to two years of a ferment sitting on your pantry shelf and still being good to eat!
Why I Love Fermenting
My favorite thing about fermentation is that it's one of the fastest ways to preserve food without having to prep a lot of food, jars, or other preservation supplies. It also means I don't have to heat up my kitchen or spend a lot of time processing. There's zero wait time when it comes to fermented foods.
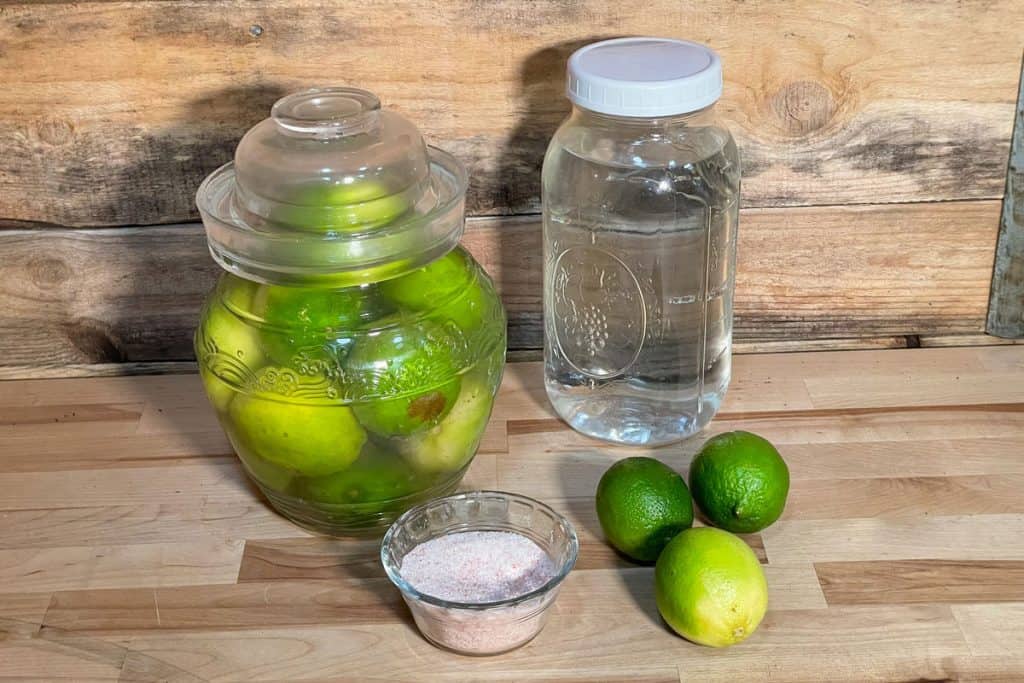
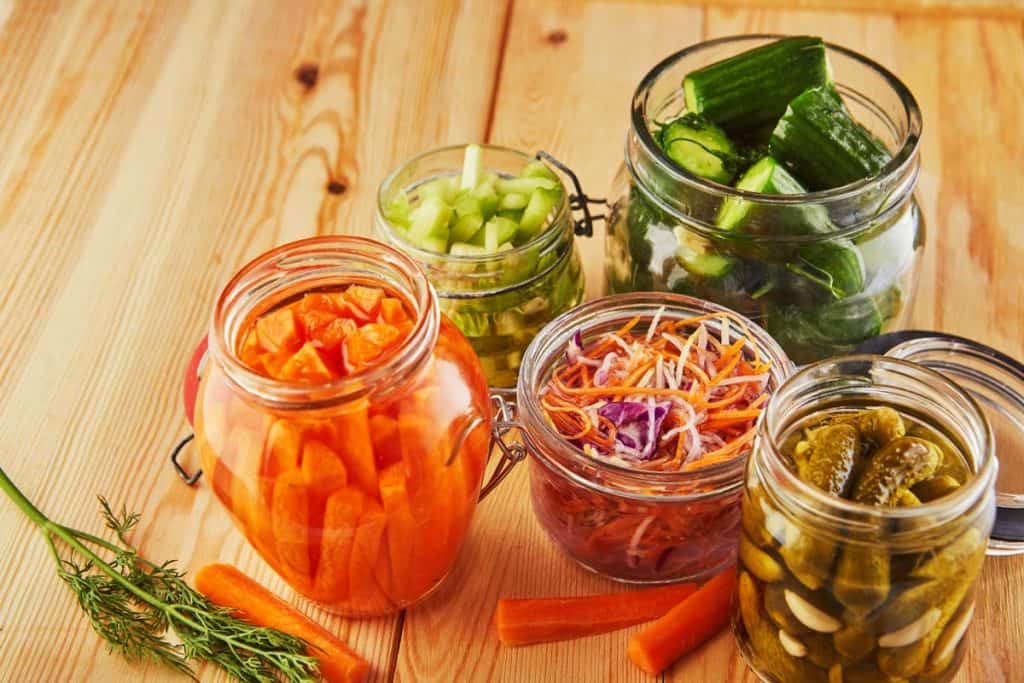
See just how simple it is to ferment tomatoes here. We've been loving our easy fermented limes all year long. Some of our other favorites are fermented green beans, fermented ginger carrots (those are our kid's favorite ferment), and, of course, homemade sauerkraut.
6 Steps to Fermentation
As I mentioned before, if you're not familiar with each of these steps of the fermentation process, be sure to go check out this Fermenting 101 post first. I'm just going to give a brief overview of the basic fermentation process, then tell you how we adjust it for long-term preservation.
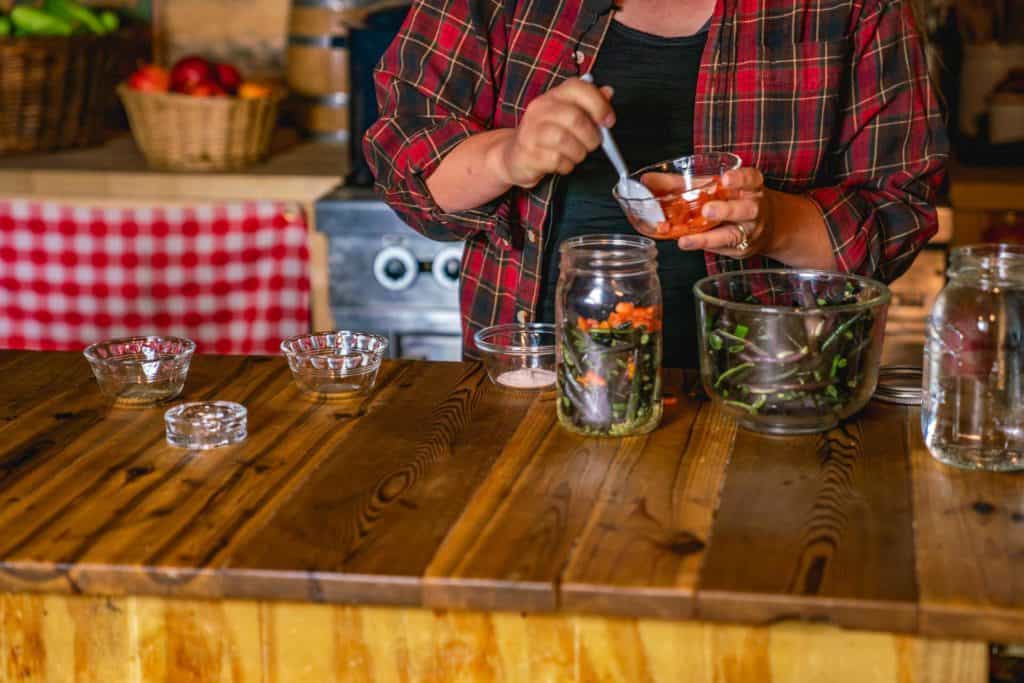
- Get your vegetables ready. When preparing your vegetables it's best to keep the pieces approximately the same size, whether that's shredded, cubed, cut into matchsticks or fat sticks, or even left whole.
- Put vegetables into a jar. The next step is to pack your vegetables into your fermentation vessel. This is where you can really pack them in there. The more tightly they're packed in, the easier it will be for you to keep those vegetables covered with the brine.
- Cover with salt brine. My basic salt brine is pretty salt heavy. In most cases, for long-term preservation, a larger amount of salt is needed. However, if you'll be utilizing cold storage (such as the refrigerator or cold storage that stays below 50° F, you can typically reduce the amount of salt by half. My basic salt brine ratio is 3 Tablespoons of high-quality fine salt (not a table or iodized salt, we use Redmond Real Salt) for every quart of water. For cold storage, use half the amount.
- Weight the vegetables down under the brine. When it comes to long-term fermentation, you'll need something that will keep the vegetables under the brine until you're ready to take that food off the pantry shelf for consumption. Fermentation weights, a large cabbage leaf, or these rounded crocks are great options.
- Allow food to ferment fully. During the fermentation process, you'll cover the jar loosely to allow air to escape. You'll likely see bubbles and fermenting liquid that pushes up and out of the container (I like to put my ferments in a casserole dish to catch any spilled liquids). Once the food is fully fermented you will no longer see bubbles or liquid rising to the top of the jar.
- Store food. Once this process is complete, top off the jar with more clean, filtered water and seal the jar up for long-term storage.
Adapting Ferments for Long-Term Preservation
The real key to keeping ferments good for long-term storage is to sterilize your fermentation vessels and use clean utensils and hands before adding your vegetables.
If you start with a sterilized jar, crock, or container, it won't matter if the ferment gets tipped after it's done fermenting because there won't be any bacteria present on that part of the jar.
When your vegetables are in the vessel initially and fermentation starts kicking off, there are so many good bacteria growing in that jar that they will hunt down any bad bacteria and kill them off.
However, after the fermentation has occurred, it's extremely important that we don't dip into those jars with our hands or unsterilized utensils. Anything you introduce into that ferment can actually take over and ruin it.
Fermentation is truly a very simple form of preservation. If you haven't fermented something I encourage you to just get started (these ginger carrots are a fantastic first ferment). Fermentation is the only preservation method where your food is actually getting healthier while they're sitting on your pantry shelf! (Source)
It's important to note that I am not a certified medical practitioner. This post is not intended to diagnose or treat but is for informational purposes only. Please contact your healthcare professional before introducing new herbal and natural remedies into your wellness routine.