
Have you ever considered combining the benefits of garlic and fermentation? Lacto-fermented garlic is longer-lasting and great for your immune system and makes food taste amazing. You can use it in your favorite sauce or pickle recipe or eat it raw!

We plant garlic in our fall garden every year because growing garlic is a staple in our home for our meals and health.
We use it to make everything from roasted garlic to a garlic salve for colds and coughs, refrigerator dill pickles, pickled asparagus, pickled snap peas, homemade bone broth, or to add to any meal that calls for garlic. And we love to add it to our beef and broccoli stir fry recipe!
Since garlic is a prevalent ingredient in our home, we use fermentation as one way to preserve it. Lacto-fermented garlic is easy to make, easy to use, and full of health benefits. Check out our Guide to Fearless Fermenting if you’re new to fermenting or to get some great recipes and tips.
It’s important to note that I am not a certified medical practitioner. This post is not intended to diagnose or treat but is for informational purposes only. Please contact your healthcare professional before introducing new herbal and natural remedies into your wellness routine.

Why We Ferment Garlic
You may have heard about the health benefits of the fermentation process. It adds good probiotic bacteria to your food. But fermentation is also a fantastic method used to preserve food. (Source)
We choose to ferment garlic as one of our preservation methods so that our garlic will last the whole year. When we harvest garlic, we peel a large quantity at once and preserve it by fermenting it. In the proper storage conditions, it will last up to a year.
It's best to use fresh garlic when fermenting. If your garlic is starting to age, try making our homemade garlic and herb seasoning salt or freeze-dried garlic.
What Is Fermented Garlic
Fermented garlic is raw garlic that's fermented in a salty brine. This process uses good bacteria to break down sugars and starches in the garlic, making lactic acid.
The lactic acid gives fermented garlic a tangy taste and helps keep it fresh. The garlic's flavor changes, becoming a bit milder.
The table below shows how raw or fresh garlic and fermented garlic differ:
| Key Aspect | Fresh Garlic | Lacto Fermented Garlic |
| Flavor | Sharp, Pungent | Mild, Tangy |
| Nutritional Profile | High in Allicin | Enhanced Nutrient Bioavailability |
| Digestibility | Can be Harsh | Easier to Digest |
| Beneficial Bacteria | None | Rich in Probiotics |

Health Benefits of Fermented Garlic
Fermented garlic is great because good bacteria benefit your gut health. They make it easier for our body to use the garlic's nutrients, which is better than eating raw garlic.
Here's a detailed breakdown of the components and benefits:
| Component | Health Benefit |
| Antioxidants | Protects against oxidative stress and free radicals. (Source) |
| Immune System Boosters | Enhances the body's defense mechanisms. (Source) |
| Antimicrobial Agents | Can fight against bacteria (Source) and viruses. (Source) |
| Prebiotics | Promotes digestive health by fostering beneficial gut bacteria. (Source) |
| Heart-protective Compounds | Improves cholesterol levels and supports cardiovascular health. (Source) |
Does Fermented Garlic Taste Good
When you open a jar of fermented garlic, the aroma smells heavenly! The taste is even better, especially if you are a garlic lover.
When you ferment garlic, it remains raw. Fermenting garlic mellows raw garlic's spicy flavor, making it more easily consumable but still delightfully garlicky. The taste may be overwhelming for some people, but the health benefits make it worth eating.
You can eat fermented garlic straight from the jar or make garlic-infused honey to help boost your immune system during the cold and flu season. (Source) You will gain all the healthy bacteria and probiotics from the fermentation process and all the great natural benefits of raw garlic.

What Is Fermented Garlic Good For
As mentioned above, eating raw fermented garlic offers immune support. However, you can use fermented garlic in any recipe that calls for garlic.
To use fermented garlic, pull what you need from the jar, slice or mince it, and add it to your meals. Enjoy the simplicity of using already peeled garlic cloves ready to use.
- Salad Dressings - Fermented garlic is fantastic in salad dressings. Try it in this homemade vinaigrette recipe or buttermilk ranch dressing recipe.
- Pasta Sauce - Fermented garlic improves pasta sauces. For more flavor, try it in this raw marinara or Alfredo sauce (and serve it up on homemade egg noodles).
- Marinades - Fermented garlic is perfect for marinating meats and veggies. It adds a strong flavor and is ideal for chicken or beef.
- Spreads and Dips - Fermented garlic makes a delicious appetizer spread when mixed with cream cheese, hummus, or guacamole.
Homesteading Hack: When you cook fermented garlic, you will lose the probiotic benefits from the fermenting process. However, when you ferment garlic, even to cook with, you are gaining the ability to make your food last for much longer than in standard storage.

Supplies
- Pint-Size Jar - If you have a lot of garlic to ferment, you can fill a quart jar or any other fermentation vessel (read this post on the best fermentation vessels). Just adjust the recipe accordingly.
- Mason Jar Lid - The plastic, screw-top style lid works well with this recipe. It does not seal tightly, leaving room for gasses to escape while fermenting. You can also use specialized products like these fermentation lids to eliminate burping the jar.
- Small Mixing Bowl - You can use a liquid measuring cup as a mixing bowl to save on dirtying one more dish.
- Spoon - Use a stainless steel spoon or a clean and dry wooden spoon.
- Measuring Cup - Use a liquid measuring cup to measure the liquid and use it as the mixing bowl.
- Tablespoon - It's not ideal to eyeball measurements in fermenting recipes. Be extra careful by measuring the amount of salt needed in this recipe precisely. You do not want to skimp on the salt.

Ingredients
- Raw Garlic - Peel the garlic cloves down. You do not need to cut the ends off. Make sure you peel enough to fill the pint jar almost to the top.
- Starter Liquid - For the starter liquid, you can use the juice from something previously fermented or cultured. Use whey from cheesemaking or whey drained from plain yogurt as long as it does not contain thickeners or additives. Use kombucha, the brine from homemade sauerkraut, or the brine from any other fermented foods, like this curtido recipe.
- Salt - Any salt will work, but I prefer pure salt that does not contain additives or colorization. I recommend Redmond Real Salt. (Using that link for Redmond Salt will automatically give you 15% off your order!)
- Water - You may need to adjust the amount of water at the end of the recipe to ensure the liquid fully covers the garlic cloves.
- Weight - If you don't want to bother with shaking the jar multiple times daily, using something like a glass weight can help keep the garlic submerged.


How to Make Fermented Garlic
Now that you know why you need fermented garlic in your life, you are probably asking, “How do you ferment garlic?” These instructions will guide you through the very simple process:
- Take your heads of garlic and separate each clove. Peel the garlic cloves entirely. You do not need to cut off the ends.
- Put the whole, raw cloves of garlic into the pint-sized jar, leaving at least an inch of headspace at the top.
- In a liquid measuring cup, measure ¼ cup of the starter liquid you chose. I like to use homemade kombucha as a starter for fermented garlic. If you do not have a starter liquid, use ¼ cup of water and double the salt.
- Add one tablespoon of pure sea salt to the starter liquid and stir them together. The brine may foam or fizz as it reacts to the salt.
- Add ¼ cup of the water to the brine (or salt water) and mix until the salt dissolves.
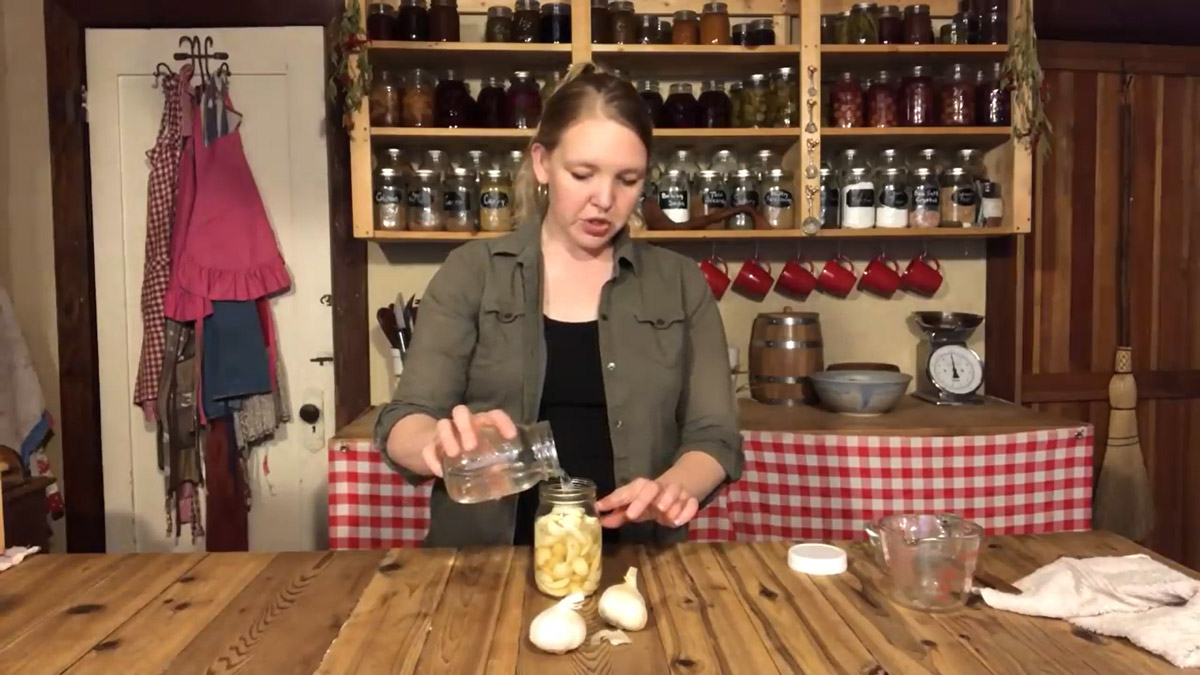
- Now add the brine to the pint jar. Cover the garlic completely but be sure to leave an inch of headspace.
- You may need a weight to keep the garlic submerged, but I prefer my method of shaking the jar periodically for the first three days. Give your jar a good shake every time you come through the kitchen to disrupt any mold that may be trying to form.
- Leave the pint jar of garlic on the counter at room temperature for at least three days, shaking it periodically. During these first few days, you may see fizz or bubbles forming. This reaction of the fermentation process will calm down, indicating when it is ready to use or store.
- You can use fermented garlic immediately, as the flavor tastes good after only three or four days. Or, you can store it in cold storage at a stable temperature of 55°F or lower. When stored properly, it will last for up to a year.


Did you make this recipe? If so, we’d love for you to leave a star rating in the recipe card below. Then, snap a photo of how you’re using your fermented garlic and tag us on social media @homesteadingfamily, so we can see!
FAQ
Lacto-fermented garlic is made by adding good bacteria to raw garlic. This makes the garlic taste milder and more nutritious. It's easier to digest and has more health benefits.
Fermented garlic boosts your immune system and has antioxidants and anti-inflammatory properties. It's good for your heart and digestion too.
Use clean fermenting vessels and utensils, and follow proper fermenting methods in the recipe card.
Yes, it's great for your gut. Its probiotics help keep your gut bacteria healthy, improving digestion.
Check for off smells or weird colors like blue-green. Good fermented garlic smells tangy and looks normal.
Refrigeration is optional but keeps it fresh longer. It's okay to store it in a cool, dark place like a root cellar.
No, it doesn't. The fermentation process uses lactic acid bacteria, which is safe and doesn't make alcohol.
Use it in salad dressings, pasta sauces, and marinades. It adds a special flavor that makes your food taste better.
Absolutely! It boosts your immune system, helping fight off colds and flu. It's a great way to keep your body strong.
Other Posts You May Enjoy
- Fermented Ketchup (Easy, Homemade, Probiotic & Kids Love It)
- Garlic Dill Sauerkraut Recipe
- Preserved Limes with Fermentation
- Cherry Almond Flavored Kombucha
- Homemade Fermented Ginger Carrots
- Easy Homemade Lacto-Fermented Mayo
- Lacto-Fermented Green Beans (Pizza Beans)
- Fermented Tomato Sauce – Just 3 Ingredients!
- Fermented Cranberry Sauce

Fermented Garlic (Pickled Garlic)
Equipment
- Pint-Sized Mason Jar + Lid
- Small Mixing Bowl
- Measuring Cup
- Spoon
Ingredients
- 2 cups garlic cloves peeled
- ¼ cup kombucha see notes below
- 1 tablespoon salt
- ¼ cup water filtered or spring water
Instructions
- Take your heads of garlic and separate each clove. Peel the garlic cloves entirely. You do not need to cut off the ends.
- Put the whole, raw cloves of garlic into the pint-sized jar. Leave at least an inch of space at the top of the jar.
- In a liquid measuring cup, measure ¼ cup of the starter liquid you chose. If you do not have a starter liquid, use ¼ cup of water and double the salt you add.
- Add one tablespoon of pure sea salt to the starter liquid and stir them together. The brine may foam or fizz as it reacts to the salt.
- Add ¼ cup of the water to the brine (or water) and mix until the salt dissolves.
- Now add the brine to the pint jar of garlic. Be sure to leave an inch of headspace in the jar. Add more water, if needed.
- Keep garlic under the liquid level. You may need a weight to keep the garlic down. But, I prefer my method of shaking the jar periodically for the first three days.
- Leave the pint jar of garlic on the counter at room temperature for at least three days, shaking it periodically.
- You can use fermented garlic immediately, as the flavor tastes good after only three or four days. Or, you can store it in the refrigerator or cool storage at a stable temperature of 55℉ or lower. It will last for six months to a year when stored properly.
Notes
- You can use other starter liquids such as kombucha, kefir, sauerkraut juice, fermented pickle juice, whey or the liquid strained from yogurt.
- During these first few days, you may see fizz or bubbles forming. This reaction of the fermentation process will calm down, indicating when it is ready to use or store.
- Store fermented garlic in the refrigerator or cool storage at a stable temperature of 55℉ or lower.
- Fermented garlic will last for six months to a year when stored properly.


