
Is there anything like a kitchen filled with pumpkins to welcome autumn? There is something SO special about food that can double as a decoration while preserving it. Learn how pressure canning pumpkin can make your favorite pumpkin recipe easy to cook in a fraction of the time. Simply open a jar, puree, and enjoy pumpkin in pie, soups, stews, and more!
When Canning Pumpkin Makes Sense
Understanding the basics of canning is an essential skill for every homesteader. It provides a way to preserve seasonal foods you have worked hard to raise and grow, like safely canning raw meat or lining your pantry shelf with canned potatoes, canned beets, canned pickles, and plum jelly.
Even if you don’t grow a year’s worth of food, you can still can healthy convenience foods such as white bean chicken chili or hearty beef stews. These especially come in handy on busy weeknights or to be prepared for a short-term power outage.
I’m going to be honest; canning pumpkin is not my go-to method of preservation. It is much easier to store them in a root cellar or a cool spot in the house and use them up in order of how long they last.
However, if you find it a hassle to monitor your cold storage or see that your pumpkins are going over the hill and want to save them before you lose them, canning pumpkin is a great option for you.
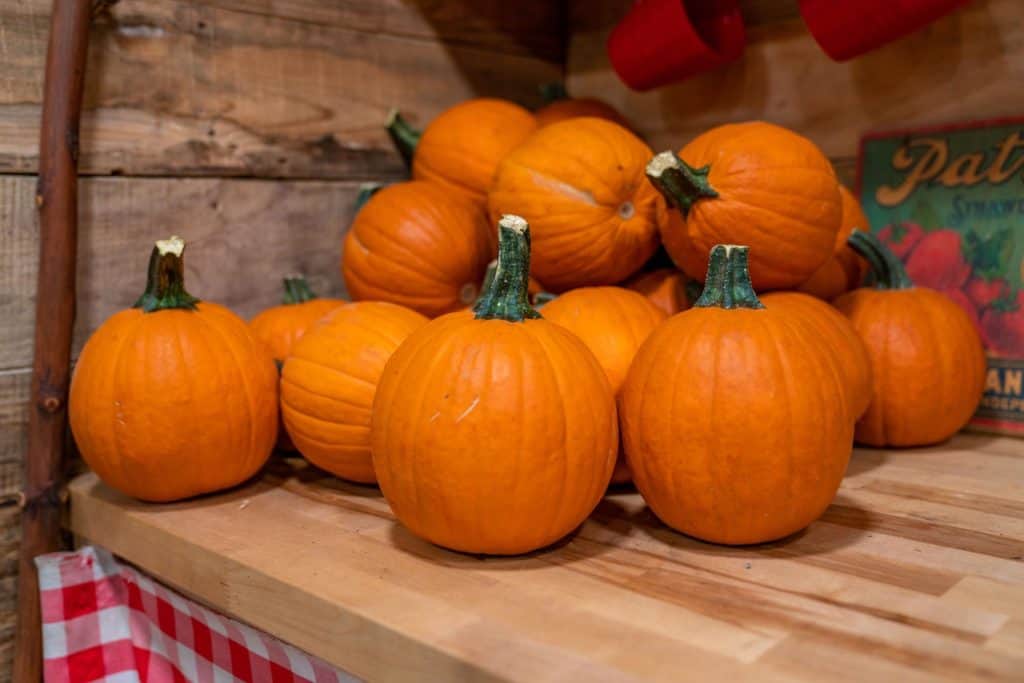
Best Pumpkins for Canning
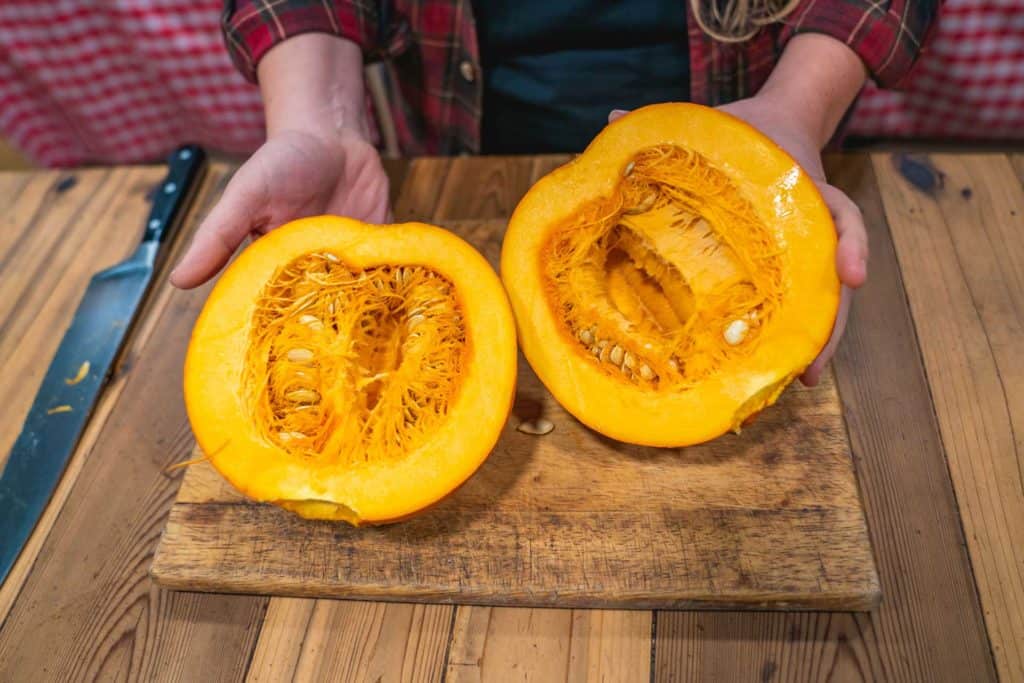
Small sugar or pie pumpkins give better results than field (jack-o-lantern) pumpkins because they are sweeter and less stringy. Make sure your pumpkins are fully ripe and cured for the best flavor (read more about how to cure pumpkins here).
If you’re tackling this project later after your pumpkins have been in storage for a while, make sure that you choose a sound pumpkin for canning, meaning the rind should be firm, the pumpkin should feel heavy, and there should not be any signs of mold or decay.
Homesteading Hack: You can also use this canning tutorial for any variety of winter squash: banana, Hubbard, butternut, etc.
Ways to Use Canned Pumpkin
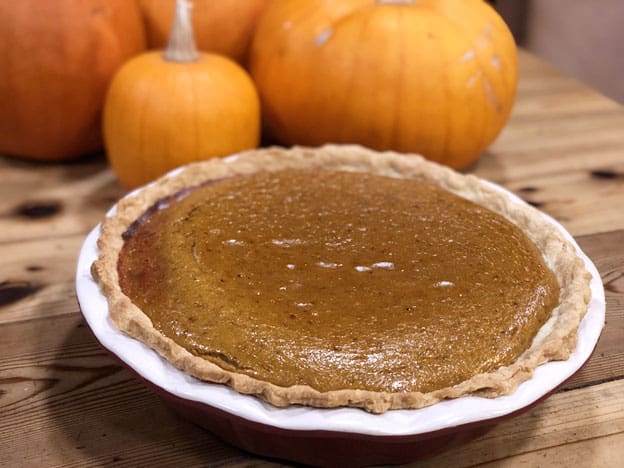
This homemade pumpkin pie recipe is hands down my favorite pie (cherry pie is a close second). For years, I couldn’t really get past the idea of pumpkin and other squash as only dessert food. That was until a plate of pumpkin, sage and sausage ravioli changed everything.
Soon after, I discovered that pumpkins are very versatile in the kitchen! You can use your home-canned pumpkin or winter squash in the same recipes you would typically use a can of commercial pumpkin from the grocery store.
The only difference is you will drain off the liquid from the jar and quickly mash the pumpkin with a fork before adding it to most of your recipes. Here are a few of our family’s favorites:
- Baking - Use pureed canned pumpkin in place of Instant Pot applesauce in baked goods like pumpkin bread and muffins.
- Pasta Sauce - Make a sauce of mashed pumpkin with melted butter and sage to top pasta, homemade noodles, or rice.
- Simple Soups - Puree canned pumpkin and cook it with broth or milk for a simple soup, adding your favorite seasonings.
- Stews - Add whole chunks of canned pumpkin or squash to stews near the end of cooking time. This is a great way to stretch a meal if you have many mouths to feed.
- French Toast - Dip stale bread in a mixture of beaten eggs, homemade pumpkin puree, and pumpkin spice for pumpkin spice French toast or French toast soufflé.
- Yogurt Flavoring - To make pumpkin pie yogurt, add 1⁄4 cup canned pumpkin puree, one teaspoon of pumpkin pie spice, and 1 Tablespoon of maple syrup to flavor this Instant Pot yogurt recipe.

Safety Tips for Canning Pumpkin
Safety starts with a high-quality pressure canner. Then, it is imperative to follow this recipe carefully.
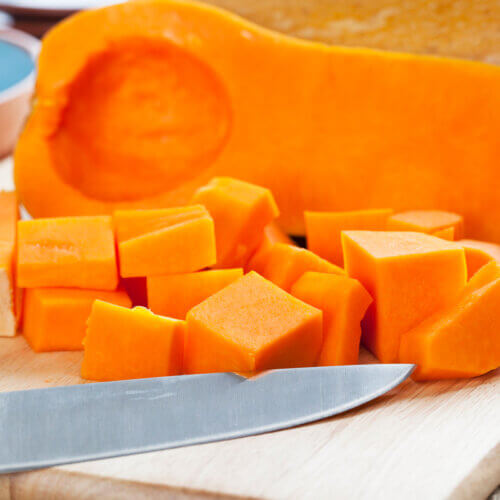
Do NOT mash, grate, chop, or puree pumpkin or squash for canning. These veggies (which are really fruits, botanically speaking) are very dense. Safe canning depends on cutting the pumpkin into 1-inch cubes so that heat can circulate around and through the pieces inside the jars as they process.
Additionally, pumpkin is a low-acid food, so it must be pressure canned. If you are new to canning, check out these additional resources for more safety tips on canning.
- Pressure Canning Tips (+ 5 Common Mistakes to Avoid)
- Canning Mistakes to Avoid When Water Bath & Pressure Canning
- How Full Should My Canner Be When I’m Canning?
- Can I Pressure Can in the Instant Pot?
- How Long Is Canned Food Good For?
Supplies Needed
- Canning Jars - Cubed pumpkin fits best in either pint or quart jars.
- Two-Part Sealing Lids - For best success with a proper seal, be sure your sealing lids are new. You can read more about whether reusing canning lids is safe here.
- Stock pot - You will need a stock pot large enough to par-boil the pumpkin cubes before placing them in the jars for canning.
- Colander - Use a colander or strainer to fully drain the hot water off the pumpkin cubes before placing them in the jars for canning.
- Funnel - I recommend using a stainless steel funnel.
- Headspace Ruler - This headspace ruler doubles for removing air bubbles to ensure there are no air pockets trapped in your jars.
- Vinegar - Vinegar is used to clean the rim of the jar before placing the canning lids onto the jar. Distilled white vinegar is the most popular, but any type of vinegar can be used as long as it contains 5% acidity.
- Clean Towel - Make sure to use a lint-free towel, if possible. A clean paper towel will also work.
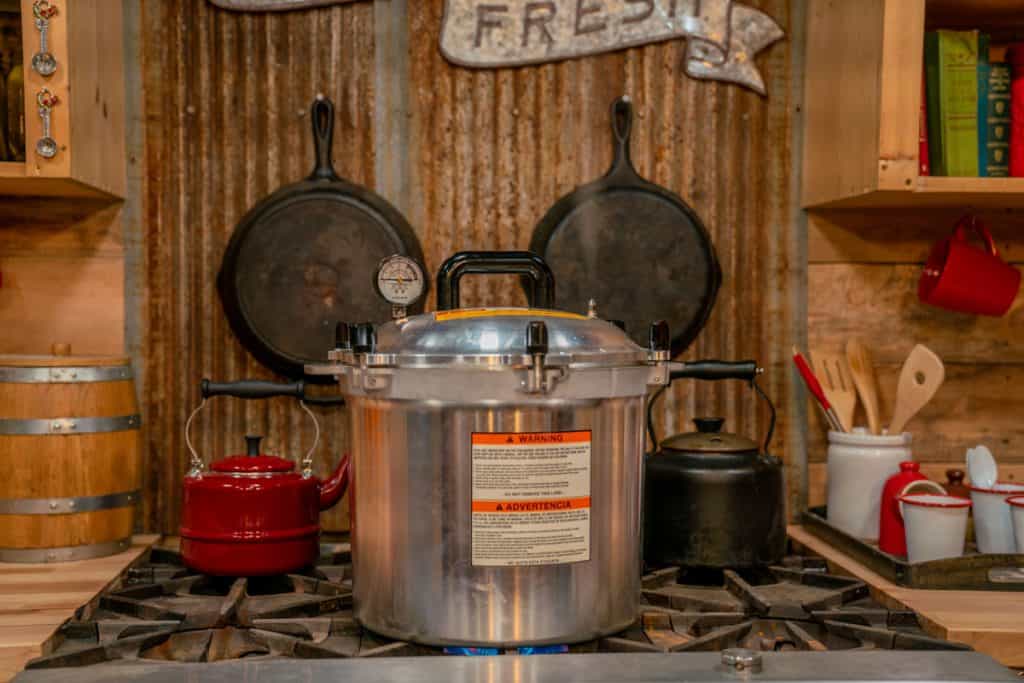
- Pressure Canner - I use and recommend the All-American Pressure Canner.
- Jar Lifter - A jar lifter is not necessary, but it’s a good safety precaution to prevent burned hands! This is the jar lifter I use.
- Sharp Knife - Use a large knife to cut the pumpkins open and cut them into one-inch cubes. A knife or a peeler can be used to remove the rind.
Ingredients Needed
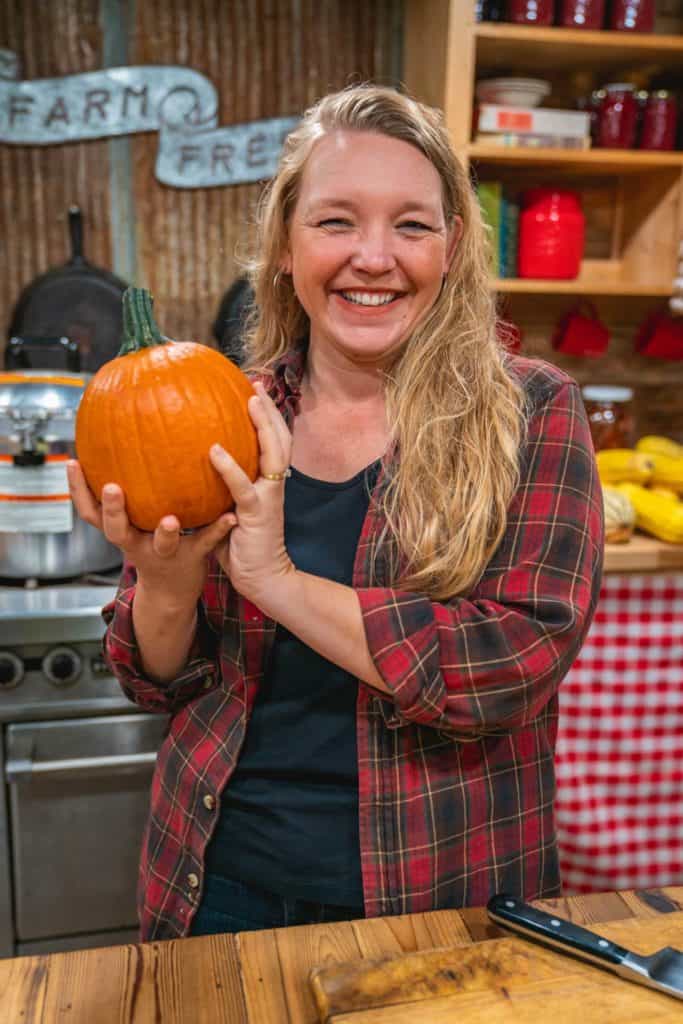
- Fresh Pumpkin or Winter Squash - Make sure your pumpkins are fully ripe and cured for the best flavor. The rind should be firm, it should feel heavy, and there should not be any signs of mold or decay.
Homesteading Hack: 2 1⁄4 pounds (1 kg) of pumpkin makes 1 quart (liter) jar; 1 pound (.5 kg) makes a pint.

Canning Pumpkin (or Squash) Step-by-Step
- Prepare your jars, lids, rings, and canner:
- Wash your jars, lids, and rings in hot, soapy water.
- Fill the pressure canner with 2-3 inches of water and put it on the stove on low heat to warm.
- Put some water in the clean jars to keep them weighed down, and place them in the canner to keep them warm. Turn the canner off when it begins to steam.
- Prepare your preserve:
- Wash the pumpkin, remove the stem, cut it in half, and scoop out seeds and stringy pulp. Remove the rind with a peeler or knife.
- Cut pumpkin into 1-inch (2.5 cm) cubes. Do NOT mash or puree.
- Meanwhile, bring a saucepan of water to a boil.
- Add pumpkin cubes to the boiling water. Bring to a boil over medium-high heat and boil for 2 minutes until heated but not soft. Do NOT mash.
- Pour into a colander to drain, discarding the cooking liquid.
- Clean and refill the saucepan with water; bring to a boil.
- Fill jars, fit lids, and place them in the pressure canner:
- Remove the hot jars from the canner with the jar lifter and turn the canner on again to bring the water to a low simmer of 180°F (82°C).
- Using a funnel, pack the pumpkin cubes into the jars. Pour or ladle fresh boiling water to cover the pumpkin, leaving 1-inch headspace. Release the bubbles with the headspace ruler, adding more water if needed.
- Clean the jar rims using a clean towel dipped in vinegar, add the lids and screw on the bands to fingertip tight.
- Using the jar lifter, carefully place the jars into the pressure canner (remember, jars will be hot since we're hot-packing the pumpkin).
- Vent canner: Place the lid on the pressure canner, turn up the heat, and let the steam vent for 10 minutes.
- Pressurize: Put the pressure regulator on the lid and bring the canner to 11 pounds of pressure (PSI) on a dial gauge or 10 pounds of pressure (PSI) for a weighted gauge (adjust for elevation).
- Process: Once your canner has stabilized at full pressure, set a timer for 55 minutes for pint jars or 90 minutes for quarts.
- Cool canner:
- Let the canner come down to 0 PSI by itself. Do not jiggle or remove the pressure regular or vent valve.
- Once the gauge reads 0 PSI, remove the pressure regulator and let the canner stabilize for 5 minutes before removing the lid.
- Remove jars and cool:
- Carefully take the lid off the canner.
- Remove the jars and set them on a clean towel to cool undisturbed overnight (or for at least 12 hours).
- Check seals and clean jars: Check each seal, remove the bands, and clean each jar with room-temperature water.
- Store:
- Label each jar with the contents and year.
- Store the jars out of direct sunlight.
Did you try this tutorial? We’d love for you to give us a star rating in the recipe card below, then share your beautiful canned pumpkin (or squash) with us on social media by tagging us at @homesteadingfamily!

The Homestead Kitchen
This canning tutorial was featured in issue No.3 of the Homestead Kitchen magazine. If you are looking for a homesteading resource that can provide answers, guidance, encouragement, tips and tricks, or advice, this magazine was designed just for you.
As new homesteaders, it took us a lot of trial and error to overcome feelings of inadequacy. Now, we have made it our mission to share our journey and knowledge with others to help them bypass some of those growing pains.
With the Homestead Kitchen magazine, you will be put on the fast track to homesteading with confidence as we share how to overcome the big obstacles along with the little things that can make a huge impact on your success. Now, the Homestead Kitchen magazine is available in print! So subscribe today and start enjoying this magazine in the palm of your hand.
Other Recipes You May Enjoy
- Pumpkin Fruit Leather Recipe
- Homemade Pumpkin Pie Recipe – From Scratch
- How to Make Pumpkin Puree from Scratch
- Canned Ground Beef (Easy Step-by-Step Tutorial)
- How to SAFELY Can Raw Chicken
- How to Can Beef Stew for Easy Convenience Meals
- Canning Bone Broth or Stock (Chicken, Beef, or Vegetable)
- Canning Cherries at Home
- Strawberry Rhubarb Jam (With Low Sugar Option)
- Plum Jelly Recipe (+Time-Saving Trick)
- How to Pressure Can Black Beans
- How to Make Pickles (Pickled Cucumber Recipe & Best Canning Method)
- Easy White Bean Chicken Chili – Pressure Canning Recipe
How to Pressure Can Pumpkin or Squash
Equipment
- Pressure Canner
- Canning Jars & Lids
Ingredients
- pumpkin or winter squash
Instructions
Prepare Jars, lids, rings and canner.
- Wash your jars, lids, and rings in hot, soapy water.
- Fill the pressure canner with 2-3 inches of water and put it on the stove on low heat to warm.
- Put some water in the clean jars to keep them weighed down, and place them in the canner to keep them warm. Turn the canner off when it begins to steam.
Prepare your preserve.
- Wash the pumpkin, remove the stem, cut it in half, and scoop out seeds and stringy pulp. Remove the rind with a peeler or knife.
- Cut pumpkin into 1-inch (2.5 cm) cubes. Do NOT mash or puree
- Meanwhile, bring a saucepan of water to a boil.
- Add pumpkin cubes to the boiling water. Bring to a boil over medium-high heat and boil for 2 minutes until heated but not soft. Do NOT mash.
- Pour into a colander to drain, discarding the cooking liquid.
- Clean and refill the saucepan with water; bring to a boil.
Fill jars, fit lids, and place them in the pressure canner.
- Remove the hot jars from the canner with the jar lifter and turn the canner on again to bring the water to a low simmer of 180°F (82°C).
- Using a funnel, pack the pumpkin cubes into the jars. Pour or ladle fresh boiling water to cover the pumpkin, leaving 1-inch headspace. Release the bubbles with the headspace ruler, adding more water if needed.
- Clean the jar rims using a clean towel dipped in vinegar, add the lids and screw on the bands to fingertip tight.
- Using the jar lifter, carefully place the jars into the pressure canner (remember, jars will be hot since we’re hot-packing the pumpkin).
Canning
- Place the lid on the pressure canner, turn up the heat, and let the steam vent for 10 minutes.
- Put the pressure regulator on the lid and bring the canner to 11 pounds of pressure (PSI) on a dial gauge or 10 pounds of pressure (PSI) for a weighted gauge (adjust for elevation).
- Once your canner has stabilized at full pressure, set a timer for 55 minutes for pint jars or 90 minutes for quarts.
- Let the canner come down to 0 PSI by itself. Do not jiggle or remove the pressure regular or vent valve.
- Once the gauge reads 0 PSI, remove the pressure regulator and let the canner stabilize for 5 minutes before removing the lid.
- Carefully take the lid off the canner.
- Remove the jars and set them on a clean towel to cool undisturbed overnight (or for at least 12 hours).
- Check each seal, remove the bands, and clean each jar with room-temperature water.
- Label each jar with the contents and year.
- Store the jars out of direct sunlight.


